August 5th, 2021

I won’t dwell on the fact that I last posted over 1 ½ years ago; suffice it to say that I just haven’t felt like I had anything useful to say. For whatever reason, I do feel like I have something to share today, so I will!
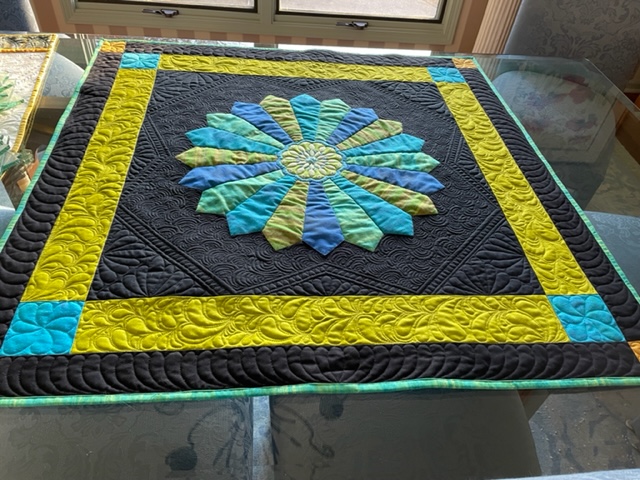
Do you ever start something new and get to a point where you stop because you’re really intimidated by the next step? I am quite enamored by the work of MariQuilts whose blog is called the Quilted Edge. You can find her blog by clicking here. Anyway, I love her color choices and her bold curves and lines and I have spent many an hour drooling over her work. A couple years back, I played around with some improvisational quilting in a similar spirit. I had never done “any quilt as you go” (QAYG) kind of work because I really love free motion quilting and am not bothered much by the bulk of the quilt anymore, so QAYG didn’t really offer me any gains. I did do it “halfway,” with this project, though, because I really like the look of the spiral quilting and that would be awful to do (if it were even possible to do) with a full size quilt. So, a couple years back, I made and then spiral quilted (using my walking foot) these 2 mini-quilts which were actually portions of a larger improve quilt that had yet to be made:
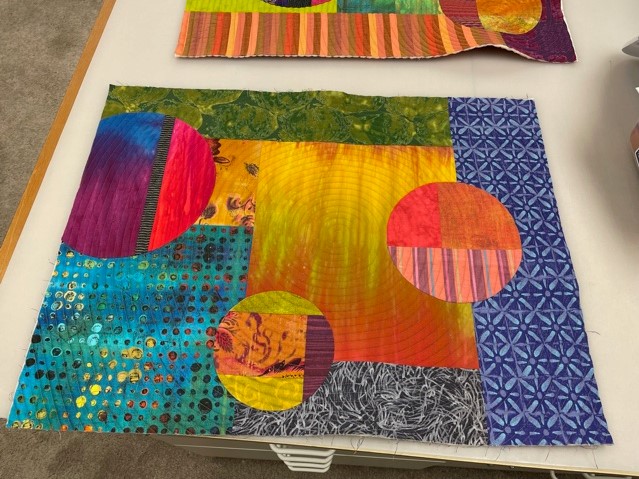
Above is piece one and below is piece 2:
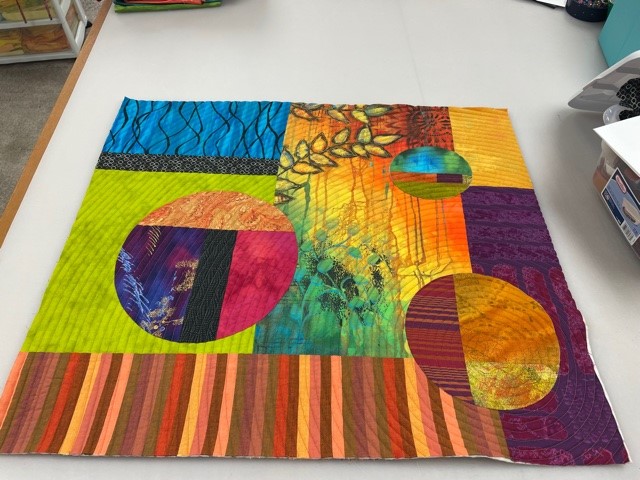
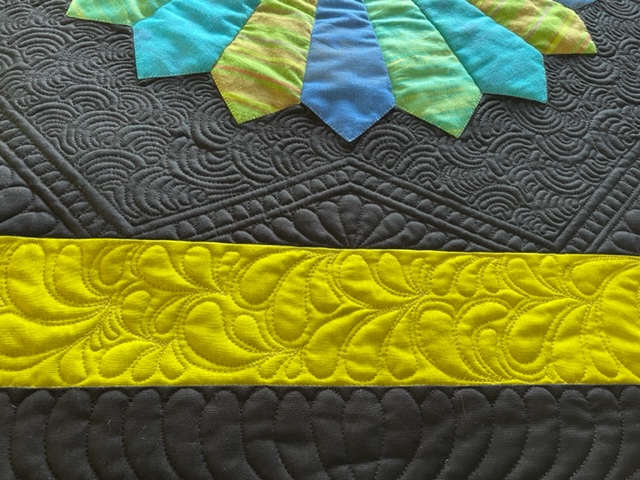
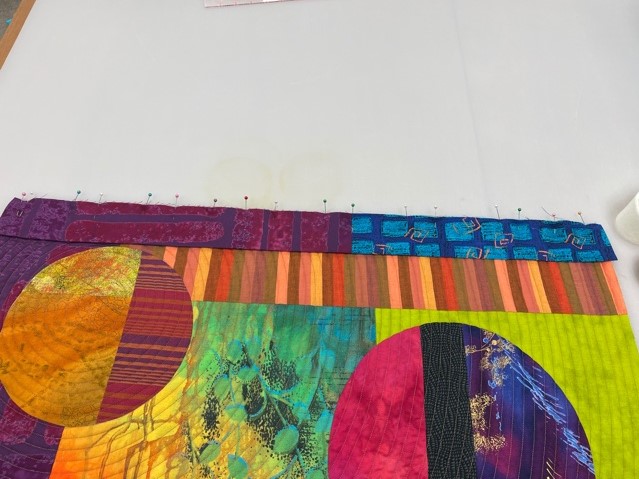
These 2 pieces have been pinned to my design wall (along with other “lost souls made of fabric”) for the past 2 years! The reason why is because I was too chicken-hearted to try and join them! I know, just pathetic! It’s just freakin’ fabric! Mari has a wonderful, very clear tutorial on her web site that gives perfect guidance for every step (you can find that tutorial by clicking here) and I had read that tutorial about a million times but was so worried that I would screw it up that I just let it all be. I finally got up my courage last week and I could just kick myself for being so worried about what was actually a very easy process. After squaring up my edges, I cut my joining strips for the front and back and the batting strip, all according to the very clear directions on her blog. I pressed my top joining strip in half and then pinned it to the top side of one of the blocks. I also pinned one side of the bottom joining strip to the backside as those 2 strips are sewn on in the same seam. I was laughing at myself as I did this because in her directions, she said that one only needed to use 1 pin. As you can see in the photo below, I did not trust myself and pinned the heck out of it:
In the photo below, I have added the bottom joining strip to both blocks, and have sewn one side of the top joining strip to one of the blocks:
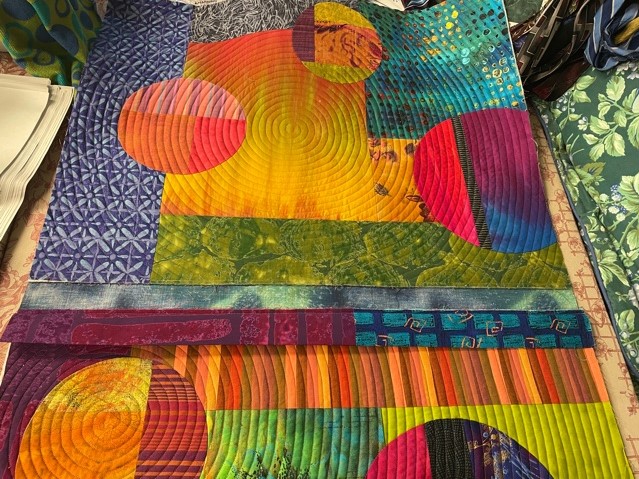
You can see there is an empty space above that bottom joining strip and eureka, the strip of batting literally fits perfectly in that space:
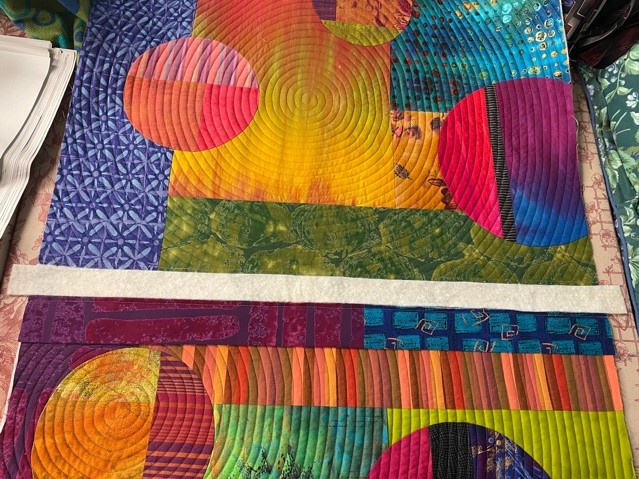
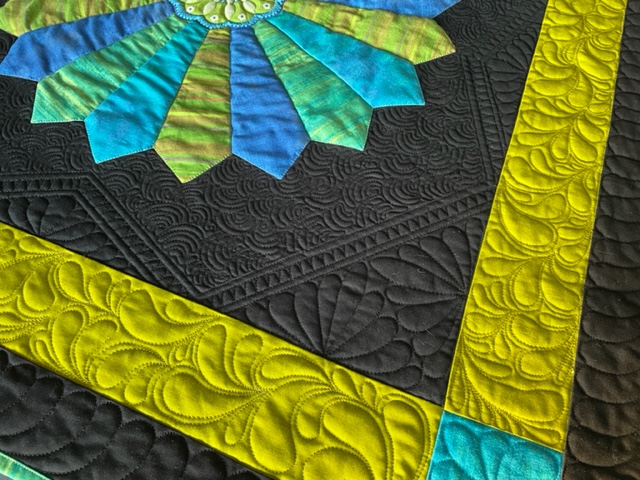
I carefully ran a thin line of Elmer’s Glue that would temporarily hold the folded top joining strip to the other block while I was sewing. I was cringing the entire time I did this…it felt totally unnatural and I was certain I would end up with smears all over the place. Instead, it was a very easy and neat process and most importantly, it allowed me to sew this top joining strip down without the use of any pins! Another eureka moment! Below is a shot of the joining strip pressed into place and held down with the glue:
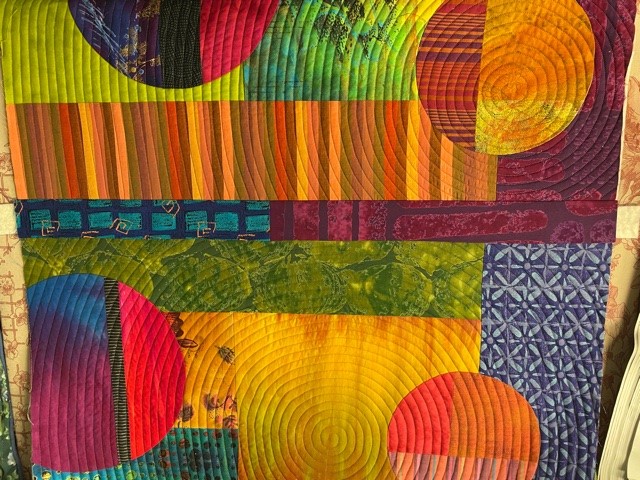
I know, unbelievable how well that worked! I took it to my machine and sewed it down and it wasn’t hard to do. Phew!! Here is a shot of the piece thus far, and it is not done yet:
Can’t wait to start some more improve piecing to create the next panel!!
Filed under
Free Motion Quilting.
January 10th, 2020
If you are looking to advance your free motion quilting skills, then you’ve got to check out Blueprint’s new campaign called 28 Days to Better Free Motion Quilting.
Blueprint has taken lessons from 11 of its top free motion quilting instructors and organized these lessons into a 28 day program designed to advance your skills and provide you with fresh and new free motion quilting design challenges! Isn’t this an incredible idea?!! The lessons begin with easier designs and then build your skills to more complex designs.
Here’s the breakdown of lessons by week:
Week 1: Lines and Curves (Days 1-7)
Kick things off with simple designs that get you comfortable moving fabric around your machine. Start with simple scribbles, then move through a series of lines and curves to build a foundation for more complex designs.
Week 2: Meandering Designs (Days 8-14)
Get comfortable filling up all that blank space by practicing meandering motifs, including the infamous stipple. Then see what else you can do with all-over stitching to create swirls, flowers and more.
Week 3: Between the Lines (Days 15-21)
Leave behind your meandering motifs and focus on being a little more precise. From arcs and serpentine curves to hearts and more, this lesson is all about practicing motifs between a set of lines. They’re perfect for borders and sashing.
Week 4: Feature Motifs (Days 22-28)
Feature motifs are meant to be showstoppers — we’re talking feathers and flowers. Get tips for combining these gorgeous motifs with other designs from previous lessons. Then go forth and quilt all the quilts!
In case you’re wondering, you’ll find 2 lessons by me during the 4th week…I’ll let you guess what those lessons might be about! You can find this series of lessons by clicking here, and feel free to browse through all the other great Blueprint classes while you’re there!
Filed under
Free Motion Quilting.
December 5th, 2019
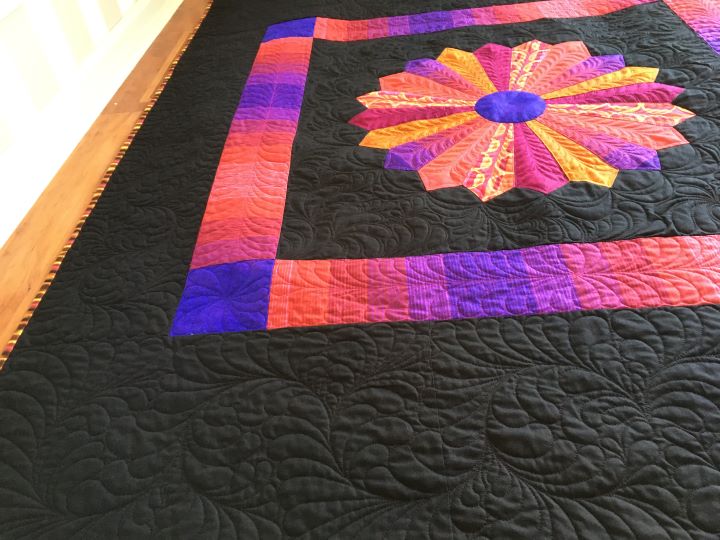
I am on a mission to finish up old projects as I’m no spring chicken anymore. I keep meeting quilters who’ve developed joint issues, etc that have impaired their ability to quilt or make quilts. This has me thinking that if I don’t get focused on getting some of these projects finished and out the door, they might never get done. Below is a perfect example:
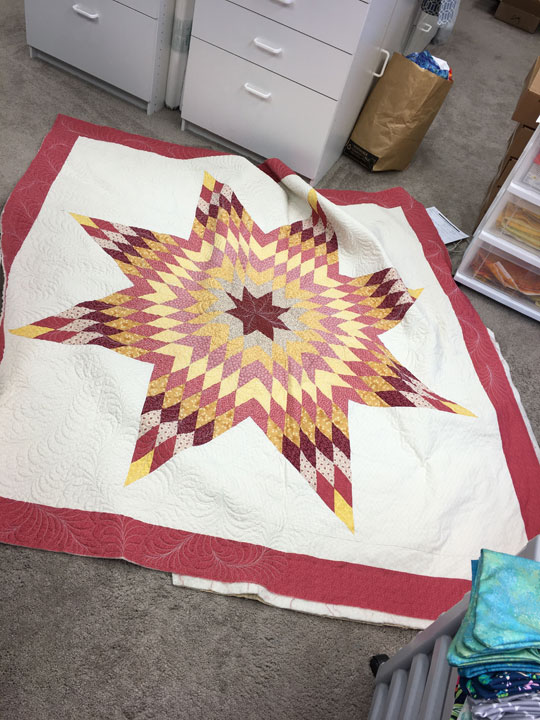
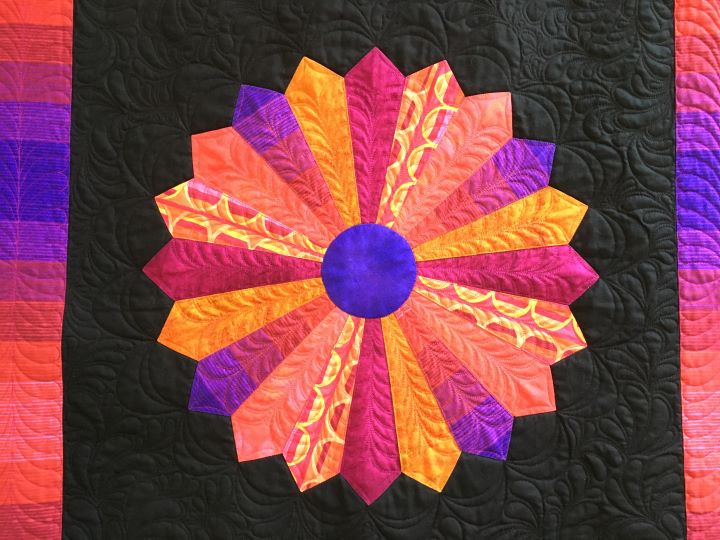
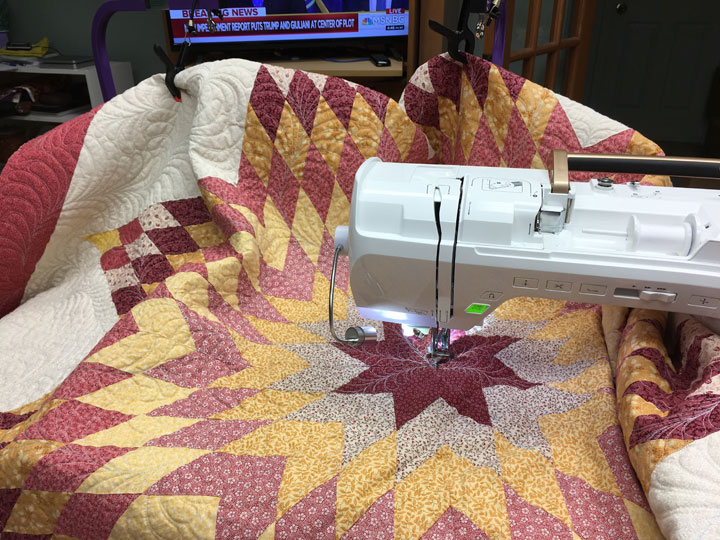
If you are thinking that this quilt doesn’t look anything like my normal work, you would be 100% correct. The colors, fabrics, and style are not me at all; that may be why this project has not been touched in so long. I started quilting this 15 years ago with the goal of it being an example of flowing feathers with elongated, thin plumes. I remember picking it back up to finish it, but it’s been at least another 10 years since the last time I laid my hands on it. I’ve been plugging away on it the past couple of days and am committed to handing it in as a hospice donation quilt by the end of January at the latest. For the time being, that seems very do-able to me.
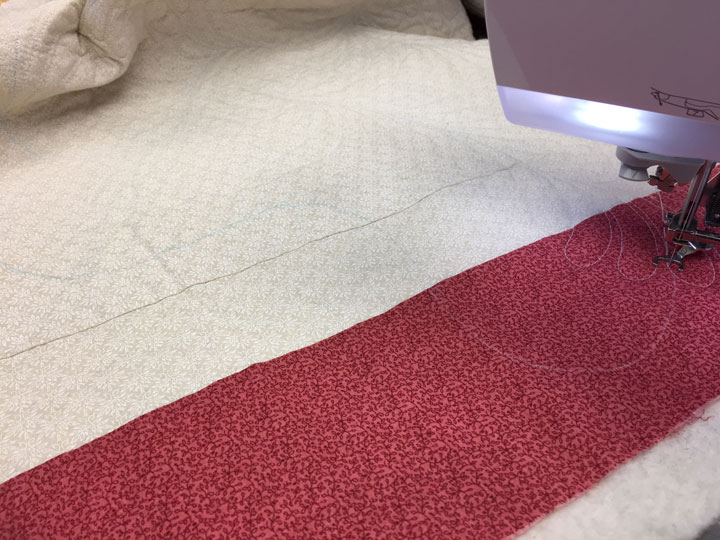
These feathers are made by “springing” a feather from between 2 plumes of an already stitched feather. The photo above shows the curve that will determine the curve of the spine of the next feather. (The line is white on the red fabric and blue on the cream fabric.) If you can’t see it well, this next shot might show it better:

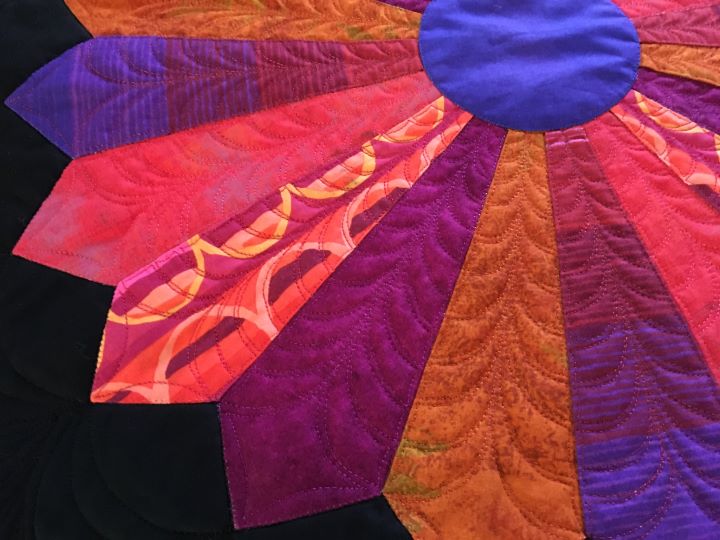
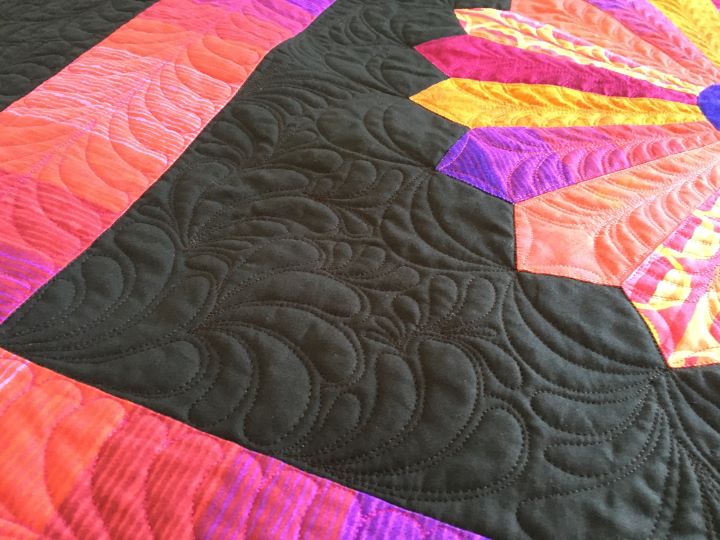
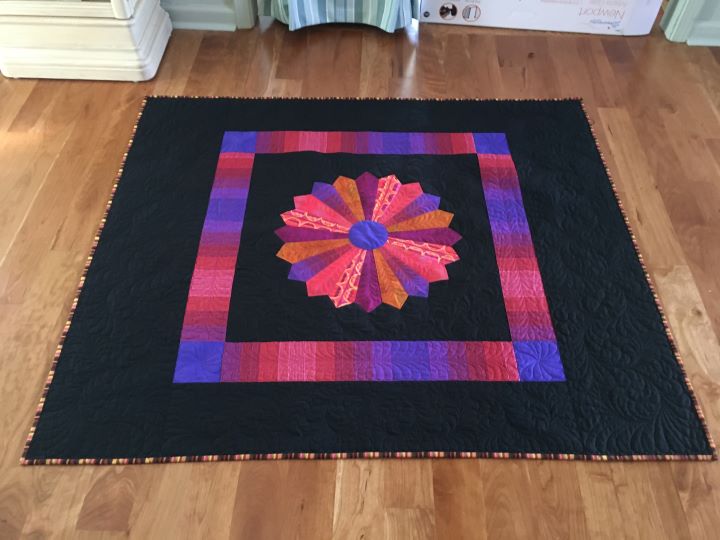
You will notice that the plumes are deliberately stretched out to come close to nearby feathers. By taking up most of the available space with more plumes, it adds to the drama of the swirling feathers. I have to “honor” the way I started quilting this quilt, and that’s kind of weird. For reasons unknown to me, I did not do any stitch-in-the-ditch quilting before I started throwing in feathers. (I know, I am aghast at myself!) There isn’t even any stitching around the perimeter of the whole star! What was I thinking…who knows?! It all begins with a feather that springs from the very center of each of the 8 diamonds that make up the star:
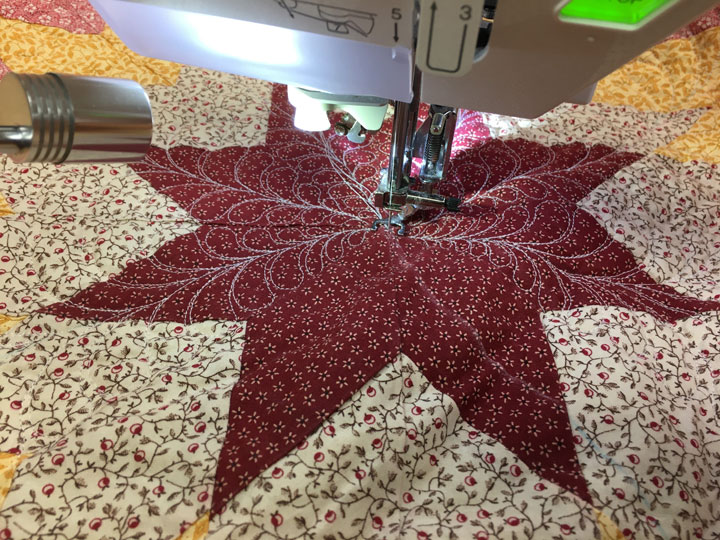
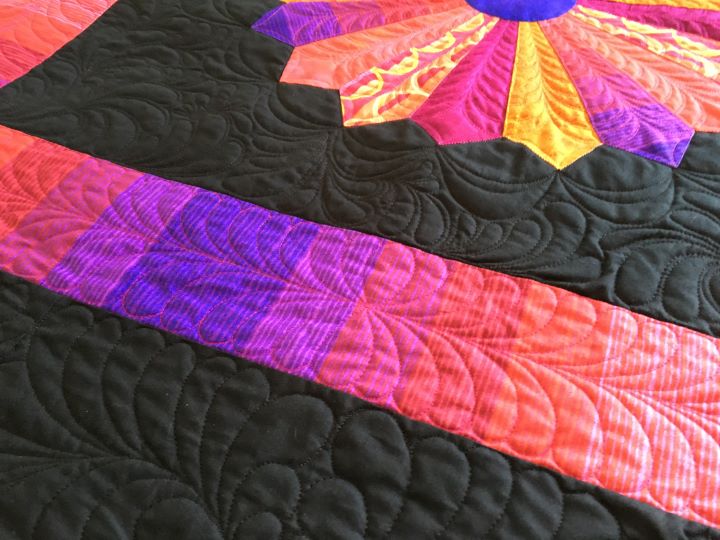
(If you look closely, you can see a white soap line that is the curve this new feather will follow.) I start stitching from that center, and then fill each individual diamond with 2 feathers. Once done, I move to the outlying cream colored fabric zones. For now, tough, this is my vantage point:
I’ll post photos once it’s all quilted and bound. Posting this on my blog will make me even more accountable to getting this quilt finally finished!
Filed under
Free Motion Quilting.