Oct 17 11
Creating a Basic Feathered Frame for Your Quilt-Part I
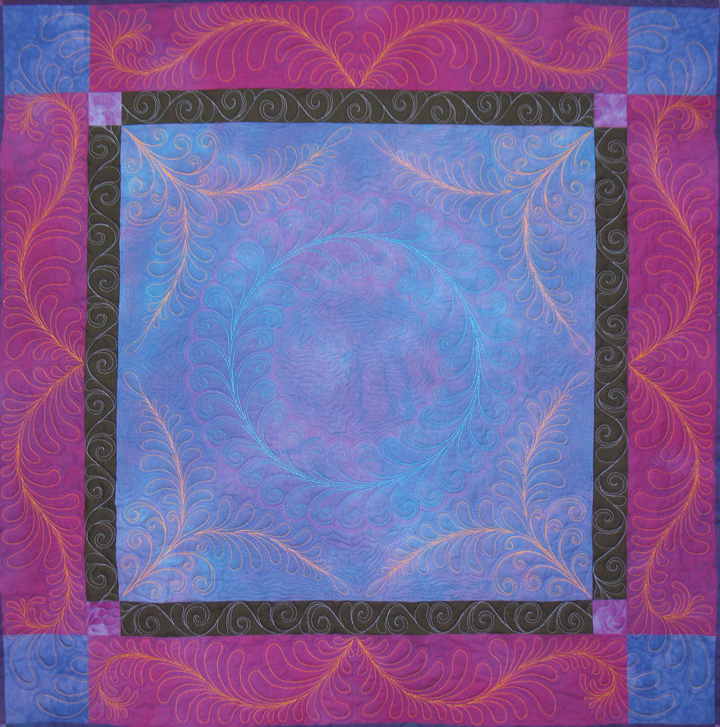
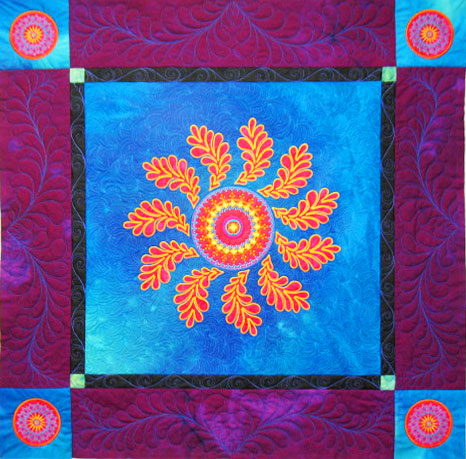
You can really crank up the drama of a quilt by stitching some kind of a feathered frame around the center, whether it’s a small center like the quilt above or if it’s a larger center, such as on a pieced quilt that is surrounded by a feather border design. I just stitched a very simple feather border around my machine embroidered feathered wreath:
… and I thought it might make an interesting post about how easy it is to create a basic feathered frame. We will create this frame by stitching very short freeform feathers in the border zone, and these will have the appearance of being mirror-image feathers, but we’ll know they are not!
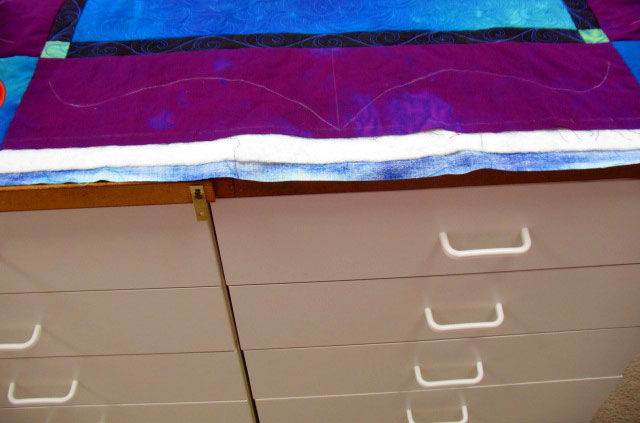
To begin, you’ll mark a line in the center of each of the borders along the 4 sides of the quilt; I use a soap remnant for this. Next, you’ll bend a flexible curve ruler into an interesting shape, beginning at the center line and traveling to the edge of that border. Once you’ve got a pleasing shape, just trace along the edge with that same soap sliver to mark it. You can easily mark the opposite side of the border by flipping the ruler over and repeating this exercise. This will give you a border that looks like this:
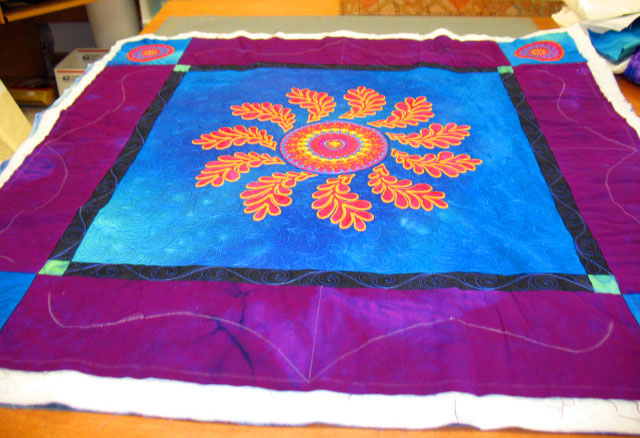
…and once you mark all four sides, you can really see the shape of the frame that will emerge once you quilt feathers along those spine guidelines:
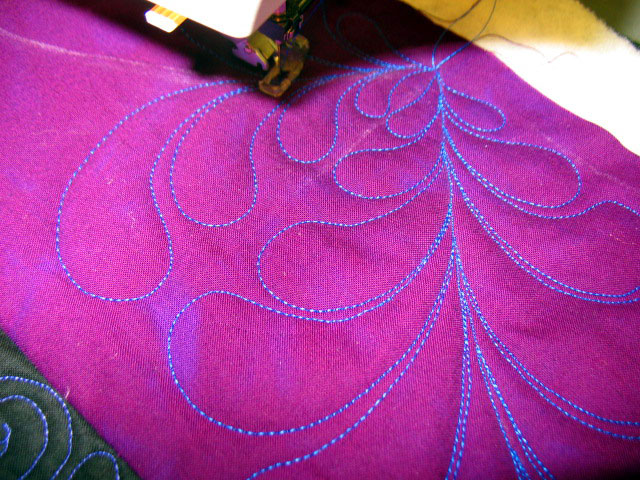
Take this to your machine and you are ready to start quilting! Now here’s the cool part…in feathered frame designs, all the action happens in 2 places; the place where feathers “take off” and the place where feathers “kiss.” This means that these are the places that will catch the viewer’s eye, so these are the places where you’ll want to put some effort into making the viewer believe these are mirror-image feathers. The first feather is easy; just stitch a basic freeform feather that respects that spine guideline. As you go to stitch it’s “mirror-image” counterpart, take care to try to line up those first few plumes so they are opposite one another as below:
(To orient you, this stitching is occurring on the 2 sides of that soap line that marks the midway point of the border.) Once those plumes are stitched, you can kind of take it easy and not pay attention to what was done on the opposite feather until you approach the kissing zone. The key to all of this is doing a nice job when marking those spine guidelines. As long as those babies are mirror image guidelines, you’re good to go.
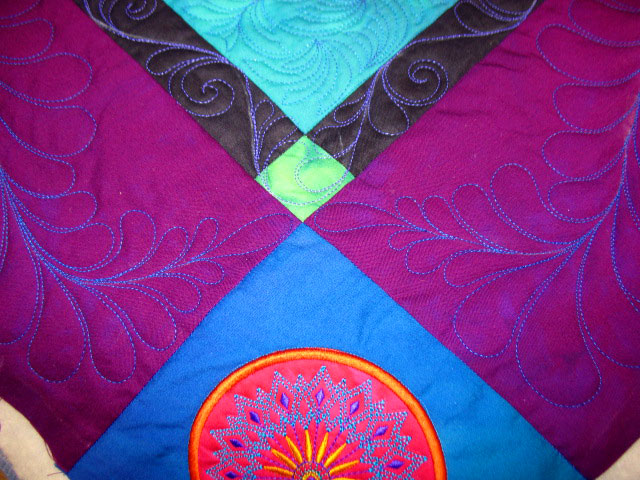
So, you’re stitching along and you’re getting close to the kissing zone-what do you do? Easy…just try to “mimic” what was already done on the feather you’re about to kiss. On this quilt, it was easy because they barely even kiss:
This was an easy one because they’re barely reaching one another since the corner blocks aren’t involved in the feathered frame. I mean, really, these feathers aren’t really kissing, it’s more like a handshake! You’ll need to pay more attention to your stitching when the corners are part of the frame, as in this quilt, where we’ve really got a French kiss thing going on:
So now we’ve got phase 1 of our feathered frame done, created by stitching 8 short freeform feathers so they appear to all be mirror images of one another. Even when stitched in a fairly innocuous thread color, you can begin to appreciate the wonderful framing effect:
I’ll post about part 2 once I’ve hyperquilted those feathers, and then you’ll really appreciate the framing effect!


Stunning, my husband was just looking over my shoulder at your post and said ‘wow I love that!’
Patsy, How can I find out where you are teaching next? I have been watching the videos, but would love the in person classes!
Pat,
You can always find my schedule by going to the home page of the web site and clicking on the “education” tab. Click on “Patsy’s Classes,” and this will show you all the current classes. At the very bottom of the list is the schedule. I haven’t been so reliable about updating it, but I’m trying!
Thanks for this Patsy – you’ve just made it so clear, easy and do-able – I’m definitely going to have to create something to try this out on, as my current WIPs just don’t lend themselves to this, but I really want to try it!
wow—this is really beautiful. I want to cancell all of my plans today and just sit and sew at my machine. This is so inspiring!!!!
Another doozy!!! I feel like I’m always dripping with compliments so I’ll stop now…well….AMAZING…and I’ll leave it at that.
Giggles,
Kelly
Patsy, thought I commented on this but apparently not. Fantastic as usual. I took my fmq class yesterday and unfortunately it was a very beginner class so I didn’t learn much (except I was forced to practice and got a nice leaf design down). But how do you make those feathers sooooo smooth??? I can’t believe you do those by hand. They are so perfect. I had a really hard time with them and I asked the teacher to show me one on my machine and it was even worse! lol! So is it just practice? You dont’ draw them on first do you? She (teacher) never draws and didn’t give any tips on that (which I was kind of looking for). My stitches were still quite inconsistent and I just don’t see how they can be the same (perfect, like yours) every time since every time is a little different (with regards to excact speed setting on machine, foot pressure, hand speed, etc.) The teacher (others & owner) seemed impressed with my quilting (I took in my quilt) and it may be fine for a start but it is not what I’m looking for or expecting from myself…I know, practice! lol! Have a happy Sunday!
Your quilt is just beautiful 🙂 Hoping you’re enjoying the brief sunshine today before it rains again. We need to dry out before we can combine corn 🙂
You inspire me and make me want to try new things and extend myself more. Each time I visit your blog there is a new wonderful project to see and admire.