Feb
18
13
Boy, I’m really struck by how stuck I’ve been on blues/greens for awhile now…I need to focus on warm colors for my next quilt! Here’s the center section of a quilt I’ve just begun quilting (it’s not completely pieced yet in this photo):
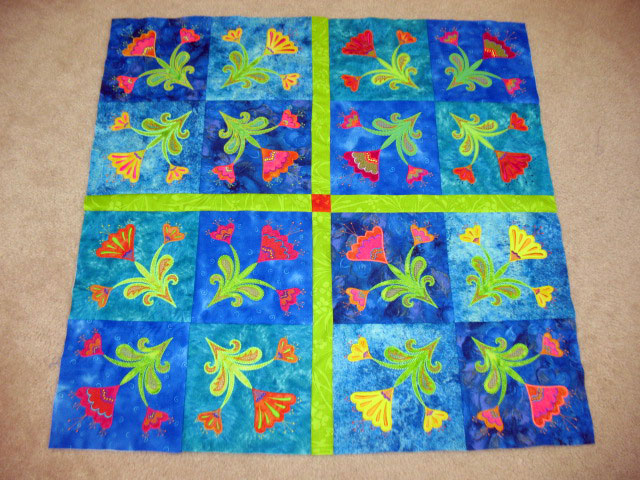
The 4 large blocks are 4-patches like this one:

…and all of the flowers are either red/pinks, oranges, or yellows. The shapes were all cut from Appli-K-Kutz dies and cut on my Sizzix Big Shot machine, and then I embroidered them using an embroidery machine. Once the center section was done, I added a yellowy-gold border around the whole thing:
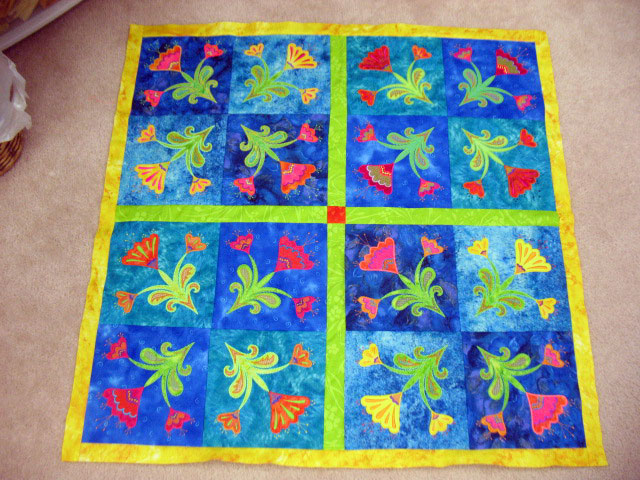
I couldn’t decide what color to use in my outer border, so I started auditioning fabrics by laying them “next door” on the floor:
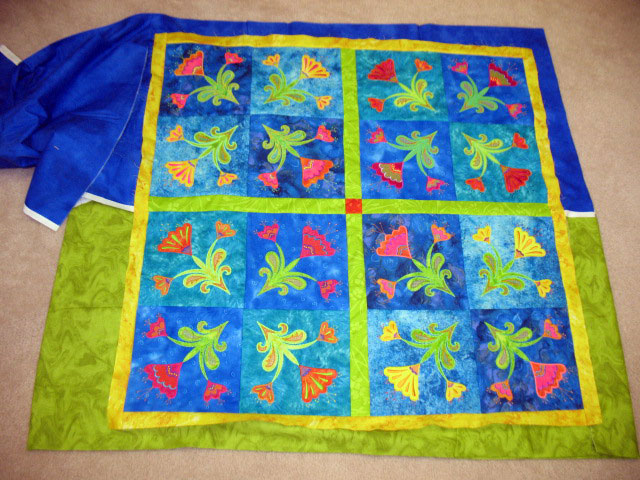
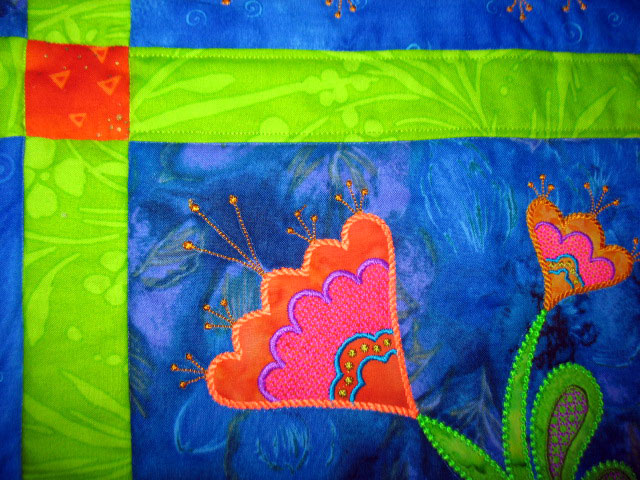
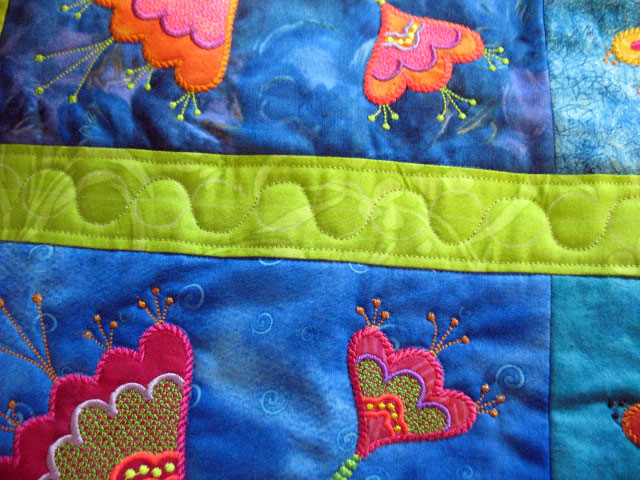
I ended up going with the blue border and using small machine embroidered blocks for the 4 cornerstone blocks, but I didn’t snap a photo once it was at that stage. (There will be more photos of this quilt to come as I get to quilting all the different parts.) Once it was basted into a sandwich, I outlined all the applique shapes with Monopoly invisible thread and also did all the stitch in the ditch along the outside of the large 4-patch blocks and along the sashing/borders. (I deliberately didn’t stitch in the ditch inside the 4-patch blocks because I want to use a quilting design in the centers that would be “fractured” if I did stitch in the ditch there.) I started quilting the light green sashing by quilting 2 parallel lines about 1/8 inch from the stitch in the ditch lines. This photo shows how it’s already making the sashing look a bit different:
My goal was to then stitch a chain of very large circles inside the sashings. When you’re stitching really big circles in a setting like this, it’s important that they look fairly symmetric and there’s no way I could do that freehand. I had seen a posting on the Quilt Rat’s Blog some time ago about placing adhesive circles where you wanted to quilt and then stitching just outside the edge. I’d never done it before, so I did a short run of them on a throw away sandwich:
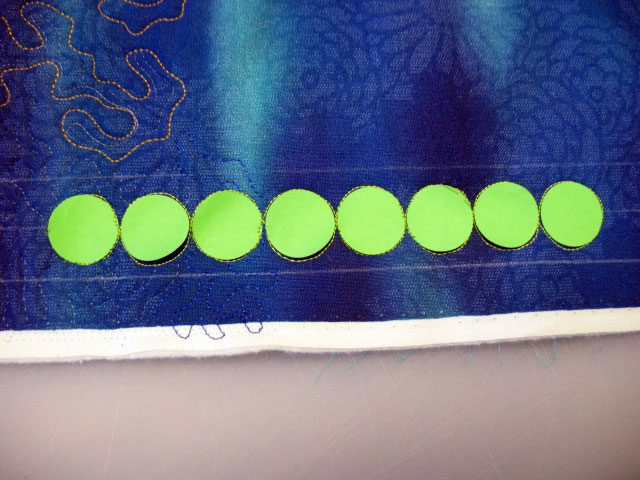
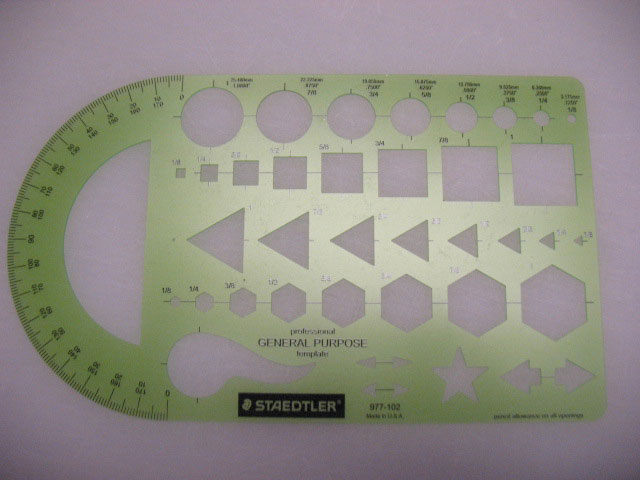
It worked great, so I marked a line down the center of my sashing and placed my long line of adhesive circles. I was excited as I got ready to start stitching, but then I realized that most of my circles had come off/changed position just by me manipulating the quilt. DRAT!!!!!! That told me this technique is probably good in places where you only have a few circles and won’t need to manipulate the quilt much, but it wouldn’t work for what I needed. I removed them all and then started marking with one of my trusty templates from the office supply store:
Once marked, I stitched the first half of the circles out like this:
…and then went back along the opposite sides to finish the chain of circles. Here’s a closeup of what the sashing stitching look like:
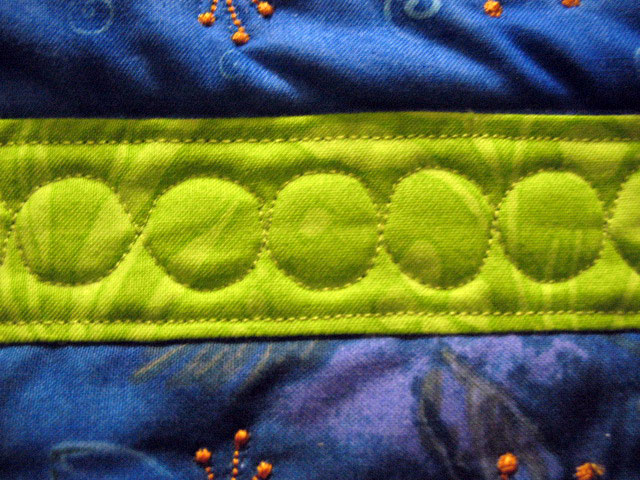
And here’s a shot that shows part of all 4 sides of the sashing:
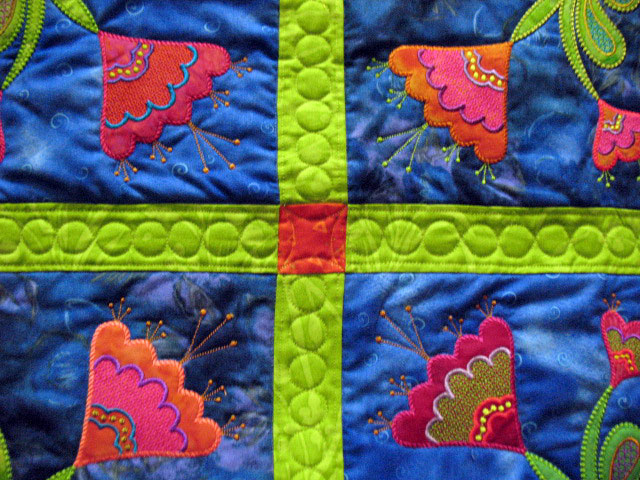
I really like how that sashing came out with an interesting texture and can’t wait to quilt the rest of it!
cost viagra
Filed under Sizzix.


It is so much fun to see your work. I too love to use the ideas shared by other bloggers in own stitching and quilting.
Smiles,
Kelly
Your work looks so beautiful! I have one of those trusty office templates that I use to for circles. I’m getting freezing rain this morning–I’m ready for spring!