Jul 06 13
Part II-Creating a Feathered Frame for an Important Quilt Block
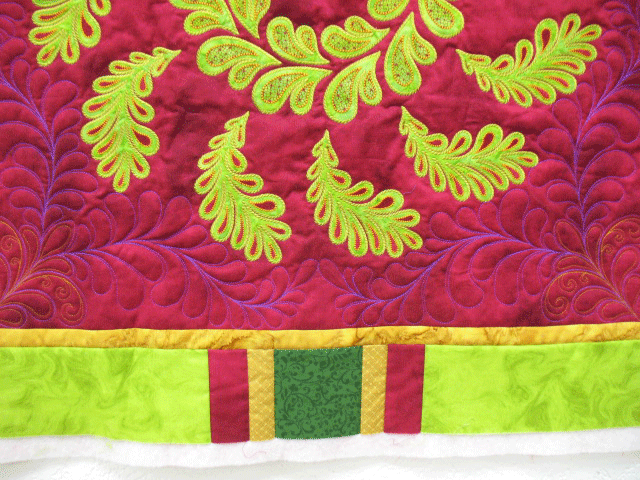
We finished part I of this tutorial by marking the spine guidelines for the feathers that would flow from each corner of the block. In the next step, we’ll stitch out those feathers. I chose a corner and stitched my first feather as shown below. Notice that the only constraints on the feather is that it cannot cross the take off line or the kissing line as it flows, and as I approach the kissing line, I am tying to draw my tip toward it. (This is because it will later “kiss” the feather approaching from the opposite side.)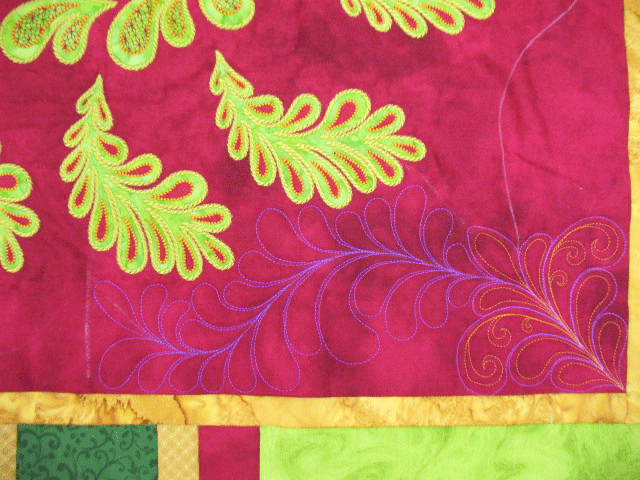 Next, I stitched the remaining 3 feathers that flow in that same orientation. I work this way because they are more likely to appear somewhat alike if I work in this way. (From my standpoint, I’d like them to resemble one another mostly in the takeoff and kissing zones. So, this means I want all my take off zone areas to have 3 plumes that extend toward the marked take off line and I want 1 plume at the tip that is reaching for the kissing line. The rest of the plumes can pretty much do what they want, as long as they follow the curve of the spine guideline.) Once those first 4 feathers are stitched, I stitch the remaining 4 that flow in the opposite direction. As the last four are stitched, I’m trying to roughly “mirror” the plumes already stitched nearly at the respective take off and kissing zones. Here is a shot where uou can see what I mean about mirroring in these areas:
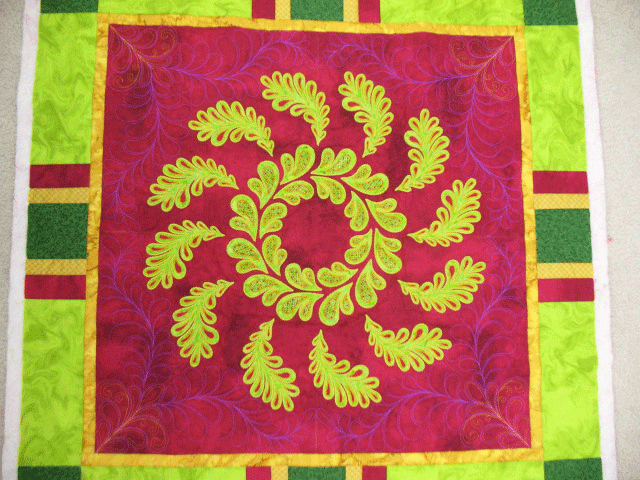
 …and here is a shot that shows all 8 feathers stitched. You can see that the curves created by the feathers have created a very interesting frame around the center appliqued wreath:
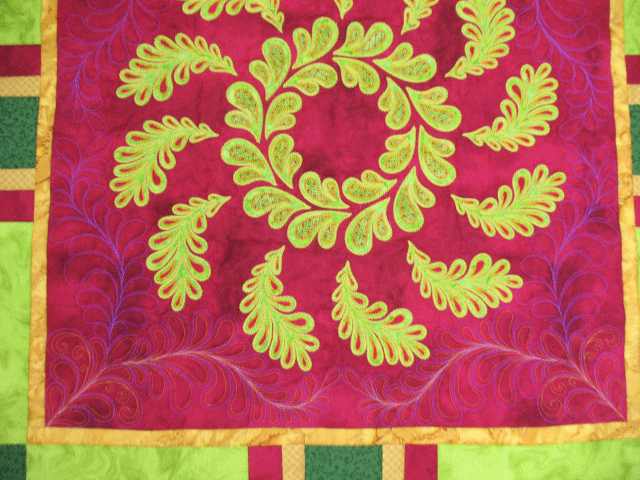
 Next, I wanted to accentuate the curves (and therefore crank up the framing effect) by hyperquilting. Once the first pair had been stitched, you could begin to see how the lines were more evident:
 …and here’s a shot of that center block once all 8 feathers had been hyperquilted:
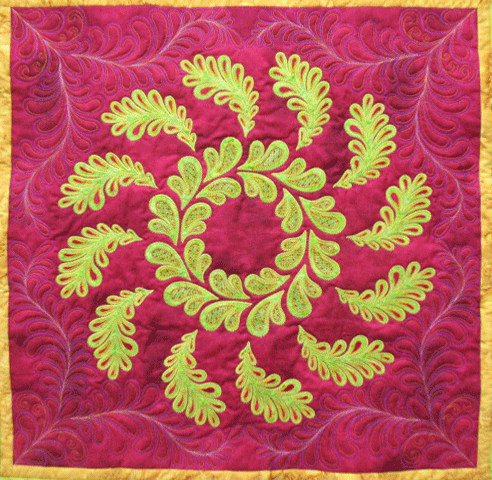 (In person, this is really much more striking than the photos show. Red is a hard color to photograph well.) One more thing on this center block that needs some quilting is the center of that wreath. I used one of our stencils that is part of a set of interchangeable centers designed for our square wreaths. Here’s what it looked like chalked in:
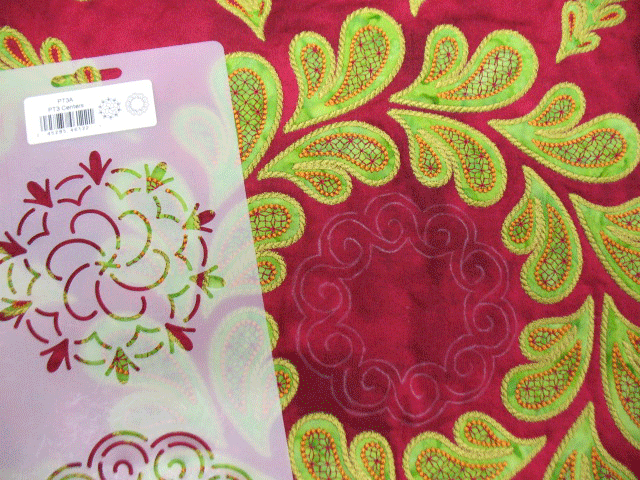 It’s hard to see in the photo above, but this is the bicycle chain design and it’s stitched in 3 separate thread lines. I did it in 2 colors because it looks cool and it fits the other quilting better this way:
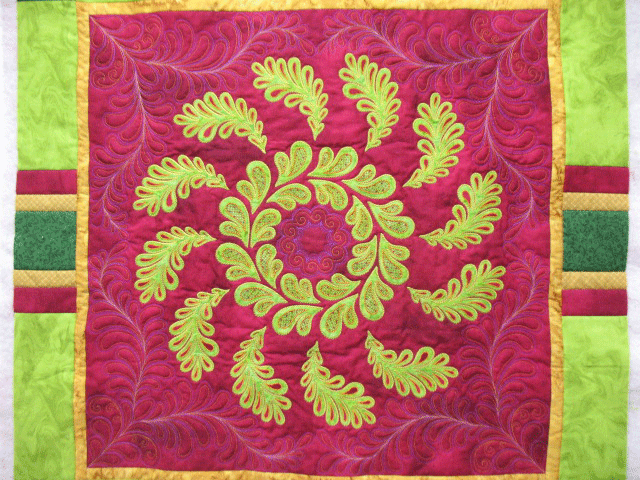
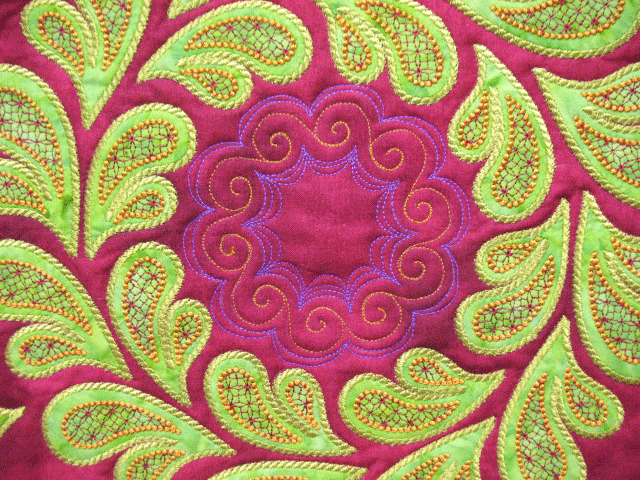 Do you notice the “halo of color” surrounding the center circular design? This effect is easy to create merely by echoing the curves of the bicycle chain that was stitched. The “spider web effect” is created by binging each thread line of each arc back to its most “plunging” point. Here’s what the whole center block looks like once it’s been quilted:
 If you’d like to see how easy it is to use those interchangeable stencils and how to stitch out the bicycle chain design, here’s a video showing just how to do it:
http://youtu.be/hUbzSSl08nAcheap viagra paypal


Gorgeous – your quilting is always stunning and so very appropriate to the deisgn. I love the colors – talk about mouth watering! 🙂
Absolutely stunning. Love, love, love it! Thanks for the tutorial!
SewCalGal
http://www.sewcalgal.blogspot.com
PS – I’m so looking forward to your class at Road to California in 2014!!!!! Yippee!