Mar
01
14
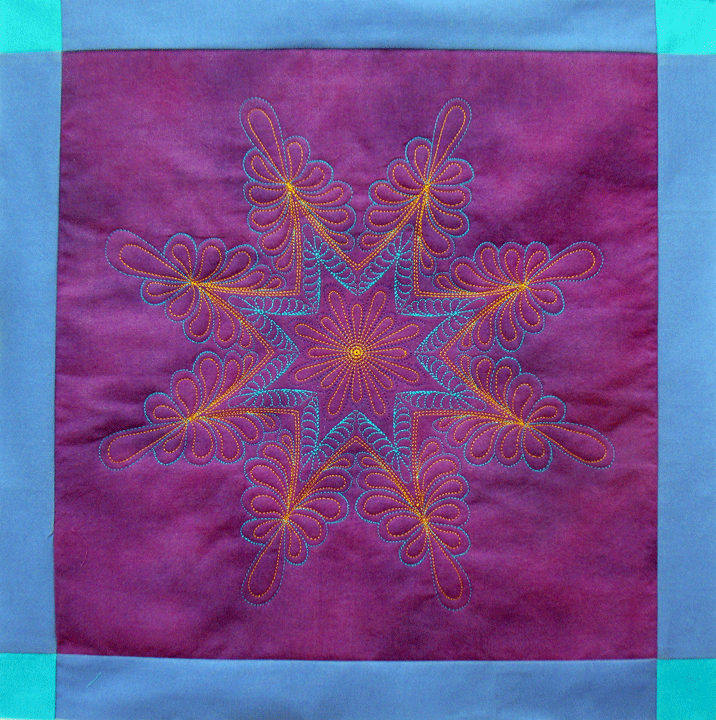
I had lots of fun the other day messing around with melding a quilted design I made on the embroidery machine with some freehand quilting. This is very easy to do so I want to walk you through how I did this. I began by stitching out a quilting motif on my embroidery machine and I used the feathered star motif that you see below:
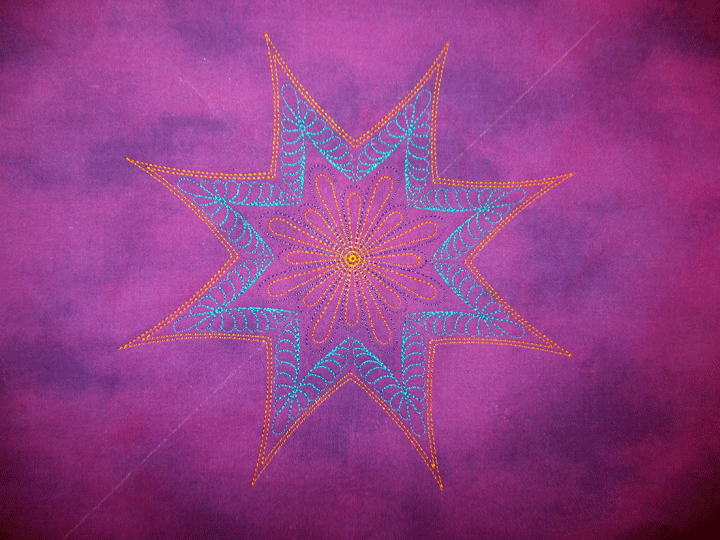
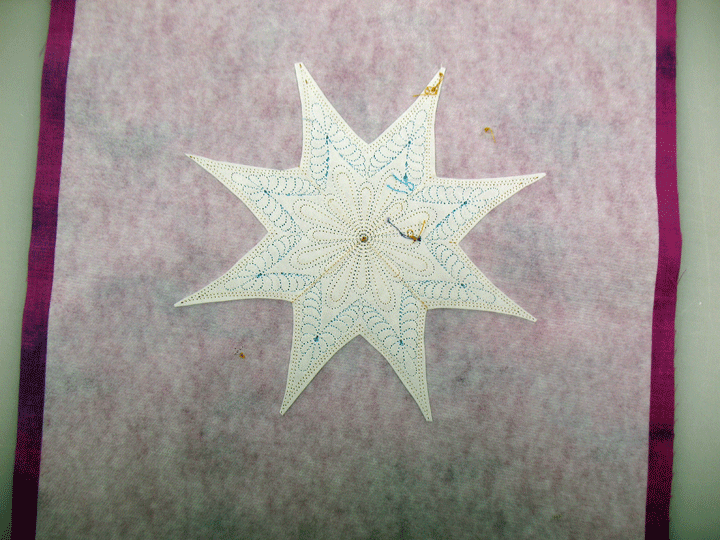
(This motif is available as a downloadable design in our store and you can find it here.) Technically, I stitched this out as an embroidered design because I did not add a batting layer, but if you wanted to, you could have added a batting layer in your initial stitch out. I removed it from the hoop and trimmed away the excess stabilizer from the backside, so this is what the backside looked like once I was done:
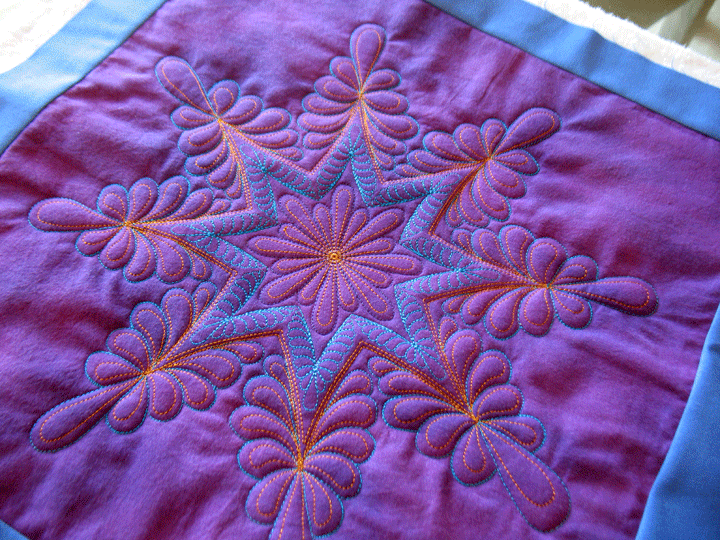
Next, I pinned a piece of scrap batting behind the block and this is to create the trapunto layer. It’s very hard to see in the next photo, but I used a soap sliver to draw “boundary lines” 1 inch beyond all the outermost stitched lines of the star. This created an even larger star that I used as my boundary lines for freehand stitching of plumes around the original “star skeleton.” In the photo below, the stitching in turquoise thread is the plume stitching I’m talking about:
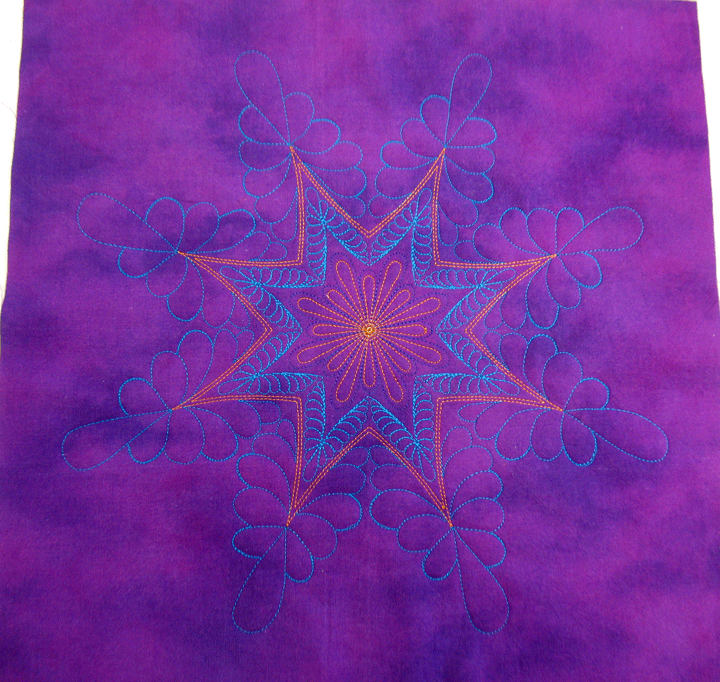
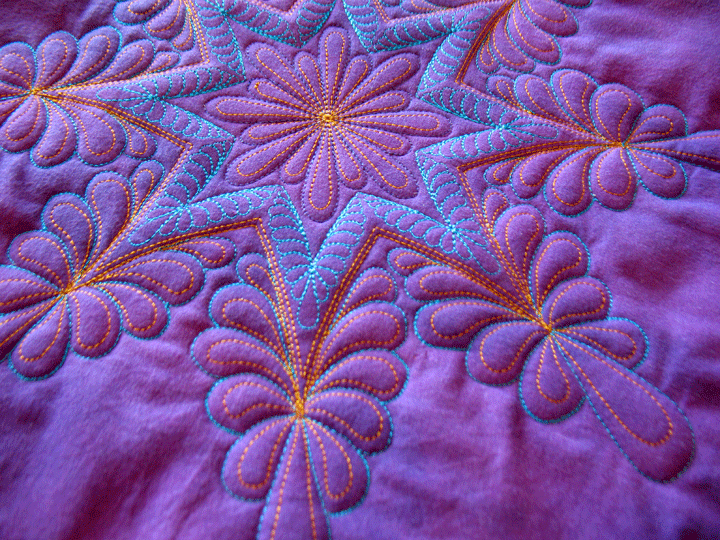
(The point of the boundary lines that didn’t show up at all in the photo was to make my freehand larger feather fairly symmetric.) Next, I went in with my trusty Robison Anton 24 karat gold rayon thread and hyperquilted those new plumes:

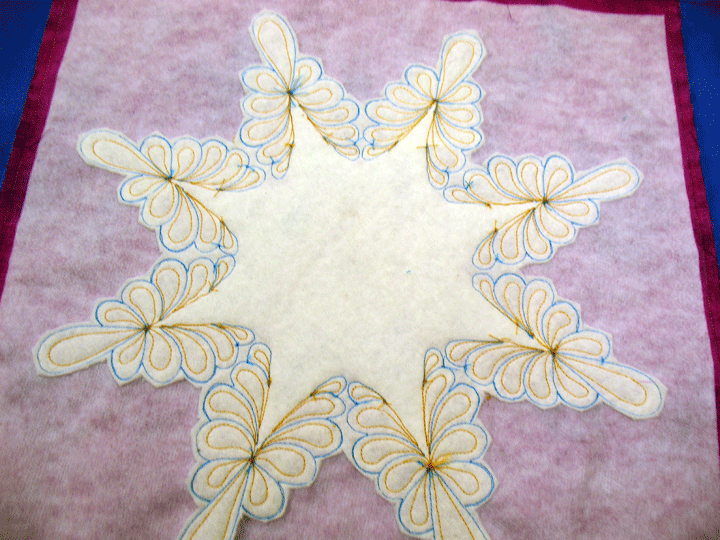
Yahoo! This design is coming to life, but we’ve just gotten started! Next up, I cut away all the excess batting that fell outside my quilted design. This is what the backside of the block looked like at this point:
(Notice that there are lots of big knots and untrimmed thread tails… no one will ever see this layer except you, so there’s no need to be neat on this layer!) Next, I added a border onto the block. I have no idea what I’m going to use this for, but I did this to show you that when you’re doing trapunto projects, you always want to work in ways that are easier for you. This step was merely to illustrate the point that you don’t need to even have a block or quilt top completely pieced to add trapunto layers or quilting details. (Smaller blocks=less work since there’s less weight and less bulk to move around on your machine bed.) Anyway, here’s what it looked like at this point:
Now is the time to add a batting layer under the whole quilt, and add that backing layer of fabric. (i.e. this is now in the final quilt sandwich.) This next step is where the magic happens! I put invisible thread in my top needle (Monopoly by Superior Threads) and a purple thread in my bobbin and began outlining “zones” of my quilted design. You are in the driver’s seat here, because you decide what you wish to highlight with the trapunto layer. The most important piece of advise I can pass along to you is that you don’t want to outline everything!
When you do this, always begin at the center of the design. I outlined the circular feather in the center (note that I did not outline the hyperquilting layer inside that feather), then I outlined the inside of the tiny plumes of the star. I then went in and outlined the outermost layer of gold star stitching. Lastly, I went in and outlined the outermost layer of my freehand plumes. I think you may get a better sense of the wonderful textures and “zones” that were created in this photo:
Lastly, I did my outline quilting surrounding the star:
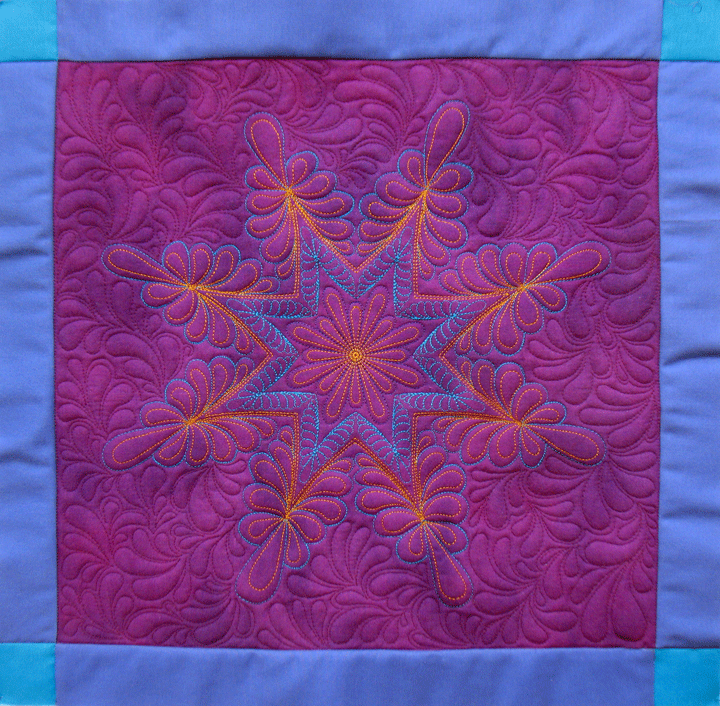
I still haven’t done anything to that border zone, but this gets you an idea of what the center block looks like completed. This is a way to enlarge an embroidery design into a larger quilted motif. If you want to play wound with it, that original star motif can be found here.
Filed under Free Motion Quilting, Machine Embroidered Applique.


There really needs to be a better word than love, as in love it. I think I’m now totally mesmerized and obsessed with this approach. Absolutely love it. Great job. Thanks for sharing.
SewCalGal
http://www.sewcalgal.blogspot.com
Your trapunto and quilting are fabulous! One question: did you have backing fabric in place when you stitched the outlines?
I didn’t place it into the final quilt sandwich (with a new layer of batting that went under the entire thing, and also a backing layer of fabric) until after I’d pieced the whole thing. That is the place where you put invisible thread in the to needle and begin your outlining process. Sorry i didn’t make that clear!
Patsy
This is beautiful! Your skill continually amazes and inspires me. Wonderful idea and the photos are excellent (didn’t need to see the chalk marks anyway). Thank you!