

Dec 23 14
Ruler Work Part 2: Filling in the Skeleton
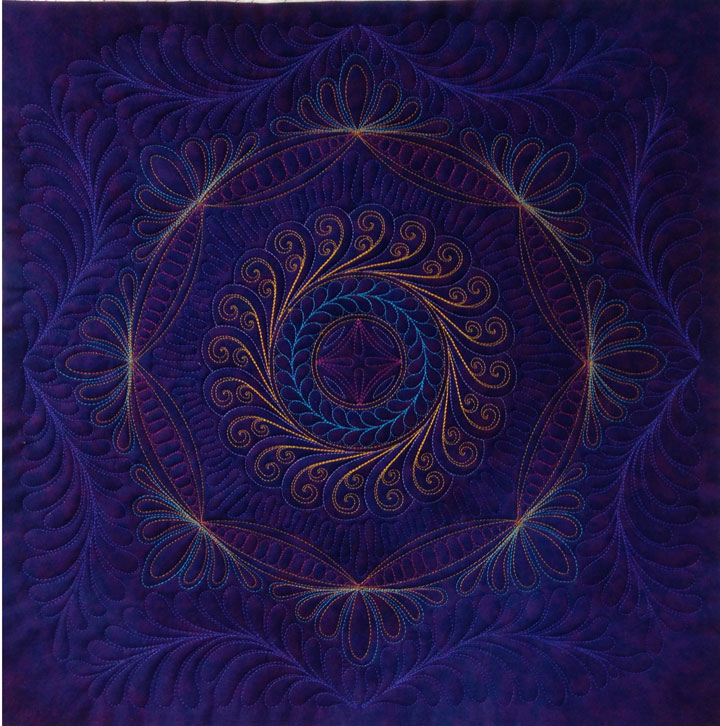
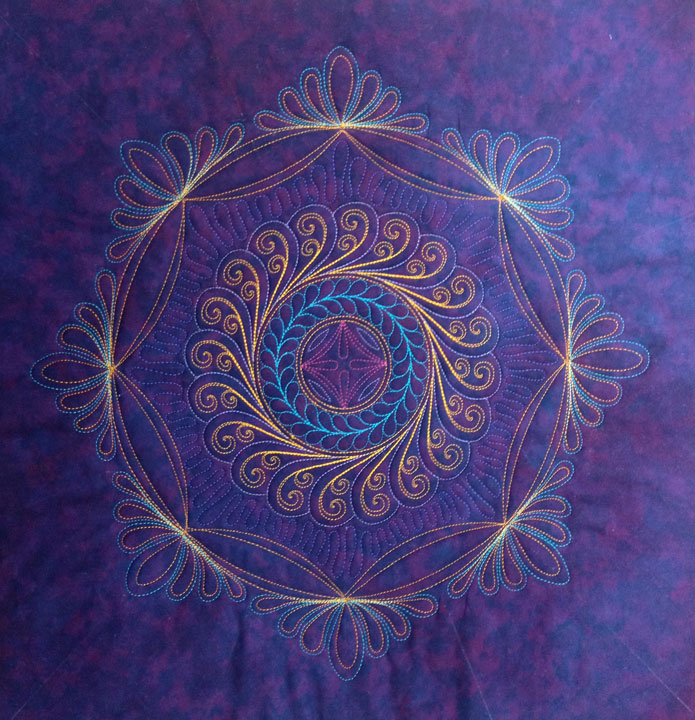
In my last post, I showed you fun and fast ruler work can be to create a skeleton to frame an important quilted motif. This was the final product once I’d filled in the entire skeleton:
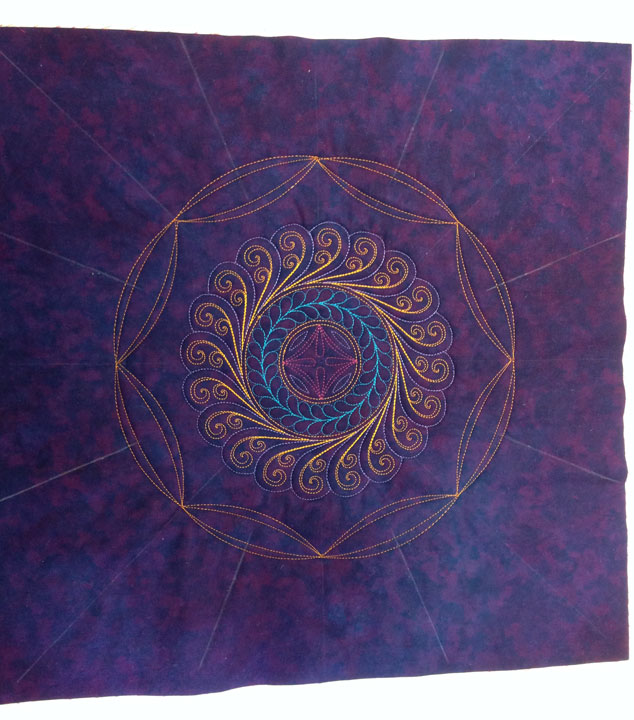
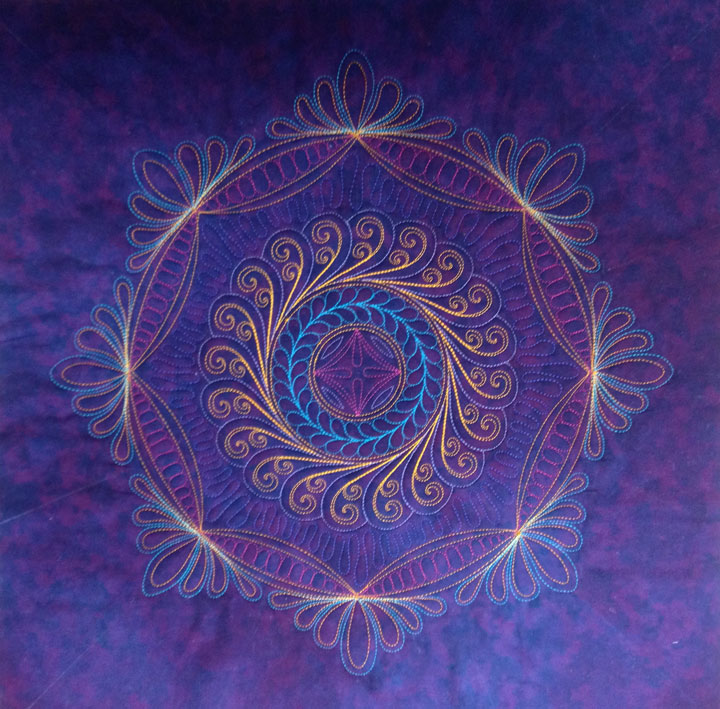
So, in this post, I want to show you the steps of how I filled this in. Remember, what I ended up doing was only one of many different ways one could fill this in, so I’m hoping this will just give you some basic guidelines about how to go about “filling in” in general. Once the ruler work was completed, this is what the block looked like:
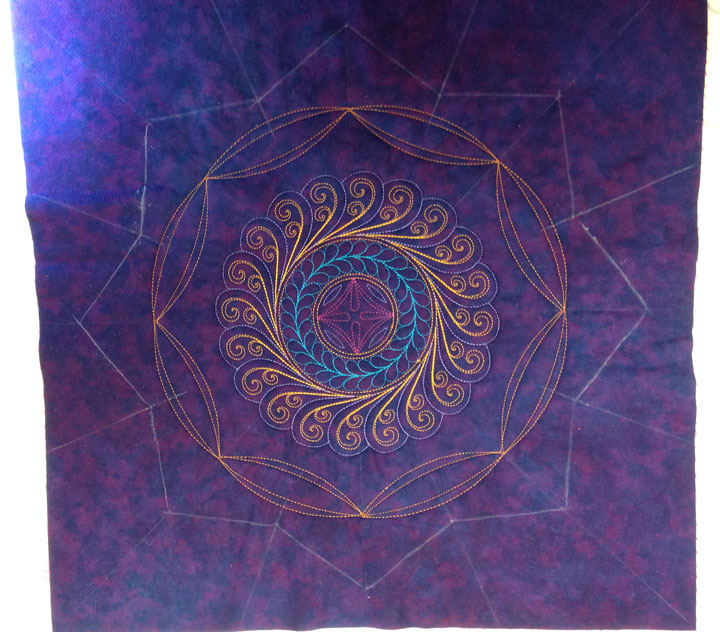
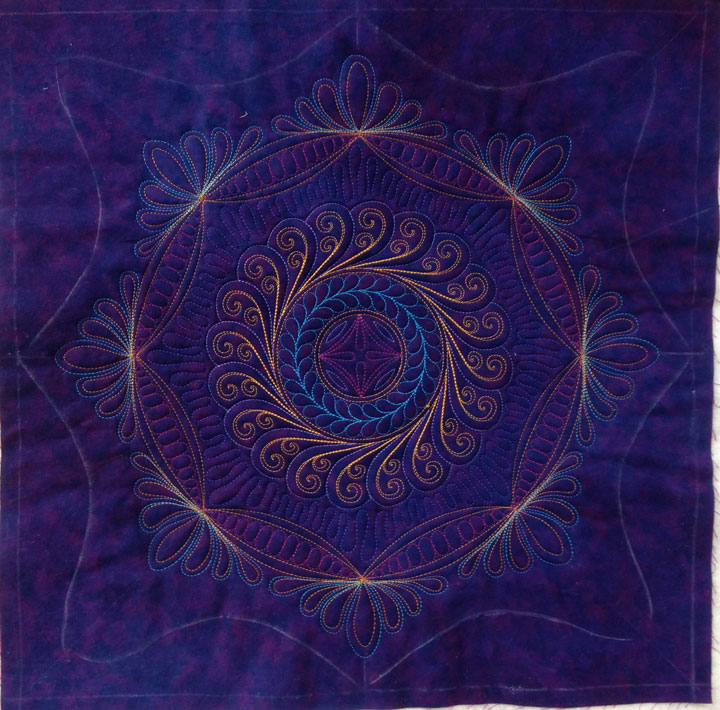
So, we have a circle of crescents surrounding a trapuntoed feathered wreath. There are still markings that divide the block into 8 equal quadrants. I divided the block further into 16 quadrants and marked lines with a sliver of soap. (This was easy to do; I used the halfway mark on my Pro Echo ruler and then just ran a line from that mark through the center of the block.) Once that was done, I marked a small triangular area that was centered on each of these new marks. Here is what the block looked like at this point:
Why did I do this? I wanted to be able to stitch a small feathered “unit” that would be centered at the juncture of each pair of crescents. By outlining these triangular zones with a soap line, I created boundaries for my feathered “unit.” Remember, the greatest attribute of feathers is that any given plume may easily be stretched or contracted to fill a specific space, so by creating 8 triangular units, I now have a way to create 8 feathered units that will appear to be identical, as long as I strive to fill each triangle with my plumes. Along those lines, here is what a single feathered unit looks like:
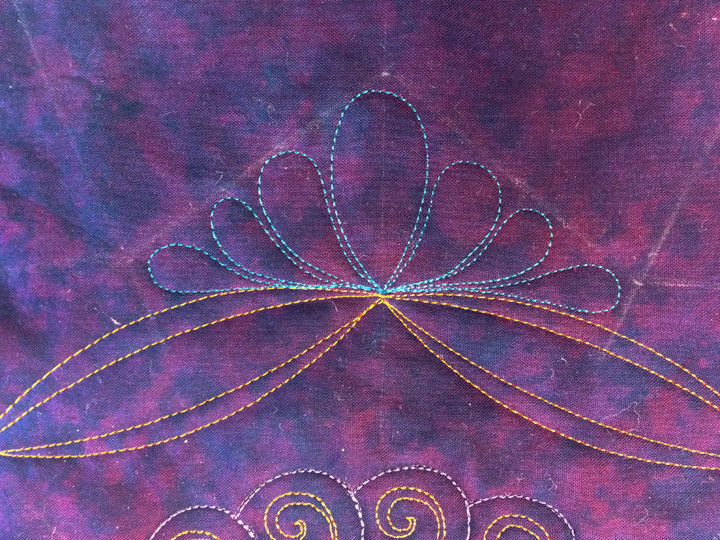
Can you see how I’ve tried to fill that triangle with the feather? Notice also that I didn’t cross my lateral (side) soap lines either because this is where this feather unit will “kiss” the neighboring feather unit. Here is what this looked like once all the triangles were filled and before I had hyperquilted the feathers:
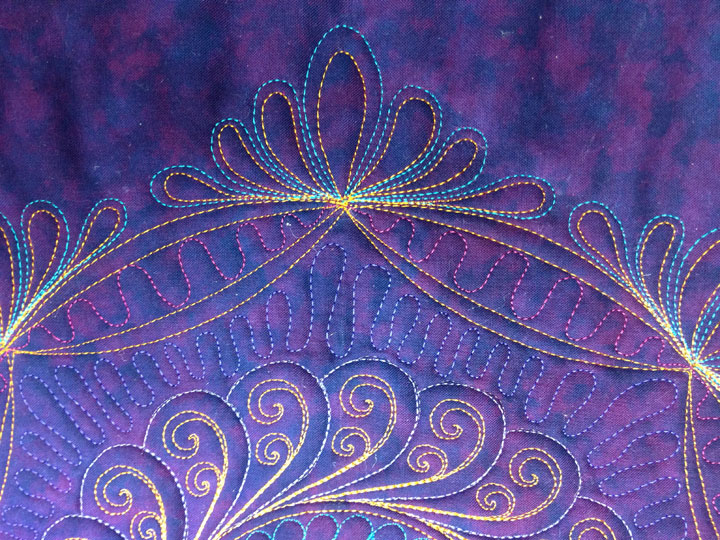
I liked it at this point, but it seemed understated (by my tastes!), so of course, I went in and hyperquilted those feathers. I also filled in that zone just outside the feathered wreath with a design I call “inchworms” and here’s what it looked like at this point:

…and here’s a side view of it at this point:

Don’t the insides of those crescents look like they’re begging for some action? I quilted “capsules” inside them. This is easy to do as a 2 step design. You begin inside one crescent and stitch the inchworm design, then cross into the next crescent and do the same inside all crescents in the circle:
Once all those are filled, you stitch the inchworm design again, but in the opposite direction, and this converts inchworms into capsules:
At this point, the only remaining “zone” to quilt was the outermost section. Feathers always work well in a situation like this. I began by using a soap sliver to mark the curves of each feather, trying to make all my curves mirror images of one another. Here is what my “soaped in framework” looked like before I began stitching the feathers:
Absolutely gorgeous and inspirational. Thanks for all the tips and tutorial for ruler work. I definitely want to play with this. #quiltlove
SewCalGal
http://www.sewcalgal.blogspot.com
You make it seem so effortless! Thanks for sharing.
This ruler work is just what I needed to get me inspired again. I’ve been in a quilting slump for a while now. I’m heading off right now to try it. Thanks to The Quilt Show for showing your ruler work video.
Patsy, thank you for a great video on using rulers with a free-motion machine.
I bought some long-arm rulers and now know how to have fun experimenting with them!
Thanks to The Quilt Show for sharing your work and website.
Above comment from:
TwinCreekQuilts
http://www.twincreekquilts.com. Website and Blog
Patsy, I know at one time you used a Pfaff. I have an older model and I am wondering if you know of a ruler foot that may work on the Pfaff? I am currently searching & asking around to see if I can find something that would work. Thanks for all of your videos; they are so helpful.