Oct
19
15
I got to spend a little time playing with my Westalee Circle Rulers last week. (You can find them in our online store by clicking here.) They offer 4 separate templates that can be used to make a wide range of circle sizes that can be used to create circular designs or Baptist fan designs:
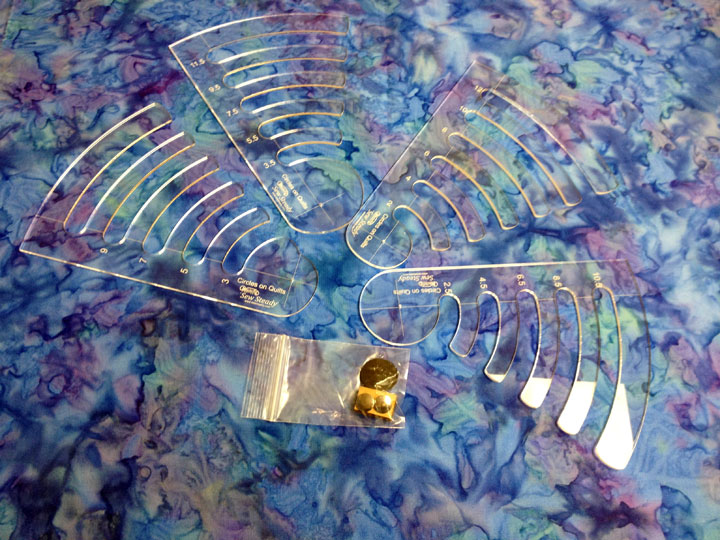
To me, this circle set is like the Line Tamer Ruler except that you use these to create circles (or partial circles) instead of straight lines. Both types of rulers/templates have a channel that holds the ruler foot, so it’s kind of an extra level of security that your stitched line will fall where you want it to fall. I have the low shank set but I have used this same low shank template set with my low shank, medium shank, and high shank Westalee ruler feet.
You begin by placing a small pin in the center of the block, or where you want the center of the circle to fall. I believe the pin that came with my set is really a common thumb tack. Once you’ve placed the pin the center, you decide which size circle you want to stitch. The markings on the templates are for the diameter of the circle, so remember that the distance from the center of the circle will be 1/2 the diameter. Once you’ve made your circle size choice, you place the tiny hole at the base of the template onto the pin (thumb tack), then “lock it into place” using the small circle that has holes punched into it. Here’s a closeup of how it attaches so you can understand this better:
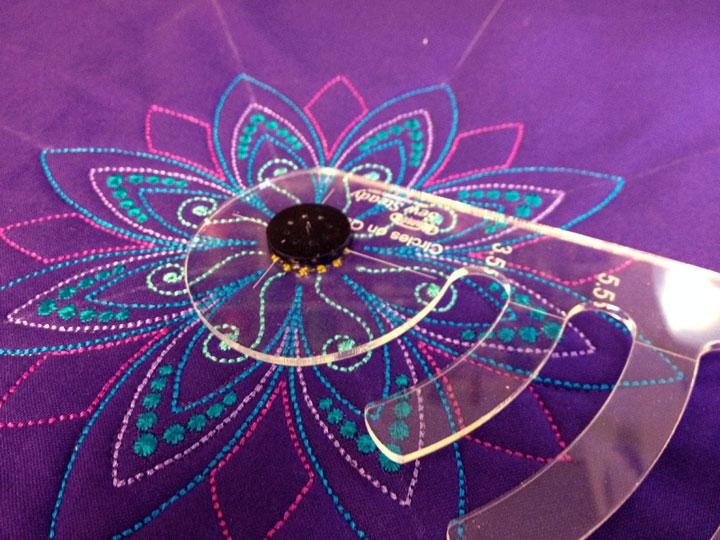
(Don’t be distracted by the light green “bead-like” structures under that plastic circle. Those are embroidered, not part of the circular attachment piece.) Removing that plastic locking circle and swapping out templates is very easy and only takes about 4-5 seconds. At this stage, you can easily move the template around that center axis point as you work. Here’s what it looks like after I’ve stitched a few sizes of circles and I think you can see how this works:
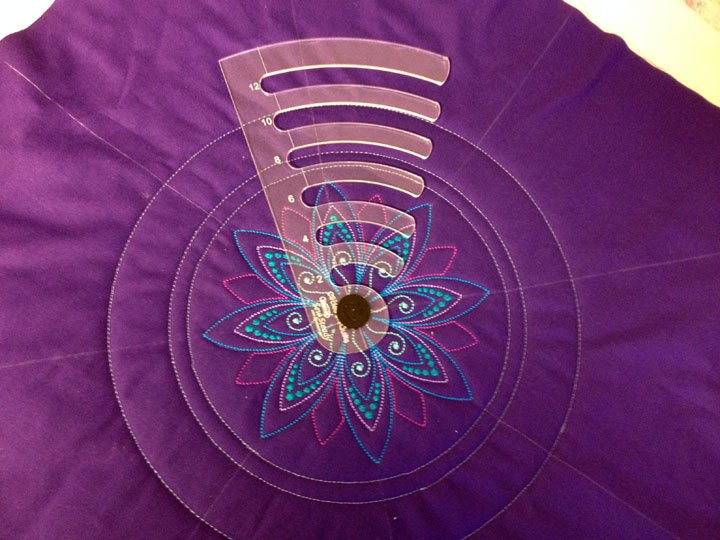
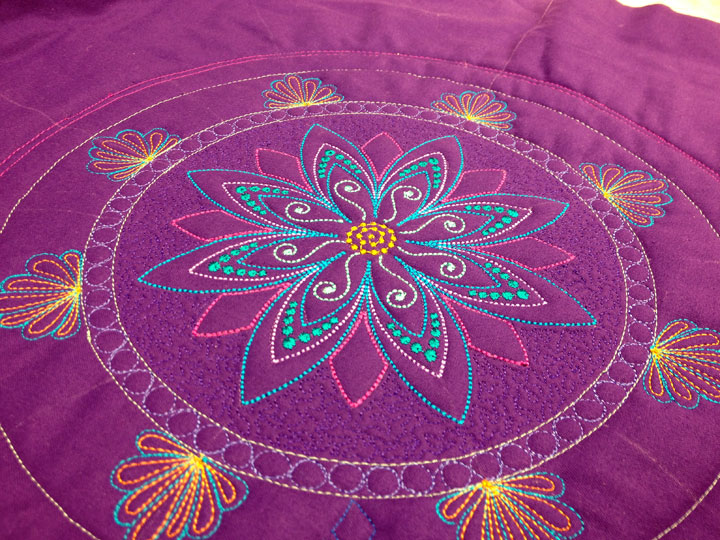
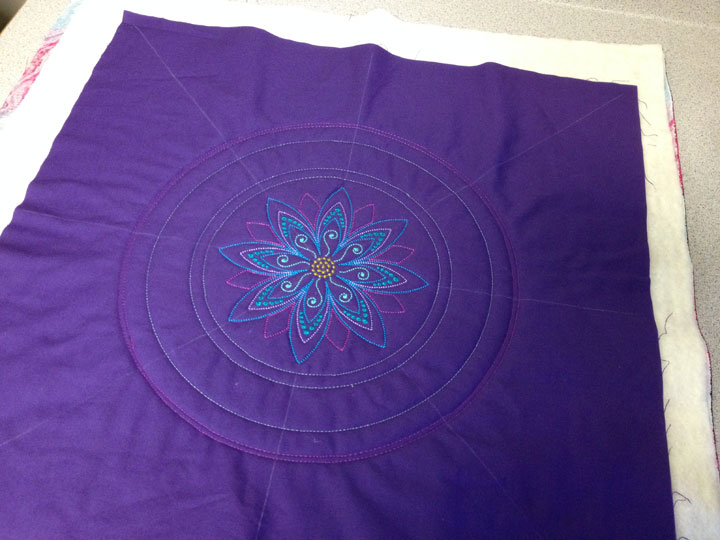
I think the secret to success with this system is that you only want to rotate the template as you work; you don’t want to rotate your fabric. (This is kind of challenging to me because I flip my quilt around a lot as I work, so it seems very unnatural NOT to move it!) I am really eager to play with these some more because I love the thought of creating circular frames or skeletons that can be filled with free motion work. Here are a few early shots of this:
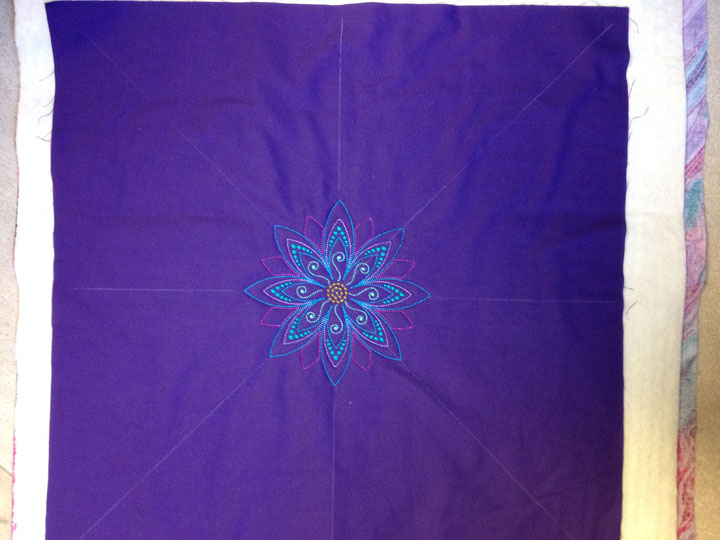
That center design is an embroidered design that came loaded on my Destiny. I enlarged it to about 7 inches in diameter and then worked to frame it with a circular design:
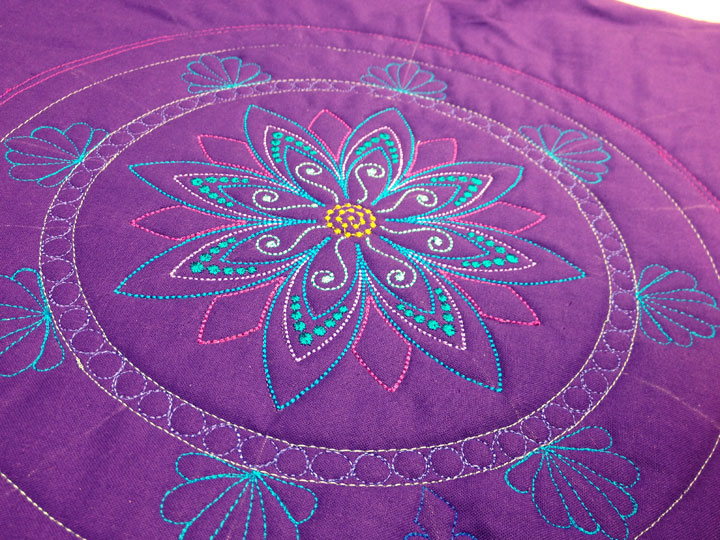
Fill-in begins! Here you see some featherettes and also a pearl-filled channel near the center:
I had already outlined the center design with invisible thread to make the trapunto pop, but it wasn’t very striking. I went in with a purple rayon thread that was just a bit darker than the fabric and did a small stipple to make the area around the embroidery kind of flatten a bit:
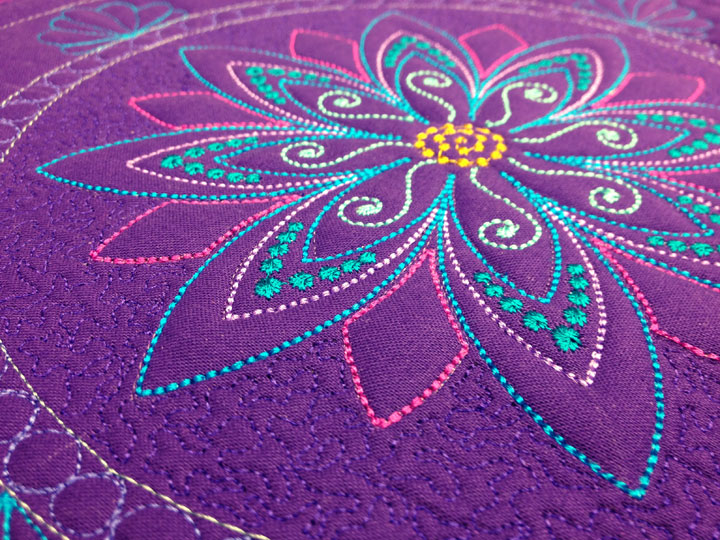
…sadly, that didn’t really make that trapunto pop very much either! Oh well…I then hyperquilted the featherettes:

I still have a ton I want to do with this but haven’t had time to get back to it yet. My fingers are crossed to add some new ruler work and new “fill-in” work later this week. If you’re interested in the Westalee circle rulers for the home sewing machine, you can watch a video showing how to do it by clicking here.
Filed under Free Motion Quilting, ruler work on a HDSM.


I recently started working with the Westalee circle ruler set for domestic machines also. It’s fantastic, so easy and accurate. The design possibilities are very exciting.
Love it! Got your new class just started watching it!
That is awesome, Patsy. Have you tried the rulers with George?
Have watched your new Craftsy Clara all the way through, unbelievable!!!
Just itching to put it all together with the ruler class. YUMMY. THANK YOU SO MUCH FOR ALL YOUR SHARING AND ENCOURAGEMENT. Await with baited breath until the next instalment.
Hi Patsy,
Once again you made my jaw drop! You really are incredibly talented.
Here’s my silly question of the day. Could a person maybe go the other way with the circle rulers and just let the foot gently push the ruler around, thus keeping it going in a continuous circle?
BTW, who won the Crafsty Class?
See ya later Alligator
Gorgeous. You’ve definitely inspired me to try these rulers. Total #CreativeGoodness
QuiltShopGal
http://www.quiltshopgal.com
Really love your quilting!! I too wonder how the foot fits/ works on the George??
[…] began filling in with some free motion work. (You can read Part 1 of Ruler Work in the Round by clicking here.) I actually ended up taking out some of my stitching because the designs I made just […]