

Aug 11 16
Ruler Work: Elegant Simplicity to Intricate/Complex Designs

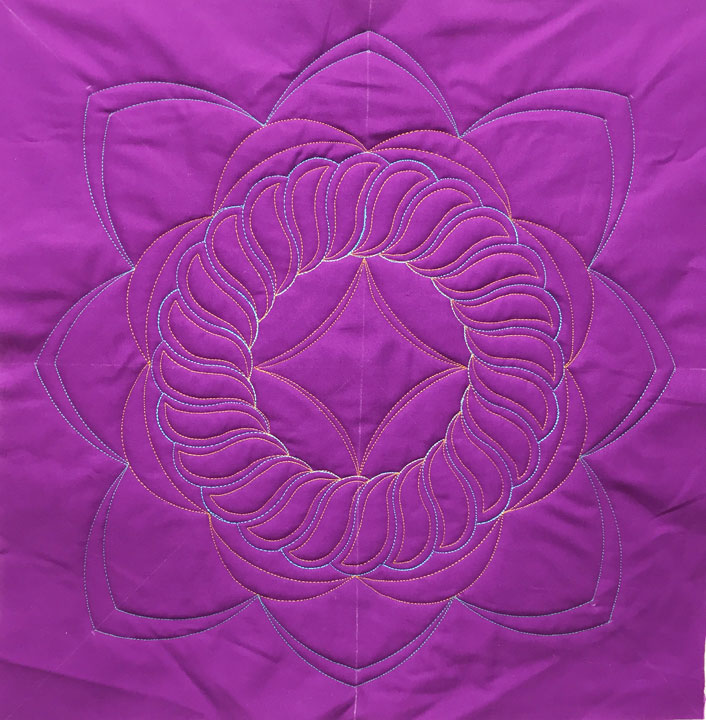
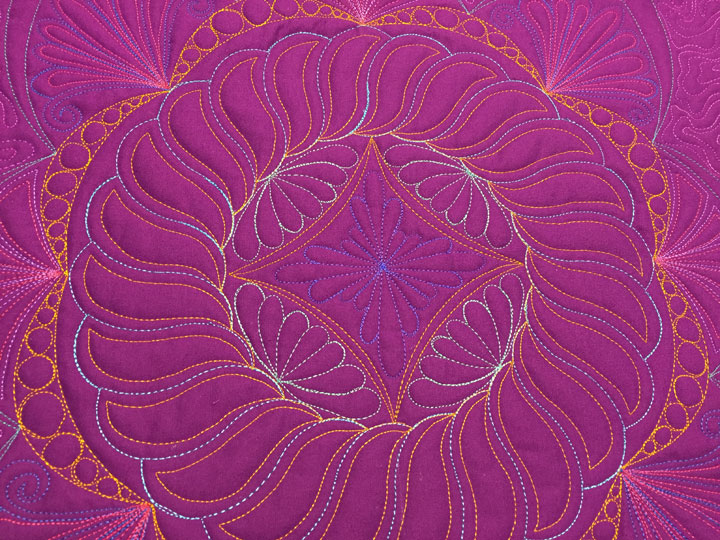
This is a center shot of a complex ruler work design that has been filled in. This “began life” as a very simple, yet elegant rope-cabled wreath that was honestly very easy to create using the Westalee Circles on Quilts Wreath #3 template. (You can find that template by clicking here.) Here is what this wreath looks like in its “native state:”
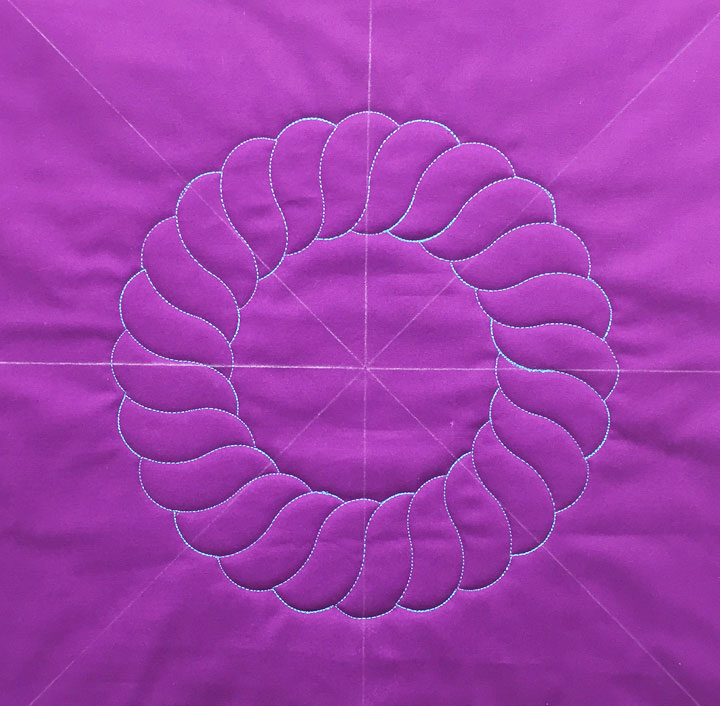
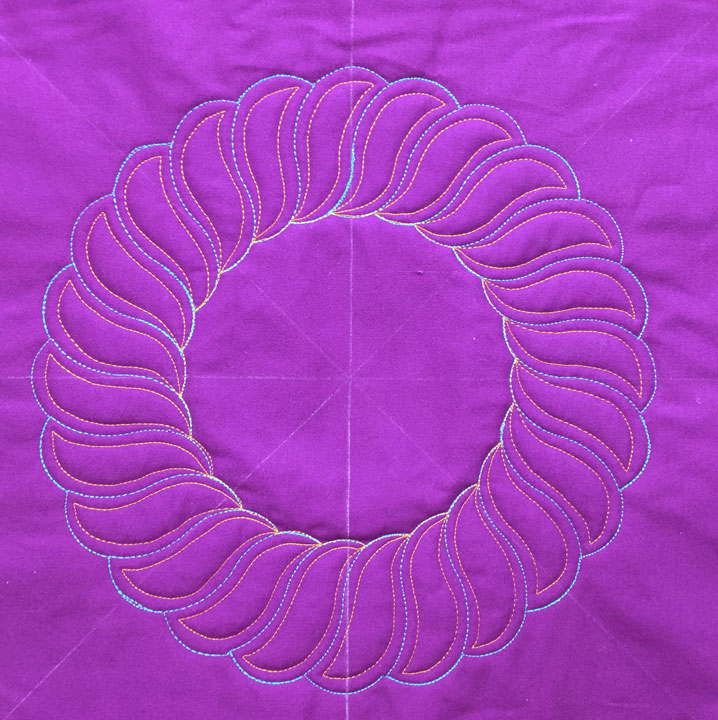
(Sorry for all the color changes. All these photos were taken in different places with different lighting.) I think this wreath is so cool. If you look at it closely, it’s not the traditional wreath comprised of plumes that we stitch so often. Instead, it’s composed of repetitious rope cabling shapes. This gives it a bit more movement, almost a “spinning” type of effect. Here, you can see that effect accentuated once it’s been hyperquilted with gold rayon thread:
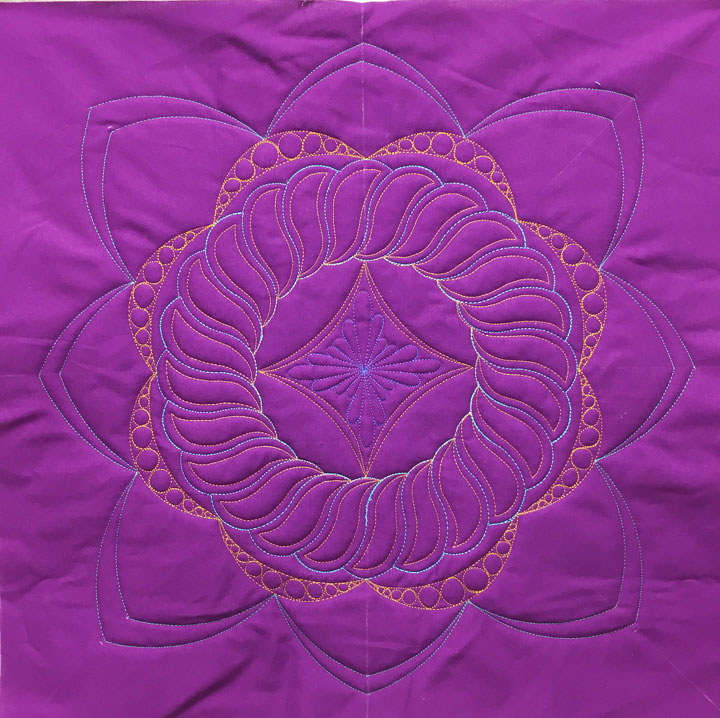
In this next shot, I’ve created a framework in the center using my PTD arc rulers:
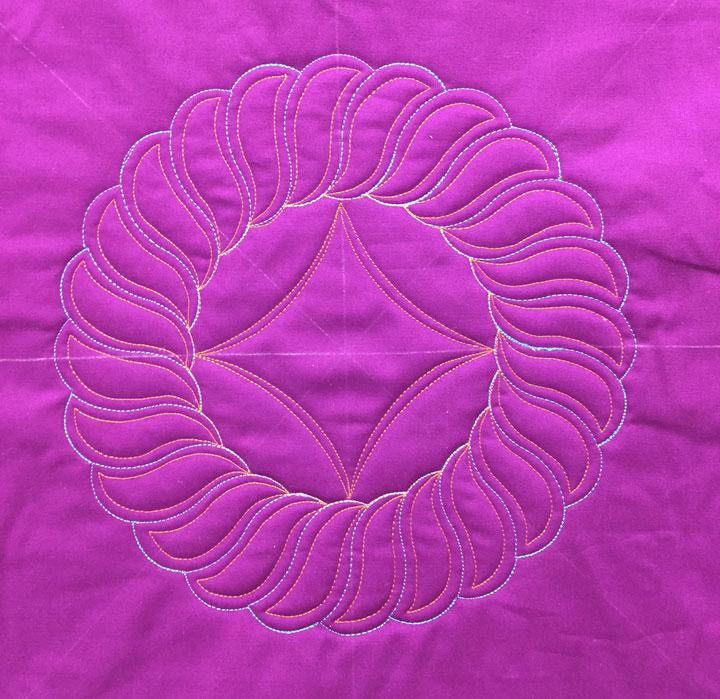
…and in this next shot, I’ve began creating a design just outside the wreath by adding a small double crescent ring around it:
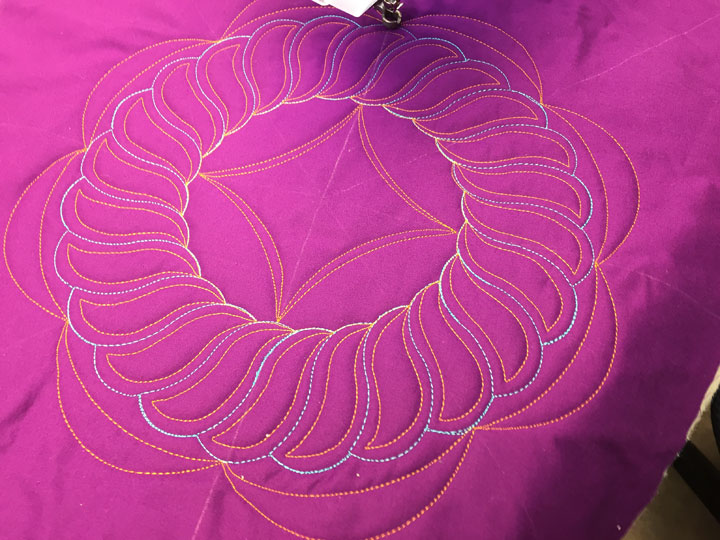
(Notice that I am using my original soap lines as my starting and stopping points.) Next up, I added some arced swags that reach for the outermost parts of the block:
And now it’s time for the fun filling-in portion of the designs! I added a featherette in the center of the swagged “quadrangle,” then added a single row of pearls inside the gold double crescents:
…and now 4 featherettes have been added in an aqua polyester thread:
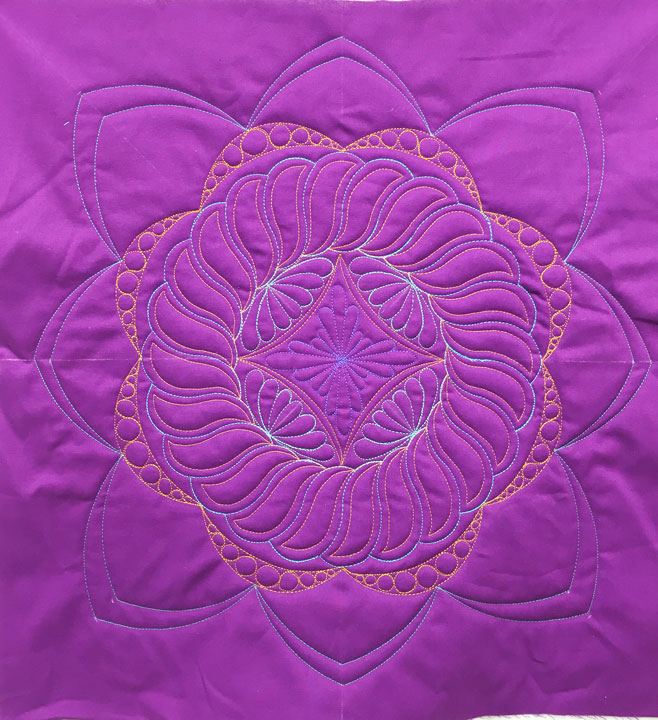
…and then the outer arched swags were filled in and then hyperquilted:

…and here it is with the background quilted:
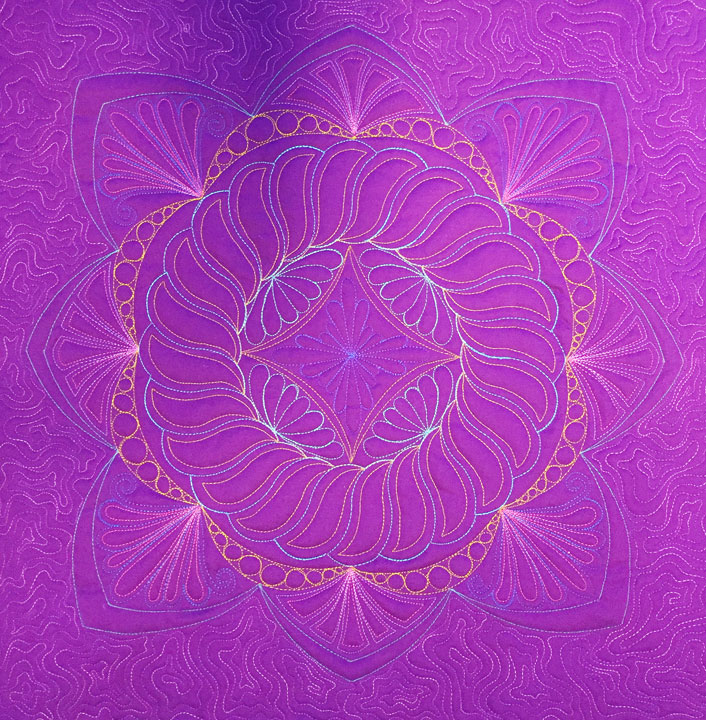
In truth, the color is much more like this color below:
Totally fun from start to finish! That baseline wreath really is very easy to create using the Westalee template. Here’s a nice video that shows you how to do it:
Hi Patsy, did you use your sit down machine. I noticed on the video she used her long arm. Was it easy to use if you used your home machine or sit down long arm. Thanks
Gosh, this is pretty, Patsy — and I know what you mean about not being able to get into that studio for a period of time. You feel as though your creative juices have been drained from your fingers, and they’re just itching to get back to that machine.
Diane
Gorgeous as always Patsy. I actually did straight lines with a ruler on my domestic for the first time the other day. I think it’s going to become an addiction……..
Thanks for the compliments! I did this on my Babylock home sewing machine. It was very easy to do. The key is to remember to check and make sure that your template edge aligns with the stitched line every time you begin a new rope cable. As long as you do that, everything will line up perfectly at the end when you reach the beginning again. This template creates a nice sized wreath (11 inches in diameter), but the shape of the template is small enough that the short movements involved in stitching it make moving the wreath/template together quite easy. This is probably the easiest template I’ve ever used on my home sewing machine, and I did not expect that going into the design!
I think a lot of ruler work is actually easier in sitdown mode on your home sewing machine than it is on a longarm. I say that because most of the time, you can eliminate the hopping mechanism with the home machine but you’re stuck with it on your longarm machine. Being able to have the foot glide makes templates like this one much easier to work with.
You’ve imseesprd us all with that posting!