

Feb 21 17
Trapuntoed Ruler Work-Part 2A
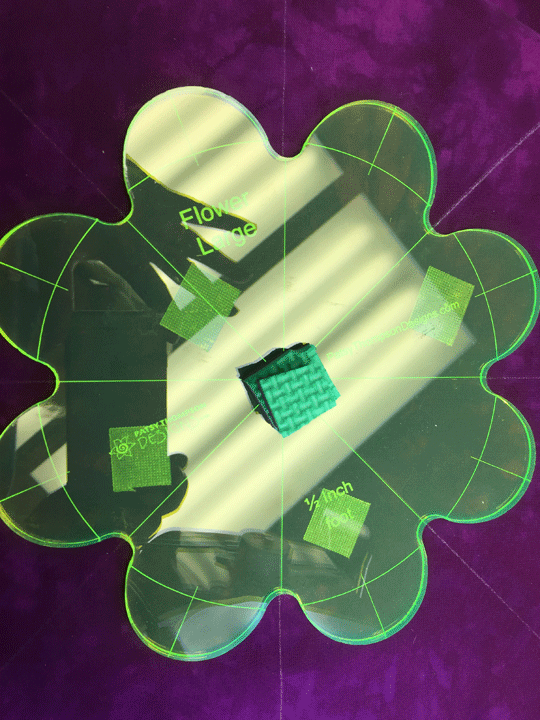
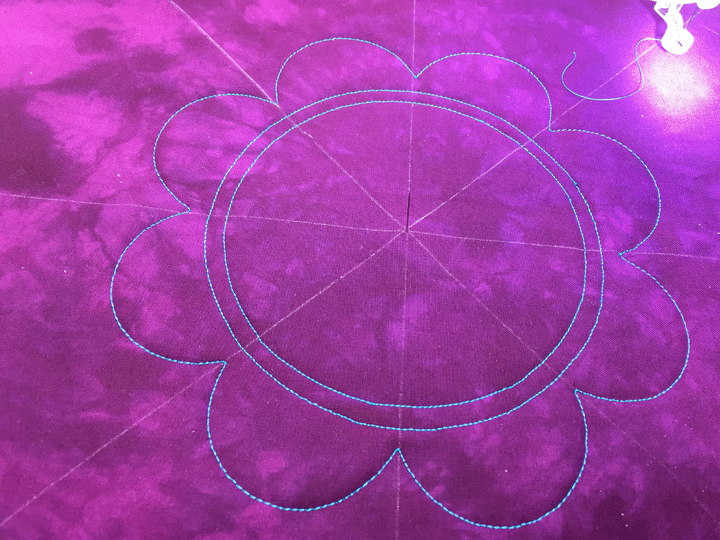
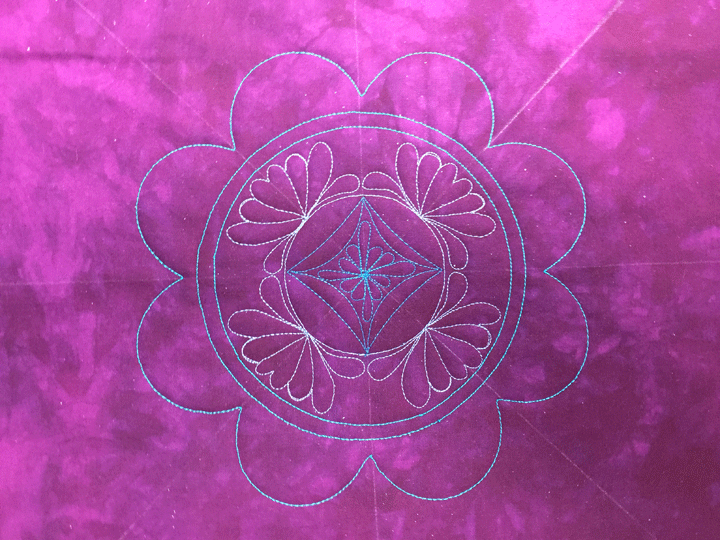
This is the 2nd block in my trapuntoed ruler work quilt; you can read about creating the first trapuntoed ruler work block by clicking here. This block began just like before, by subdividing it with 8 soaplines that intersect in the center of the block. I then used the largest template in the PTD Flower Template set to create my center-most shape:
Next, I left my pin in the center of the block but swapped the flower template to one of my Westalee Circles on Quilts templates. I choose a circle size that was just a tad bit smaller than the center of the flower template I’d just stitched. The circles on quilts templates are fun and you stitch the circles by “riding” inside the cut-out channels as shown below:

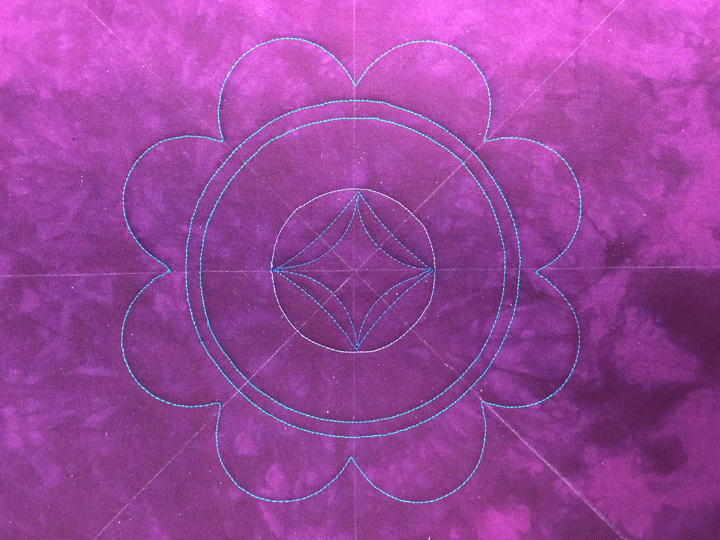
Once my circle was stitched, I swapped to a different Circles on Quilts Template that allowed me to stitch a circle that was just 1/2 inch smaller in diameter. This allowed me to create a narrow channel and adding a channel always makes a design look more interesting:
Notice that my center pin is still in place. That was deliberate as I thought I’d probably stitch another circle. I swapped to a different color thread, then stitched a much smaller circle. I swapped thread colors again, and used 2 different arc rulers to form a small curved “square” on point with tapering channels in the smallest circle:
Finally time for a bit of “fill-in” work! I added a small featherette inside the square on point, then used my soap lines to guide me in stitching 4 featherettes inside the large “spine zone:”
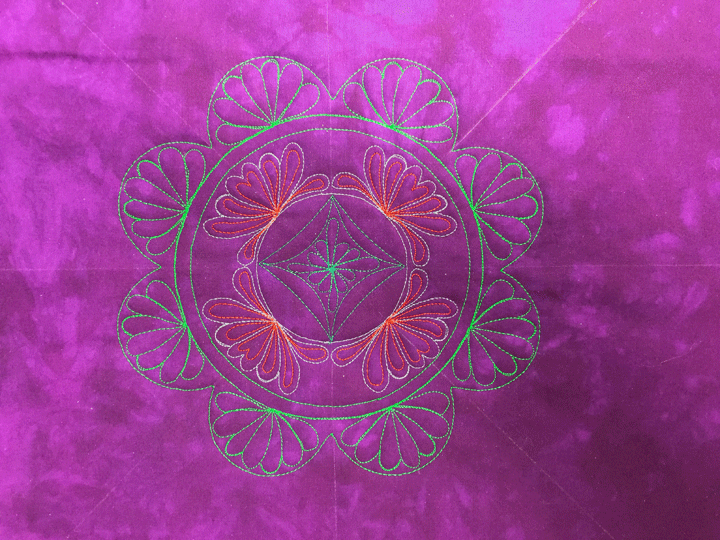
Next, I hyperquilted the lavendar featherettes with gold polyester thread and added small featherettes inside the flower petals. (Sorry, the colors on this next photo are totally off!)
Before I go any further, doesn’t it strike you that the flower shape we began with really doesn’t seem much like a flower anymore? I made tick marks on the center of each flower petal (they’re on the template), then used an arc ruler to add curved triangles that spring from the flower edge. It was easy to create a tapering channel around the triangles y marking a temporay tick mark 3/4″ further out than the point of each triangle:
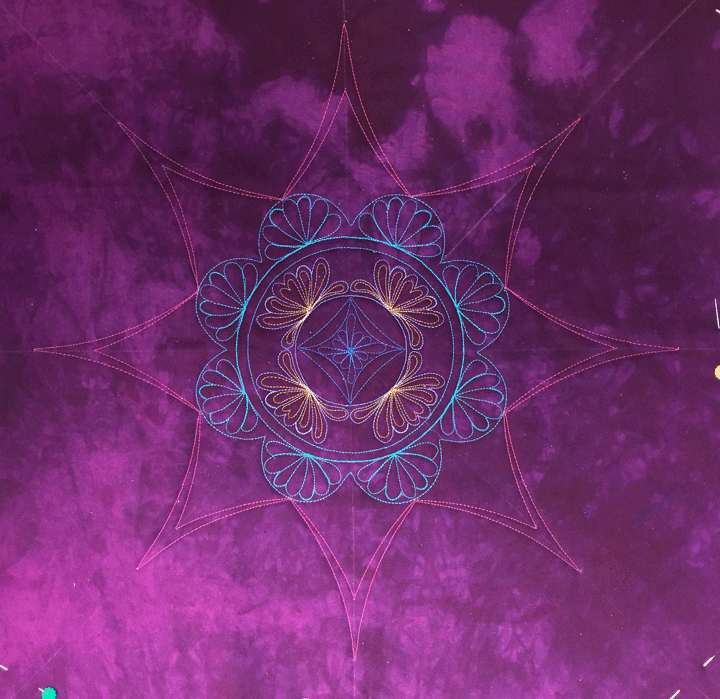
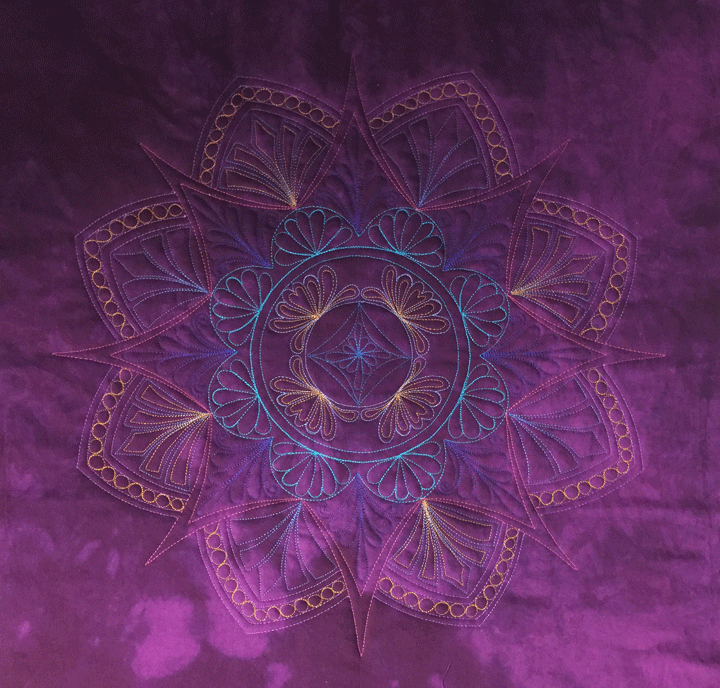
This design is far from complete but there are so many steps that it’s too much for one post! See you soon with Part 2B details that will explain how to take the design above to the design below:
So beautiful, Patsy! And you always make it sound so easy!
Wow! Gorgeous! Your instructions are so clear too! Thank you, Patsy, for breaking it down so clearly. I darn near drool over your work – now to my machine. Your work is inspiring.
[…] steps in creating the trapuntoed ruler work block above in an earlier post; you can find that post by clicking here. This left us at this […]
I loved your Craftsy Courses, especially about Feathers. I haven’t yet done one of your beautiful circular patterns because I don’t have many rulers. But, I just bought your Fineline 7-1/2 straight and circular ruler, and I have the Westalee intro set. So, I’ll catch up.
Anyway, you are one of the instructors that I absolutely treasure.
God Bless.
[…] you can access by clicking on the post names below: Trapuntoed Ruler Work Mandals Part I Trapuntoed Ruler Work Mandalas Part 2A Trapuntoed Ruler Work Mandalas Part 2B This quilt was my first experiment with using […]