

Apr 12 17
Using Westalee Wreath #3 + Westalee Circles on Quilts Templates to Create a Complex Ruler Work Feathered Wreath
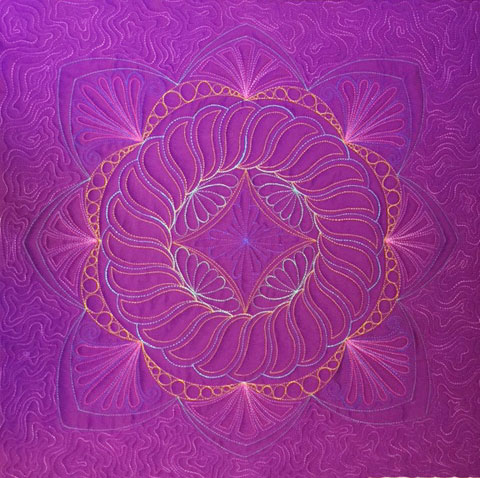
 (I really have finished the last quilt I was blogging about and the borders came out great. I just haven’t gotten around to taking pictures for a blog post yet. It’s coming!) In the meantime, I made this new ruler work feathered wreath today. It starts with the Westalee Circles on Quilts Wreath #3 Template, which you can find by clicking here. This is my absolute favorite Westalee template because the “rope wreath” it creates is just plain fabulous:
 …and you might remember it from the mandala I made several months ago:
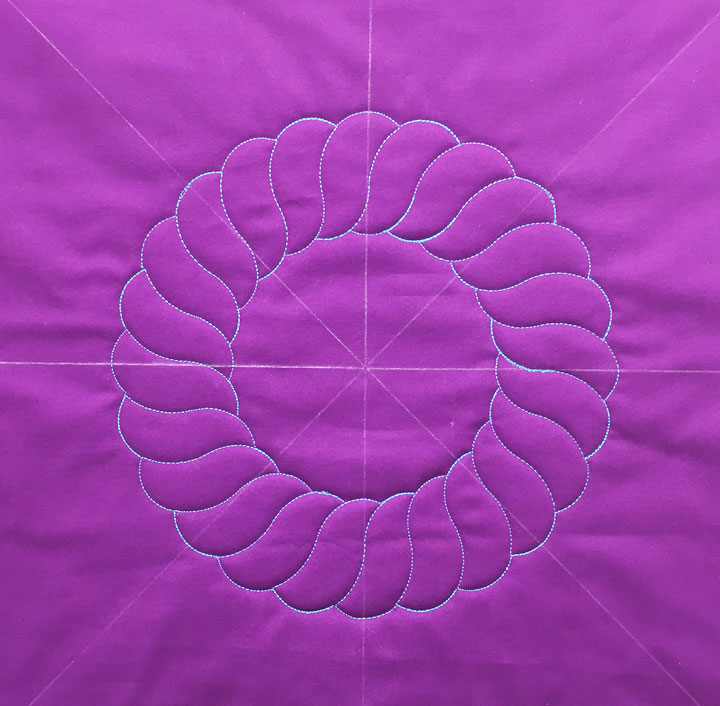
 The first time I stitched the rope wreath, it came out perfectly and seemed easy-peasy at the time. I fell in love with it but when I went to make another one, things didn’t line up properly when I arrived back at the place I’d begun. Sadly, this happened to me several times, regardless of what I did. I finally got frustrated and decided I needed some time away from that rope wreath template, and that was many months ago. Today, I got it out again and after 2 attempts where things did not join properly at the end, I just decided to join the ends freehand at the end. Here is a shot of my rope wreath part-way through:
 …and here’s a shot of the finished wreath. If you examine it, you’ll see the awkward “join up,” but I’m ok with it:
 Next up, I swapped out the wreath template for my Westalee Circles on Quilts template (which can be found by clicking here), and stitched a 5 in diameter inner circle. I needed this circle so I’d have a thread line from which to flow my inner plumes. Here’s a shot of that stitching in progress:
 I then swapped to a 12-inch circle template and did the same thing to stitch my outermost circle, as this would be the thread line from which would flow my outer plumes:
 I added my inner plumes and here’s what the design looked like at this point. Also notice that there is a faint circular soap line drawn outside the outermost circle. This will serve as my “boundary line” when I go to stitch my outer plumes free hand. (To see a tutorial about how to stitch wreath plumes freehand, click here and scroll to step 8.)
 I added some hyperquilting (simple in-lining) inside the inner plumes and also filled the narrow zone between the inner plumes and external rope wreath with the inchworm design. I then added all my external wreath plumes using the same polyester thread that I’d used for the inner plumes. Here’s how it looked at that point:
 Next up, I hyperquilted the rope wreath with the same gold polyester thread I’d used to hyperquilt the inner plumes. This adds intricacy to an already beautiful rope wreath, and it also adds a sense of movement:
 (Now do you see why the Westalee Wreath #3 is my all-time favorite?!!) I then swapped to a turquoise rayon thread and stitched the inchworm design to fill the space between the rope wreath and the external plumes:
 In my last step, I hyperquilted the outside plumes with the heart-inlining design:
If you read my blog regularly, you know I am a creature of habit and love trapunto, so you also know this will be a trapuntoed wreath when fully complete. I’ll blog about all that later, but for now:
In my last step, I hyperquilted the outside plumes with the heart-inlining design:
If you read my blog regularly, you know I am a creature of habit and love trapunto, so you also know this will be a trapuntoed wreath when fully complete. I’ll blog about all that later, but for now:

Another beautiful wreath. Once you get all of the hyperquilting done you can’t even notice the little blurp where you matched up the inner wreath.