

Apr 20 17
Trapuntoed Ruler Work Mandalas-Part III
 I started this quilt a couple months ago and you can read the step-by step process in older posts that you can access by clicking on the post names below:
Trapuntoed Ruler Work Mandals Part I
Trapuntoed Ruler Work Mandalas Part 2A
Trapuntoed Ruler Work Mandalas Part 2B
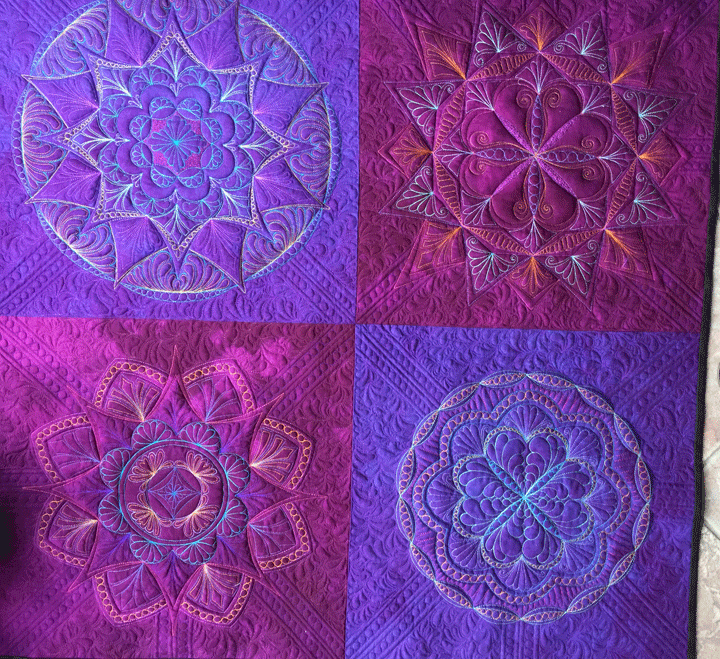
This quilt was my first experiment with using trapunto with ruler work quilted designs. I had a blast making all 4 blocks. As I was working on each one individually, I had an idea in my head about how I would quilt the surrounding area once they were all joined together in a quilt. Sadly, once I pieced them together, that design just wouldn’t work. Rats! Anyway, I quickly outlined all the various zones of each mandala with invisible thread (Monopoly clear by Superior Threads…can’t say enough wonderful things about this thread and I use it exclusively for all my invisible thread work, which is a lot!) Anyway, this part was very satisfying to me as I could quickly see the trapunto effects before I had even touched the quilting of surrounding areas:
I started this quilt a couple months ago and you can read the step-by step process in older posts that you can access by clicking on the post names below:
Trapuntoed Ruler Work Mandals Part I
Trapuntoed Ruler Work Mandalas Part 2A
Trapuntoed Ruler Work Mandalas Part 2B
This quilt was my first experiment with using trapunto with ruler work quilted designs. I had a blast making all 4 blocks. As I was working on each one individually, I had an idea in my head about how I would quilt the surrounding area once they were all joined together in a quilt. Sadly, once I pieced them together, that design just wouldn’t work. Rats! Anyway, I quickly outlined all the various zones of each mandala with invisible thread (Monopoly clear by Superior Threads…can’t say enough wonderful things about this thread and I use it exclusively for all my invisible thread work, which is a lot!) Anyway, this part was very satisfying to me as I could quickly see the trapunto effects before I had even touched the quilting of surrounding areas:
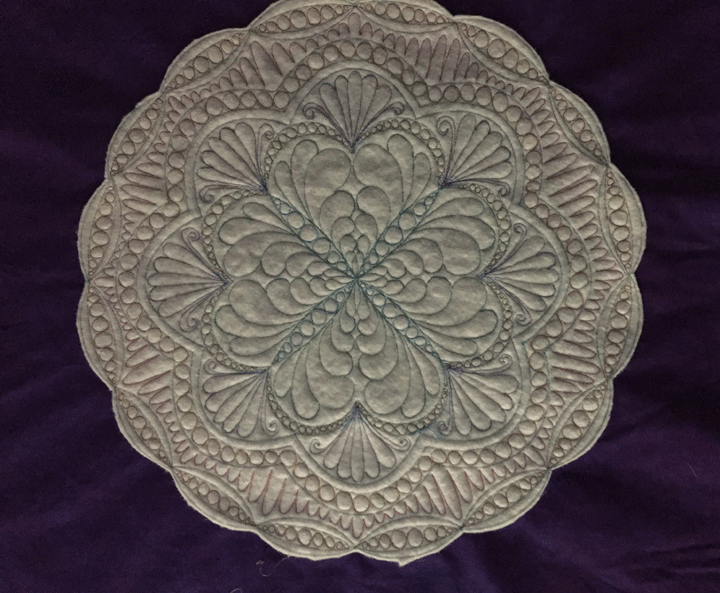
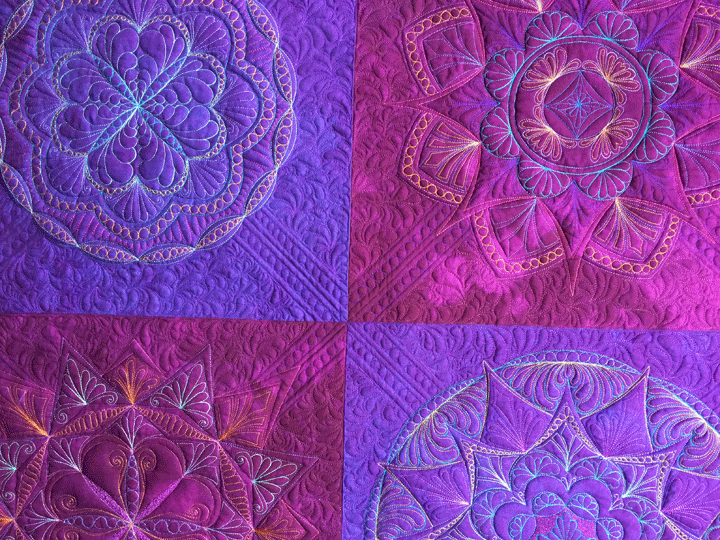
 Here is a shot of each block individually, and you can get a better sense of the wonderful texture created by the trapunto:
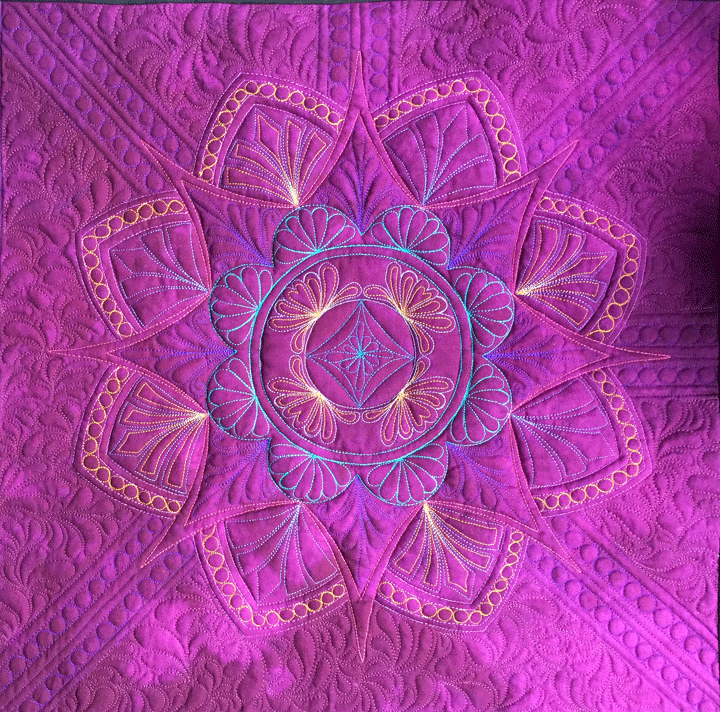
 …and number 2:
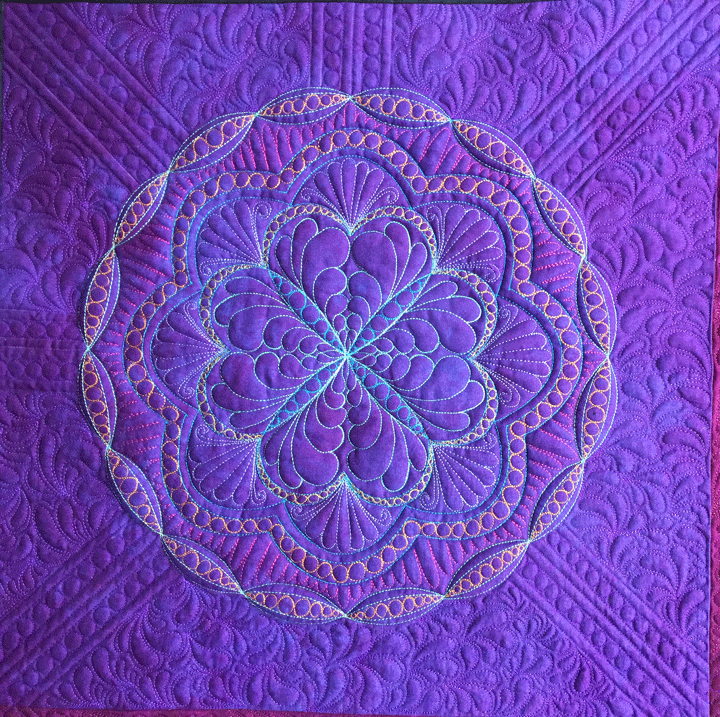
 …and number 3 (my personal favorite!):
 …and number 4:
 I’m writing this post in an airport and don’t have access to the quilt, but each block was either 20 or 22 inches square. Once each mandala had been created, I cut away the excess batting that fell outside the design. You can see what I’m describing in the photo below of the backside of mandala #1 below:
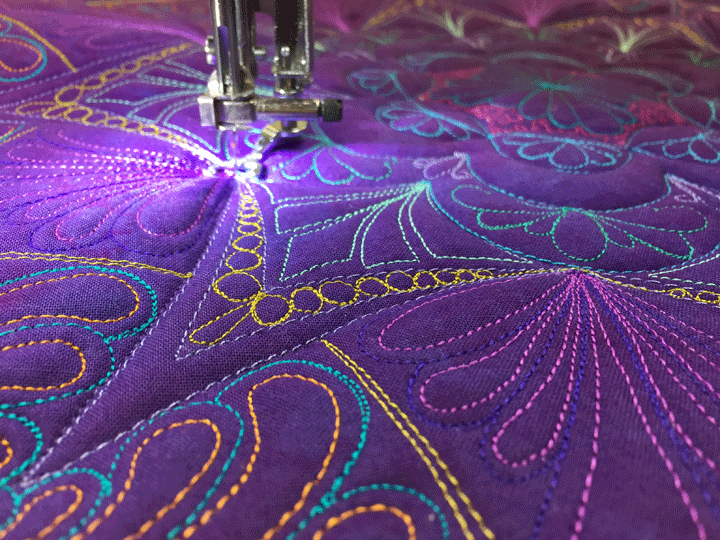
 Once all 4 blocks were completed, I decided that I wanted to create more texture by selectively adding another layer of extra batting behind only certain shapes within each mandala. My first layer of batting was Hobbs Tuscany Silk. (There is no reason for that beyond the fact that I have a ton of it I want to use up and I know if has enough loft to create some nice trapunto effects.) For my next layer of batting, I used the thinnest loft of Quilters Dream polyester batting. I used this because it’s fairly thin but it also creates nice definition once it’s been quilted, so it would add luscious texture to the top without adding much thickness. In the shot below, you can see how each of the 4 blocks has had extra batting selectively added to the backside:
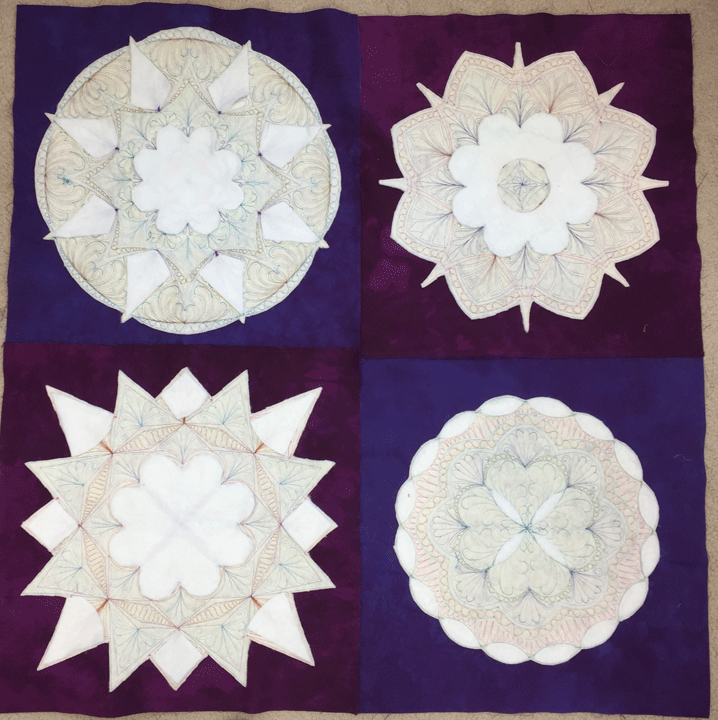 (The very white pieces are the Quilters Dream polyester batting and the “dirty white” is the Hobb’s Tuscany Silk batting.) My 3rd layer of batting (the batting that goes underneath the entire top) is Hobb’s Tuscany wool/cotton blend batting. I LOVE this batting. It has enough wool to give great definition to your quilt but the cotton component adds some weight and reduces the loftiness that comes with 100% wool batting. Here are some more shots of it from different angles:
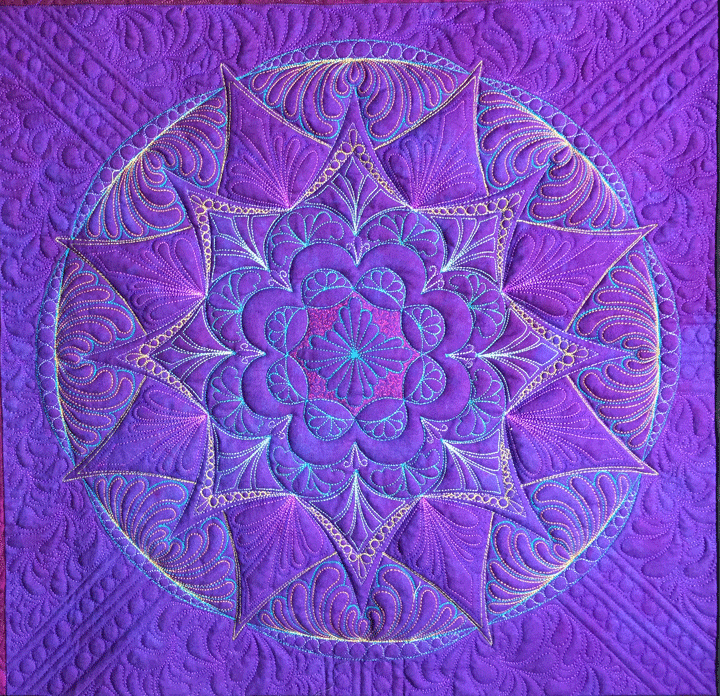
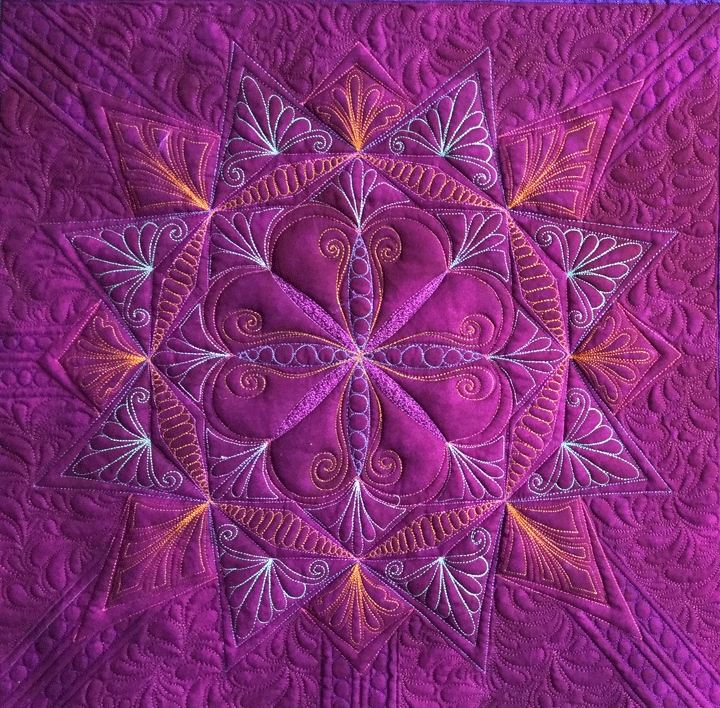
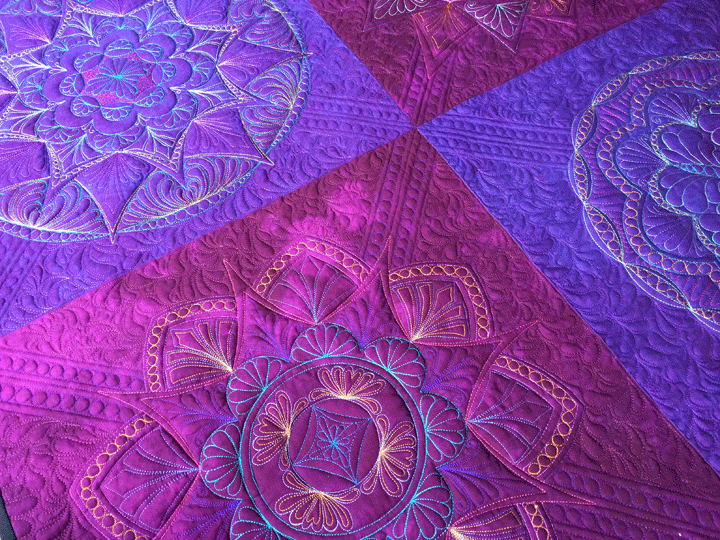 The background quilting is uninspired and uninspiring. This was a situation where I literally had no ideas once I threw out my original concept. I sat on it for a few weeks and then decided I just needed to get the darn thing DONE!! Here’s another shot:
 ..and another:
 I’m ready to work on a quilt that isn’t purple or burgundy for awhile; I’m getting burned out with those colors!
Hi Patsy– Just wanted to tell you that I think your mandala quilt turned out great. I know you said that you weren’t so satisfied with the background quilting but I think it works well to let the mandela’s themselves stand out. Thanks for the info on the trapunto. I have not tried that yet but it is on my list to do. Thanks for the inspiration. Robbi
This is so extraordinary, Patsy. I have a bunch of questions, if you have the time: (1) How did you attach the small sections of batting to the medallions to achieve the “extra” trapunto look? (2) What weight thread have you used? (3) When you outlined the mandalas with the monopoly thread, did you have one layer of the Tuscany silk batting already in place?
I can’t wait to try all these techniques!
Diane
Patsy, your work is, as always, fabulous! Thank you for sharing your lucious work, and for detailed explanations of how and why you approached it to create such unique and fun quilts.