September 26th, 2014
If you’ve ever tried machine quilting a large quilt on a home domestic sewing machine, then you know the frustration that goes along with “Quilt Wrangling,” or trying to maneuver it through your harp space and around your machine as you work various areas of the quilt. Not fun and not easy! I recently began suspending my quilt and was shocked by just how much easier the whole process became. By literally removing the weight of the quilt from process, it becomes quite easy to move the quilt almost effortlessly as you work I first read about it many years ago when Caryl Bryer Fallert posted about her system:
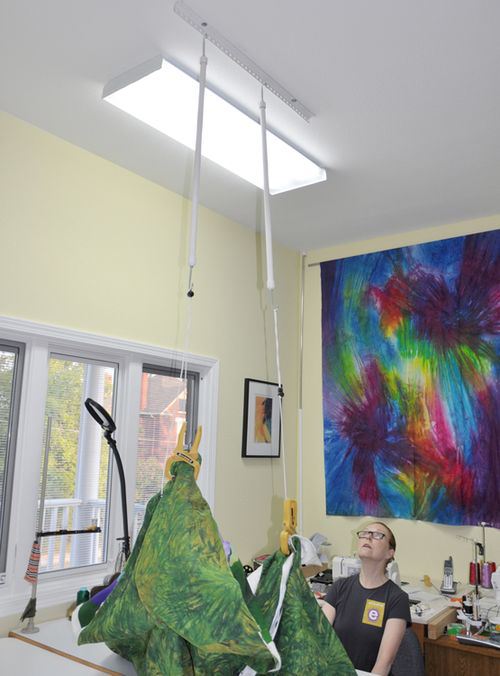
Later, when Leah Day posted about it here, I thought seriously about giving a try because Leah always has really good ideas about free motion quilting. I held off on trying this for years, though, because I didn’t want to mess around with my ceiling but now there are lots of other options. Many years ago, I purchased a set of easily portable quilt display stands from Pals Products with the intention of using them to photograph quilts. For me, they have turned out to be the perfect solution for suspending my quilt as I’m working. The system is composed of 2 telescoping vertical poles on a base and 1 telescoping vertical pole that is held between them. It’s very easy to adjust the height and width to whatever size is comfortable for you and your current project. The photo below shows how I am using these stands for quilt suspension as I’m working on a quilt:
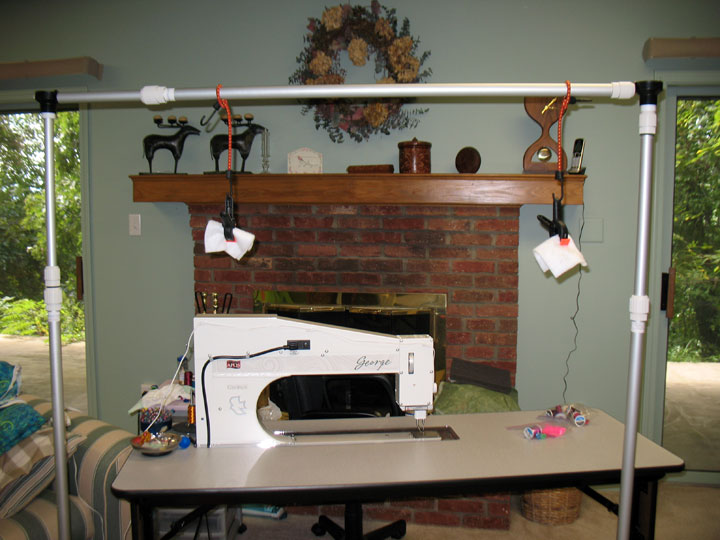
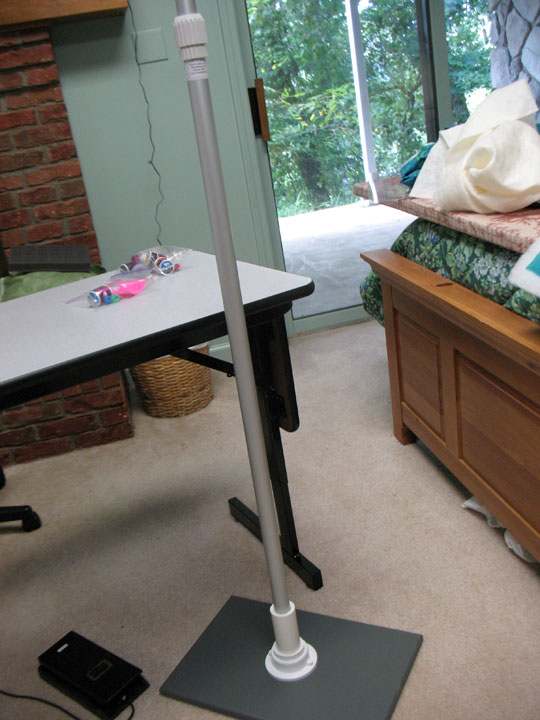
I had originally placed an ironing board behind the table that holds my George machine, and because I set the table height about 6 inches higher than the table, I had a pretty good system going. BUT, I have to say that suspending your quilt in mid air is a total game-changer. No joke and no exaggeration…there is no weight to your quilt and it’s very easy to move that baby all around the machine bed! Let me give you some close up shots of how my system works. First up is the framework of my suspension system. Here is a shot of the “empty version” of my suspension system’s upper section and then the bases:
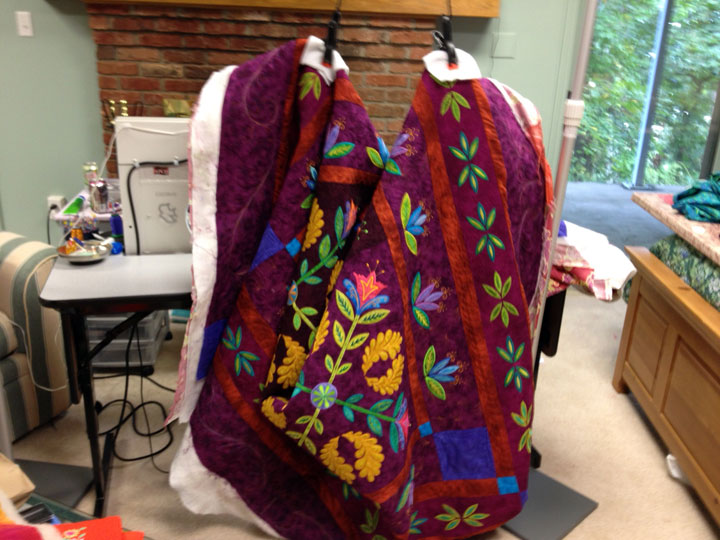
(I should tell you that Pals Products has altered their quilt hanging system from when I bought mine. Click here to see a photo of what their current system looks like.) To hold the quilt, I tied 2 bungee cords around the top (horizontal pole) and then drilled a hole in a pair of spring-action hand clamps so they would fit inside the hooks on the bungee cords. (Truthfully, you don’t need these to be elasticized cords; any strong cord would work.) I place a scrap of polyester batting inside the clamps just to make sure my quilt stays clean. Here’s a close-up of the clamped quilt:

By having the vertical pole of my system within easy reach, I can push one suspended side to an extreme side or move it closer to center quite easily and then sit right back down and get back to my quilting. It never occurred to me that it would be helpful for ruler work, but it really helps there! Of the 4 sides of my ruler foot, I am always trying to avoid holding the ruler on the right side of the foot because it’s hard to control the ruler when it’s so close to the presser foot’s shaft. (The arrow is pointing to my “problem side”):
If my quilt is suspended above the table, it is very easy to simply “twist” the portion of the quilt I’m working on to move it into an orientation that’s easier for ruler work like below:
If you’re looking for a quilt suspension system that’s ready to go, you might want to try Jenoop Quilt Suspenders. This company has ready-made quilt suspension systems (ceiling based or frame based) that are ready to go into action as soon as they arrive on your doorstep! You can find the web site by clicking here. There are things that you can do that will make machine quilting easier and then there are things you can do that will be game changers in your free motion quilting life. Suspending your quilt is a total game changer!
Filed under
Free Motion Quilting, George Sitdown Quilting Machine, ruler work on a HDSM.
April 26th, 2014
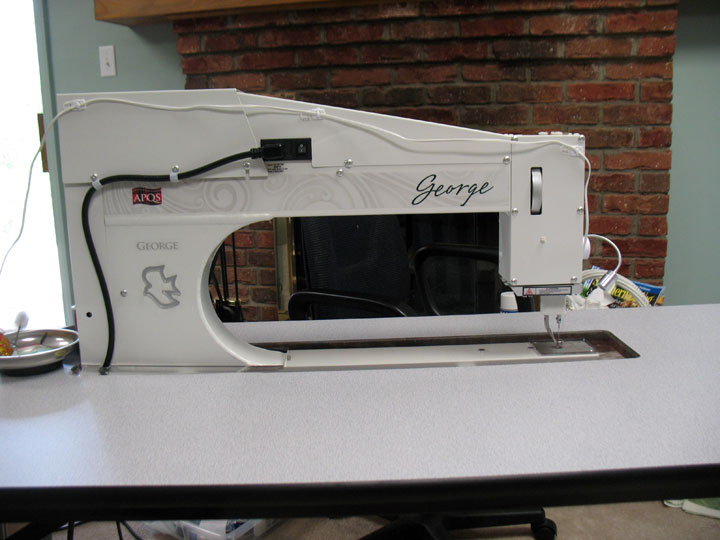
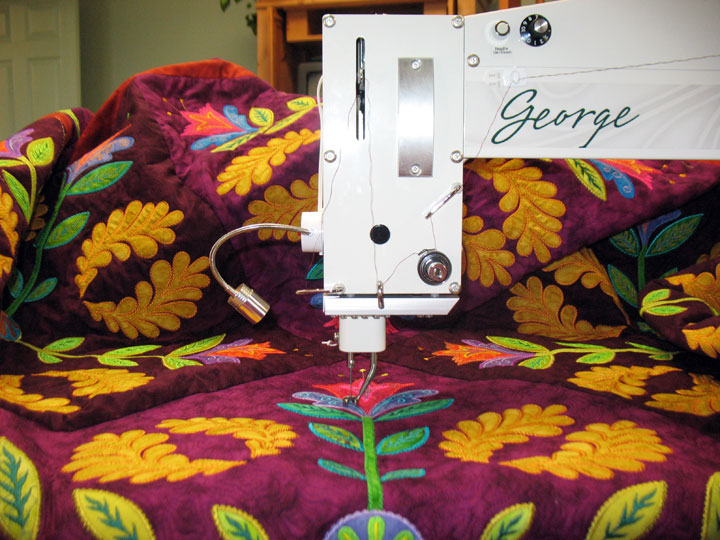
Today is my one week anniversary. Last Friday, I took the plunge and purchased a used George sitdown quilting machine. I’m calling her Georgette and she is one beautiful machine:
 In a way, this was kind of an impulse buy. I wasn’t even thinking of buying a long arm or mid arm sitdown quilting machine, but I read that one was for sale on one of my favorite blogs, Tamarack Shack. I followed up on it and found the machine was living near Winston Salem, NC and was owned by Laura of the Tanderwen Quilts Blog. Winston Salem is about 2 1/2 hours from Asheville, so I figured it was worth going for a test drive. I knew I would like Laura when she wrote to tell me I’d know her house because she had a quilt block attached to her mailbox-how cool is that?! Anyway, I took 3 types of thread to test on it:
-invisible thread. I use tons and tons of this stuff and I always hear long arm quilters complain about it, so if it couldn’t quilt with invisible thread, that was going to be a deal-breaker for me.
-rayon thread. Rayon has great sheen but it is a weak thread so I thought it might be problematic on a long arm.
-trilobal polyester thread. I didn’t think this would be an issue at all, but I had to find out since I use it so much.
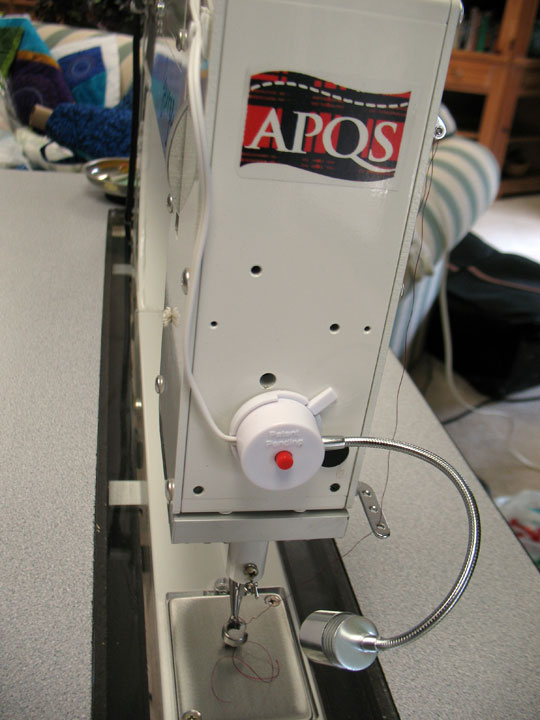
I didn’t take any cotton threads with me because I never quilt with cotton thread anymore. Well, that machine sewed beautifully with all 3 thread types, so I was sold on the machine and she came home with me! Laura kindly gave me some quick lessons on things like oiling/winding a bobbin, playing with tension, etc., and I was off to the races! Because I only had 1 week from the time I found out about the machine and the day I test drove it, this really was an impulse buy for me. (I’m normally someone who ruminates for ages about this kind of decision.) I didn’t even think through where she’d go so I’ve got her set up in a guest bedroom (that I’m gradually taking over with quilting stuff) and I’ll have to figure out her “real home” later. I’ve only made one addition to her and that was to add a Bendable Bright Light:
In a way, this was kind of an impulse buy. I wasn’t even thinking of buying a long arm or mid arm sitdown quilting machine, but I read that one was for sale on one of my favorite blogs, Tamarack Shack. I followed up on it and found the machine was living near Winston Salem, NC and was owned by Laura of the Tanderwen Quilts Blog. Winston Salem is about 2 1/2 hours from Asheville, so I figured it was worth going for a test drive. I knew I would like Laura when she wrote to tell me I’d know her house because she had a quilt block attached to her mailbox-how cool is that?! Anyway, I took 3 types of thread to test on it:
-invisible thread. I use tons and tons of this stuff and I always hear long arm quilters complain about it, so if it couldn’t quilt with invisible thread, that was going to be a deal-breaker for me.
-rayon thread. Rayon has great sheen but it is a weak thread so I thought it might be problematic on a long arm.
-trilobal polyester thread. I didn’t think this would be an issue at all, but I had to find out since I use it so much.
I didn’t take any cotton threads with me because I never quilt with cotton thread anymore. Well, that machine sewed beautifully with all 3 thread types, so I was sold on the machine and she came home with me! Laura kindly gave me some quick lessons on things like oiling/winding a bobbin, playing with tension, etc., and I was off to the races! Because I only had 1 week from the time I found out about the machine and the day I test drove it, this really was an impulse buy for me. (I’m normally someone who ruminates for ages about this kind of decision.) I didn’t even think through where she’d go so I’ve got her set up in a guest bedroom (that I’m gradually taking over with quilting stuff) and I’ll have to figure out her “real home” later. I’ve only made one addition to her and that was to add a Bendable Bright Light:
 The machine actually has very good lighting but my aging eyes want all the light they can get! The machine comes set into a table that is far sturdier than I thought it would be when I saw it in photos. I’m currently working on a quilt that’s about 103 in x 103 in, so I need a larger table surface and have placed an ironing board next to the table and adjusted the ironing board higher than the table:
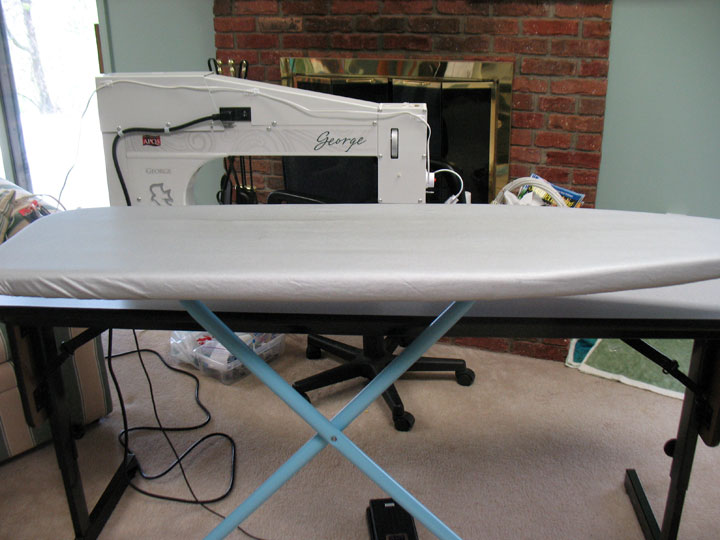 …and here’s what the view is from the “sewer’s side” of the system:
 This machine has 20 inches of harp space. I can’t tell you how wonderful it is to all of a sudden have all this luscious space in which to shove a quilt:
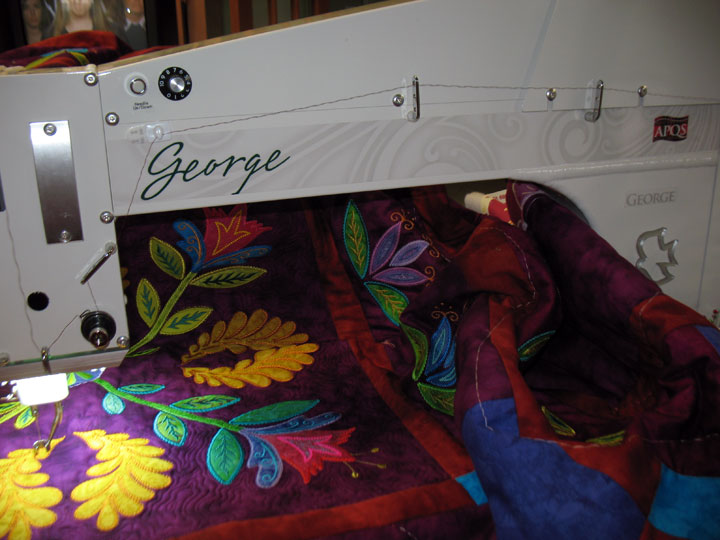 To put it into perspective, here’s a shot of that same portion of the quilt shoved into the harp space of my sewing machine where I HAD been quilting it before last Friday:
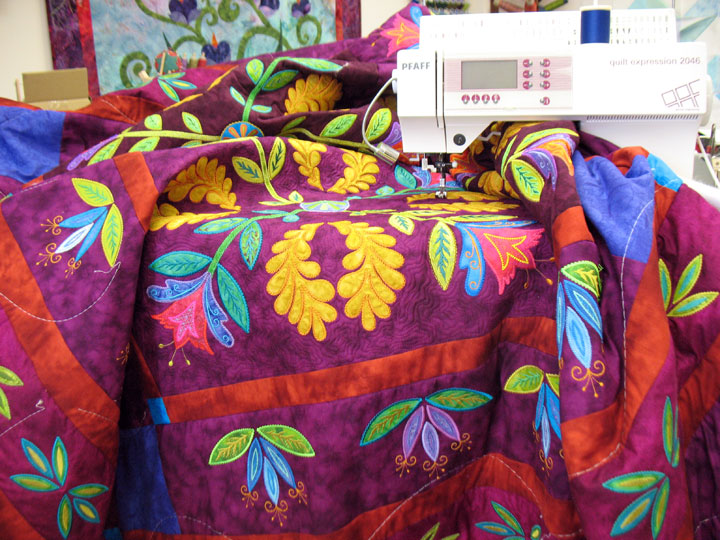 Pfaff machines require the presser foot to be placed in this “halfway” position for free motion quilting, and you can see in this next photo that the presser foot effectively eliminates about 3 inches of the 7 or so inches of throat space, so moving to Georgette is a big step up for me:
 I am so happy to have made this purchase and it is such a lesson of the power of connections we make on the internet! If you aren’t already reading the Tanderwen Quilts and Tamarack Shack blogs, you should be! These are 2 women who quilt professionally for others, so there’s lots of eye candy and inspiration! Have a happy weekend, everyone!
Filed under
Free Motion Quilting, George Sitdown Quilting Machine.


