August 30th, 2018
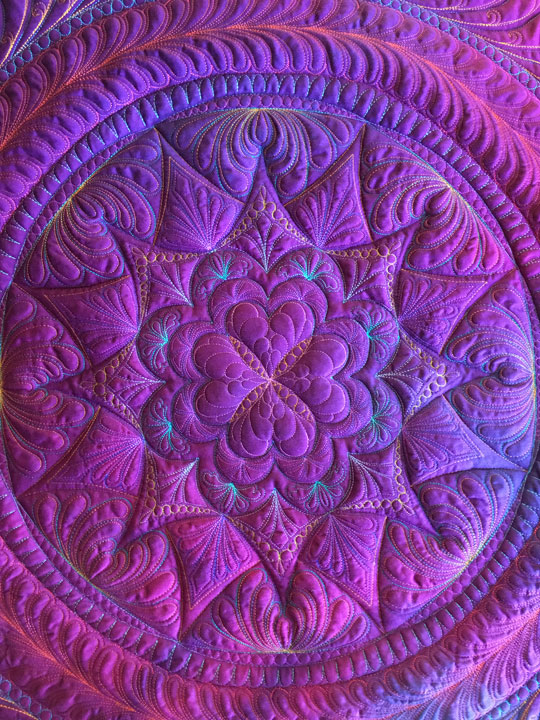
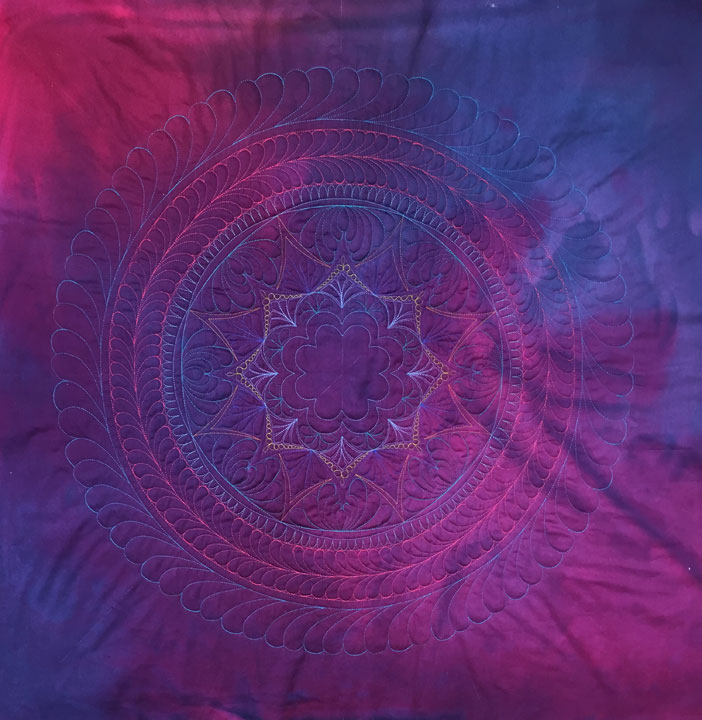
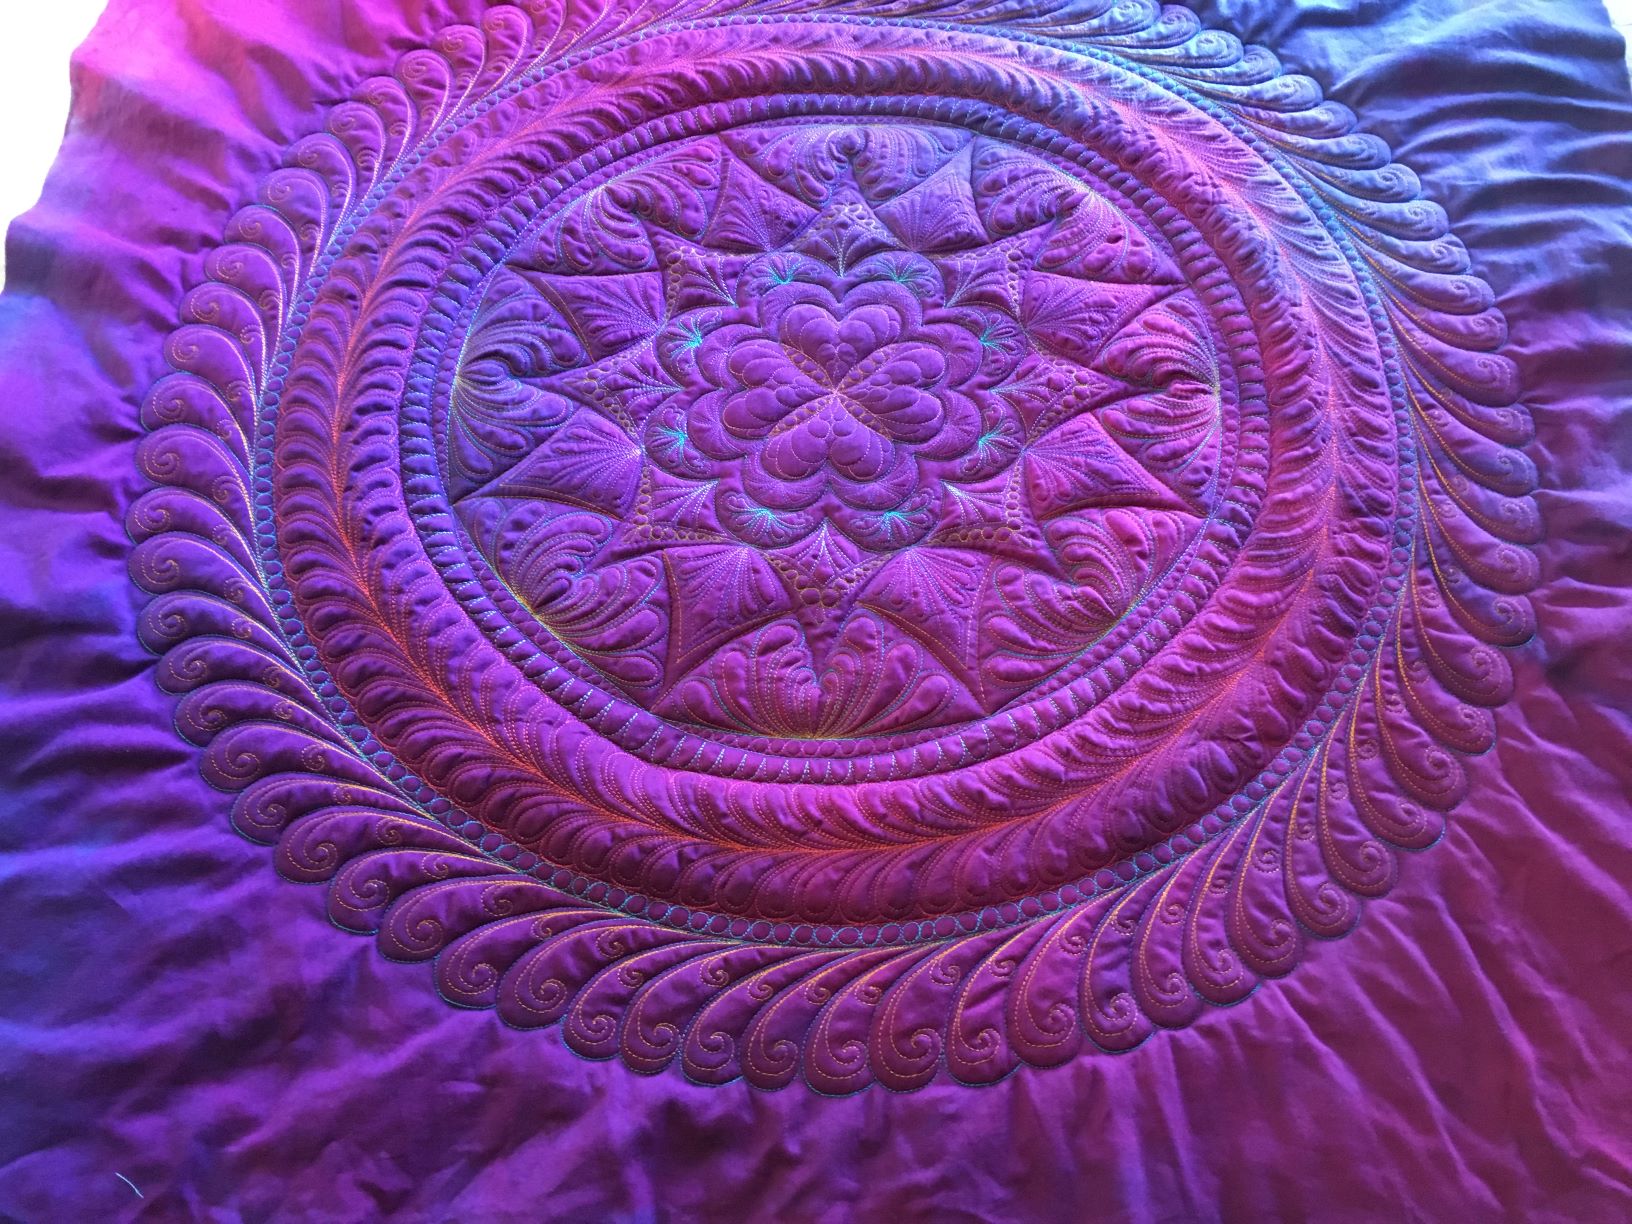
This is the center of a very complex and large feathered wreath. It was created using ruler work, then “decorated” with free motion quilting inside the various “zones” of the spine that were created using rulers. When you have a complex quilted design like this one, using variable levels of trapunto inside different zones will help define those zones better. This is important because it means that you can kind of control how the viewer will perceive the design. On top of that, the work is much easier to do since all of the highly detailed quilting is done before the quilt is in the final quilt sandwich, so you are dealing with a smaller and lighter piece that is easy to move around your machine bed.
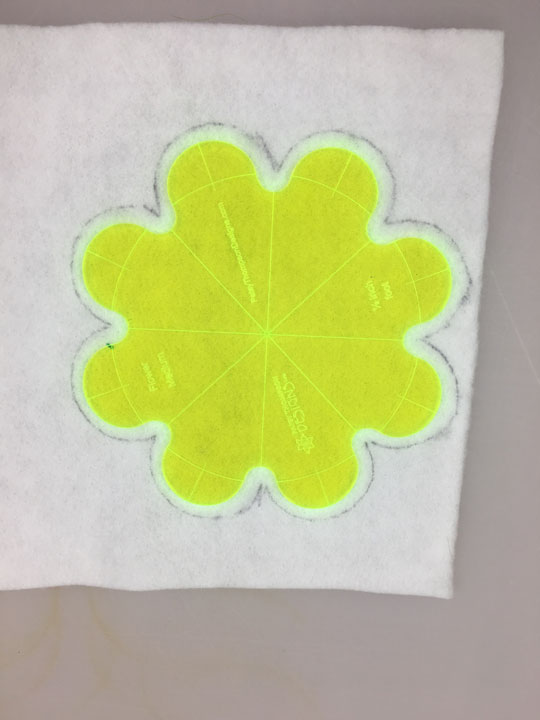
This began as a 40 inch square piece of hand dyed cotton sateen. I pinned a piece of scrap batting (Hobbs Tuscany Wool/Cotton Blend) behind the fabric; it was nearly as large as the top because I wanted the entire wreath to have at least 1 layer of trapunto. I know this very wide spine zone is very complex, but it begins very simply, adding layer upon layer of ruler work. To begin, used my traditional 8 lines to create registration marks across the block, then quilted the 3 sizes of the PTD flower templates, as shown below:
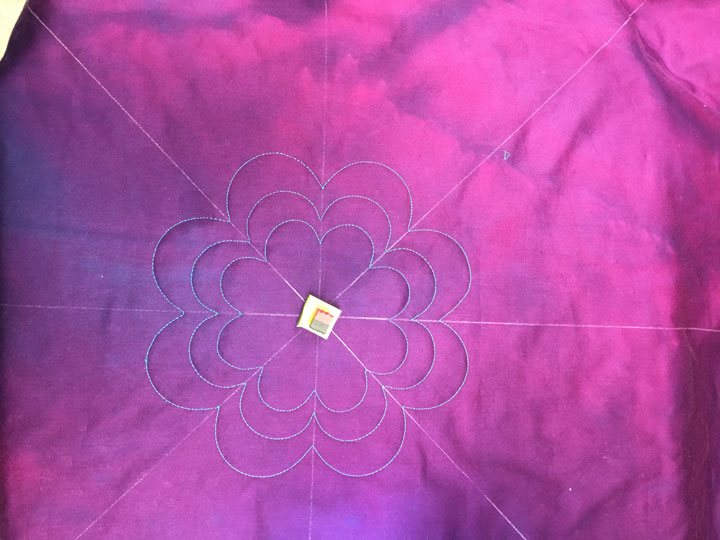
(Note that there is a foam pin anchor holding a pin in the dead center of the block. I used it when I was doing the flower template ruler work, and have left it in place because I may need it later. You don’t have to do this, I just do.) Next up, I used arc rulers to create a series of tapered channels that spring from the largest flower template design, (maroon polyester thread), then another series of tapered channels that spring from the first set of tapered channels, (gold polyester thread), and then used 2 different arc rulers to create a set of tapered channels that encircle the largest triangles (aqua polyester thread). Here’s what the design looked like at this point:
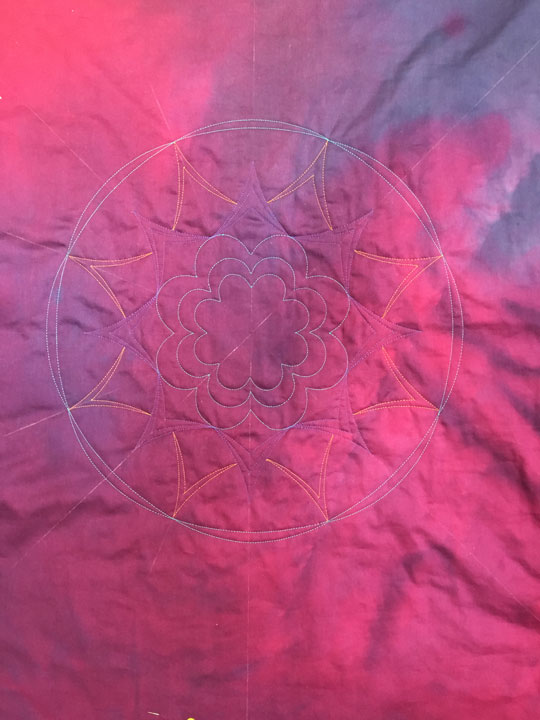
One of the challenges in working on a multi-colored base fabric is choosing thread colors that will show. I try to save my high contrast thread colors for the areas where I really need the design to pop. There were so many layers to this design that it would take to long to post it all here. In this next shot, I’ve added 3 concentric circles around that earlier design. Do you see a white soap line of a circle that encircles the entire thing? That is my temporary boundary line that I’ll use to guide me as I stitch the plumes along the outer edge of the circle. I actually had to draw that boundary before I did the stitching of the other circles so that I could figure out how wide my spine zone could ultimately be. I used my oversize set of Westalee Circles on Quilts templates for some of these circles. For others, I used my PTD shallow arc rulers. I can get away with this because I know that all our PTD arc rulers are cut from circles (as opposed to arcs), so I can use a PTD 30 arc to stitch/draw a 30 inch diameter circle, a 24 arc to stitch or draw a 24 inch diamter circle, etc.
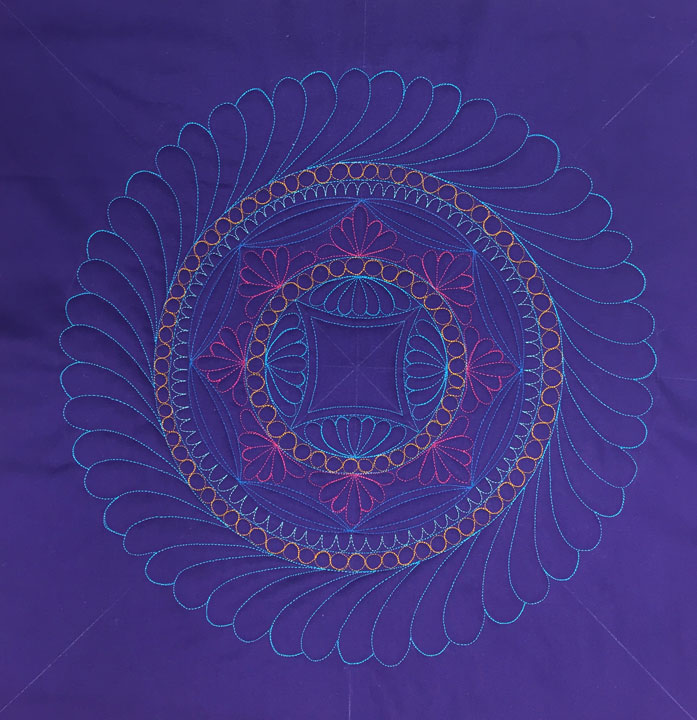
You can see that I’ve begun a lot of the fill-in work in the shot above. I try to avoid much hyperquilting until I’ve got a fairly even expanse of fill-in, but sometimes I can’t help myself. In this next shot, I’ve added the outermost plumes. The feathered wreath is a 30 inch diameter feathered wreath.
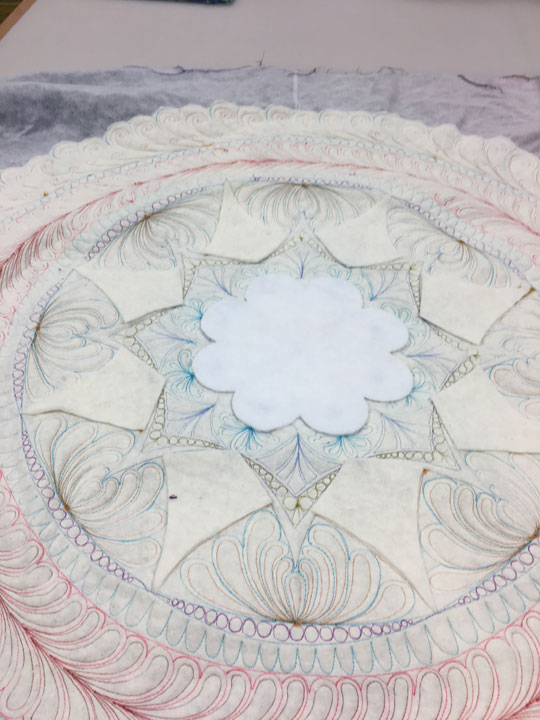
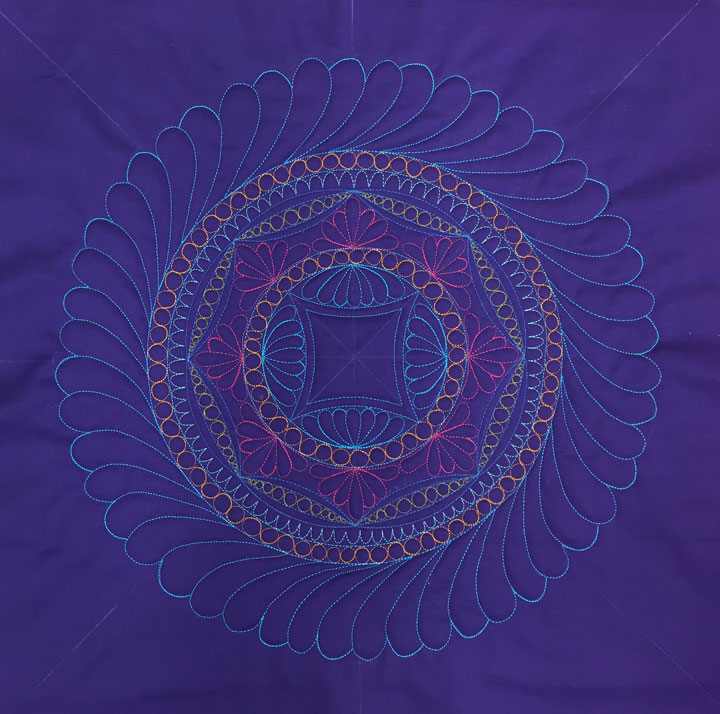
I am now in a position to add a lot of hyperquilting. I need to have all the hyperquilting completed before I can begin adding additional layers of batting to select portions of the wreath. In the shot below, you see a close up of the center of the wreath once the hyperquilting has been added:

What I’m hoping you can see are areas of “excess” along the top and bottom of the wreath. When you do this much hyperquilting, it really hightens the contraction of the quilt that occurs w/dense quilting. When you’re working in a circular design like this, that contraction “traps” portions of the quilted design. It’s at this point in the process where I start to have heart palpitations and worry that I’ll never get it to lay flat, but I’ve done this so many times that I can usually calm myself from worrying too much! This next shot shows how “loose” and “excessive” the fabric outside the wreath appears:

Do you understand now what I meant about the heart palpitations?! Trust me, the quilted wreath itselkf does not come close to lying flat either, so there’s far more to worry about than what this photo illustrates!
Since the wreath is quilted, I cut away all the excess batting that falls outside the wreath. Here’s what the back of the top looked like at this point:
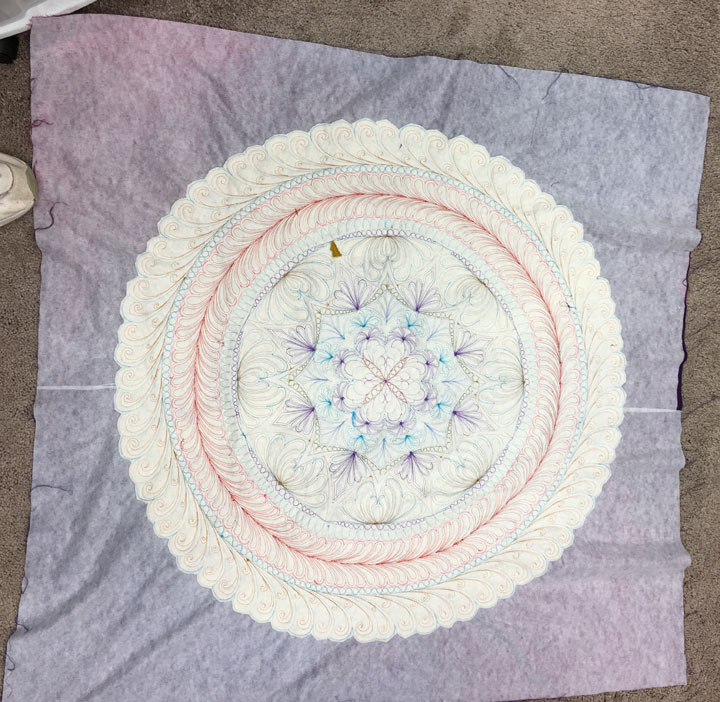
So, at this stage, there is one layer of batting underneath the entire wreath. Know that the white stuff you see on the backside of the fabric is a layer of lightweight fusible interfacing (Pellon 845FW Designer’s Lite, to be specific.) You don’t need to do this when you’re creating a trapuntoed project. The only reason I am using it is the fabric is a cotton sateen. This is a beautiful fabric but it is a twill and can sometimes be a bit of a “shape shifter,” if you know what I mean! For that reason, I now back it with fusible interfacing so it will behave more consistently. This is a super lightweight interfacing that will not alter the hand of the fabric.
I’m ready to add some extra batting to focal areas of the wreath. I start by tracing the medium size flower onto a scrap of Quilters Dream mid wt polyester batting:
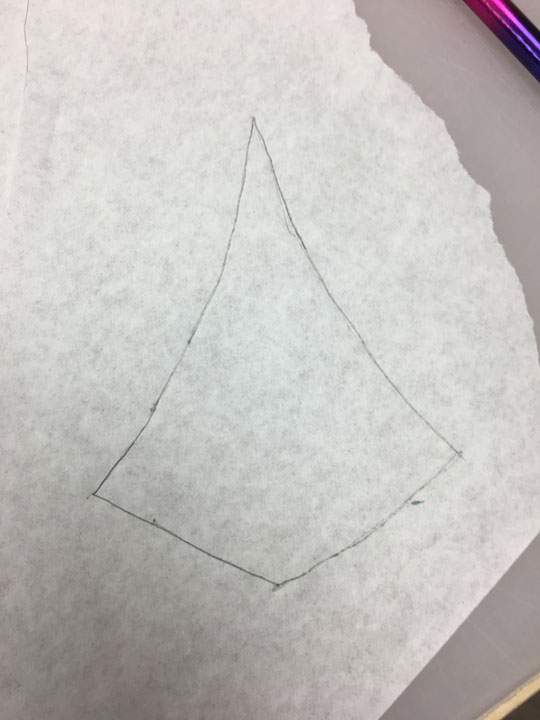
Note that I traced that shape using a donut on my pen. You need to do this for a shape like this because the ruler foot adds 1/4 inch to the outer edge of the stitched template. I then decided I wanted to add a layer to one size of trapezoid in the wreath, so I laid a piece of tracing paper (doctor’s exam table paper is perfect for this kind of work), and did a rough trace of that shape:
I used my rotary cutter to cut out 2 of those shapes at a time, so it went very quickly. In this next shot, you can see that I have attached the flower shape of batting and the trapezoid shapes to the back side of the wreath. A simple swipe of the glue stick is all you need to use to adhere these:
I normally add trapunto layers to areas where I want to draw more attention, but for this wreath, I also had to consider construction issues. There is a zone of the spine where a continuous feather is stitched. I don’t really want to draw attention to this area, but because the quilting is so dense there and it is bounded by 2 concentric circles, the constriction caused by the quilting is “trapped.” This will cause this zone to kind of “balloon outward” if I don’t do something, so I need to add an extra trapunto layer to this zone. In the shot below, you can see that I’ve traced 2 concentric circles onto another scrap of batting (this is the thinnest version of Quilters Dream polyester):
Once I cut those out, I was ready to add it to the backside of the top, as shown below:
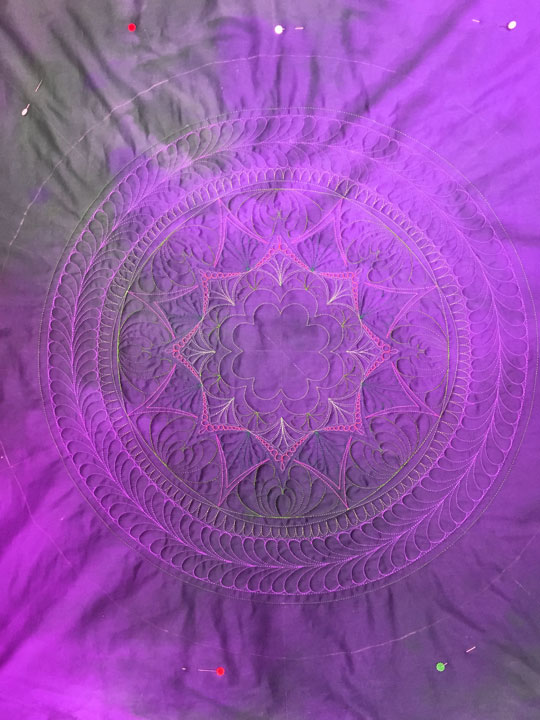
Once placed into the final quilt sandwich, (with another layer of Hobbs Tuscany Wool/Cotton Blend batting underneath the entire thing), I was ready to begin quilting. Here are a couple shots of the wreath once zones had been outlined with invisible thread in the top needle:
Can you see that the outer zone w/the continuous feather still balloons out a bit, in spite of that extra layer of trapunto batting? I think I’m going to have to go in and outline all those plumes with invisible thread. More to come later….
Filed under
Free Motion Quilting, ruler work on a HDSM, Trapunto.
June 20th, 2018
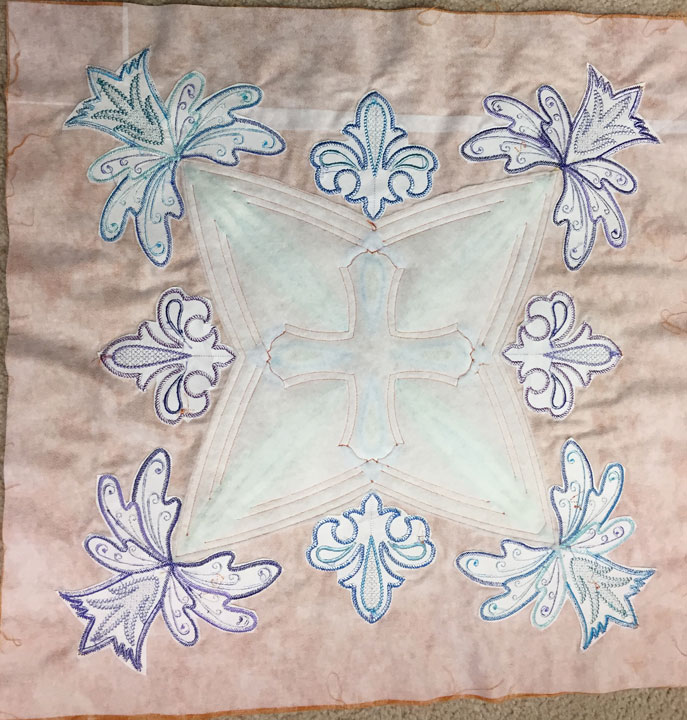
Remember the Fantasy Flower Block I showed you several weeks ago? Here is a shot of it to jog your memory:
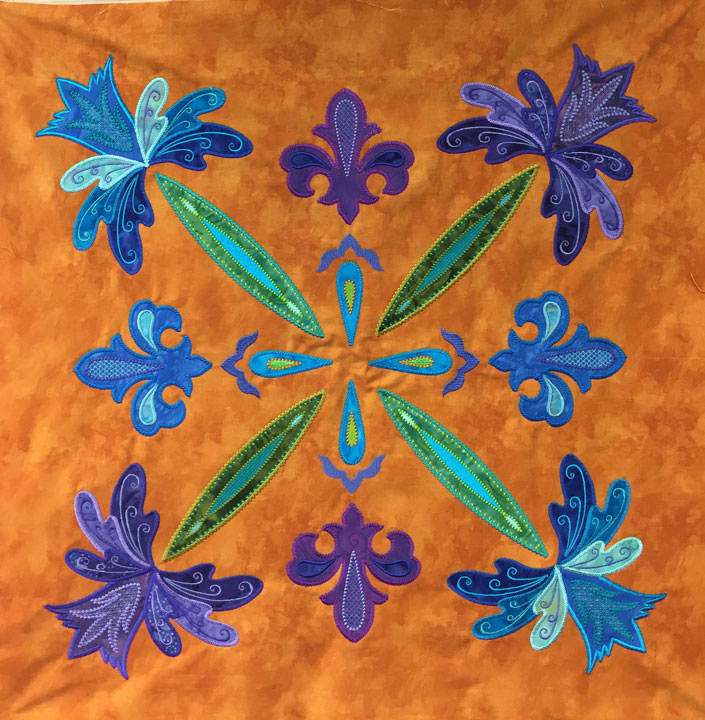
While I was trying to figure out what to do about borders to surround the 4 of these blocks in the center of the quilt, I decided to add a little trapunto to these 4 blocks. I began by pinning a piece of scrap batting behind each block, then began my design by using ruler work that played off major applique landmarks in the block. Here is the initial outline that I made:
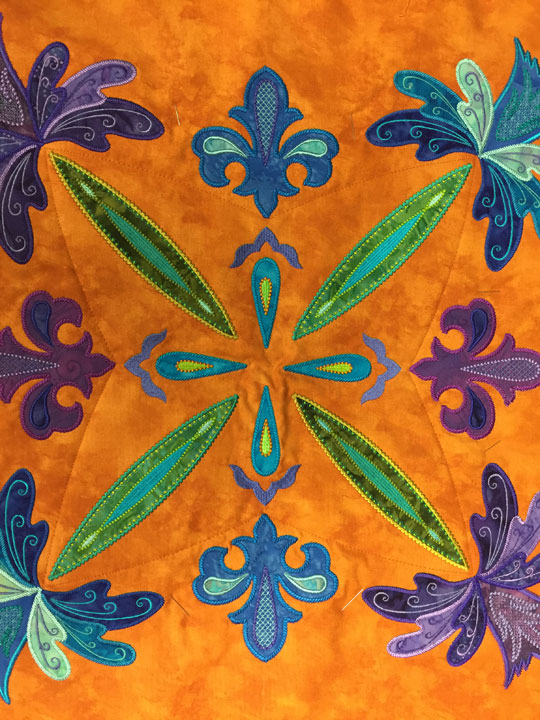
I then added a 1/4 inch parallel channel inside the outline, then a 1/2 inch channel, and then another 1/4 inch wide parallel channel. Once all that was done, I added a cross-like ruler work shape that played off landmarks in the center of the blocks. I began stitching at the edge of one of the periwinkle embroidered shapes, carried the thread line to the adjacent stem base, and then moved to the next edge of an embroidered shape. Once done, I threw a 1/4 inch parallel channel inside that design, and here is what followed:
I cut away all the excess batting that fell outside those designs, and here is what the backside looked like at this stage:
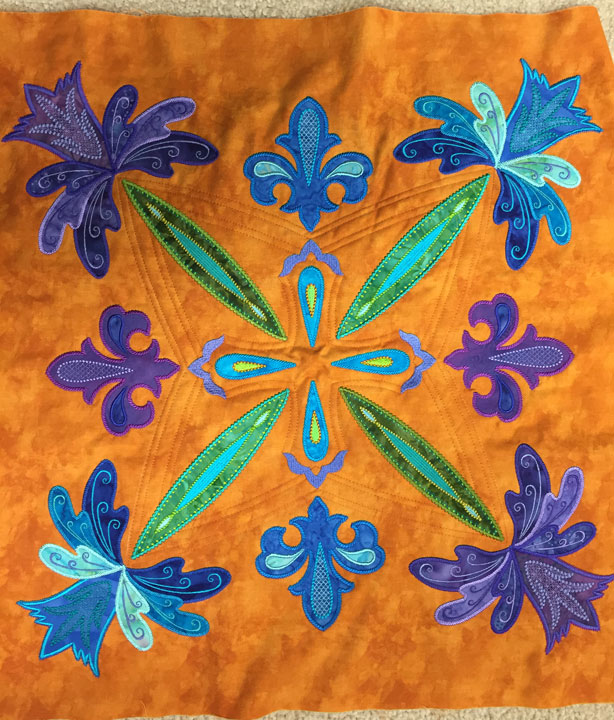
I went back in and filled my 1/2 inch parallel channels with a single row of pearls, then added plumes that sprang from the stems to add some yummy featherwork. Here is a shot of one of the gold blocks at that point:
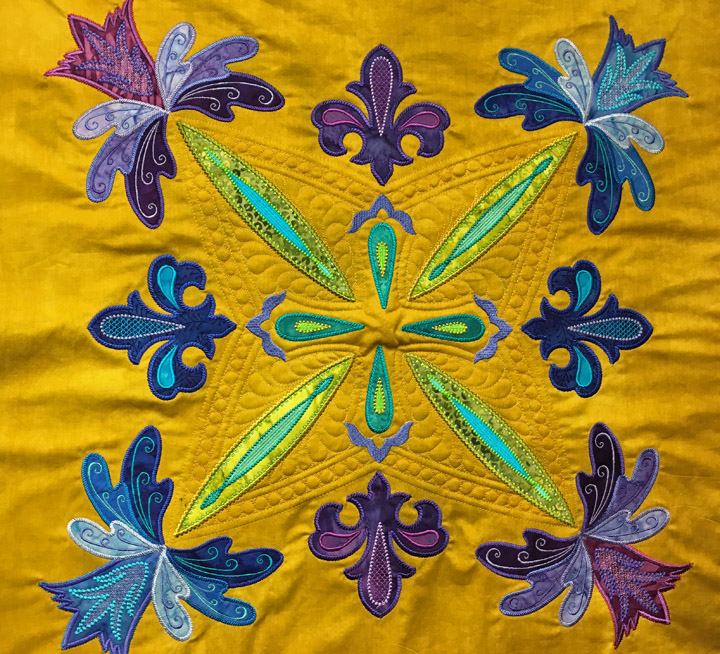
Once this entire quilt has been pieced and thrown into a quilt sandwich, I’ll outline these areas with invisible thread and it will really make all the various “zones” of this ruler work framework pop. I think it will highlight the centers of the blocks and help set off these ruler work designs from non-trapuntoed ruler work designs elsewhere on the quilt. I have my work cut out!
Filed under
Free Motion Quilting, ruler work on a HDSM, Trapunto.
November 18th, 2017
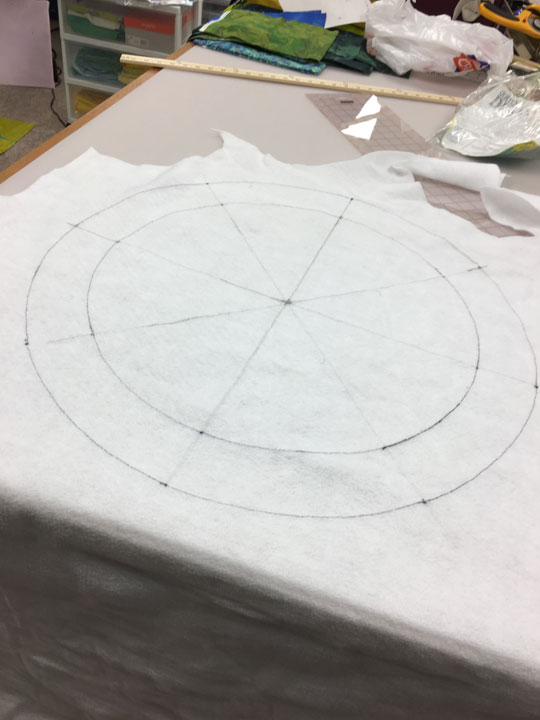
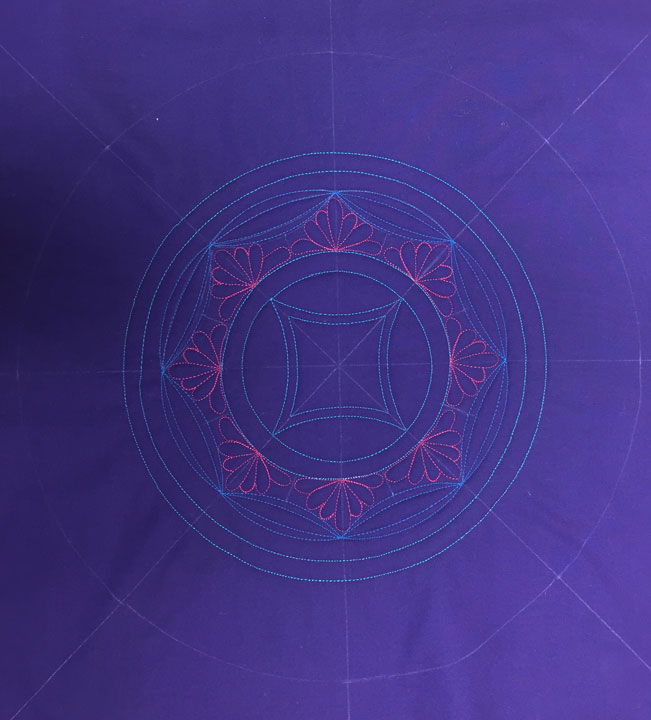
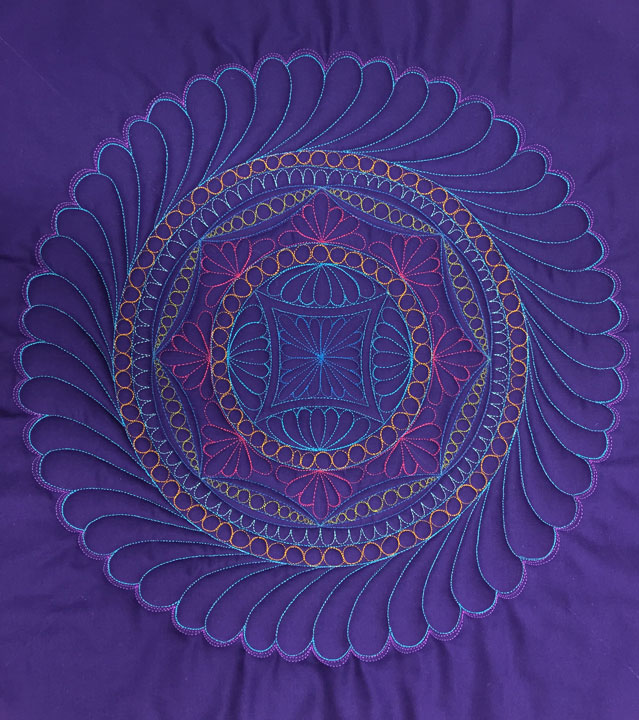
 The ruler work feathered wreath above will be one of the ruler work designs we’ll cover in the 2nd volume of our Ruler Work DVD. This DVD has been a lllooonnggg time coming. We filmed portions of it 1 1/2 years ago but we put the project on the back burner when Erns dad became ill shortly after we began shooting. His dad died last Christmas, but we didn’t feel like we could resume work on any major projects as both of our moms were having some issues. Both our moms have done well for the last many months, though, so we’ve resumed the DVD project but literally started over from scratch. I am guessing this DVD wll be out in late winter to early spring, providing there are no health emergencies. The design above will be the hardest thing on the DVD, but trust me, it’s a lot easier than you might think. I won’t detail all the steps below, but if you look closely, you’ll be able to see the step-wise progression. Here’s the initial ruler work framework:
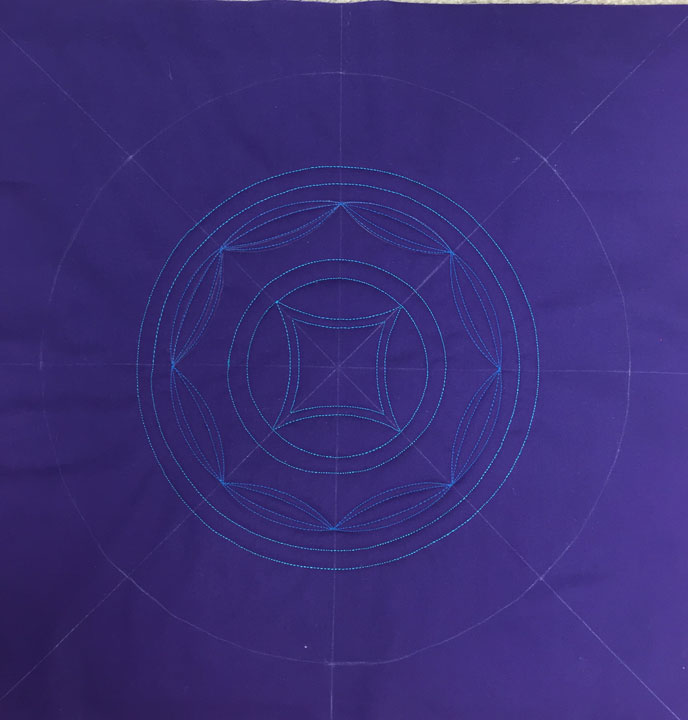 (The circular soap line around the outside is the boundary for when the plumes are added at the very end.)
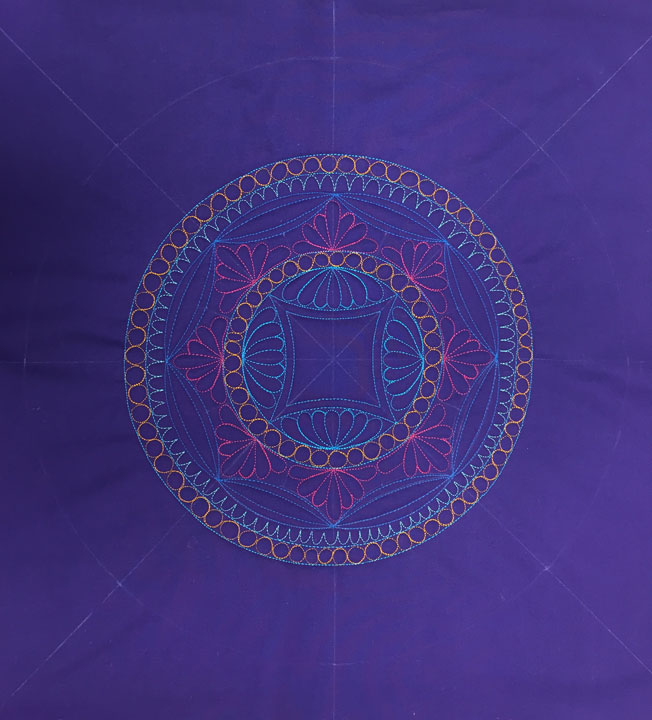
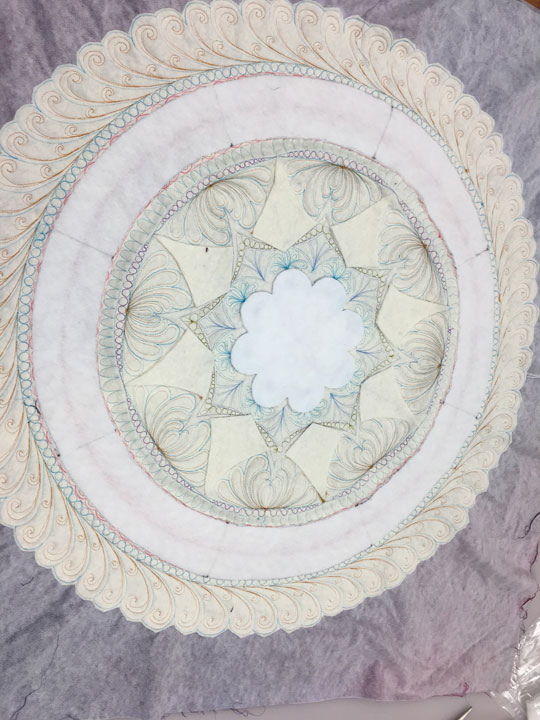
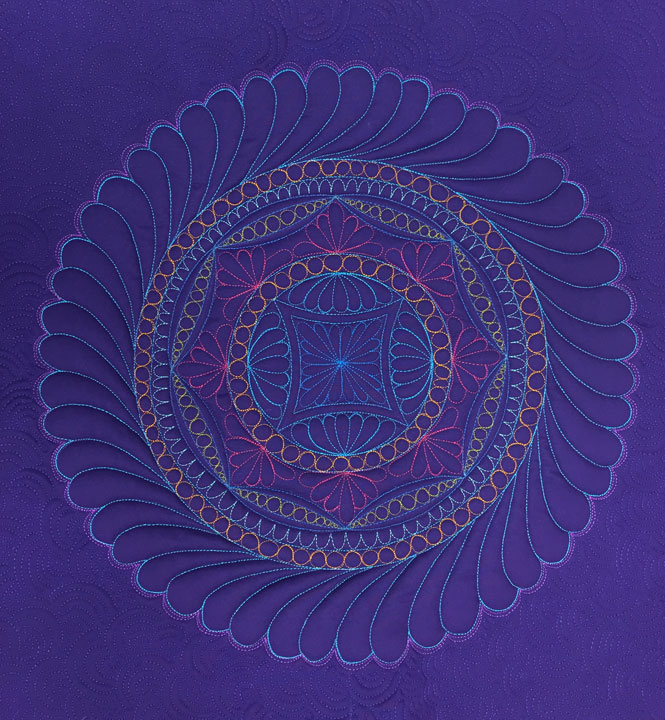
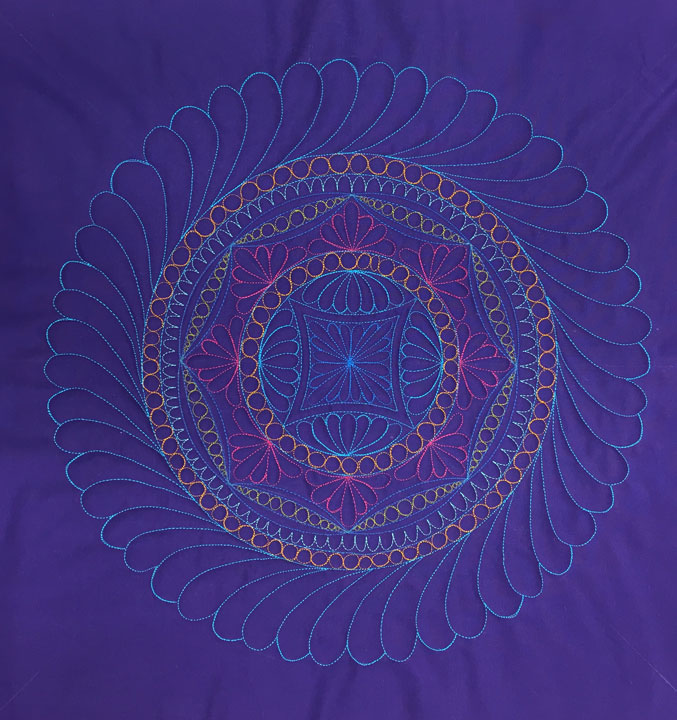 This next shot will confuse you…The wreath above was stitched as a trapunto design, so the next photo shows the wreath once it’s been placed into the final quilt sandwich and various “zones” have been outlined with invisible thread. This is what helps the viewer’s eye see the compound spine area as discrete “design zones:”
 …and now the background has been quilted using the “igloos” design:
Filed under
Free Motion Quilting, ruler work on a HDSM, Trapunto.


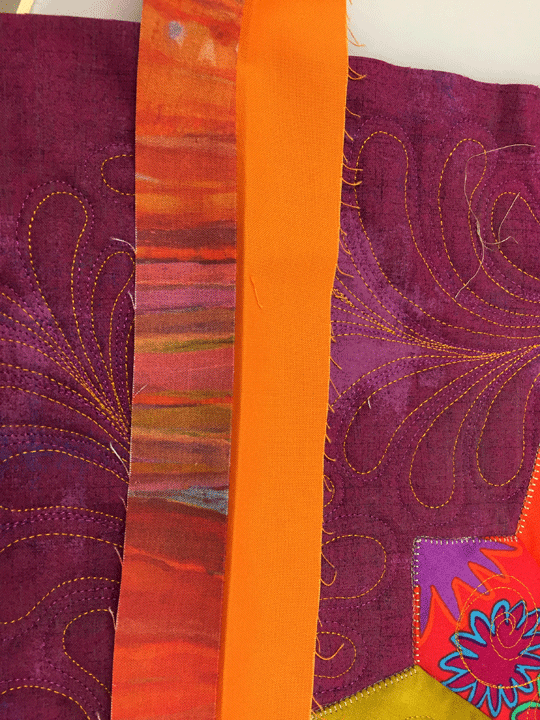
 I used a binding technique I’ve never tried before. This is a binding that has a flange that’s actually part of the binding itself. I followed a tutorial that can be found by clicking here.
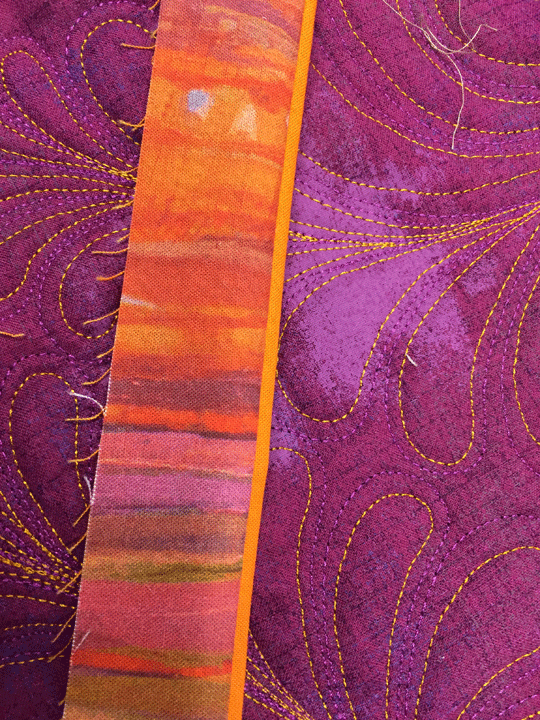
My highlight fabric, or flange fabric (solid orange) was cut at 1.75 inches wide and my “regular” binding fabric was cut at 1.5 inches wide. They were sewn together with a 1/4 inch seam:
I used a binding technique I’ve never tried before. This is a binding that has a flange that’s actually part of the binding itself. I followed a tutorial that can be found by clicking here.
My highlight fabric, or flange fabric (solid orange) was cut at 1.75 inches wide and my “regular” binding fabric was cut at 1.5 inches wide. They were sewn together with a 1/4 inch seam:
 …and once they are pressed with good sides facing outward, you can get a sense of how the binding will actually appear:
 The binding is then sewn to the wrong side of the quilt:
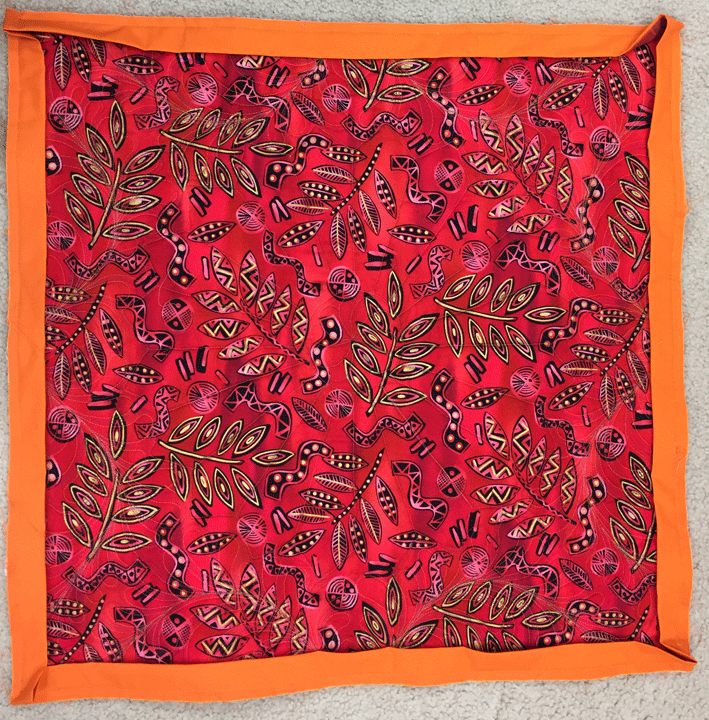 …and then it’s turned around and stitched down to the good side of the quilt. My only regret is that I was on a hurry, so I left pins in place. You can see in the photo below that this results in a not so even width of flange:
 Next time, I will remove all pins before I stitch and I’ll slow down and make a better effort to stitch right at the ditch. Still, for my first attempt, this was a good experience.

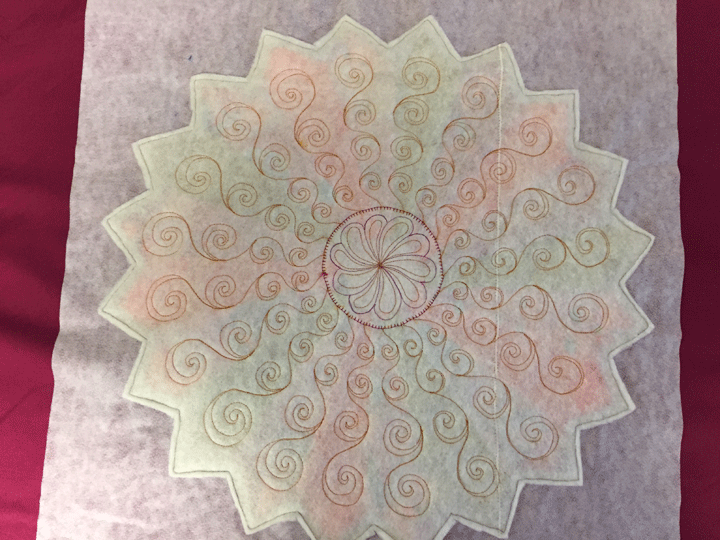
 I outlined the steps to creating a trapunto layer in my last post. That means I began this next phase by quilting curvy swirl chains inside each blade of the Dreden plate as you can see below:
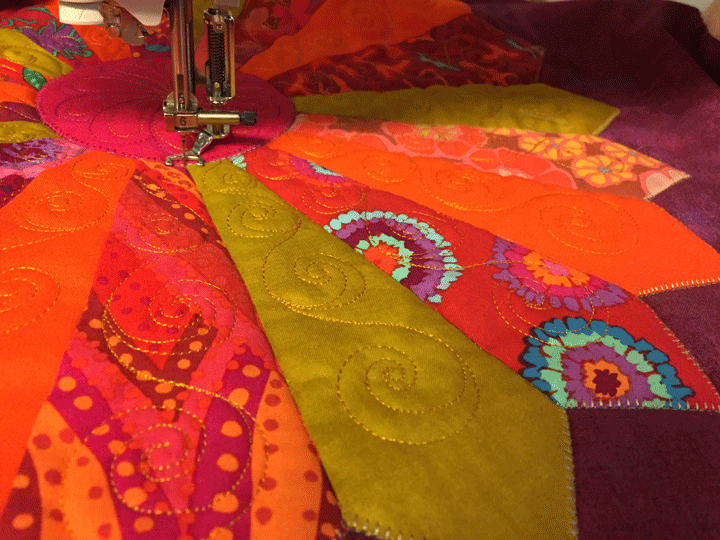
 I then quilted a feather inside the center circle and in the photo below you can see that I hyperquilted it:
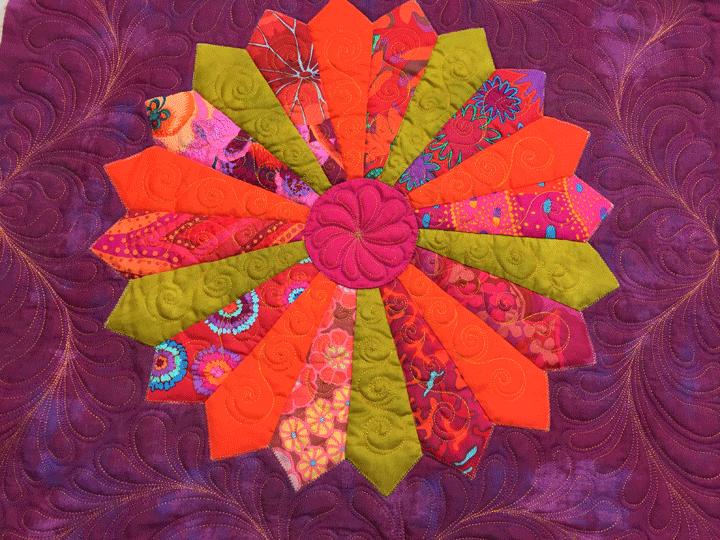
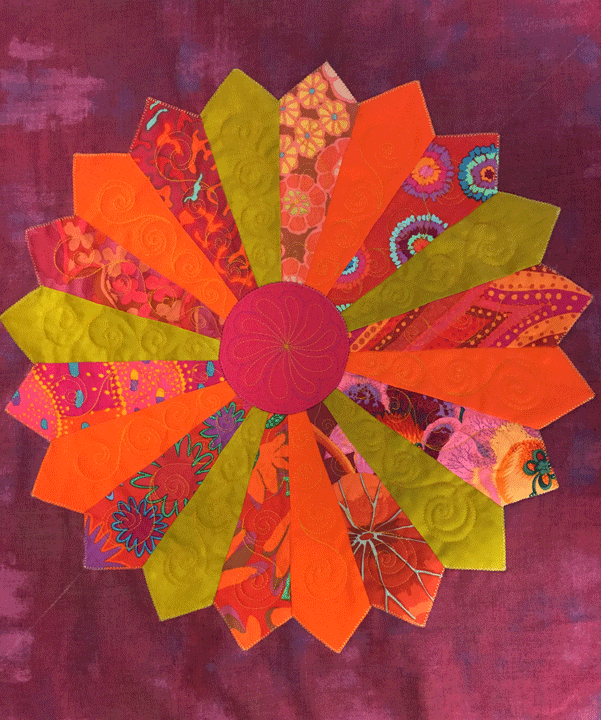
 Here’s what things looked like once the trapuntoed Dresden plate had all its decorative FMQing completed:
 It’s actually much easier to see all the quilting from the backside:
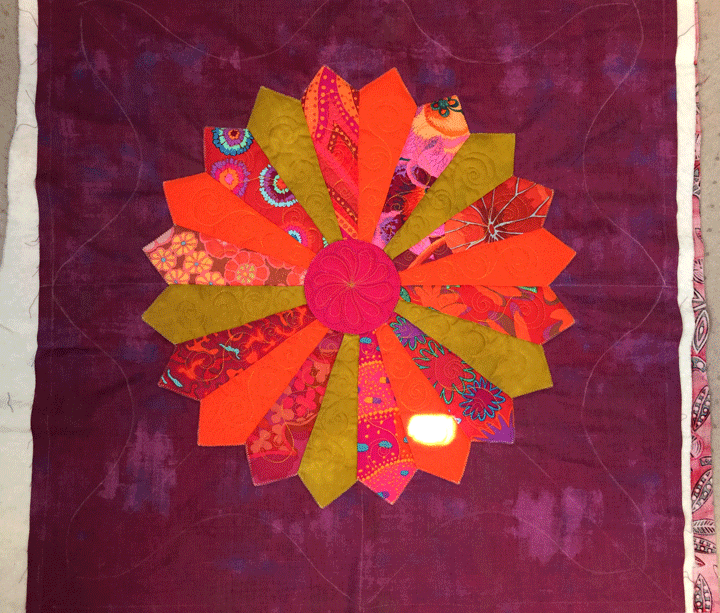
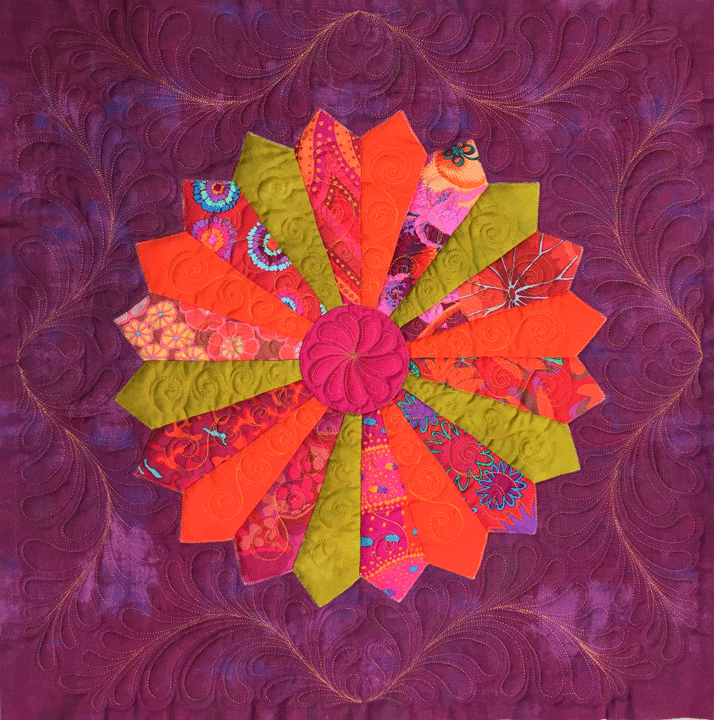
 I placed it into the final quilt sandwich and then began by outlining all the applique pieces with invisible thread. You can just barely start to see the texture developing in this next shot:
 …and here all the pieces have been outlined with invisible thread and I’ve marked soap lines that will be my guides for stitching a feather frame surrounding the Dresden plate:
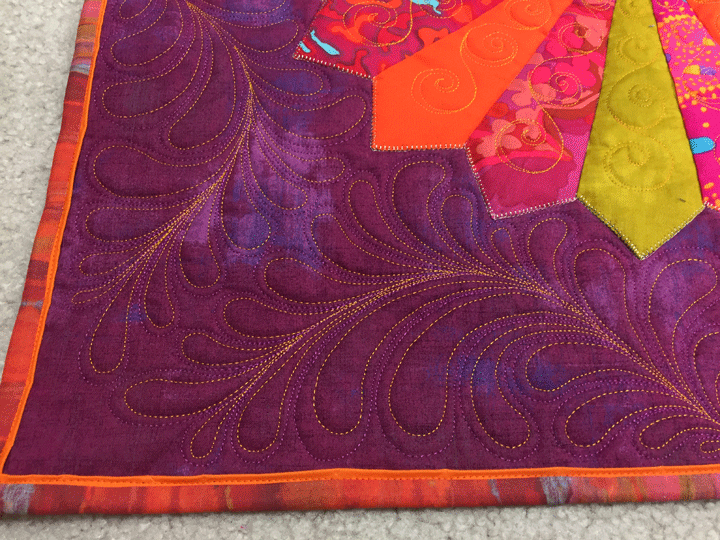
 This next shot shows the feathers once they’ve been stitched:
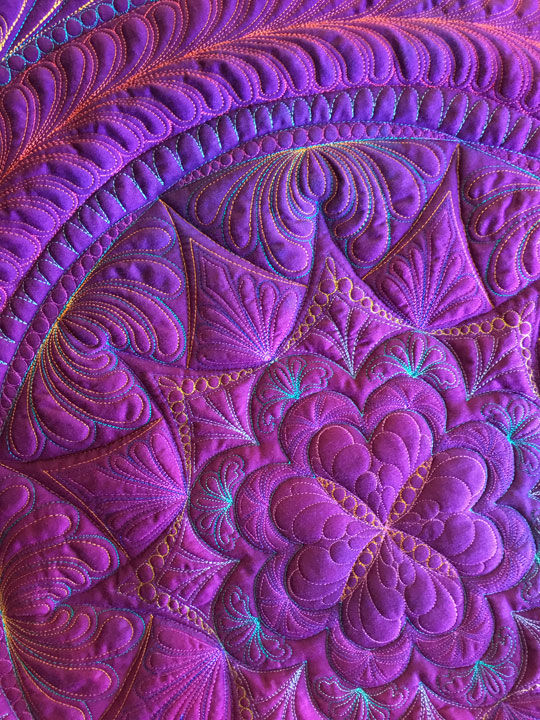
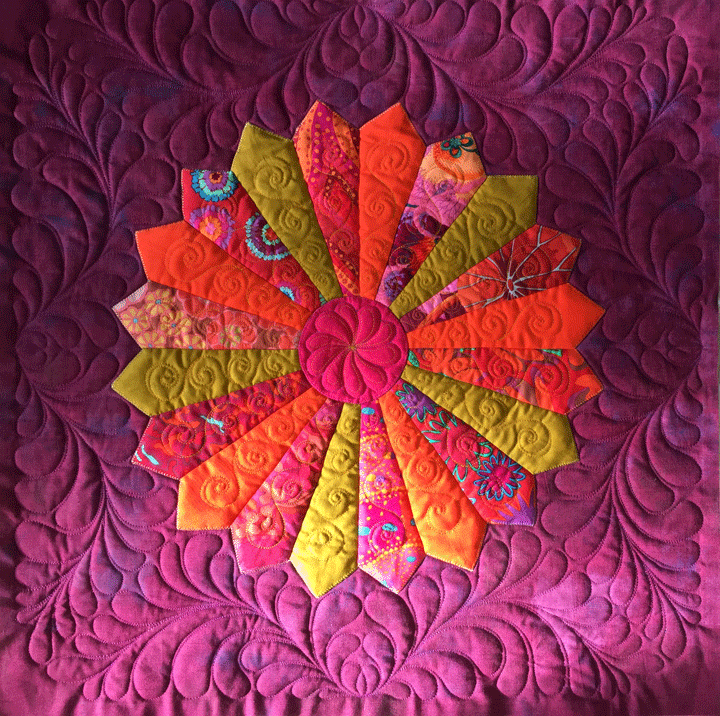 And this last shot shows the feathers after hyperquilting:
 Wonder how long it will take me to get around to adding that binding…