July 4th, 2014

Hello Quilting Friends!
Fourth of July already?! We thought we would celebrate this holiday by having a Red, White and Kaboom sale for all of our wonderful customers! Retail sales of the following product categories will be 25% off for the next week: PTD DVDs, PTD Books, Digitized Designs, Appli-K-Kutz fabric cutting dies, and Stencils. This sale will begin immediately and run until Friday, July 11th, 2014 at 9 AM (EST). Just enter the discount code: Fourth of July in the discount code box during checkout.
Remember that each and every retail purchase that you make in our store is being tabulated to count toward a gift certificate you may use for a future purchase. This is our way of thanking you for being a loyal customer. Please make sure you are logged into your account when making a purchase to properly track your points.
*Please note our offices are closed today for the holiday. We will be back on Monday July 7, so all orders will ship at that time!
|
PTD BOOKS
PTD DVDs
Digitized Designs
Appli-K-Kutz Fabric Cutting Dies

Quilting Stencils

|
Filed under
Site Updates.
July 3rd, 2014
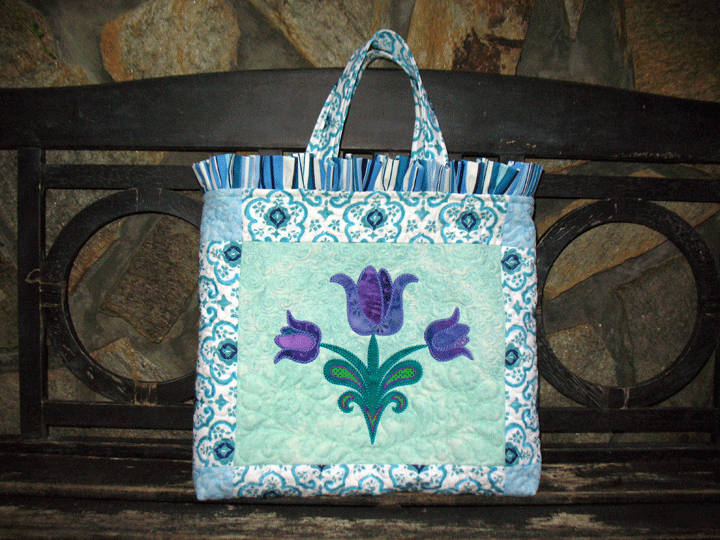 I got a wonderful surprise last week in that I received an invitation to teach at Babylock Tech in August. This is the annual Babylock convention where dealers go to learn about the new machines being introduced and also learn new techniques that can be used on sewing/embroidery machines. There was a catch, though…my classes could only be 3 hours long. Trust me, when you have 30 people in a class who need to hoop/re-hoop several times, get up and walk over to fusing stations repeatedly to fuse their pieces, and get up to walk to alignment stations multiple times to sit and align the fabric block correctly on the hoop, 3 hours is not much time. Soooo, my challenge last weekend was to design a project for the class where they’d have enough exposure to my multi-hooping technique to learn it, all within a 3-hour period. The “Springtime Bouquet Purse/Tote” above is the outcome of my weekend. Both the front and back have a central MEA panel that requires 2 hoopings, so the class will allow them to do 4 hoopings using my technique. My next challenge is figuring out how to set the class up so that all 4 hoopings are feasible, but I think I have that part nailed. (They’ll need to complete the rest of the purse on their own time once they get back home.)
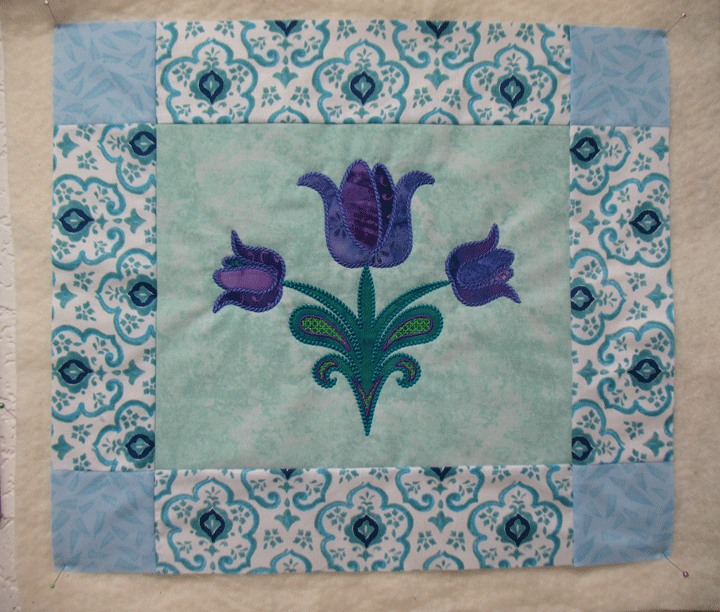
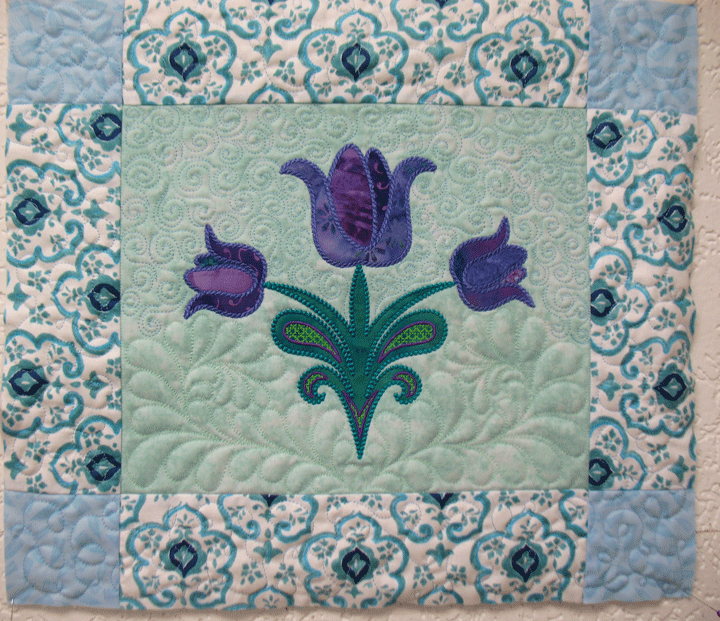
Here is what the front/back panels look like once pieced and sandwiched for machine quilting:
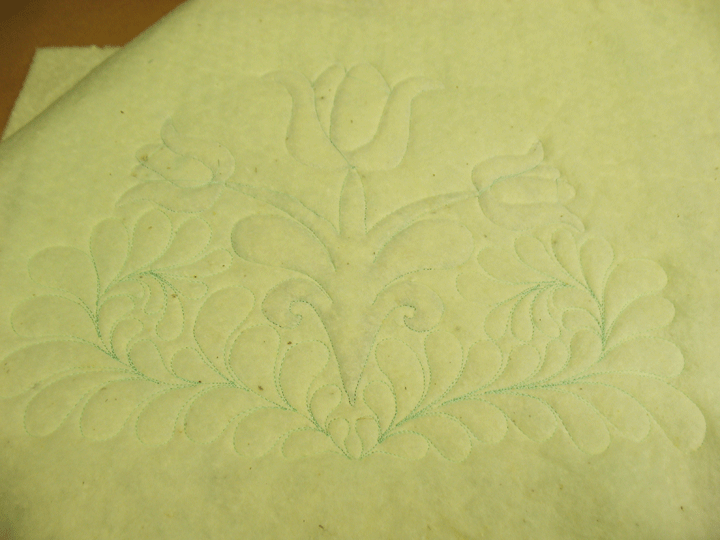
 I thought mirror image feathers emanating from each side of the stem’s base would look nice, but you can barely see them with the thread color I chose:
 This shot of the batting side shows the quilting better:
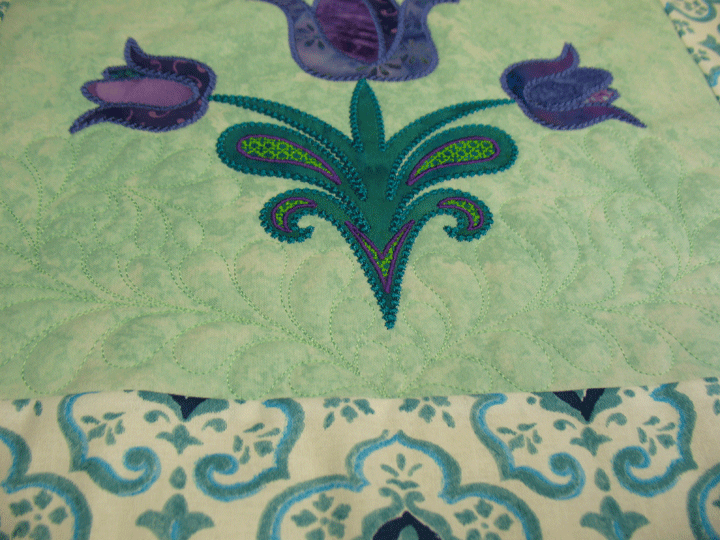
 I switched to a thread color with a bit more contrast and stitched swirls in the upper section, then a loop-d-loop design in the borders:
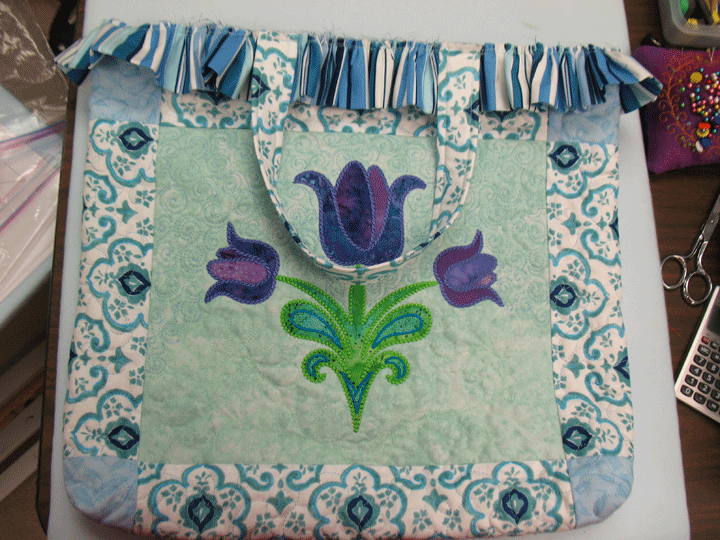
 Truthfully, I wasn’t happy with the quilting choices I made, but I just had to keep going since the real issue for me was whether or not the proportions of this project were going to work to create an enticing class project. I sewed my 2 sides together, created boxed corners at the base, then sewed my ruffle and handles to the top edge. (I had fused a medium weight interfacing to the wrong side of the ruffle before I pressed it in half. That step is important because once the lining is added, I want that ruffle to stand up and STAY up, and the interfacing will allow that to happen):
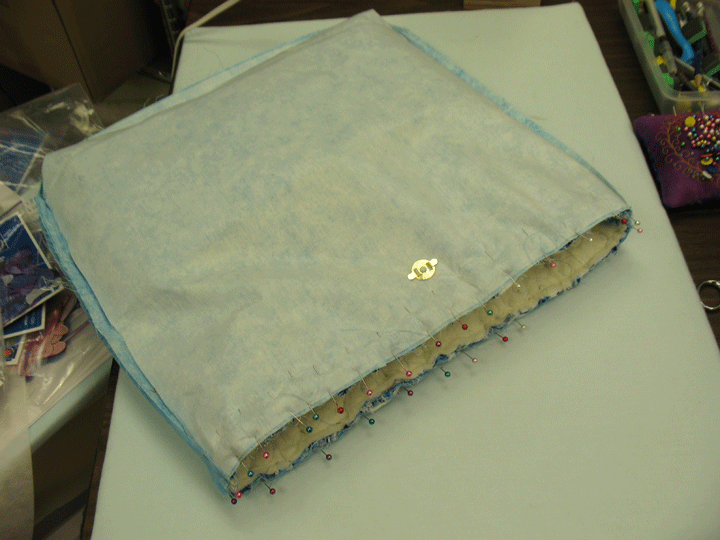
 I put that part of the project aside and created my front and back lining with pockets and sewed those sides together, then created the same boxed corners at the base. Lastly, I added magnetic snaps in the center of each side of the lining. (You can see the metal snap in the photo below.) This is the point where you attach the lining to the good side of the project. You place the tote (good side facing outward) inside the lining (good side facing inward) and pin the top edges together, as shown below:
 I sewed them together, leaving an opening of around 8 inches long, as shown below:
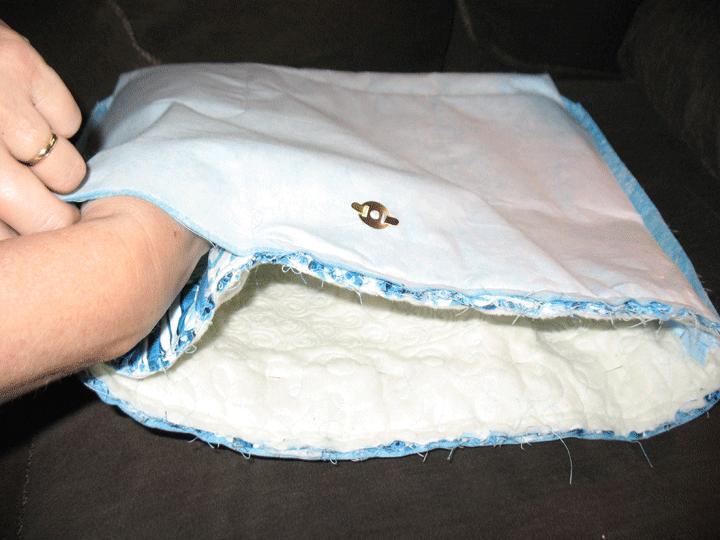 You reach into the opening with your hand and gently turn the tote inside out, so the good sides are now exposed:
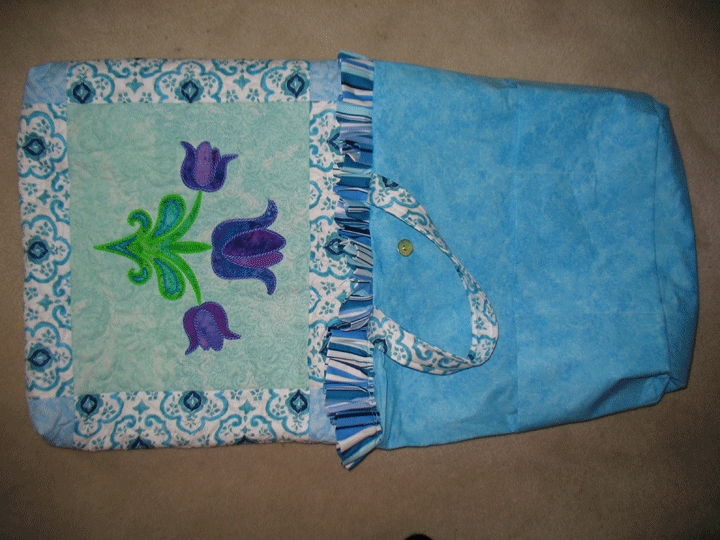 Just push the lining down into the tote, then pin the opening shut and hand sew that opening so it’s closed permanently. The last thing to do is to topstitch along the edge, and voila, a very sweet purse/tote:
 If you know a Babylock dealer, please ask them to come to my class…I promise it will be fun and educational!
Filed under
Appli-K-Kutz Fabric Cutting Dies, Free Motion Quilting, Machine Embroidered Applique, Sizzix.
 I got a wonderful surprise last week in that I received an invitation to teach at Babylock Tech in August. This is the annual Babylock convention where dealers go to learn about the new machines being introduced and also learn new techniques that can be used on sewing/embroidery machines. There was a catch, though…my classes could only be 3 hours long. Trust me, when you have 30 people in a class who need to hoop/re-hoop several times, get up and walk over to fusing stations repeatedly to fuse their pieces, and get up to walk to alignment stations multiple times to sit and align the fabric block correctly on the hoop, 3 hours is not much time. Soooo, my challenge last weekend was to design a project for the class where they’d have enough exposure to my multi-hooping technique to learn it, all within a 3-hour period. The “Springtime Bouquet Purse/Tote” above is the outcome of my weekend. Both the front and back have a central MEA panel that requires 2 hoopings, so the class will allow them to do 4 hoopings using my technique. My next challenge is figuring out how to set the class up so that all 4 hoopings are feasible, but I think I have that part nailed. (They’ll need to complete the rest of the purse on their own time once they get back home.)
Here is what the front/back panels look like once pieced and sandwiched for machine quilting:
 I thought mirror image feathers emanating from each side of the stem’s base would look nice, but you can barely see them with the thread color I chose:
 This shot of the batting side shows the quilting better:
 I switched to a thread color with a bit more contrast and stitched swirls in the upper section, then a loop-d-loop design in the borders:
 Truthfully, I wasn’t happy with the quilting choices I made, but I just had to keep going since the real issue for me was whether or not the proportions of this project were going to work to create an enticing class project. I sewed my 2 sides together, created boxed corners at the base, then sewed my ruffle and handles to the top edge. (I had fused a medium weight interfacing to the wrong side of the ruffle before I pressed it in half. That step is important because once the lining is added, I want that ruffle to stand up and STAY up, and the interfacing will allow that to happen):
 I put that part of the project aside and created my front and back lining with pockets and sewed those sides together, then created the same boxed corners at the base. Lastly, I added magnetic snaps in the center of each side of the lining. (You can see the metal snap in the photo below.) This is the point where you attach the lining to the good side of the project. You place the tote (good side facing outward) inside the lining (good side facing inward) and pin the top edges together, as shown below:
 I sewed them together, leaving an opening of around 8 inches long, as shown below:
 You reach into the opening with your hand and gently turn the tote inside out, so the good sides are now exposed:
 Just push the lining down into the tote, then pin the opening shut and hand sew that opening so it’s closed permanently. The last thing to do is to topstitch along the edge, and voila, a very sweet purse/tote:
 If you know a Babylock dealer, please ask them to come to my class…I promise it will be fun and educational!