May 27th, 2015
 If you’re looking for some free quilting advice about quicker, more efficient ways of doing quilt-related tasks, organizing your studio, etc, check out this free downloadable pdf of quilting “know how” produced by the folks at Craftsy. You can find it by clicking here!
Filed under
Craftsy!, Site Updates.
May 25th, 2015
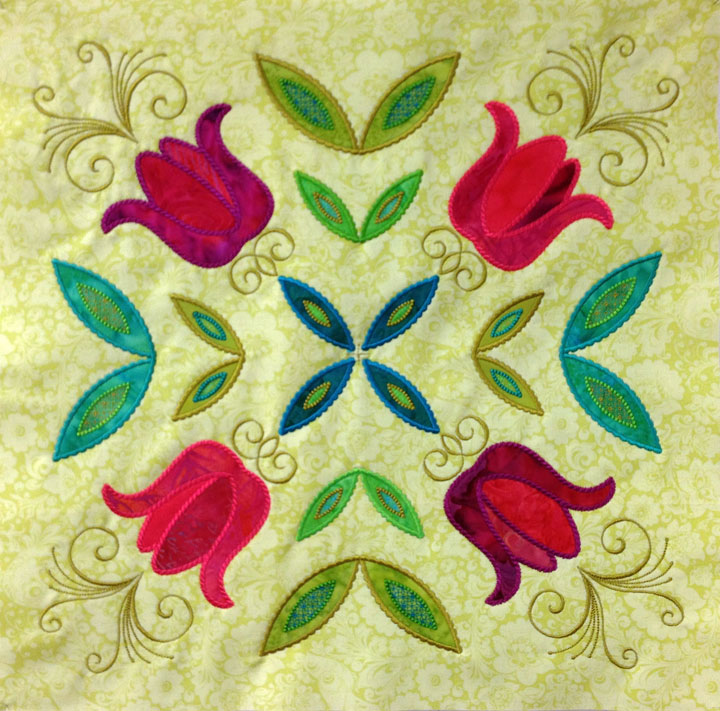
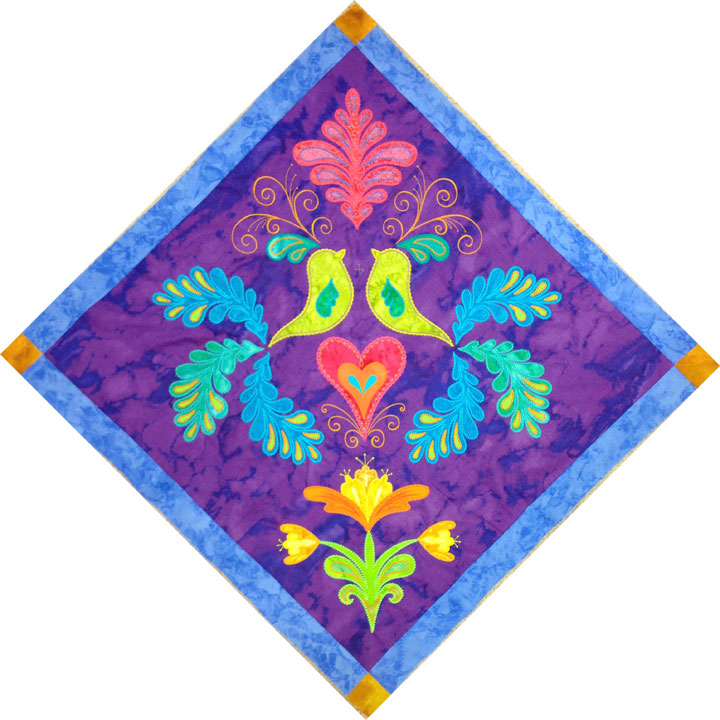
 Do you remember this applique block from a couple months ago? This was actually my first test stitch-out of the files to create this block. It’s had some minor tweaking done but I really liked how this preliminary stitch-out looked and didn’t want to waste it. So, I’m using this 22-inch block as the center of a new applique quilt. The shapes are all die-cut applique shapes that were cut out using my Sizzix Big Shot cutter. Using die cut shapes for MEA works great, because the shapes are always exactly the same and they fit perfectly into the placement outlines that are stitched by the embroidery machine. I’m kind of ashamed to say that working in this way has spoiled me.
Anyway, back to this current quilt. If you read my blog, then you know that I love to free motion quilt. A lot of times, I’ll create some of my quilting motifs so that they “play off” of applique shapes. An example would be the headdresses on these birds:
Do you remember this applique block from a couple months ago? This was actually my first test stitch-out of the files to create this block. It’s had some minor tweaking done but I really liked how this preliminary stitch-out looked and didn’t want to waste it. So, I’m using this 22-inch block as the center of a new applique quilt. The shapes are all die-cut applique shapes that were cut out using my Sizzix Big Shot cutter. Using die cut shapes for MEA works great, because the shapes are always exactly the same and they fit perfectly into the placement outlines that are stitched by the embroidery machine. I’m kind of ashamed to say that working in this way has spoiled me.
Anyway, back to this current quilt. If you read my blog, then you know that I love to free motion quilt. A lot of times, I’ll create some of my quilting motifs so that they “play off” of applique shapes. An example would be the headdresses on these birds:
 This time, I thought I’d try adding some of this kind of thread detail into the embroidery file. This means that once I get this whole quilt pieced and thrown into the final quilt sandwich, that thread work will kind of protrude outward if I stitch just outside it w/invisible thread. Here’s an example of incorporating it into the embroidery file instead. (The photo below shows the block only partially embroidered):
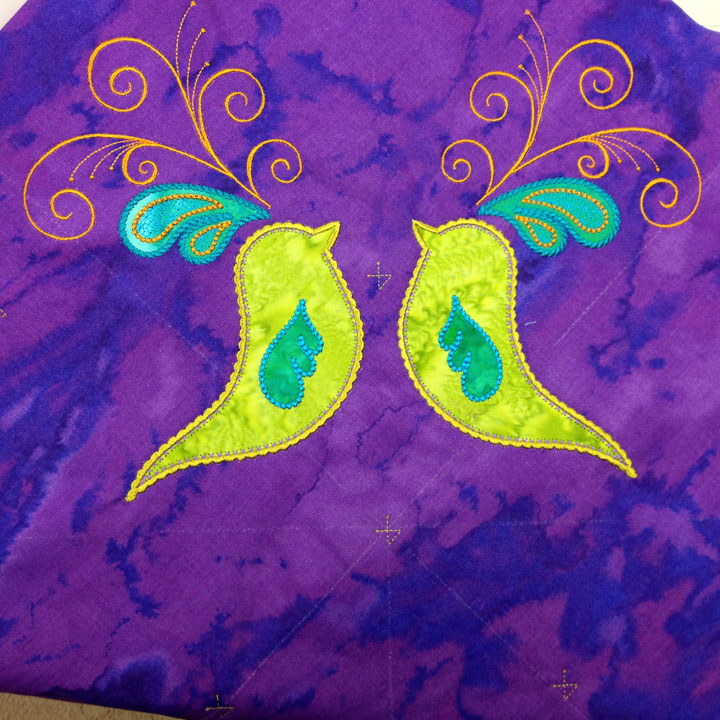 I really loved how that came out, so I went a bit nutso when I designed the headresses for the birds in the corner setting triangles. Check out THIS thread detail:
 Doing that type of thread work as part of the embroidery has 2 benefits for me:
-in the final finished quilt, the thread work will be more protuberant as opposed to having it kind of sink into the batting when it’s done as free motion quilting; and
-Because it’s done on the embroidery machine, it can be a much heavier line of stitching than the single line of stitching I can create with free motion quilting. There’s a price to be paid for this, though. For someone who loves to quilt, I am severely limiting the amount of “free space” available for quilting. That means the final quilting will not be nearly as much fun for me.
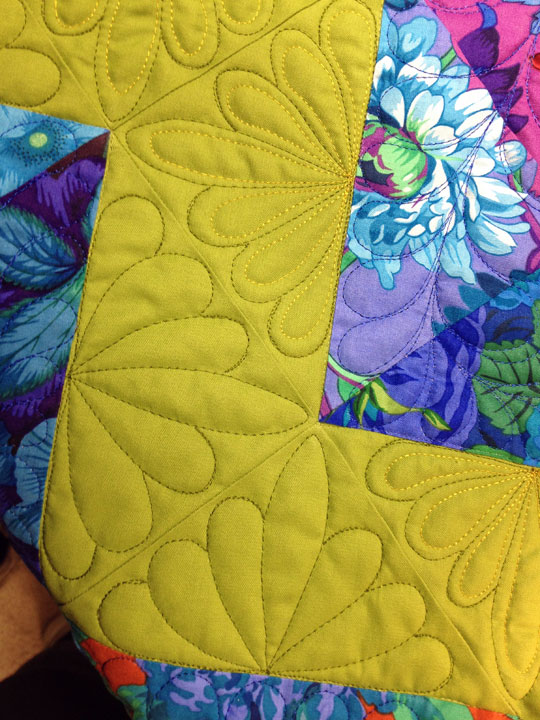
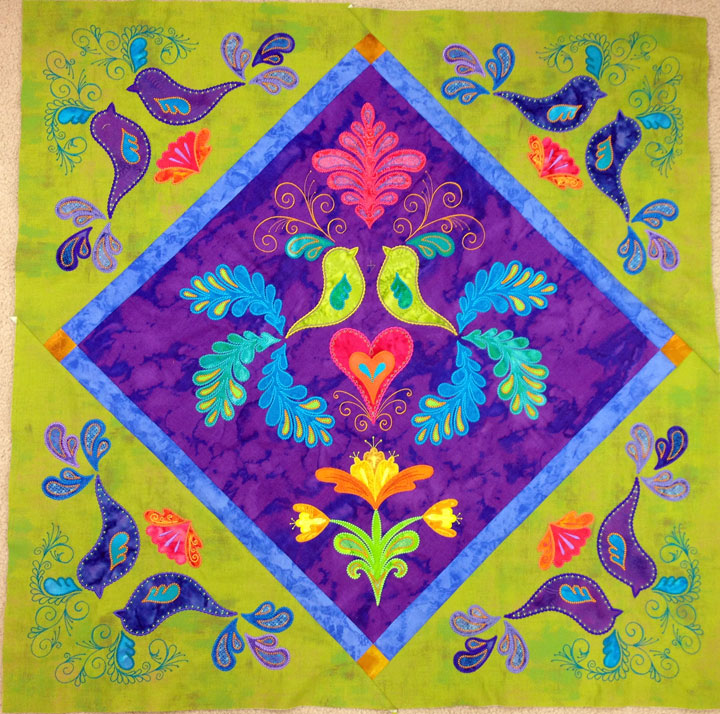
I had to go through a few renditions of this corner setting triangle block to get to this one and I’m very happy with the end result. I ended up adding a “frame” to the center block:
Doing that type of thread work as part of the embroidery has 2 benefits for me:
-in the final finished quilt, the thread work will be more protuberant as opposed to having it kind of sink into the batting when it’s done as free motion quilting; and
-Because it’s done on the embroidery machine, it can be a much heavier line of stitching than the single line of stitching I can create with free motion quilting. There’s a price to be paid for this, though. For someone who loves to quilt, I am severely limiting the amount of “free space” available for quilting. That means the final quilting will not be nearly as much fun for me.
I had to go through a few renditions of this corner setting triangle block to get to this one and I’m very happy with the end result. I ended up adding a “frame” to the center block:
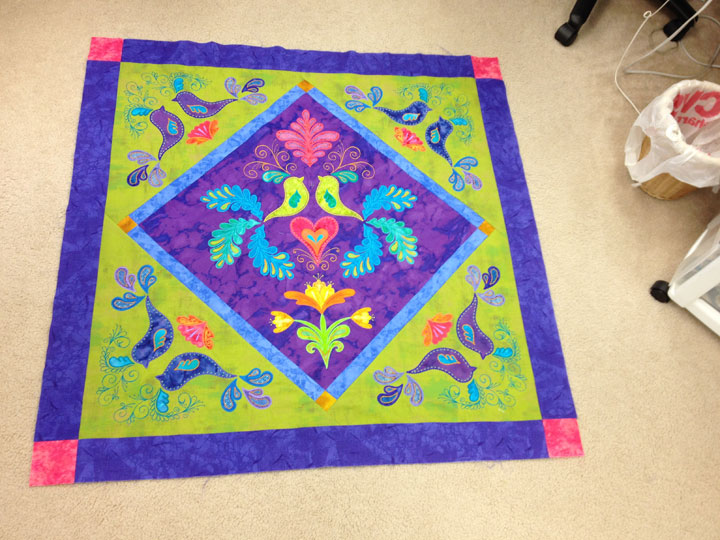
 And here’s what it looked like once I’d added the corner triangles:
 (Sorry; the pics aren’t so great because they’re all taken with the piece lying on the floor rather than flat on a wall.) Here’s what it looked like once I had added the next border as a frame:
 I have at least 3 more borders planned for this quilt. My fingers are crossed that I can get at least 2 of them done in the next week…
Filed under
Machine Embroidered Applique, Sizzix.
May 19th, 2015
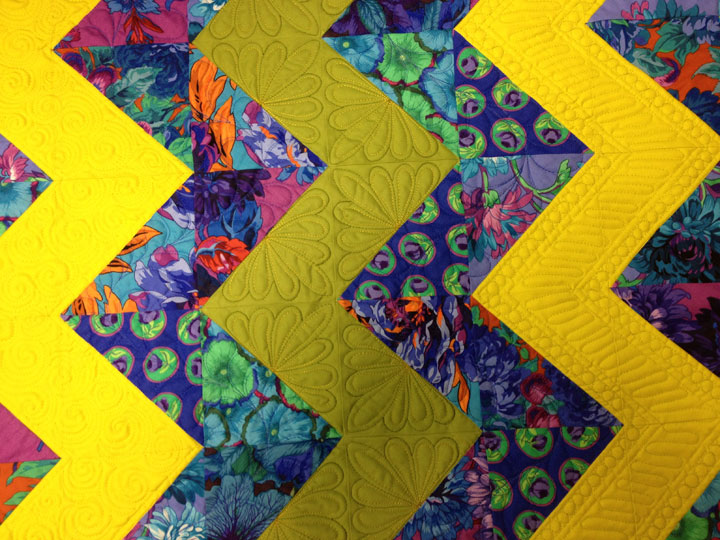
 A couple of years ago, QuiltShopGal asked me to participate in her monthly Free Motion Quilting Challenge and I chose the topic of border designs. Until that year, the only interesting border designs I stitched were variations of feather designs. If I didn’t stitch a feather border, then my border designs were pretty lack-luster. Not so anymore! Border designs thrill me and I love the challenge of coming up with new border design ideas. The design above is a good example of the kind of design that evolves merely through playing around and improvising along the way. Sometimes, I will draw out a border design on scratch paper and sometimes I will stitch out a small sample on a throw away practice sandwich. The design above is an example of just “winging it” on a real quilt and I love how it came out! If you want to try something like this, here are the steps I went through to make the above border.
Step 1: Create the skeleton or frame work using ruler work. For this, I used the #12 arc ruler from the medium set of Quilters Groove Rulers by Stone House Quilting and you can find them by clicking here. In truth, you don’t need that exact ruler, and any softly curved arc ruler will do just fine. (Note: when you’re working w/arc rulers, the curve will become softer, or more subtle, as you increase the size of the ruler.) I placed small tick marks along the base of my border for where I wanted each arc to begin and end, and placed a corresponding tic mark in the midpoint of the space on the opposite side of the border. You can see in the photo below that I elongated every other tic mark so it was easy to see where I wanted the “peaks” of my archways:
A couple of years ago, QuiltShopGal asked me to participate in her monthly Free Motion Quilting Challenge and I chose the topic of border designs. Until that year, the only interesting border designs I stitched were variations of feather designs. If I didn’t stitch a feather border, then my border designs were pretty lack-luster. Not so anymore! Border designs thrill me and I love the challenge of coming up with new border design ideas. The design above is a good example of the kind of design that evolves merely through playing around and improvising along the way. Sometimes, I will draw out a border design on scratch paper and sometimes I will stitch out a small sample on a throw away practice sandwich. The design above is an example of just “winging it” on a real quilt and I love how it came out! If you want to try something like this, here are the steps I went through to make the above border.
Step 1: Create the skeleton or frame work using ruler work. For this, I used the #12 arc ruler from the medium set of Quilters Groove Rulers by Stone House Quilting and you can find them by clicking here. In truth, you don’t need that exact ruler, and any softly curved arc ruler will do just fine. (Note: when you’re working w/arc rulers, the curve will become softer, or more subtle, as you increase the size of the ruler.) I placed small tick marks along the base of my border for where I wanted each arc to begin and end, and placed a corresponding tic mark in the midpoint of the space on the opposite side of the border. You can see in the photo below that I elongated every other tic mark so it was easy to see where I wanted the “peaks” of my archways:
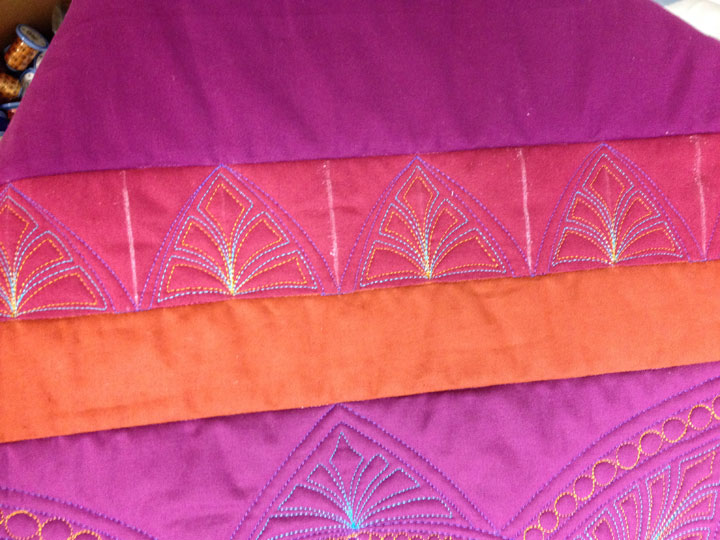
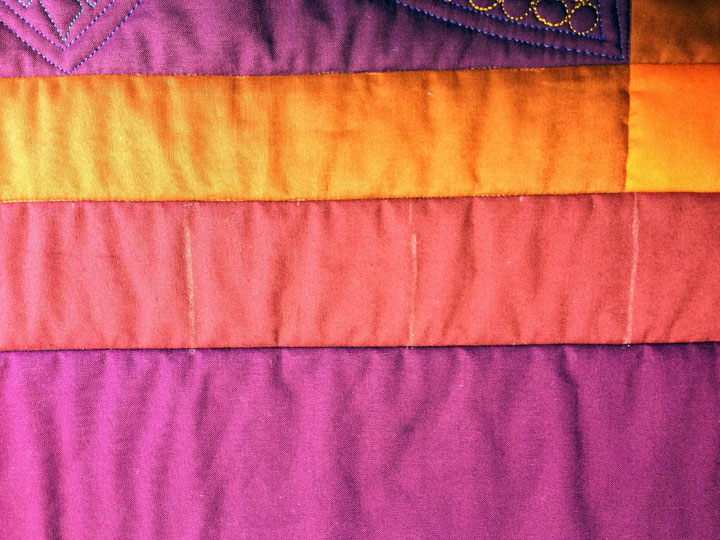 Using the tick marks as my guide, I stitched out a long row of single-line arches, then went back and stitched a small, tapering channel between them. This is very fast and easy to do as ruler work. The thread I used for this stage was a purple polyester Isacord thread:
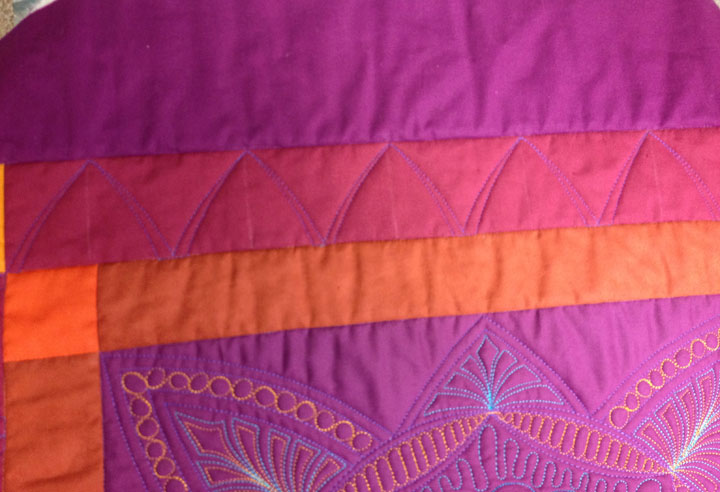 Step 2: Begin filling in your framework. For me, this next part is where it gets really fun. I think it’s all the time I’ve spent hyperquilting, but I just love coming up with “fill-in” designs. I’m going to show you a couple of options for fill in work. In the photo below, I stitched small cut-off feathers that make me think of Aztec designs. I used them because I was trying to echo some of the same types of designs I had stitched in that center block and I used a Sulky turquoise rayon thread for this step:
 Interesting, but also a little boring! (Before I go any further, note that I stitched some “Aztec” designs in the cornerstone blocks at this stage as well.) Here’s where you can go in a couple of directions. In this next shot you’ll see what it looked like after stitching a similar (yet a teensy bit different) in the opposite arches from the opposite side of the border. I used the same turquoise rayon thread for this round of stitching:
 Stitching these “Aztec feathers” is actually pretty simple. I began with a long soap line down the center of the arch, and this served as my “spine guideline.” If you approach it as if you’re stitching a regular feather but simply cut-off the rounded plume tips, you’re good to go. The goal is to completely fill the space w/the feather, so stretch out where you need to and contract where you need to, just as you would with a more traditional feather.
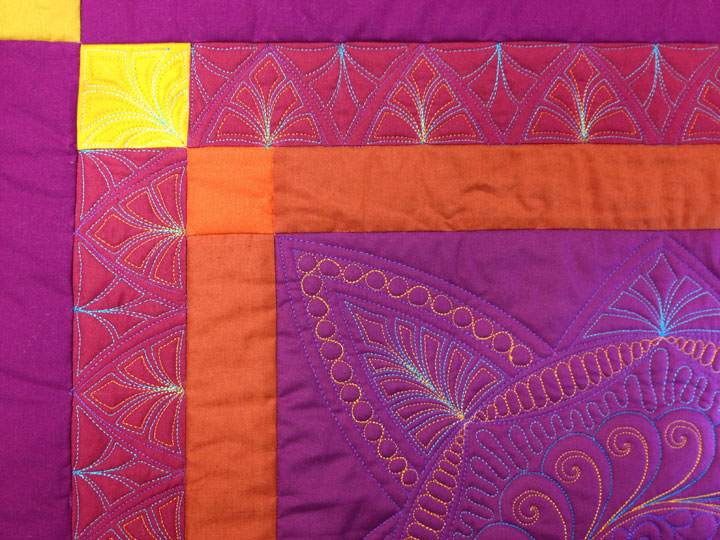
Step 3: Hyperquilt those Aztec feathers. The nice thing about borders is that there are 4 sides. This means that if you’re like me and you enjoy playing around with different design ideas, you can be doing different things on different sides of the same border to get an idea of “what if?” So, I’m hoping that I’m not confusing you, but here’s what the original border design would have looked like if I left it as arcs on just one side but then went in and hyperquilted the Aztec designs. I used Floriani gold polyester thread for this round of stitching:
Stitching these “Aztec feathers” is actually pretty simple. I began with a long soap line down the center of the arch, and this served as my “spine guideline.” If you approach it as if you’re stitching a regular feather but simply cut-off the rounded plume tips, you’re good to go. The goal is to completely fill the space w/the feather, so stretch out where you need to and contract where you need to, just as you would with a more traditional feather.
Step 3: Hyperquilt those Aztec feathers. The nice thing about borders is that there are 4 sides. This means that if you’re like me and you enjoy playing around with different design ideas, you can be doing different things on different sides of the same border to get an idea of “what if?” So, I’m hoping that I’m not confusing you, but here’s what the original border design would have looked like if I left it as arcs on just one side but then went in and hyperquilted the Aztec designs. I used Floriani gold polyester thread for this round of stitching:
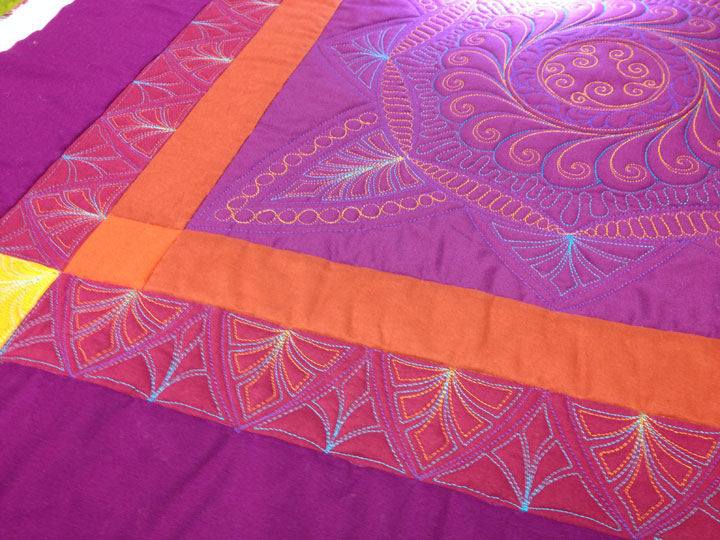
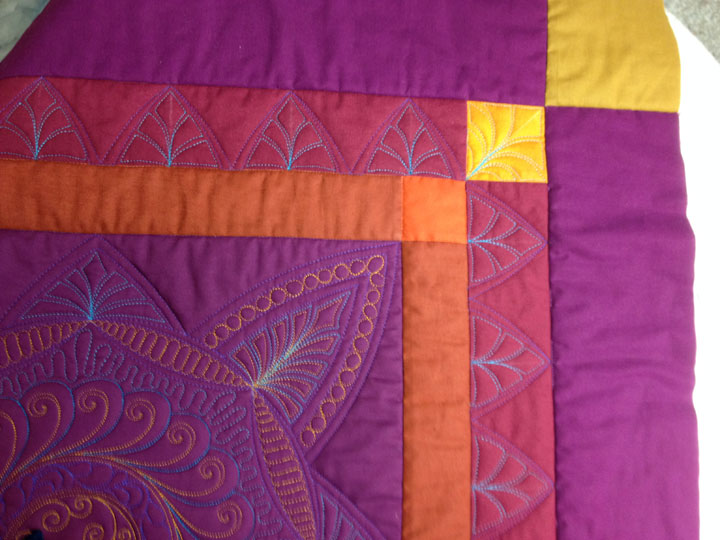
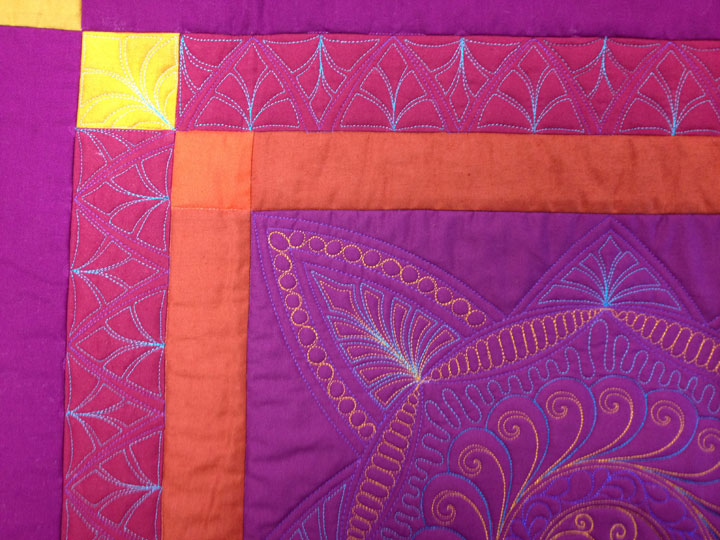
 Isn’t it nice to see different options? My final border was hyperquilting the one side of the arches but adding the turquoise Aztec designs to both sides of the arches as in this shot below:
 Could you hyperquilt both sides of the arches? Of course! In this case, I was hoping to accentuate that the arches and feathers on either side were actually a bit different from one another, so I left the hyperquilting off. I don’t think there’s a right/wrong way to do this.
I know I’ve said it before but it bears repeating. If you’re interested in learning about using ruler work as a sit-down quilter on your home sewing machine, you really need to start reading Amy Johnson’s blog which you can find by clicking here. It is a wonderful free motion quilting blog and it’s “the place to go” if your goal is to learn about ruler work on your home machine or on any sit-down machine. She explains things in a very easy-to-understand kind of way and she always has good illustrations, so head on over there now! In the mean time, I promise at least 3 blog posts in the next week. I haven’t been neglecting this blog on purpose, my life has just become too hectic lately. If you took the time to read this post, though, check back as I really do promise some more posts this week!
Could you hyperquilt both sides of the arches? Of course! In this case, I was hoping to accentuate that the arches and feathers on either side were actually a bit different from one another, so I left the hyperquilting off. I don’t think there’s a right/wrong way to do this.
I know I’ve said it before but it bears repeating. If you’re interested in learning about using ruler work as a sit-down quilter on your home sewing machine, you really need to start reading Amy Johnson’s blog which you can find by clicking here. It is a wonderful free motion quilting blog and it’s “the place to go” if your goal is to learn about ruler work on your home machine or on any sit-down machine. She explains things in a very easy-to-understand kind of way and she always has good illustrations, so head on over there now! In the mean time, I promise at least 3 blog posts in the next week. I haven’t been neglecting this blog on purpose, my life has just become too hectic lately. If you took the time to read this post, though, check back as I really do promise some more posts this week!
Filed under
Site Updates.