I’m in the Mood for Quilting!

December 28th, 2015


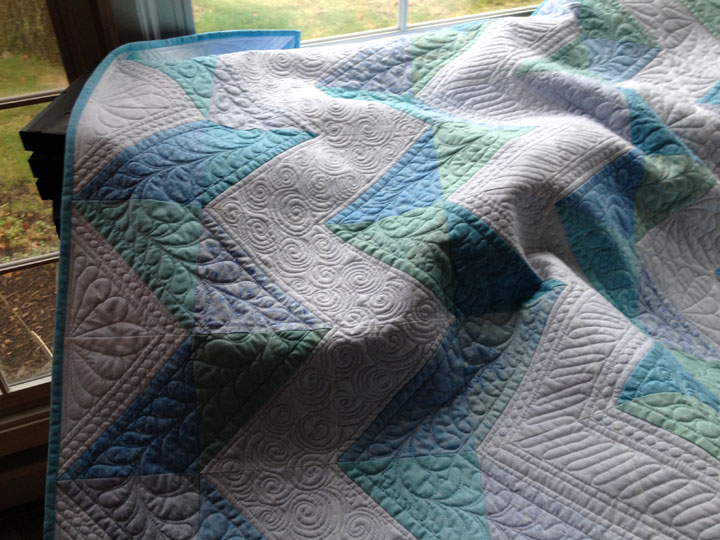
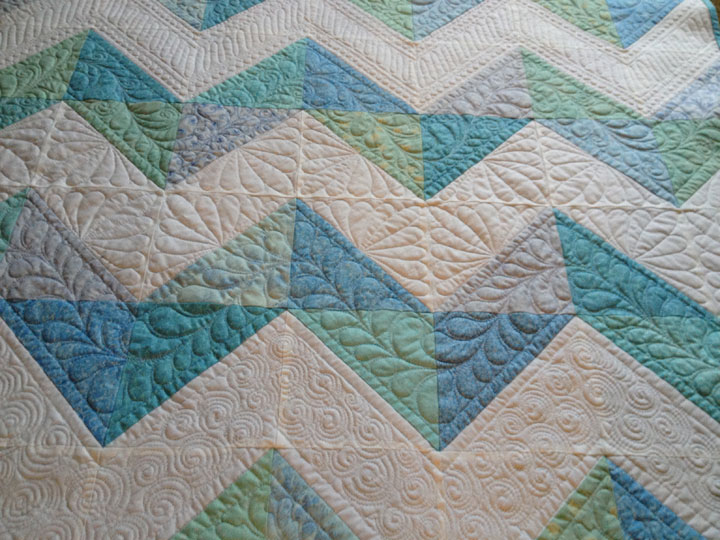
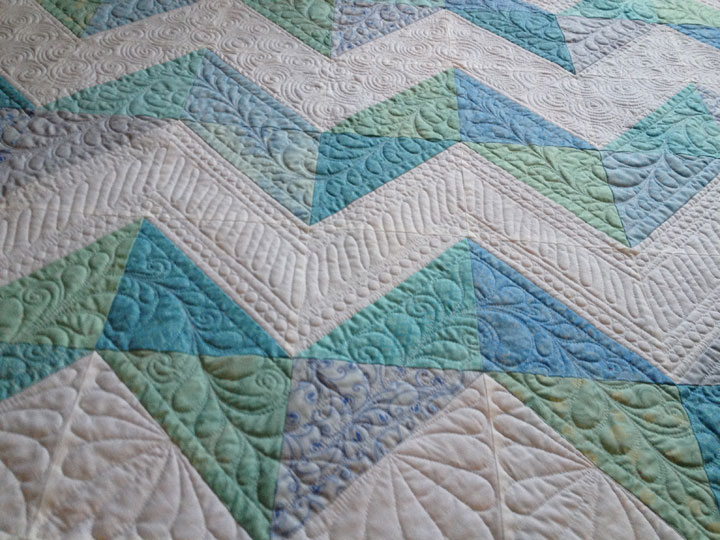
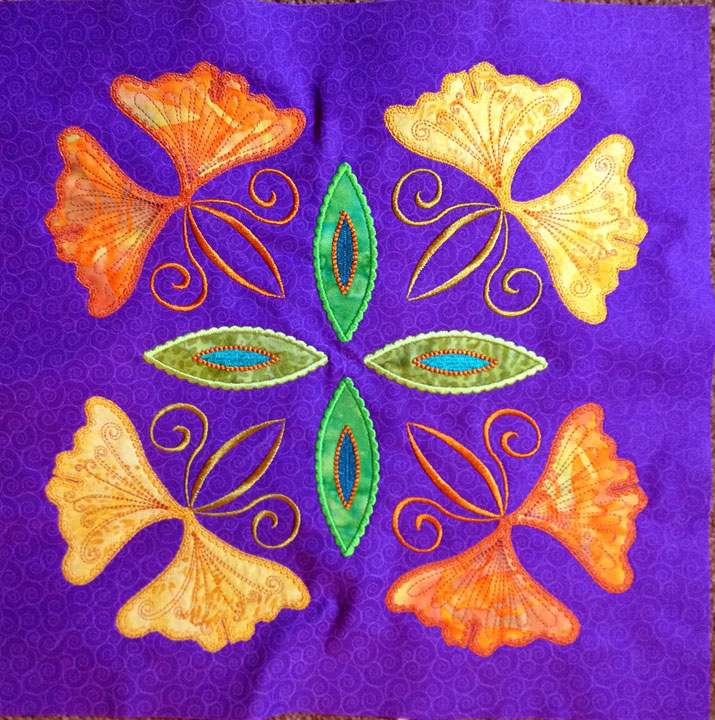
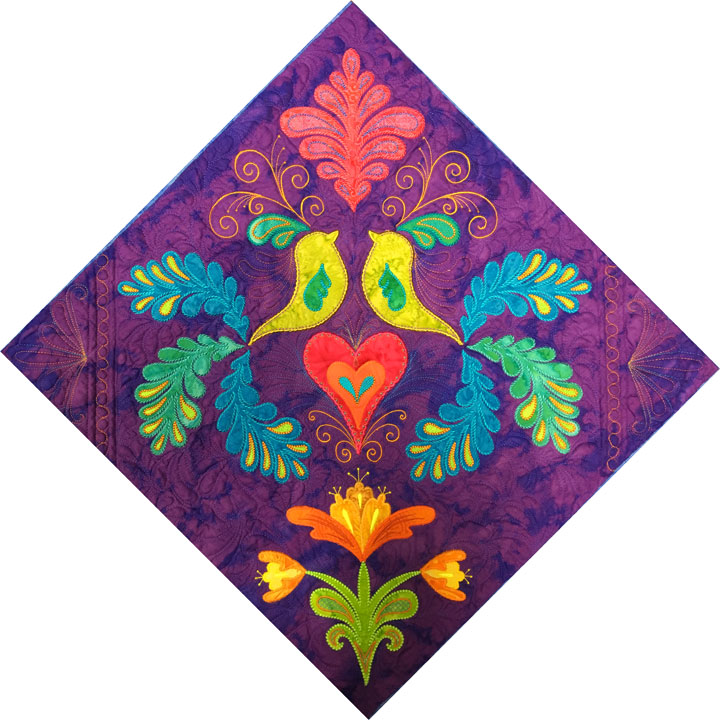
I had a wonderful time with family for Christmas and now I am SO psyched to get back to some quilting!  Remember this guy:


birds1

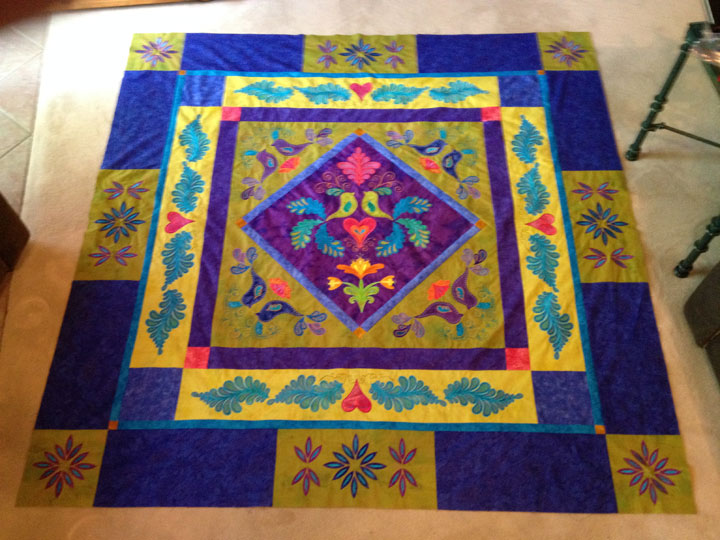
My plan was to have this top quilted in time to enter it in the Asheville quilt show last September.  I started quilting as soon as it was basted and it was one of 4 huge projects that I had going from early spring to the end of October this past year.  My 4 projects were:


1.  Design and shoot a new Craftsy class about feathers (Done and launched on October 12, 2015!  Click here for a link for a $20 discount off my Ultimate Free Motion Feathers Craftsy Class.)


2.  Design and shoot a new DVD about ruler work for the sit down quilter (Done and launched on October 9th, 2015! Click here to see a preview video clip of the DVD.)


3.  Study, study, study and then take my internal medicine re-certification exam (Done and taken on October 26, 2015!  I am still waiting to find out if I passed or not, though, and they have until Feb 6 to announce the results.  Why the heck does it take so darn long?!!)


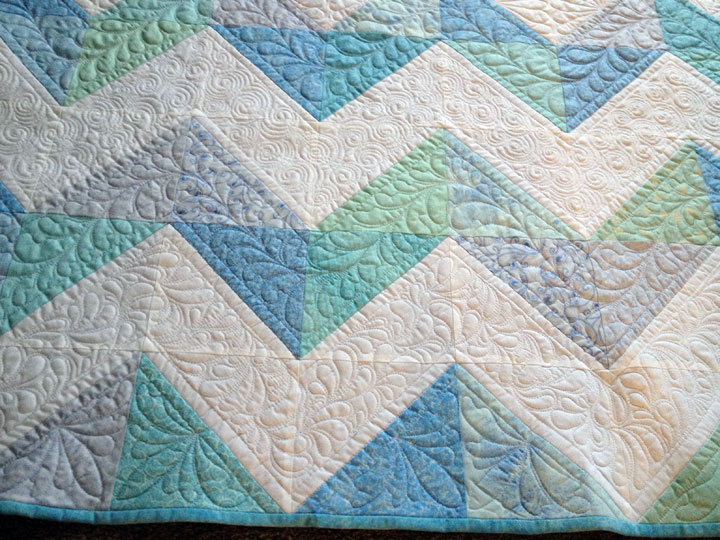
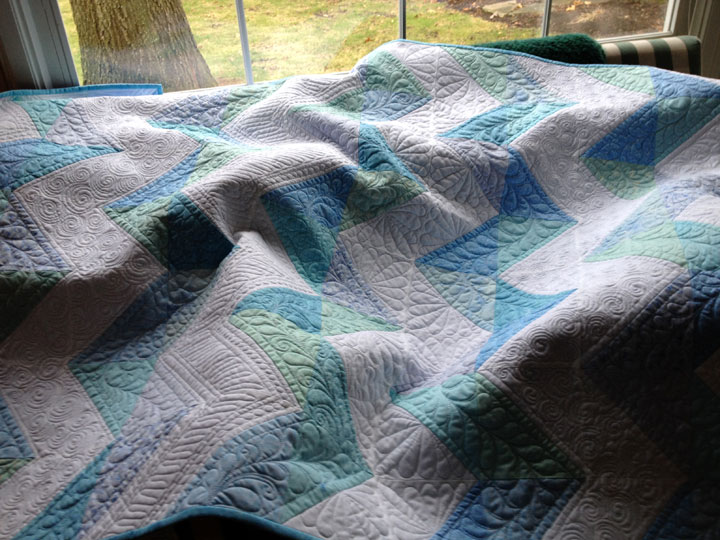
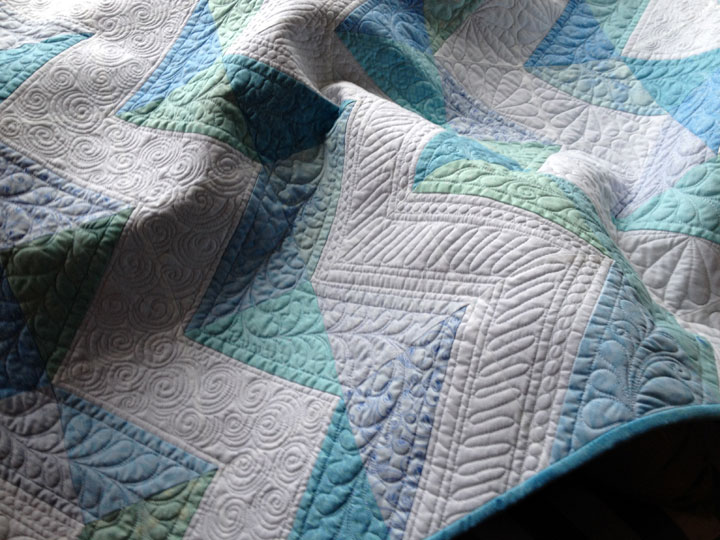
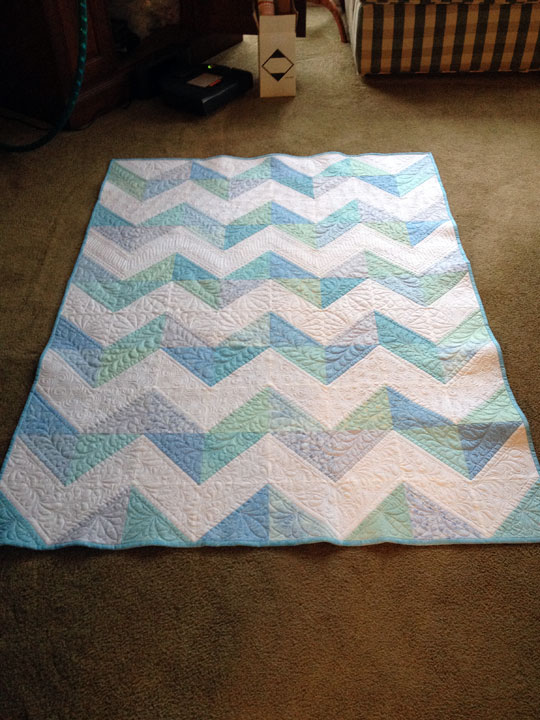
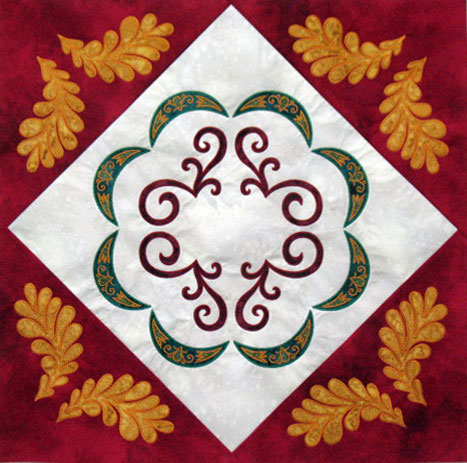
4.  Quilt the above quilt by September 10, 2015…not done.  Bummer.  I got to 4 weeks before this quilt was due to be finished and had all these other balls in the air and realized that I could either bust my butt finishing the quilting and not really enjoy the process vs forget about the deadline and finish the quilting at a pace that would allow me to enjoy the process.  To me, the whole point of making quilts is about enjoying the process, so I forgot about meeting that 4th deadline and I’m SO glad I did!  This quilt has been SO much fun to work on and that is the “story” that will forever live in my head when I look at this quilt in years to come.  Today, I will start posting about the wonderful time I’ve had with this quilt and I’ll start with some photos of the center block:


BOP1

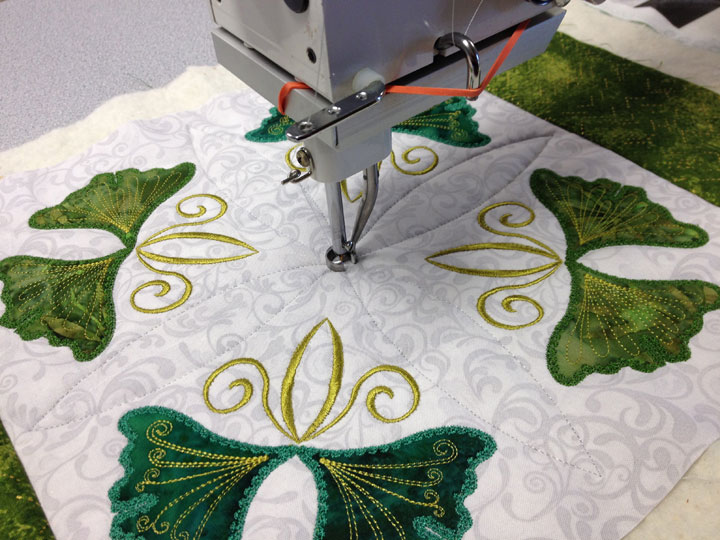
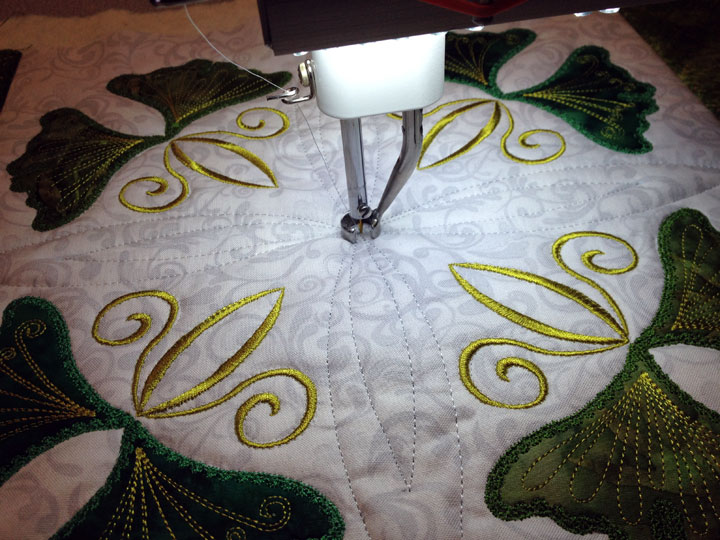
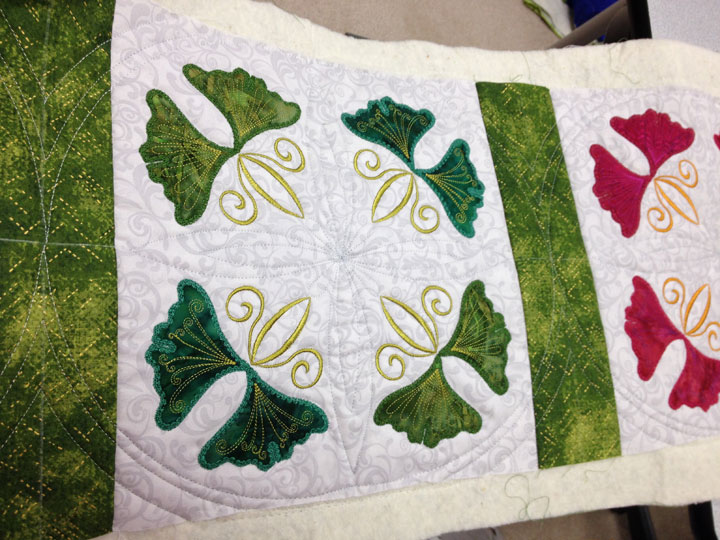
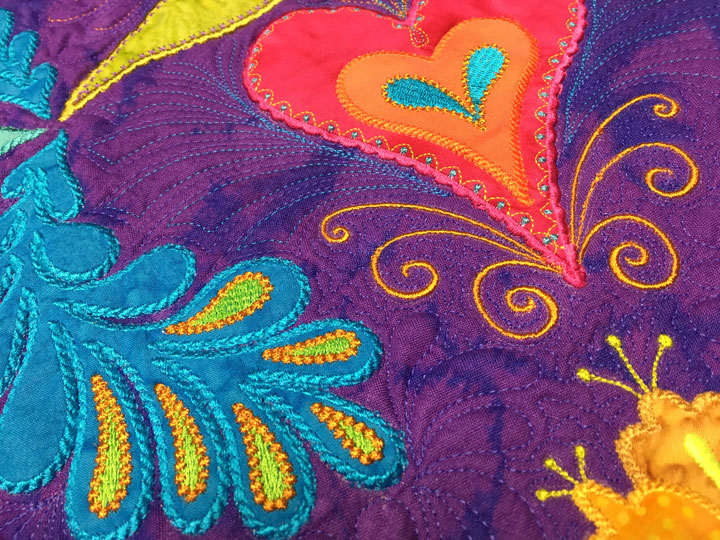
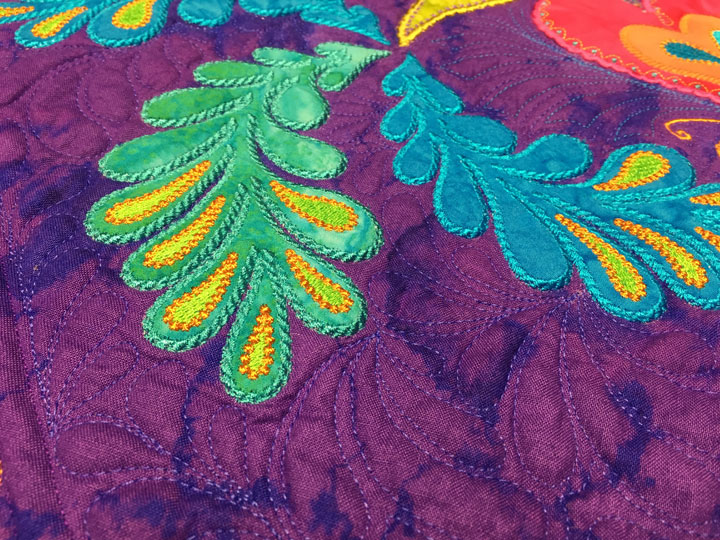
I always start  a quilt like this by SID quilting followed by outlining all the applique shapes with invisible thread.  Once that has been done, I try to add some free motion quilting motifs that “play off” some of the applique shapes.  An example is the “Aztec plumes” that spring from around the sides of the heart:


BOP2

(They were originally stitched in a purple thread, then hyperquilted with turquoise.)  There is also a small featherette that was quilted just above the heart, springing from the heart’s “cleavage.”  I love the embroidery at the base of the heart.  The heart is not trapuntoed, but it looks as if it is.  Here are a few more pics of this area:


BOP-heart-and-feather-closeup


and


BOP3

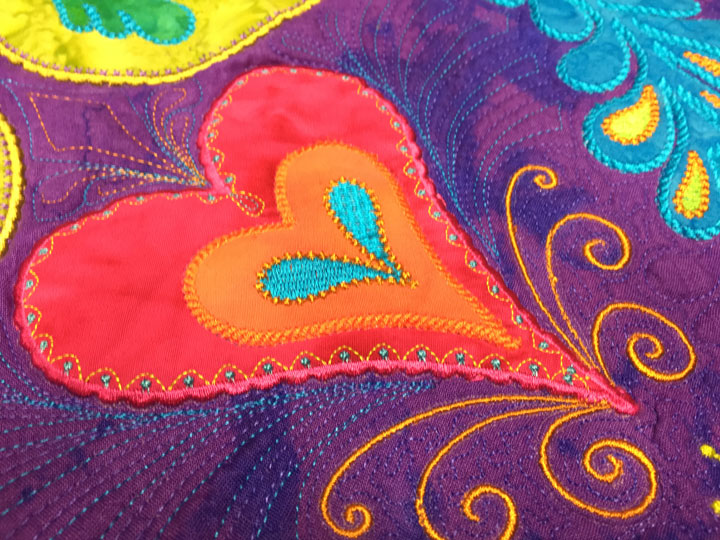
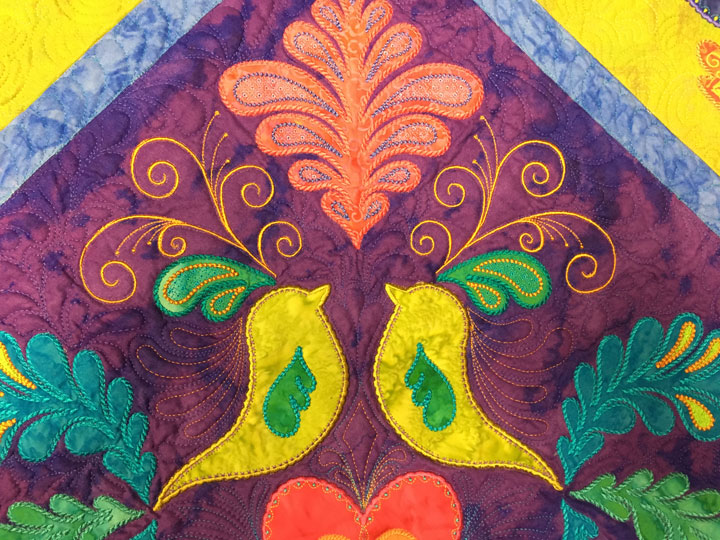
The birds have some free motion quilted plumes that spring from each side and those were also hyperquilted with gold thread to make them “pop” just a tad bit more:


BOP-bird-closeup

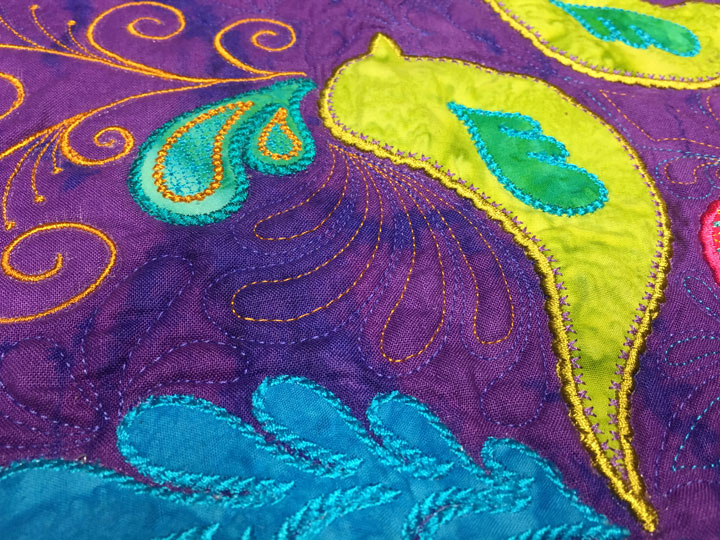
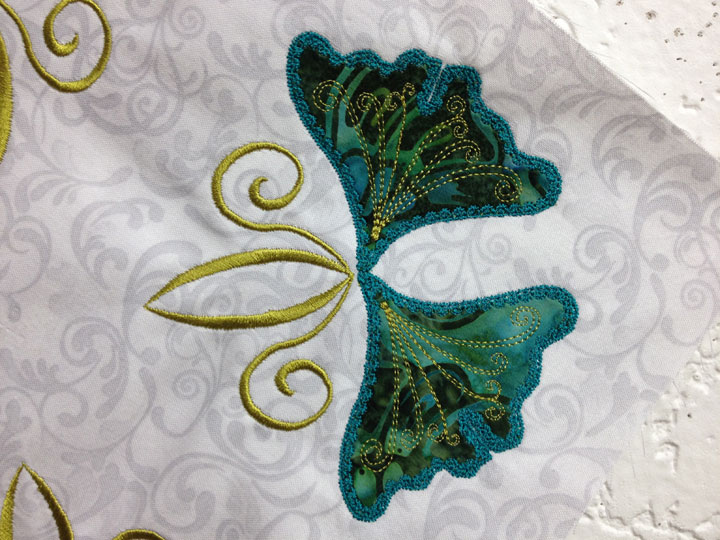
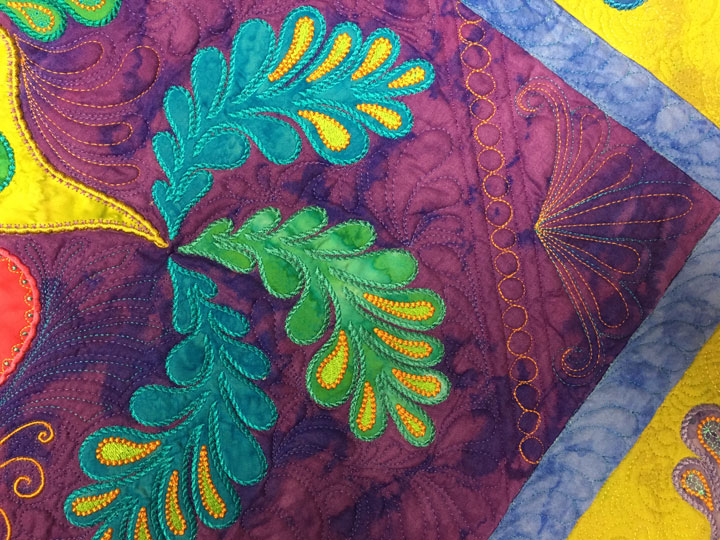
I love the 3-D effect of the machine embroidery applique.  This tangential shot of some of the feathers gives a better sense of how they almost seem trapuntoed:


BOP-feathers-closeup

In this shot, you can see the only ruler work that was done in this section of the quilt.  I used a straight line ruler to quilt some channels in the 2 side corners and then filled in one channel with  arow of pearls.  I filled the “empty triangles” with small featherettes:


BOP4

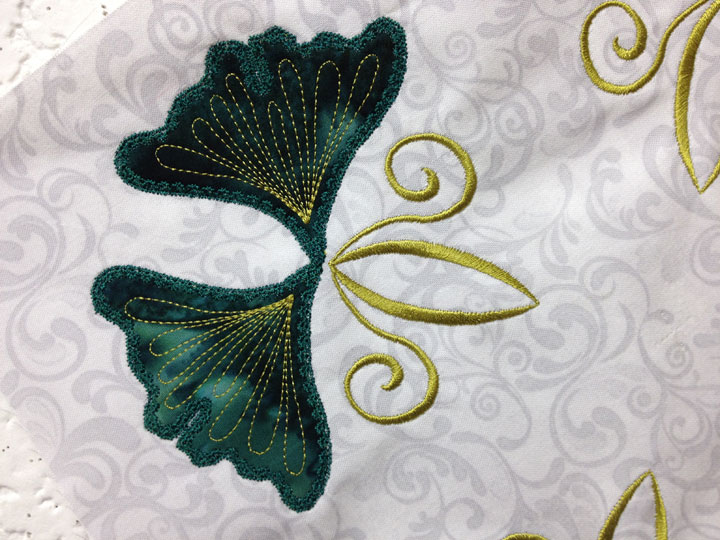
 The flower/stem unit at the base of the block is really a staylized “fantasy flower:”


BOP-yellow-flower-plus-stem-closeup

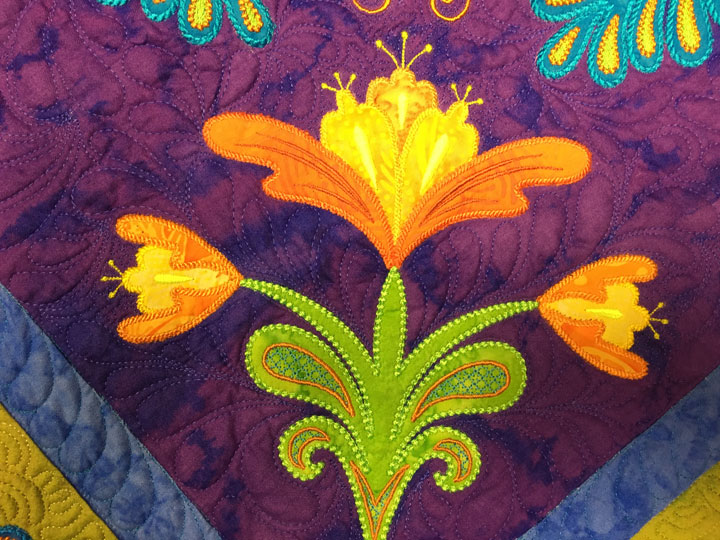
I love how the candlewicking stitch that surrounds the stem looks as if beads have been added to the perimeter of the stem.  I really over-use that decorative stitch but it’s my favorite stitch of all so I always get sucked into using it.  Here’s a closeup of the flower section:


BOP-yellow-flower-detail

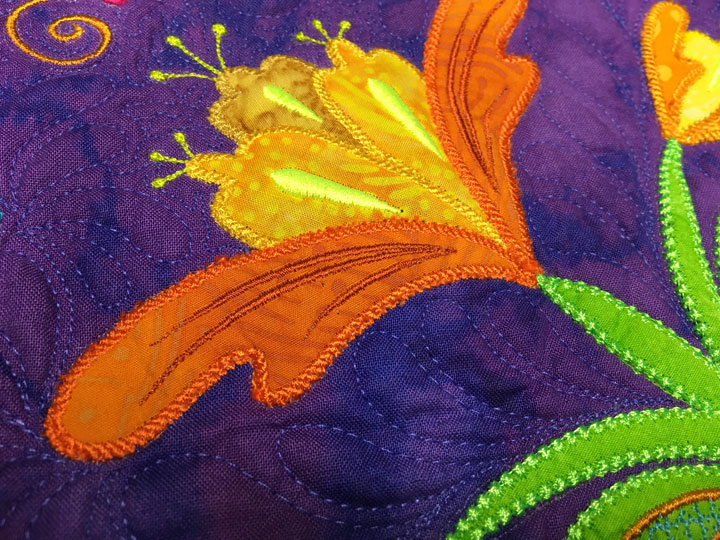
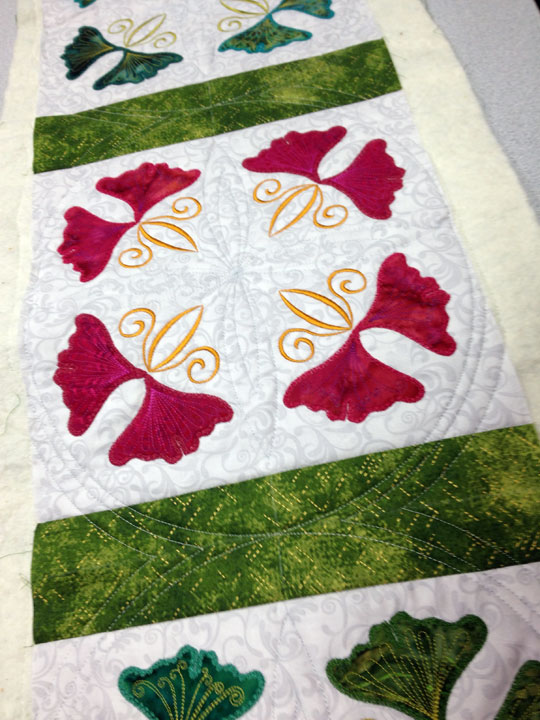
Again, I’m a total sucker for all this darn TEXTURE!!   Just a couple more shots…this is the large straight feather at the top of the block:


BOP-lge-feath

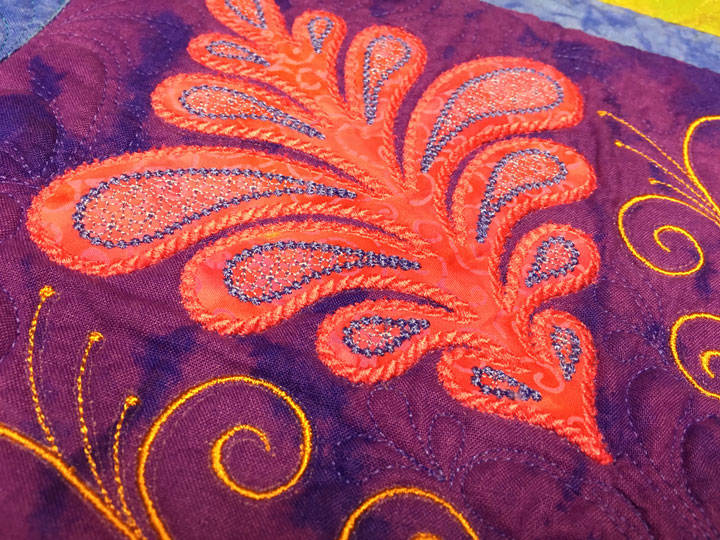
(This feather color is way off…it’s a pink/magenta in real life.)  And this last shot is a good closeup of the embroidered head feathers of the birds…love how that came out:


BOP-feath2

I hope you’ve enjoyed this center block section.  I’ll do another couple of posts to move further away from the center.  I just love, love, love how this quilt is coming along!


Just in the (Saint) Nick of Time

December 23rd, 2015
I finally finished the hand stitching of binding on the quilt I made for my mom’s Christmas present around midnight last night:
 
mom1
A few different views of various parts of it:
 
mom2
and
 
mom3
and
 
mom4
 
and
 
mom5
 
and 
 
mom6
 
and
 
mom7
 
These chevron quilts are pretty fun to quilt…I’m already thinking about my next one.  It feels so good to wrap a loved one with quilted love.  I hope you are able to finish up all your lingering projects as well!
 
***Christmas Addendum:  She loves it!  Yeah!!!

Merry Christmas!

December 21st, 2015
xmas
Merry Christmas and happy holidays to you, wherever you are and whatever holiday you celebrate!  Did you know that Craftsy is having a huge sale with up to 50% off many classes?  They sure are, and the sale runs from now through Saturday December 26th.
Quilting xmas sale
  Click here for a link to the sale classes!
 
audition4

A Christmas Table Runner

December 15th, 2015
Xmas-TR1
Gosh, it has been forever since I posted anything!  Sorry about that…I have been in a very lazy kind of unfocused state for several weeks and the longer I went without posting, the more it loomed out there as a monumental undertaking!  Anyway, this is a Christmas table runner/door runner that I recently made for a long-time friend.  The applique shapes are ginkgo leaves but it’s hard to tell that because the stems have been replaced by an embroidered design.  The blocks are all made via machine embroidery applique.  They are an amended version of this 12 1/2 inch square ginkgo block:
 
Xmas-TR1.5
I know what you’re thinking…”Whoa!!!  That block is like overwhelming in these colors!!”  (At least that’s what I was thinking once I made it!)  Anyway, that block was the “base design,” and to make the Christmas table runner, I just eliminated the center applique shapes.  Since I’ve started playing with rulers, I am pretty much looking for as many “blank space” areas as I can find to do ruler work.  Here is a shot of the same block with no center applique design:
 
Xmas-TR-2.1
Note that there are 2 pairs of ginkgos and each pair resides on opposite sides of the block.  One pair of ginkgos is embroidered with swirls:
 
Xmas-TR-3
…and the opposite pair is embroidered with small plumes:
 
Xmas-TR4
(The red ginkgo leaves are embroidered the same way, just in different thread colors.)  Once the table runner was pieced, I did my SID quilting, then outlined all the applique shapes and embroidered designs with invisible thread.  I then switched to a silver polyester thread and began laying down some ruler work.  I started in the center of each block:
 
Xmas-TR6
I used one of my Quilters Groove arc rulers to create those 4 giant petals.  (The way I choose which arc ruler to use is I lay a few of them out by my marked starting and stopping points and determine which arc will give me the widest petal without carrying my stitching line across an applique shape.)  Anyway, once the giant petals are stitched, I used the same arc ruler to create smaller petals inside.  This is quite easy because all you do is create another stopping point somewhere inside the original petal:
 
Xmas-TR7
Once I have a design like that stitched, I gaze at it and ask myself if it might be helped by adding in any kind of freehand work.  in this case, I added 4 small plumes to fill the space between the center of the block and the tips of the embroidered designs:
 
Xmas-TR8
Between the quilting and the applique and the embroidery, there’s enough “action” here for the eye to process, so I decided not to add any background quilting.  Sometimes you have to just force yourself to walk away, even though you really love FMQing and want to quilt the crap out anything that finds its way to your machine bed!  In this case, I’m glad I forced myself to walk away because any more quilting would have overwhelmed these blocks and destroyed the delicacy of the design.
 
Fortunately for me, there was still un-quilted territory OUTSIDE those blocks!  I decided to stitch symmetric short arcs that curved inward inside the green “divider strips.”  By using a curved arc, it allowed me to create a nice secondary design that frames the applique blocks.  My photos from this part aren’t very good, but these should give you an idea of what the framing looked like before I did any “fill in” work:
 
 Xmas-TR-8.5
…a slightly different view:
 
Xmas-TR-9
…and here’s a shot of the backside:
 
Xmas-TR10
I added in small featherettes inside the “triangle” sections and threw in a chain of pearls inside the innermost channels.  I don’t have many shots of the finished product but here’s what I have:
 
XmasTR2
and:
 
Xmas-TR1
Hope my friend likes it!  Whatever you celebrate during this time of year, I hope you are spending it with family and friends and have some time to appreciate the sights, sounds, and scents of the season!