November 29th, 2016
You can’t be a quilter in 2016 and NOT know who the fabulous Leah Day is! The Free Motion Quilting Project is the brainchild that sprang from her creative mind and the Free Motion Quilting Project has taught thousands of quilters all over the world how to free motion quilt. Leah is a an incredible teacher who has worked tirelessly to publish free instructional YouTube quilting videos and countless tutorials on her blog. I can’t tell you how much time/energy/focus and just plain hard work it takes to put together this kind of info in an easy to understand and concise fashion, yet Leah has done it all for many years. Imagine my surprise when Leah contacted me about doing a Podcast with her! Of course, I jumped at the chance and it will go live on her site Wednesday, November 30. You can find it by clicking here. We talk about machine embroidery applique and a bit about free motion quilting and I promise it will be fun and educational. You can listen to her podcast or read transcripts of any of her podcasts. (See what I mean when I say she makes learning easy and accessible?!) If you haven’t listened to any of her podcasts yet, I can personally recommend her podcast with her husband, Josh, that detailed the “behind the scenes” aspect of their family business. I listened to it during a layover at the airport last week and it was fascinating. You can find that podcast by clicking here. Join us for a quilty-gabfest, won’t you?
Filed under
Site Updates.
November 23rd, 2016
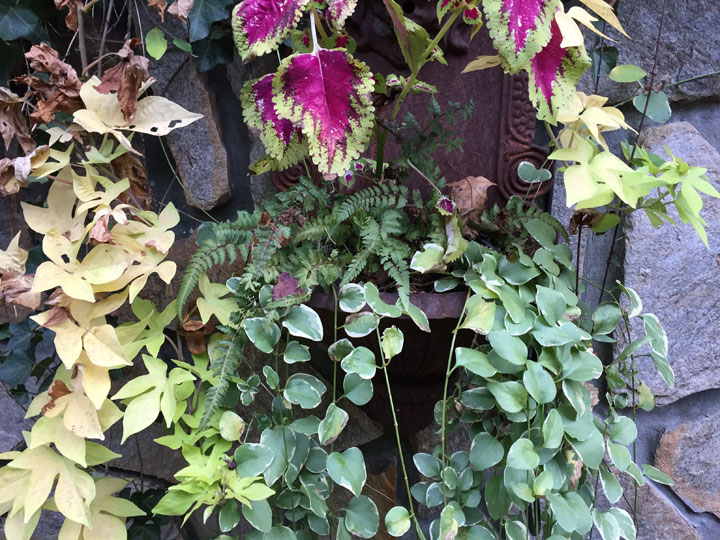
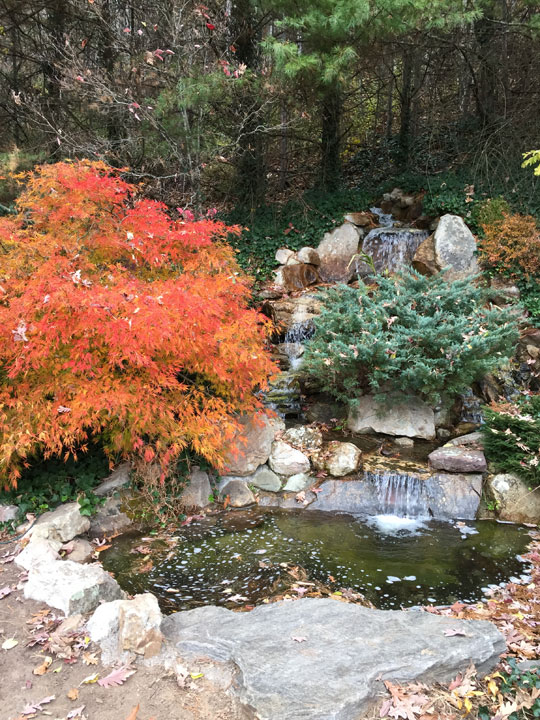 Fall’s splendor is vanishing quickly but we have a rich spot of color in our backyard for a couple more days. Thanks so much for being a reader of my blog and an internet friend. I hope you spend the Thanksgiving holiday among friends and family and still find a few splashes of fall color along your way over these next few days. I so appreciate that you’ve found your way here to my little corner of the world!
Filed under
Site Updates.
November 17th, 2016
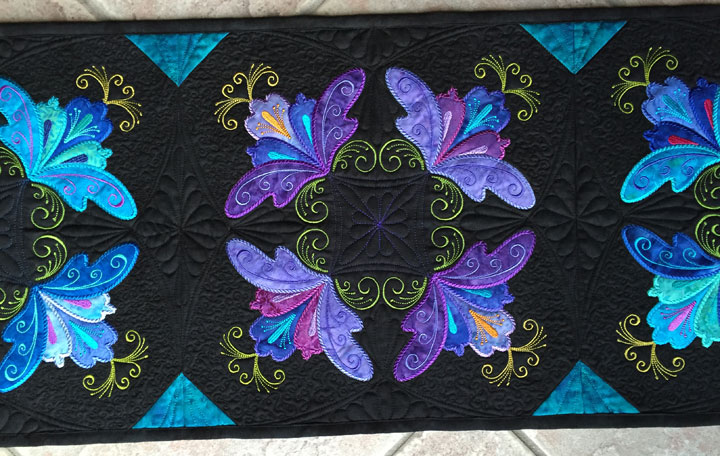
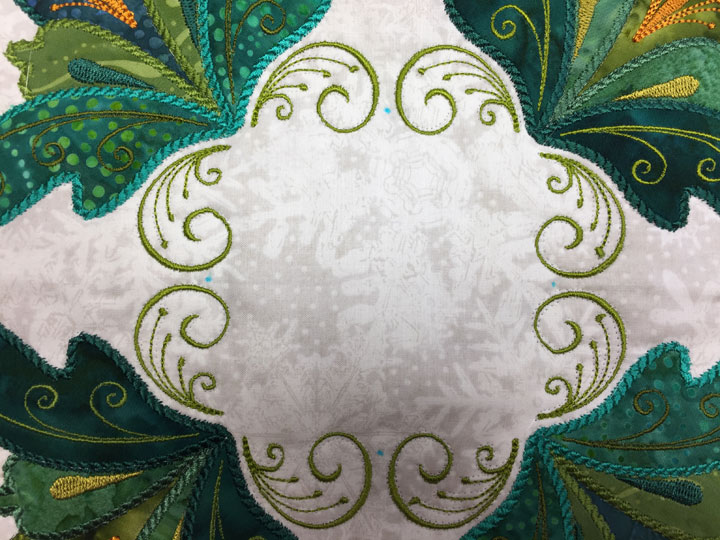
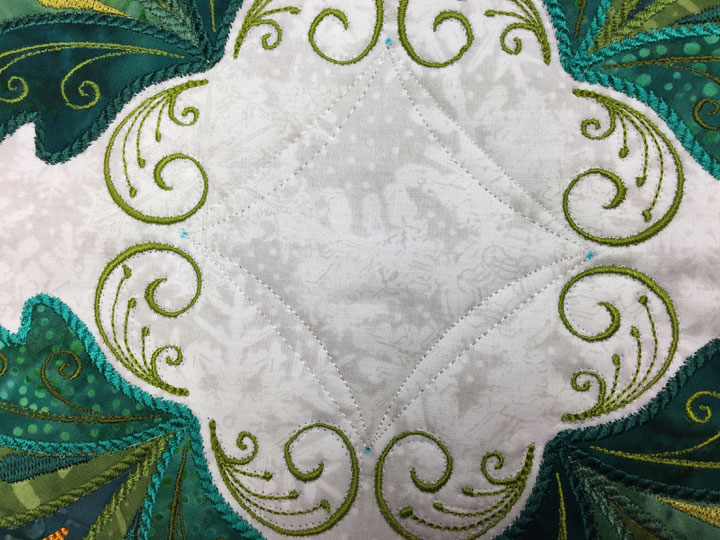
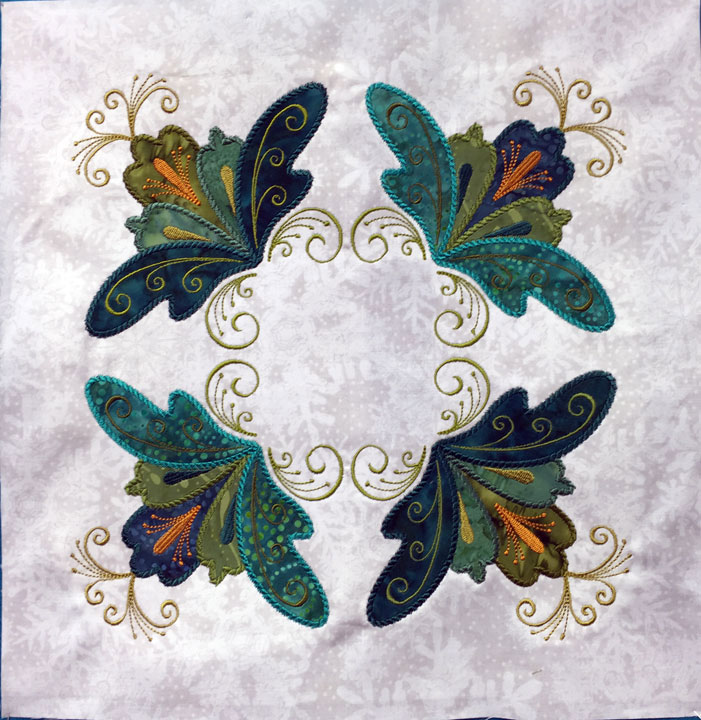
 Because almost every quilt I’ve made in the last few years has been a MEA quilt, my challenge in designing ruler work quilted designs always breaks down to creating designs to custom fit the spaces between applique shapes. This is very easy to do if you have a quilt top applique design that is symmetric, as you simply chose landmarks on the applique design to “play off.” This will always ensure a symmetric ruler work design since these same landmarks are used repetitiously and symmetrically in this type of applique designwork. The shot above is an example of a ruler work design that custom fills that oddly shaped space formed by pairs of swirls coming together. There are always multiple ways to fill this space, and if we look at a shot of an earlier wall hanging using this same applique design, you’ll see that this same space was filled differently:
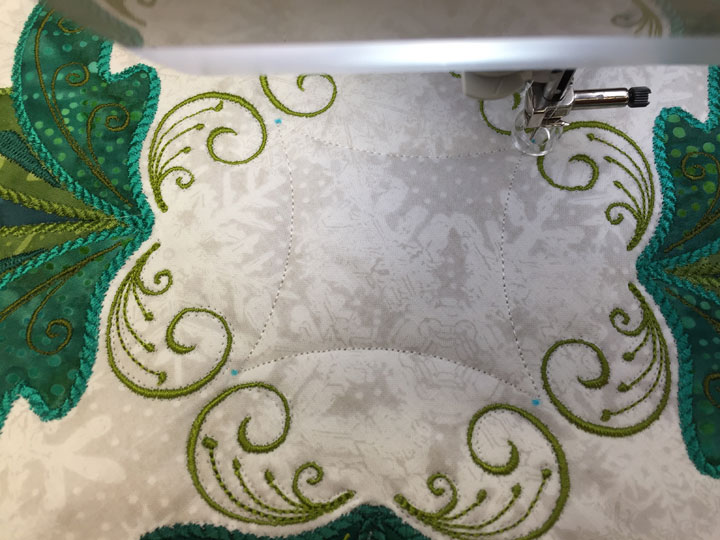
 In the black wall hanging, I used the base of each flower as my starting/ending point for arc ruler work, but in the Christmas wall hanging, I’ve used the space between swirls as my starting/ending points for arc ruler work. They each yield a different center space to fill with a featherette, and they each yield different “outer spaces.” The Christmas version left me with enough room to add 4 additional featherettes. Let me show you how easy this is to do from the beginning. This next shot zooms in on the space we need to fill. Notice that there is a tiny blue dot between each pair of swirls. These are temporary marks that denote the starting and ending points for my ruler work:
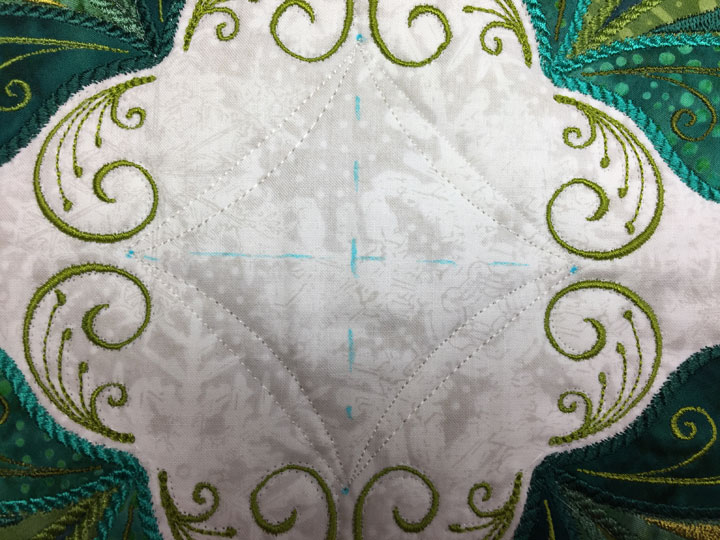
 I used an oval ruler to create my first round of swags. Why’d I use an oval ruler instead of an arc ruler? Good question! An oval ruler will give me more plunge, and I needed to add more depth/plunge than an arc ruler would give me. When you use an oval ruler, you need to take care to center it each time you place it or the plunge will be off center:
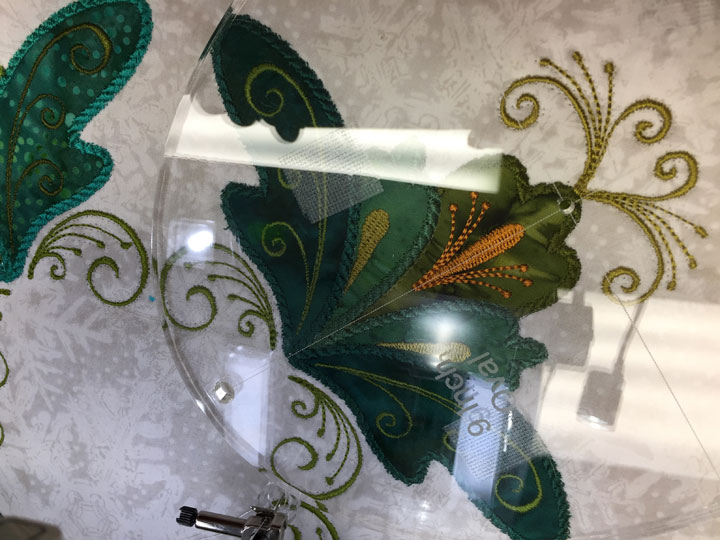 (Can you see that I was trying to line up the center line of the oval with the center of that flower?) Here’s what the center design looked like once the first round was stitched:
 Remember that rule #1 in ruler work is you always want at least 1 channel, so I took a very shallow arc ruler and used it to create a tapered channel:
 Adding a channel always makes the design more interesting. Next, I made some temporary marks to divide up the interior into quadrants that could guide my freehand stitching of 2 featherettes:
 …and once I’d filled the center with 2 featherettes, I went back and filled the blank space below each pair of swirls with another featherette:
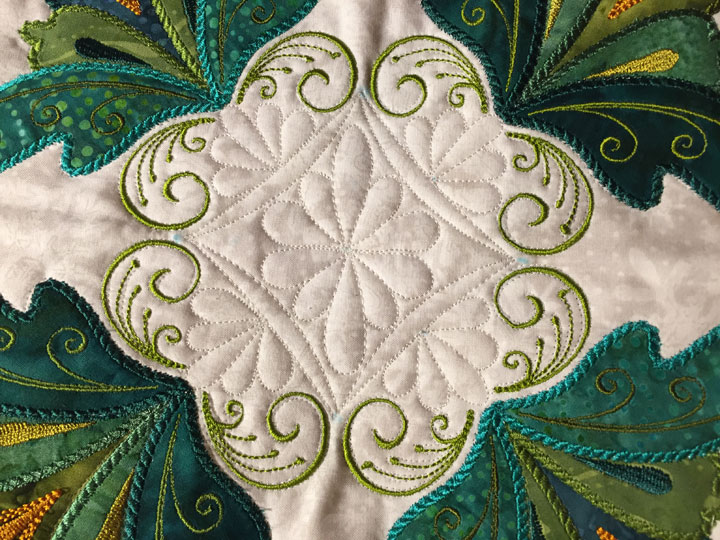 When you see a complex-appearing design like this, always try to break it down into component parts and then you’ll see how easy it is to construct symmetric designs like this. Here’s wishing you hours of fun playing with rulers!
Filed under
Free Motion Quilting, Machine Embroidered Applique, ruler work on a HDSM.
November 14th, 2016
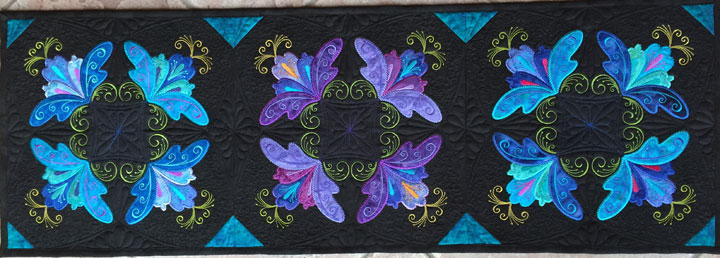
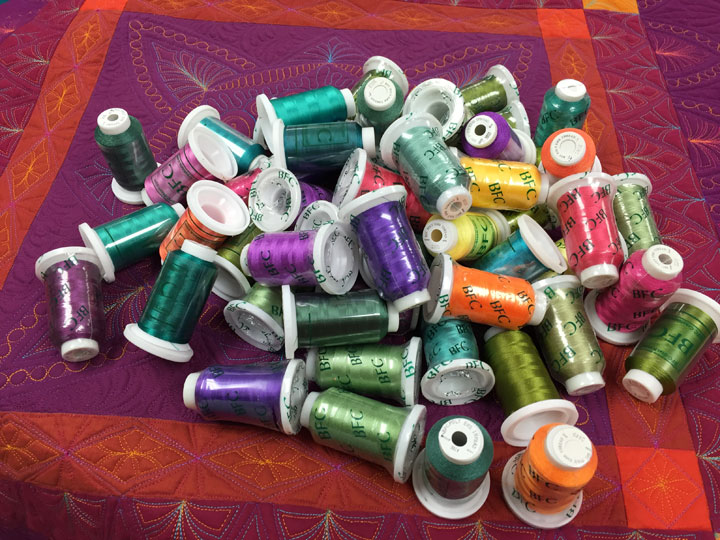 I caved and indulged myself in the thread sale at BFC stash. I don’t need any more thread but these spools were an incredible deal and I’ve been happy with their trilobal polyester thread for both quilting and embroidery. I’ve also been running through thread as I’ve had my hands in all kinds of quilty projects over the last few days. I started making a Christmas-y version of the serpentine floral table runner I designed recently:
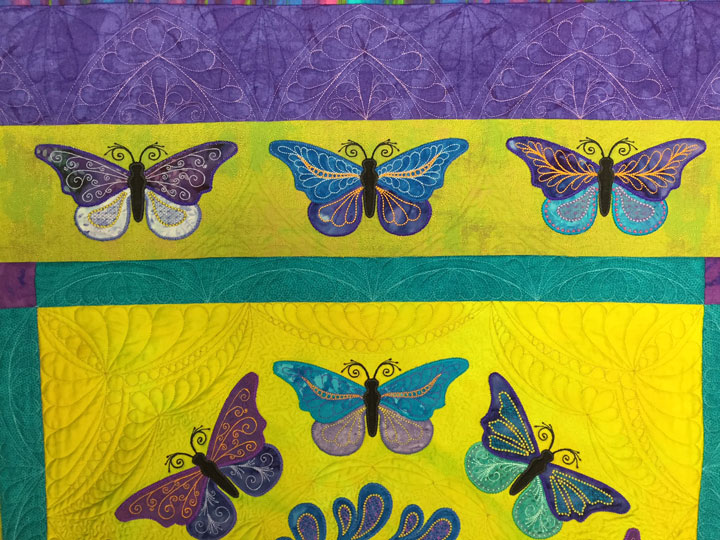
 I also went back in and added small featherettes between my border motifs on my Kissed by a Butterfly Quilt. I stitched these in a different thread color than the border design, one that is closer to the background fabric color so it’s not as noticeable:
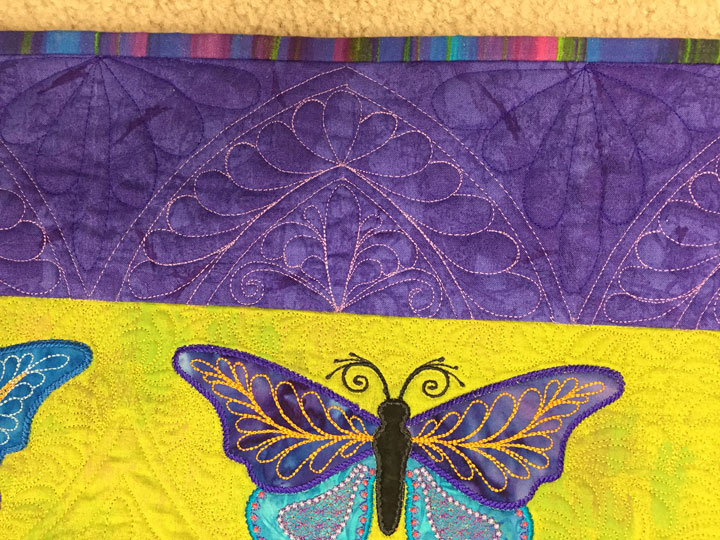 I did this because a judge commented that the un-quilted areas looked “too blank.” Here’s the before shot:
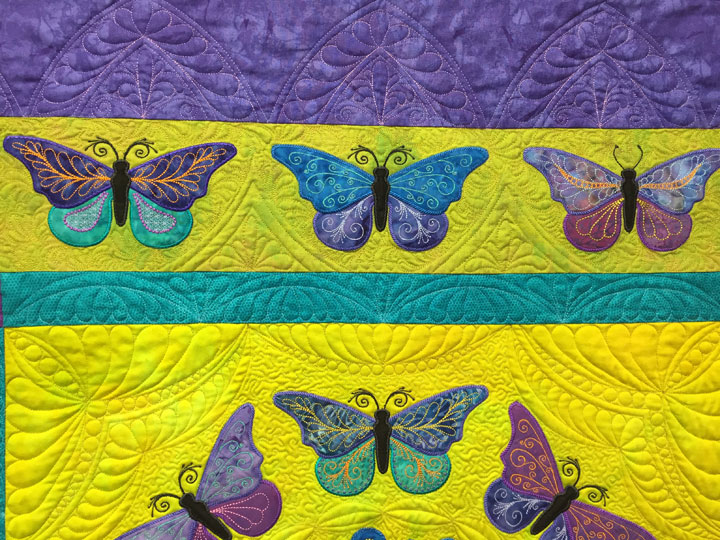 I’d honestly thought about doing this when I first made the quilt, but then decided it didn’t need it. Have to say that I like it better now. Here’s the after shot:
 I also started a Christmas version of my recent black quilted tablerunner. Here’s the center green block:
 …and here’s what one of the red blocks looks like:
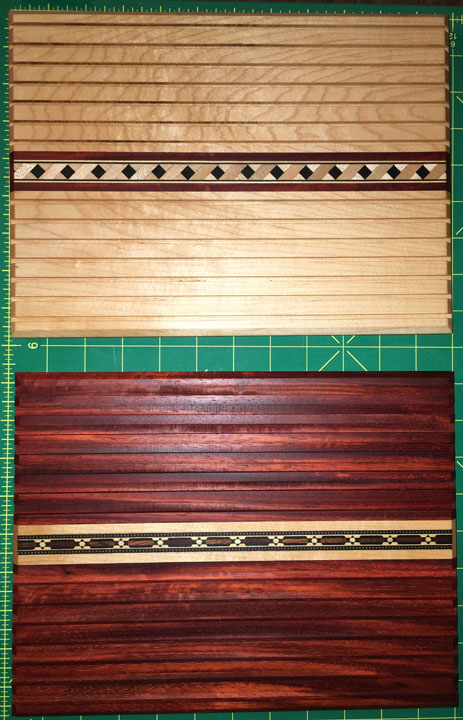
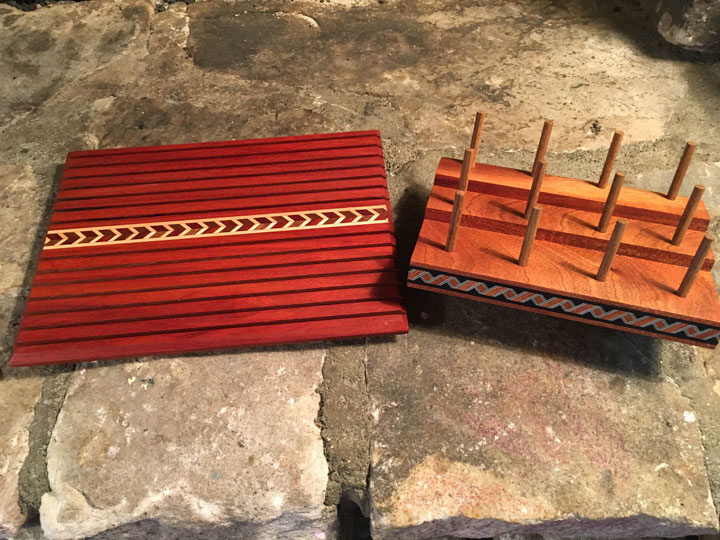
 Ern has been busy making all kinds of ruler holders for quilters:
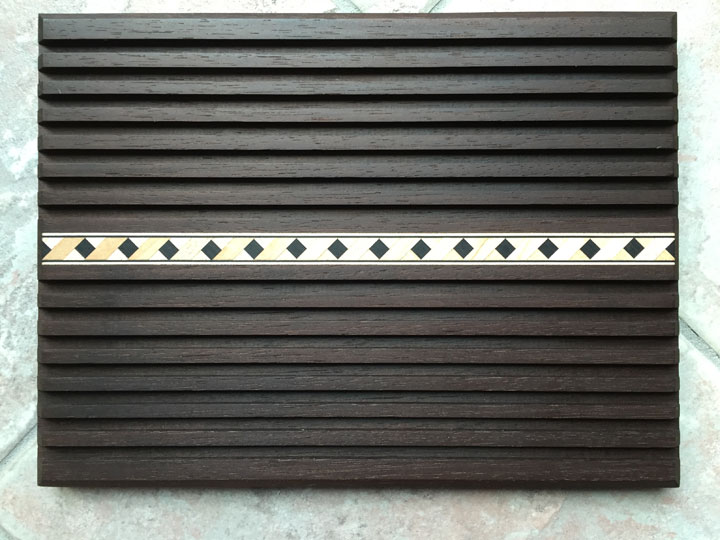 He makes them in different types of wood and different inlay designs:
 He also makes gorgeous thread racks. I have a different thread rack next to each of my embroidery machines and use them all the time:
 He even makes really beautiful ice cream scoops like these:
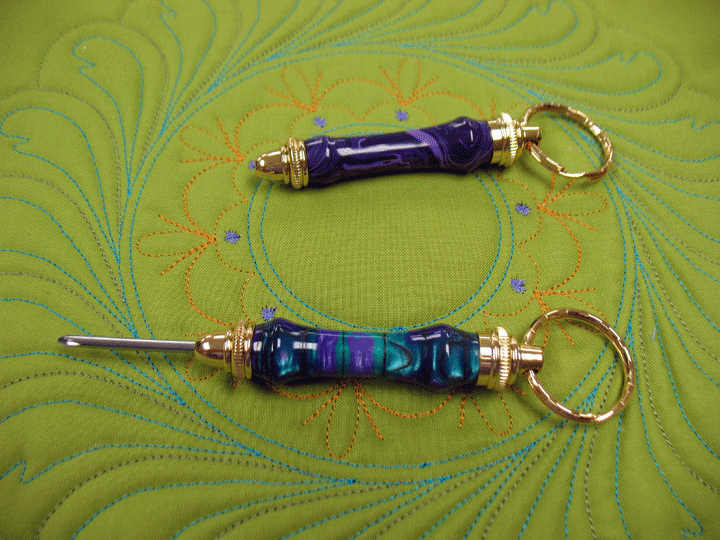
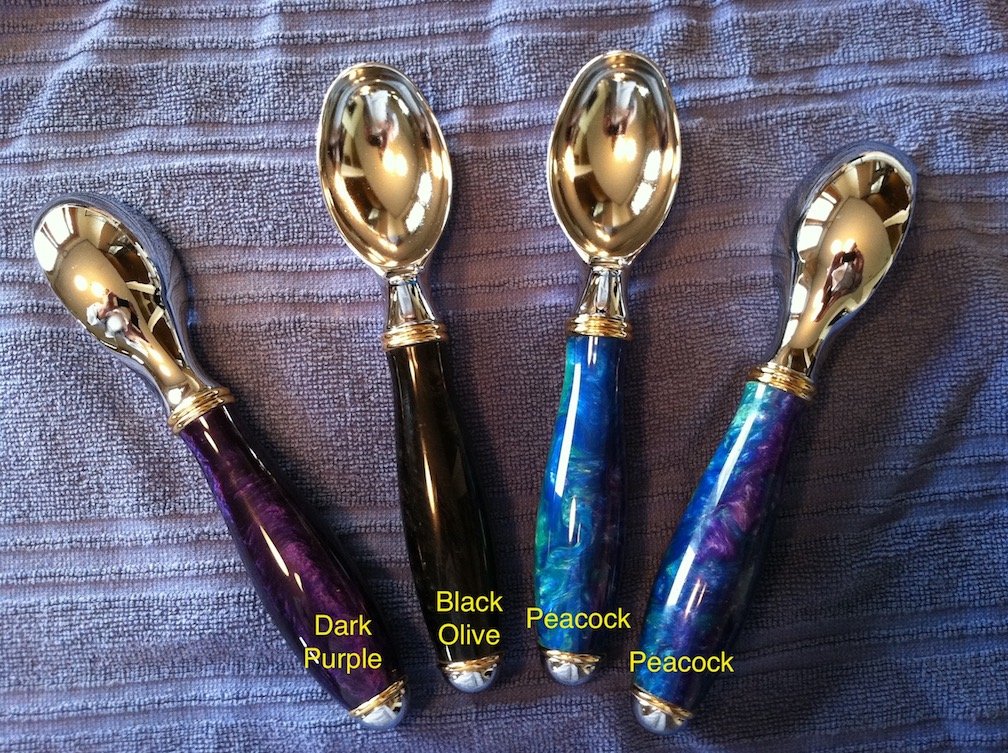 If you’ve been thinking about one of these as a Christmas gift, now is the time to place your order as he makes these to your specifications. You can find them in our online store by clicking here for ruler holders and here for thread racks. He’s also been making lots of seam rippers, stilettos, and keychain screwdriver/stilettos:
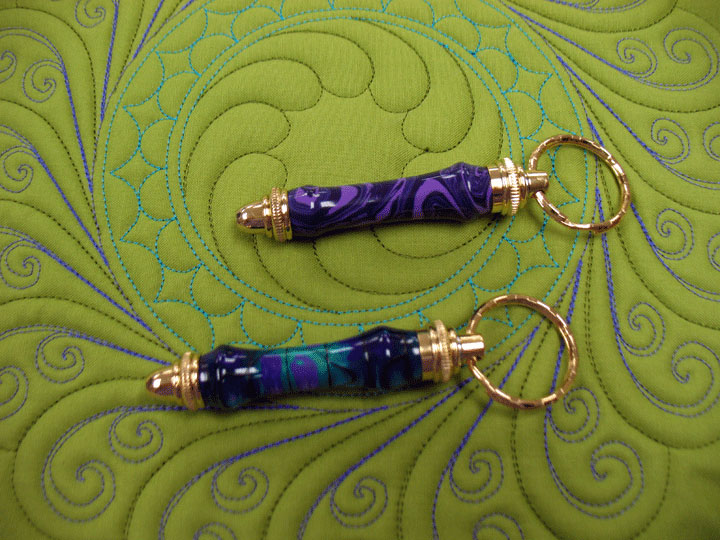 The shot above shows a couple of keychain screwdrive/stilettos in their “resting state.” If you unscrew the end, you see that they hold 3 different screwdriver tips and 1 stiletto tip:
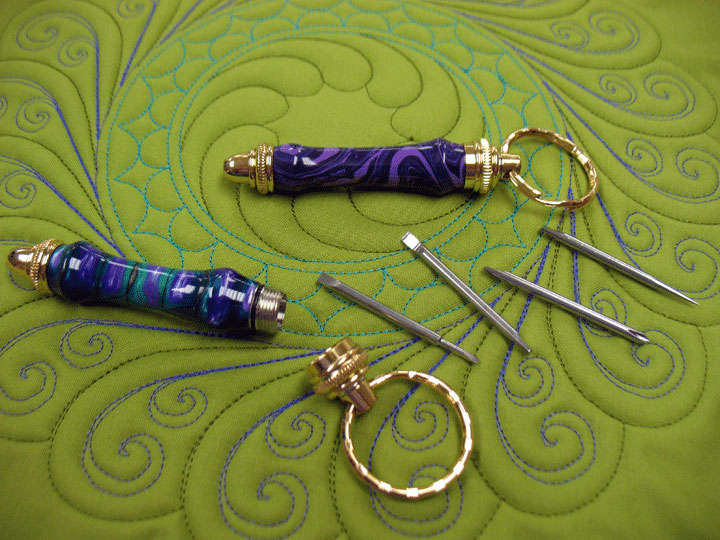 Once you choose a tip, you slip it into the end, and you’re ready to use this beautiful tool! I use my screwdriver tips all the time to put my ruler foot onto my sewing machine:
 Ern can make these up in all kinds of colors to match your taste. If you want to have them ready for the holiday, now’s the time to order and you can find all of Ernie’s handmade gifts in our online store by clicking here.
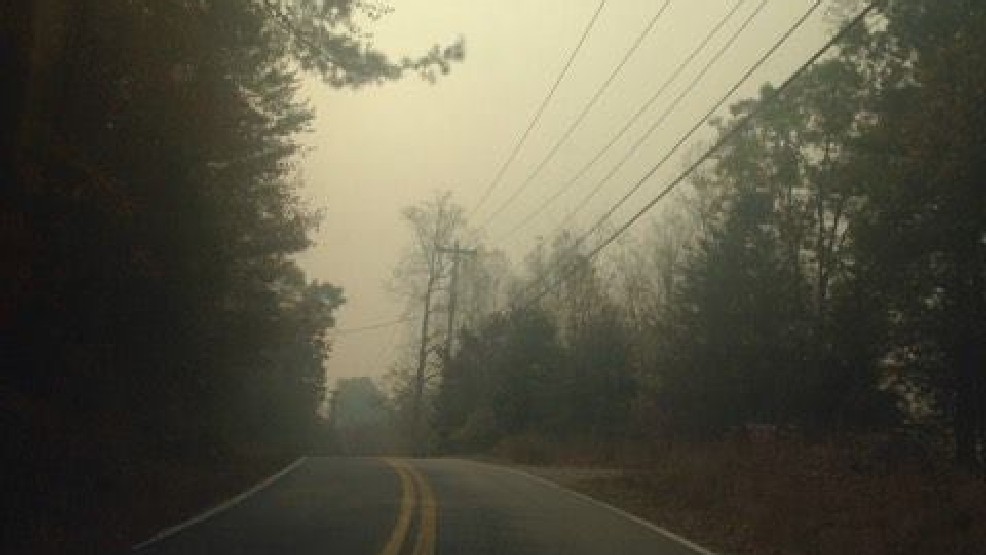
 In sad news, our beloved western NC is literally on fire because of the extreme drought. The air here is very hazy and smoke-filled and we haven’t been able to spend anytime outdoors for several days because the air quality is so poor that it’s dangerous. Say a prayer for these wildfires to come under control soon…
Filed under
Free Motion Quilting, Machine Embroidered Applique, Store Updates.