Dec
15
12
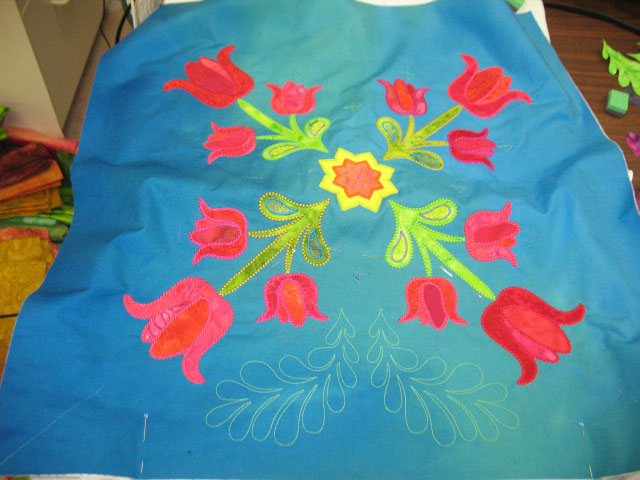
When you are working with machine embroidered applique using precut/prefused applique shapes, you really have to use a mini iron to fuse the shapes inside placement outlines. If you’re dealing with intricate shapes, you need a mini-iron that can deal with delicate appendages because there is simply no room for error in getting those applique shapes inside the placement outlines. Here’s an example of some placement outlines that need to be filled accurately:
Years ago, I bought a Clover Mini Iron (I can’t recall what I was going to use it for at the time), and here’s a shot of what my first mini iron looked like:
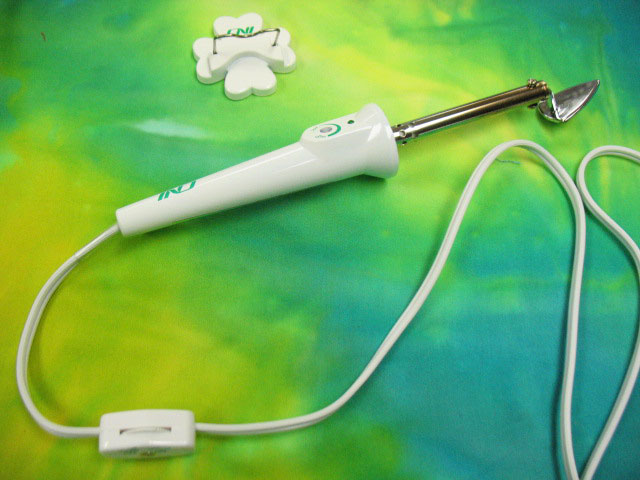
This version was not a very good mini iron. First, the little dial on the handle where you chose which level of heat is desired simply fell off the second time I used the iron…not a good sign! Second, the little iron rest (shown above the iron in this photo) is not only worthless, but it’s dangerous. I say this because it’s so lightweight that the metal part of the rest easily changes its position and the iron can fall out of it very easily. The long metal shaft gets very, very hot and it’s easy to burn one’s self, and lastly, the on/off switch that is on the cord itself has some wiring issues. I know that because over the course of a couple of years, I owned 2 of this version of the Clover mini iron and both of them repeatedly gave me small shocks as I was holding the iron. The problem, however, is that the concept of the iron and what it’s able to do were very good and also necessary for a number of quilt-related tasks, so I couldn’t just not use the mini iron. This led me to replace my original mini irons with a somewhat updated version, shown below:
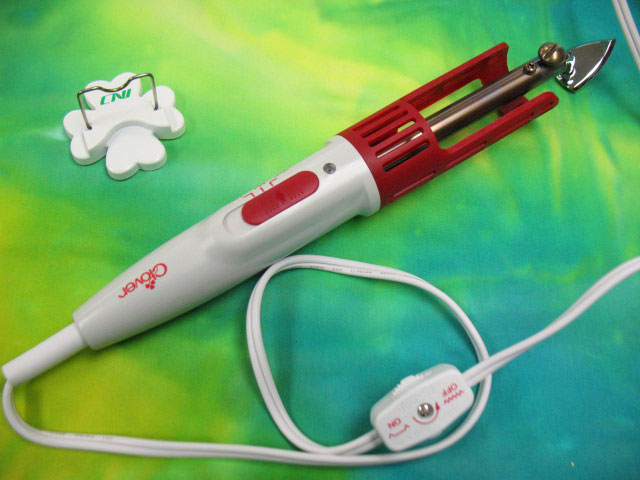
This one had an updated switch on the handle to choose the desired heat setting (great) as well as a protective shield around the shaft to minimize the risk of getting burned. It still has a poorly designed rest and I don’t trust the on/off switch on the cord to last indefinitely, although I haven’t felt any shocks using it. But, I’ve barely used this version because the protective cover on the shaft obstructs my view so I can’t see placement outlines into which I need to fuse an applique shape. Here’s what I mean:
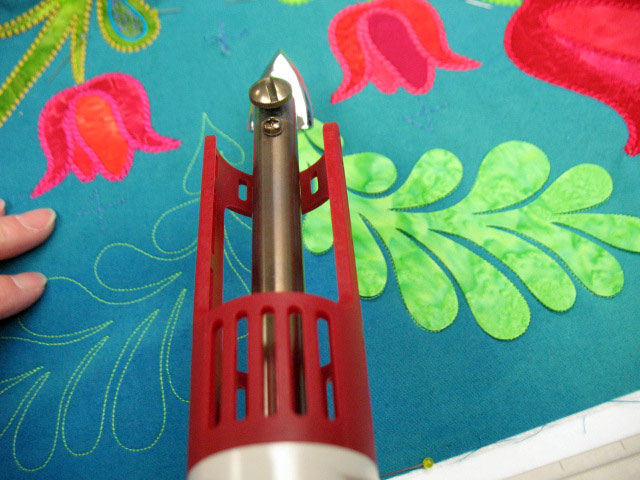
This is my view as I’m trying to fuse inside placement outlines. So, although that shield really is a safety improvement, it’s created a an obstacle in my visual field, so I haven’t used this iron in ages and it’s going to a friend who can use it for something else. Fortunately, I then found another version of the Clover mini iron that I really love:

This version has the on/off switch and the level of heat all built into the handle-excellent! The protective rim around the shaft is gone so I can see again! (I have simply learned never to touch that shaft, I guess much in the same way that a child learns to never touch a burner on the stove.) I can easily view details of the placement outline and the applique edges as below:
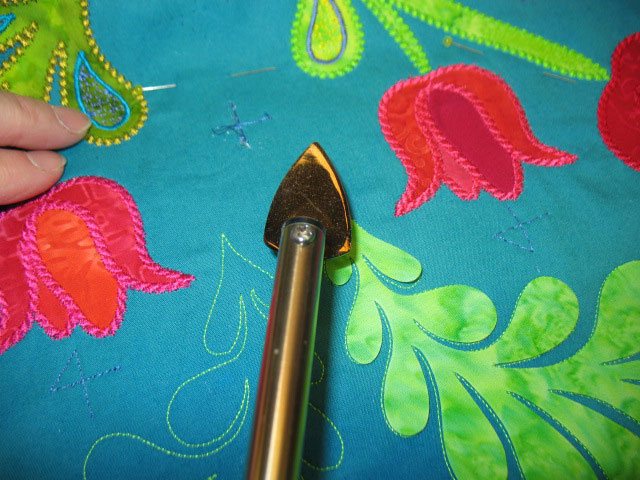
All of these irons have the same problem with the rest, so I’ve found you just need to devise your own work-around. Mine is an easy rest to make and it allows me to work quickly and not have to put a lot of time/thought/effort into placing my iron into the rest or taking it out. You can see my rest at the end of my ironing station that sits next to the embroidery machine. (My ironing station is a piece of scrap plywood covered with1 layer of warm and natural batting covered with 1 layer of cotton sateen; all staple-gunned to the backside.)
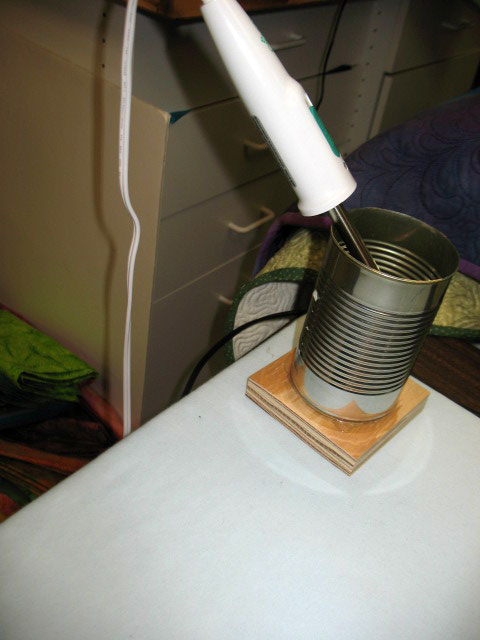
You can see that my iron rest is very low-tech, but it works great and can be made from recycled objects. The square base is cut from scrap plywood. It needs to be square as this makes it very hard to topple the rest (as compared to having a round bottom.) The can is an old olive can and it’s screwed to the wood base from inside the can (I originally hot glued them together but that only held up for a few months), and I filled about the lower 1/3 of the can with pea gravel from outside. This gives the rest some weight and also allows the very hit tip to sit in something that won’t be problematic if it heats up. ( You could also use something like sand, though.) Bottom line is I LOVE my mini-iron setup and have been using this version for a year now and couldn’t be happier. If you bought one of the earlier versions, know that there’s a better version out there and it’s worth giving it a try. And here’s a shot of that 22 inch block all embroidered, thanks to my Clover Mini Iron:

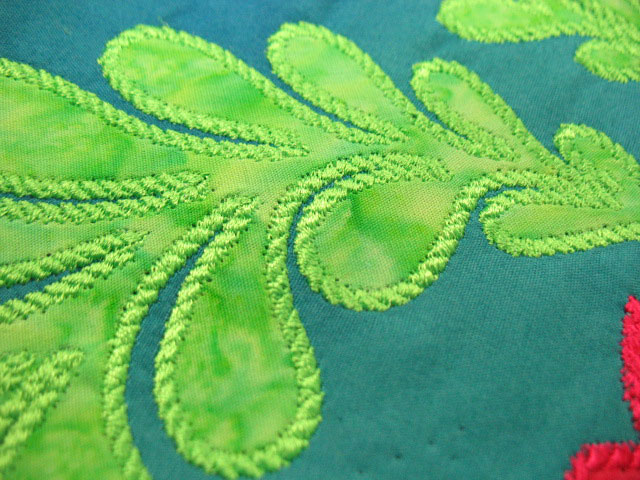
This block may be familar to you from last year, but I needed to test it out again because I wanted to switch out the edge stitching on the feathers:
order furosemide
Filed under Sizzix.


You are so right about learning not to touch that part of the handle. I just upgraded from that old one to the new one. I never have gotten shocked from it, but I totally ruined the ironing head by using Liquid Thread without release paper, live and learn. I abandoned the ineffectual holder from the beginning and used a very large ceramic mug. It has fallen over several times, and I am afraid I’ll break it. Thank you for showing your ‘high tech’ version. I am going to scrounge in the garage to see if we have a square piece of plywood so I can make my own.
I, too, love my mini iron and have learned where to touch and where not to!!!!! I don’t do any adjusting with the switch/dial on the cord but merely plug in the iron when I need it and unplug it when I am finished…end of story. For the iron “rest”, I went to a kitchen store and bought a silicone trivet and that works great. I have no problem with the iron rolling off or tipping over. A great sewing ‘notion’!!!!
I am not sure what one I got, but I used it once and didn’t like having to press with it, prefer my big iron. But with designs like yours, I can see the advantage of having a small one.
Debbie
There’s a new model available? WhooPee! I might give it another try. The two that I have now are about worthless. I frequently do very small and detailed applique so a small tip [when it works] is great.
Thank you for the head’s-up on the mini iron.
I have the same old mini iron as your original. Have been wanting to try the Hobbico mini iron(http://www.checkerdist.com/products/HCAR8000) as I’ve heard good things about it.
SewCalGal
http://www.sewcalgal.blogspot.com
Very timely as I have been looking at these mini irons myself. Thanks for the info – I had read reviews and had my reservations and returned the item to the shelf – even though I had a 50% off coupon! I will look for the new improved version next time.
I have problems with it not getting hot enough. I have the oldest version. I thought the iron itself just didn’t get very hot, but maybe it is just the one I got. Now that I know it works well for you, I will give the newer one a try. Thanks for the review. Connie