Nov 06 13
Welcome to SewCalGal's 2013 Fall Machine Embroidery Blog Hop!
Welcome to the Fall Machine Embroidery Blog Hop organized by Sew Cal Gal! I am excited to be part of this blog hop and will be blogging about an interesting embroidery project by Zandra Shaw. Zandra (isn’t that a beautiful name?) is the designer/owner of The Embroider Shoppe and you can find more of her lovely embroidery designs on her web site here. I chose this particular project because it creates a 3-dimensional flower, so I figured the design would be useful as I could use it in many different applications. Here is the photo of the flower from her web site:
Before I begin to tell you about this embroidery project, though, it’s time for some “True Confessions!”
Confession #1 – I know nothing about traditional embroidery…literally nothing! I do machine embroidery applique using my own design files but I’ve never done straight embroidery other than stitching out 2 designs that were factory-installed on my embroidery machine when I was learning how to operate the machine. So, I approached this as a true novice.
Confession #2 – I know nothing about editing designs on my embroidery machine. If I want to edit/revise a digital file, I’ve always pulled it into my digitizing software and made alterations there. I had never used any of my editing buttons before this project! Again, I approached this as a novice. Now, on to this project…
The project came with 8 pages of clear instructions with numerous color photos interspersed in the text. That was really nice!
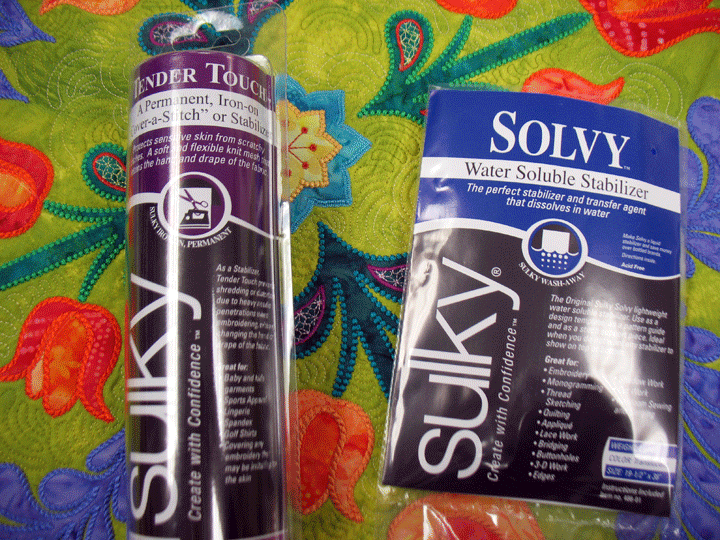
This project creates a 3-dimensional flower that has no fabric in it, so all of the color you see in the earlier photo above is from densely stitched thread and stabilizer. This project called for 2 different types of stabilizer, Sulky Fabri-Solvy and Sulky Soft ‘n Sheer Extra:
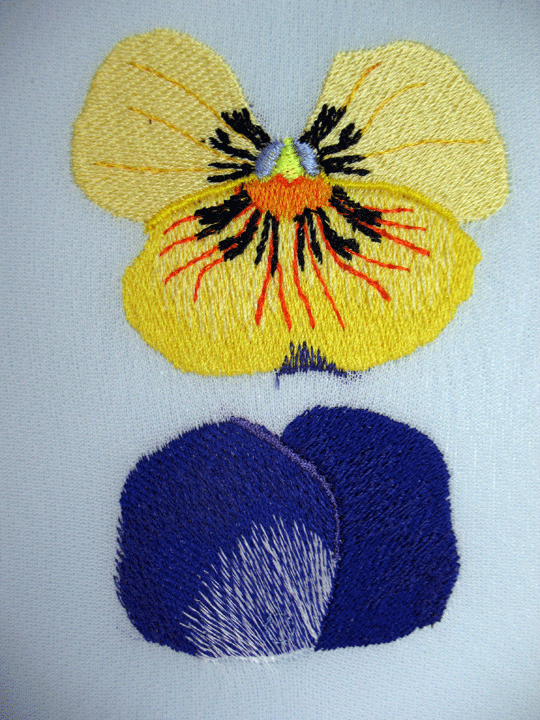
The first was Sulky Solvy, which is a water dissolvable stabilizer. This type of stabilizer will provide stabilization of the project while it’s in the hoop, but it will literally disappear after the project is completed if you expose it to water. (Water dissolvable stabilizers are handy things to have around the house, even if you don’t do machine embroidery.) I went to a couple stores in search of the 2nd stabilizer and couldn’t find it anywhere, so I substituted Sulky Tender Touch. This is an ultra-fine mesh stabilizer that will be permanently in the project. It has the feel and drape of a very lightweight fabric, so know that this is different than paper-based stabilizers. I layed 1 layer of Tender Touch on top of 1 layer of Sulky Solvy and then hooped them both. I first stitched out the 2 portions of the pansy flower, and this is what they looked like once stitched onto the stabilizer:
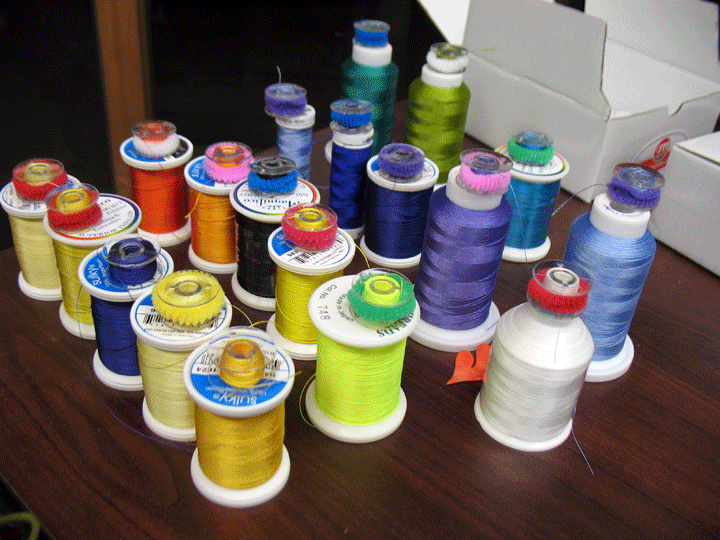
I should tell you that because this pansy is viewable from either side, I needed to use the same thread in each bobbin as I used in the top needle. Yep, every time I changed my top thread color, I needed to wind a new bobbin and change my bobbin as well. Here are some of the threads/bobbins I used:
You may be wondering why I am telling you this, but there is a very good reason. When you embark on an embroidery project, figure out how many thread changes there will be ahead of time, as each thread change takes time. (Special note to my friend, Kelly Jackson of IHaveANotion…you can get up off the floor and stop laughing now!)
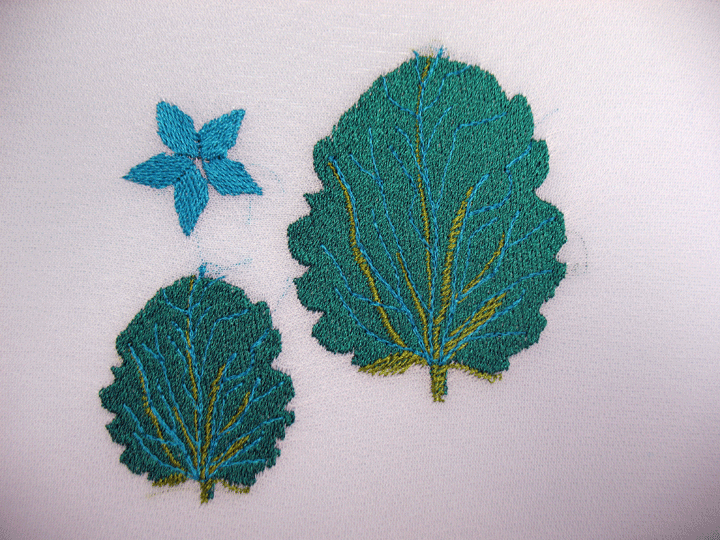
Back to the project, here is what the 2 leaves and calyx looked like once stitched out:
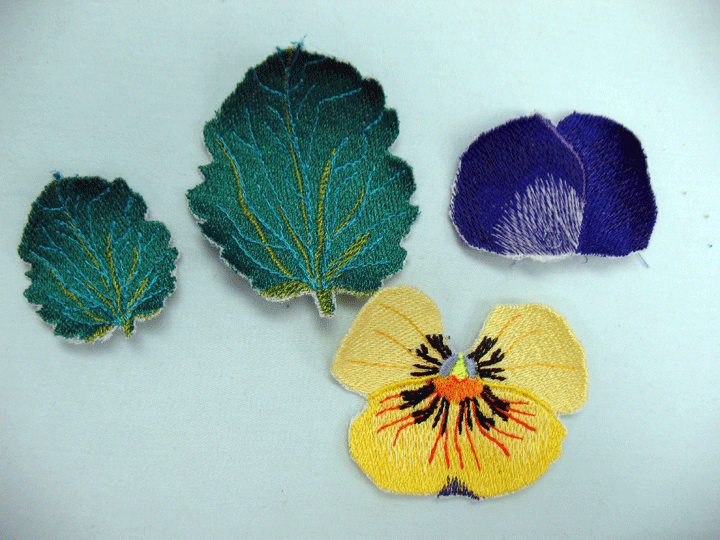
Once I unhooped the project, the next step was to carefully cut the individual pieces out. This part is a little nerve-racking, as you want to cut very close to the edge so there is minimal stabilizer remaining, but you don’t dare cut into the pieces themselves or the threads will start coming on-done. Here is what the pieces looked like at this point:
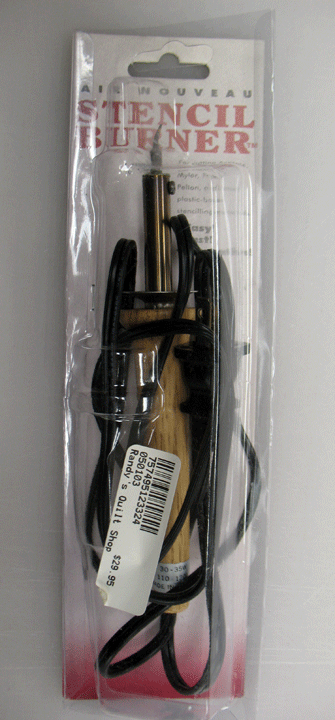
The next step was to get rid of any remaining stabilizer along the edges. The instructions called for a wood burning tool or general craft burning tool, but I couldn’t find mine so it was easily accomplished using my old stencil burner:
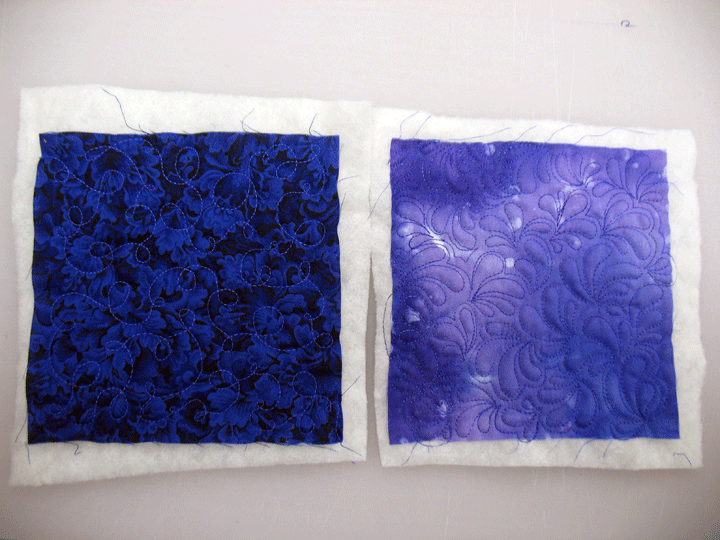
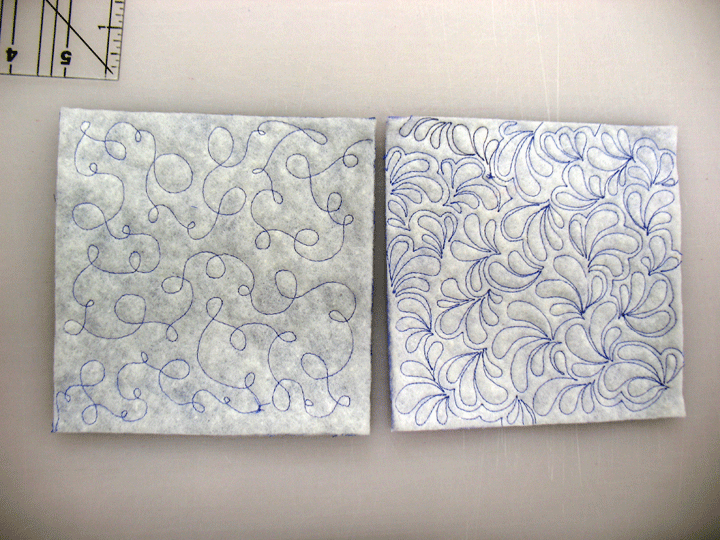
The project came with instructions to make a 3-dimensional flower on a stem, but I wanted to place my 3-D flower on a pincushion, so my next step was to quilt a top and bottom for my pincushion. I try to use different fabrics on the top and bottom as well as different quilting designs:
You don’t need any backing fabric, just a layer of batting, and you can see this on these backside shots after the batting has been trimmed away:
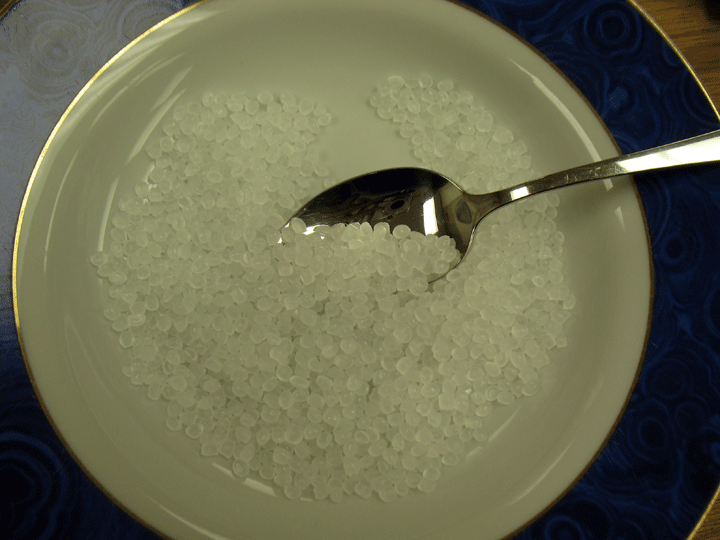
After stitching 3 of the 4 sides together and turning the pincushion inside out, I carefully attached the pansy parts to the front of the pincushion. I used beads as a way to “disguise” the stitching that attached the layers. Once attached, I filled the pincushion with polypellet beads. If you have never used these beads, they are a “must-have” in my sewing room. They are great for pincushions and beanbags for kids, and they add a nice little weight to the project. I always “top off” my pincushion by spooning the final beads in:
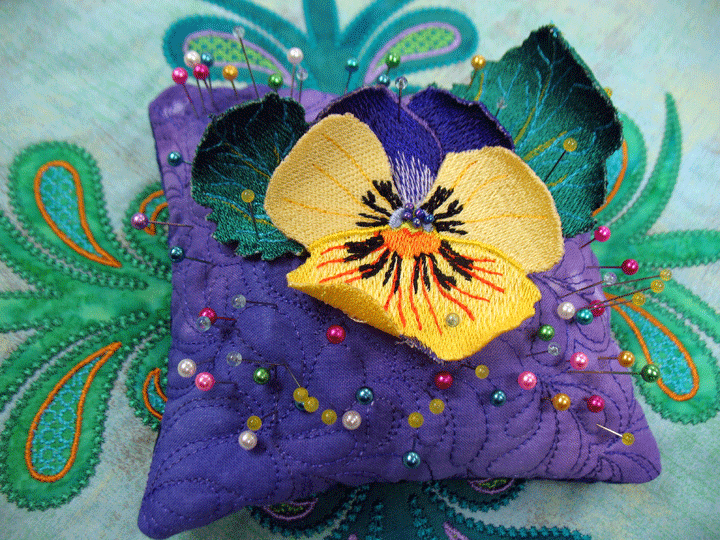
I whipstitched that 4th side shut, and I had my 3-D pansy pincushion:
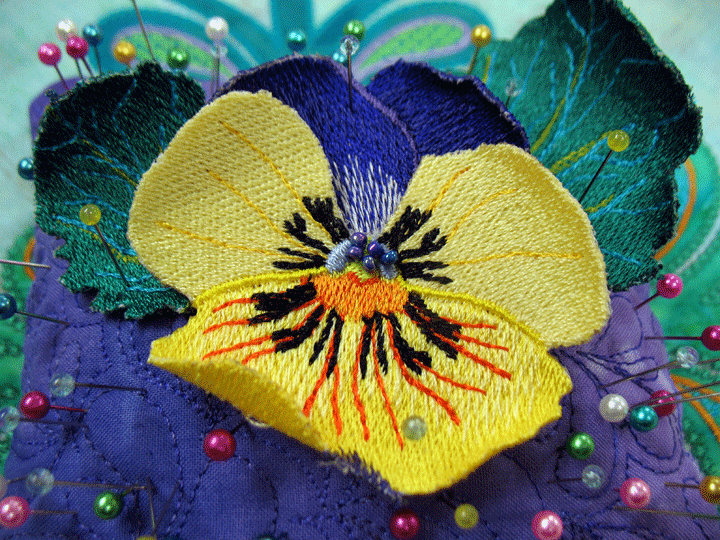
You can see how I used the beads in the attachment a little better in this shot:
This blog hop is also hosting a give away, and if you’d like to try one of Zandra’s embroidery designs for free, all you need to do is to place a comment on this blog post telling me what kind of things you’d like to learn about embroidery in the coming months. Any comment posted between now and 11:59 EST on 11/21/13 will be eligible for this giveaway! Please take the time to visit each and every blog participating in this blog hop, and you’ll increase your chances of winning each time you visit another blog and make a comment! here is the line-up of participating blogs:
Monday, Nov 4th
SewCalGal
Tuesday, November 5th
I Have A Notion
Wednesday, November 6th
Patsy Thompson Designs
Thursday, November 7th
Beaquilter
Friday, November 8th
Stormy Days
SewCalGal
I have been using this product for years. I have tried others but have not found anything that works better for me. Viagra professional? All the medications one can see in our product lists are generic.


What a great job you did, especially given you are new to machine embroidery and this is so different from what you’ve done in the past.
I do find it interesting that the recommended steps were to use a wood burning tool, but then this hop is all about learning new techniques. I was just assuming this would be stitched completely on a water soluable stabilizer, but maybe that doesn’t give enough body that creates the spectacular shapes that gives these designs such great visual 3D impact. Certainly is a unique design that I’ve not seen any other digitizer create. An what you created is absolutely spectacular. Great job.
SewCalGal
http://www.sewcalgal.blogspot.com
I loved your pansies – I have tried 3 dimensional embroidery but need to learn more about the best stabilisers to use to get such a neat result . I love the embroidery shoppe flowers .
What a great post. I liked that you said about editing and digitising. I usually put the designs in and keep my fingers crossed, hoping they will work. I have hand embroidered 3D flowers, but never by machine. Yours are beautiful!! Must have a go!
I have embroidered on organza and then burned away the extra with my soldering iron. Sometimes soldering irons are really cheap at discount stores. (mine was only a couple of dollars.)
I would love to learn how to properly place embroidery designs on clothing so that they come out straight. (I am thinking company logo on a polo shirt)
I want to learn 3d embroidery like the pansy you made- whenever I try to wind matching thread for FSL or for a flower like this, my machine goes crazy winding it, so I end up using regular white bobbin thread, which ruins the effect!
I’m very new to embroidery and I want to learn how to embroider on clothing for my granddaughters. Thanks for the steps you followed in your project.
Interesting steps involved to create this 3d flower. I have created other sew outs and can see how the second stabilizer would give items more structure. The pincushion is lovely, I would make and give it also as gifts. I’m enjoying this Fall blog hop!
I love blog hops!!!! I am learning so much in this one. I love the 3D flowers. They are beautiful. I’m going to have to try this. Thank you for sharing.
I love the 3-D flowers – what a great idea to make the pin cushion to showcase it. Very nice!
Love your 3d pansy pin cushion. This is fabulous. I love ITH proojects and I love EmbroiderShoppes designs.
I would love to know how to get things lined up with ME for continuous embroidery around the edge of a skirt or tablecloth.
Beautiful pincushion btw.
I love how you adapted this design by using beads in the center of the flower instead of creating a stem. Your method opens up all kinds of additional possibilities, and the finished flower is beautiful! I know what you mean about the matching bobbins coming as a shocker, too. I don’t even HAVE more than one or two spare bobbins for my machine, and it doesn’t take the standard ones, either, so the matching bobbins are an important consideration for anyone whose machine takes special expensive bobbins and who might not have enough of them to wind one in each thread color for these designs. But the results are SO worth it!
By the way, I only recently completed your border challenge from the 2012 FMQ Challenge and it was SUCH a great exercise. I enjoyed it and learned a lot, especially from your feather border video. THANK YOU SO MUCH! 🙂
I’d love to know more about how to hoop (and when not to), as well as which stabilizers to use. That flower is gorgeous!
I was on the floor laughing too….thanks for the good laugh!!! Changing threads and bobbins is a PITA for those of us who like to steam ahead and get’er done.
Love the pincushion. One question…what did you do with the rest of that fabric you did the free motion quilting on? If you tell me you tossed it, you better tell me what night is garbage night at your house!
Hugs,
Kelly
Patsy, you always do such gorgeous work but today was a different kind of project and that was sweet. The Pansy is wonderful; what a great idea to use it on a pincushion. The beads add a lot of beauty even if you used them as a disguise. 🙂 Thanks for all the tips on the stabilizer, etc. I did get a chuckle out of your picture of the many different thread spools and bobbins; wow!
Great dimensional pansy. I remember long ago I took a class for a dimensional flower…I think I still have it somewhere in my studio. Gotta find it. Never did anything with it…I have forgotten how it was done…..Just love the pincushion. Great blog. Thanks,
Great Job. Especially considering this was your first time. Love how it turned out, the quilting makes the design really stand out.
I would most definetly like to learn more of this technique. Your ultimate finish was lovely but seems complicated.
This blog hop is great! So glad to find your blog. I would like to learn what inexpensive software I can use to view my design files and also how to digitize. Thanks!
The 3d flowers are amazing. I have a lot to learn about stabilizers in general. The LQS is hosting an all day Floriani event tomorrow. That will be a step in the right direction for me!
I would like to learn yo do multiple hoopings.
I’m so glad to see someone do the 3-D flowers. They looked so pretty and your pincushion looks fabulous.
I think the different stabilizer uses are the most important thing to learn about in ME.
I’ve always wondered how the flowers went together. Thanks for the walk-through.
Love your pincusion – thanks for showing – great with the 3D embroidery 🙂 Love them
great job and very interesting, thanks
What a beautiful flower! Thanks for the ME blog hop! I’m a newbie and want to learn everything!
I would love to learn more about 3D embroidery. Thanks for your tutorial!
Oh wow, that looks “scary” 🙂 I only use white bobbin thread on my machine, so that would have been tricky… yours look awesome !!
I think that there are so many new Stabilizers coming out that it’s hard to keep up and be well informed.
Fabulous job I’d love to know how to do that 3D flower. Thanks for sharing your project.
You did a great job explaining what it takes for a newbie to get started in this addicting activity!! The pansy is a beautiful design. I would like a lesson using a stencil tool!!
Would like to know how to do everything, I’m new to machine embroidery and happy to have discovered this bog hop.
What a gorgeous flower, it reminds of the thread painting you did in one of your videos. It is great to see an expert demonstrating something that is out of their comfort zone! Thank you for an excellent tutorial.
PS I am a relative newbie to ME and I love learning how to use designs in practical applications such as gift items, totes, scarves etc.
Hi Patsy, I’m a real newbie to ME! I need and want to learn everything! I’ve wanted to do ME for quite a while now, and finally got a machine for it. Now, the learning curve.
Thank you for doing the giveaway.
I have been doing machine embroidery for a few years now. Made some beautiful quilt tops and a lot of gifts.
Hints and tips are always great to see.
Love the flower design. It is great and looks like it would whip up fast. Thanks so much for sharing. I am learning sew many new techniques for my embroidery machine. this is great
I have trouble w/ positioning on clothing so info on that would help me!
I need to learn more about the different kinds of stabilizer and threads to use for machine embroidery.
I would like to learn bobbin-work embroidery. Love the flower.
Is there a chart that tells you which stabilizers to use for which projects and what is required for various stitch counts. How do you know which needle is best for your embroidery project? BTW, I really love the Floriani stabilizers. The buildup on needles is almost nil when using the Floriani brand.