

Jan 08 16
Birds of Paradise Quilt-Part II
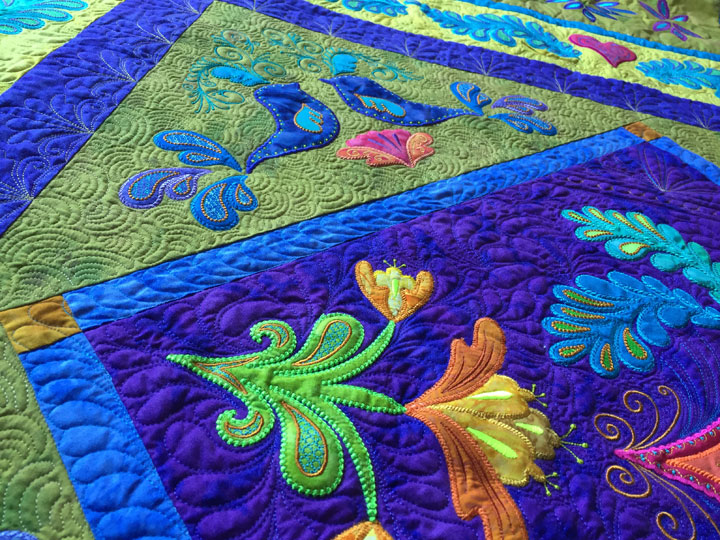 This is my second post about quilting this quilt and the focus will be on the next 2 sections. (These photos were taken in a different room with different lighting than my last post’s photos. The center block is a purple, not the blue that it looks like here.) The first section is this narrow medium blue border. It holds an elongated featherette that springs from the center:
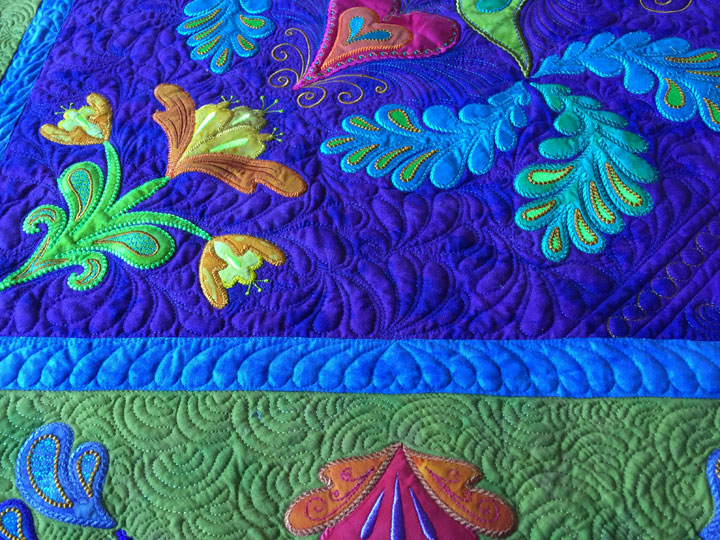 If you create this using the bump-back feather technique, you’ll end up with plumes that are fairly symmetric. This type of border is easy to do as long as you begin in the center with either a teardrop or heart shape. (The key is to start with a central shape that has a narrow top and wider bottom. This is because it’s easy to reflect plume after plume off a center shape with those features.) Another great feature of this border is that it has an easy way to “handle” the corners. As you can see in this next photo, you just draw a temporary miter line along the diagonal of the corner and this is where your last plumes from each side “kiss:”
(You can see that in the tiny gold square in the corner.)
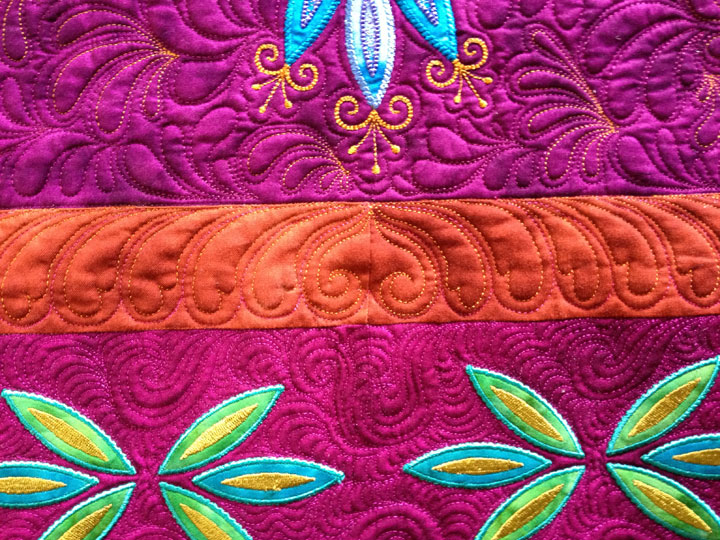
This narrow blue border is only about 1 1/4 in wide, so that means the plumes are too small to hyperquilt. But, if you have a little wider border, you can hyperquilt those plumes just like you would on other types of feathers. You can kind of see that in this next photo from the “My Thistle Garden” quilt. The baseline design was a featherette exactly like the one in the blue border above, but it was wide enough for hyperquilting of the plumes, and I stitched heart inlining inside each plume:
If you create this using the bump-back feather technique, you’ll end up with plumes that are fairly symmetric. This type of border is easy to do as long as you begin in the center with either a teardrop or heart shape. (The key is to start with a central shape that has a narrow top and wider bottom. This is because it’s easy to reflect plume after plume off a center shape with those features.) Another great feature of this border is that it has an easy way to “handle” the corners. As you can see in this next photo, you just draw a temporary miter line along the diagonal of the corner and this is where your last plumes from each side “kiss:”
(You can see that in the tiny gold square in the corner.)
This narrow blue border is only about 1 1/4 in wide, so that means the plumes are too small to hyperquilt. But, if you have a little wider border, you can hyperquilt those plumes just like you would on other types of feathers. You can kind of see that in this next photo from the “My Thistle Garden” quilt. The baseline design was a featherette exactly like the one in the blue border above, but it was wide enough for hyperquilting of the plumes, and I stitched heart inlining inside each plume:
 The next section is formed by the 4 corner setting triangles. After all the applique shapes had been outlined with invisible thread, I did the background quilting. In this case, I used a rayon thread with variegations of green in the igloos design:
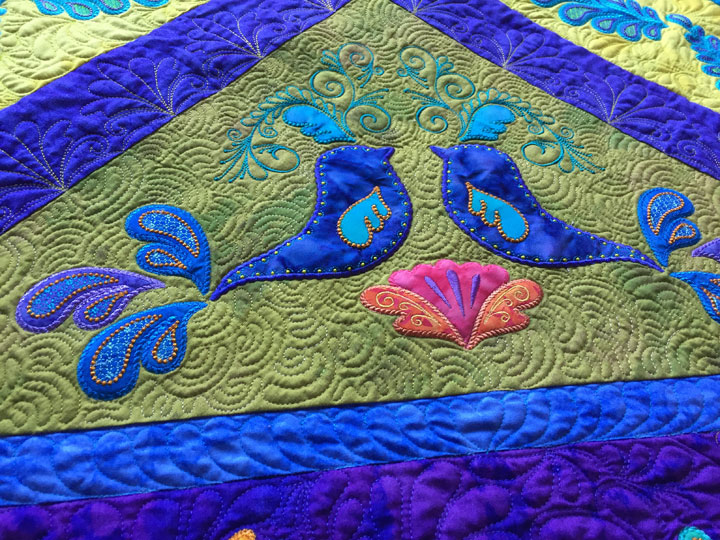 At the base of the birds is a small flower. I like how the embroidered details add some dimension to it:
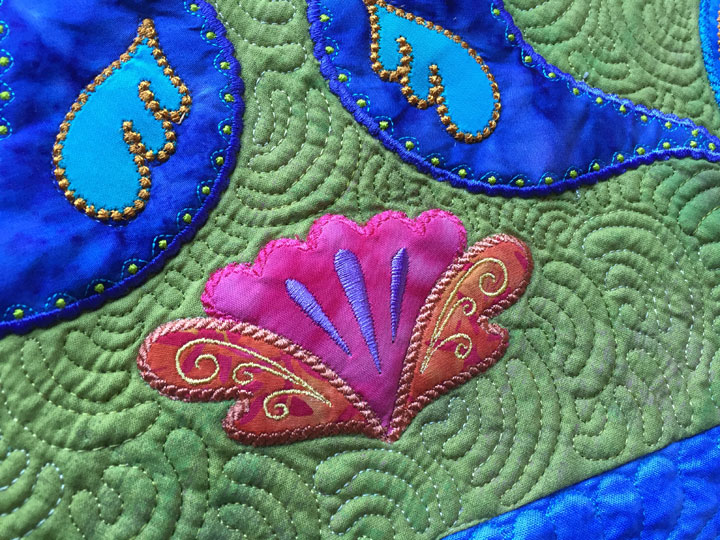 The birds have a cool edge finishing design. This is an example of a dual-edge finishing design. If you look closely along the edge of the birds, the outermost edge is a one-sided scallop and the inner edge has outlines of small half circles in one thread and then a tiny “bead” of thread in another color:
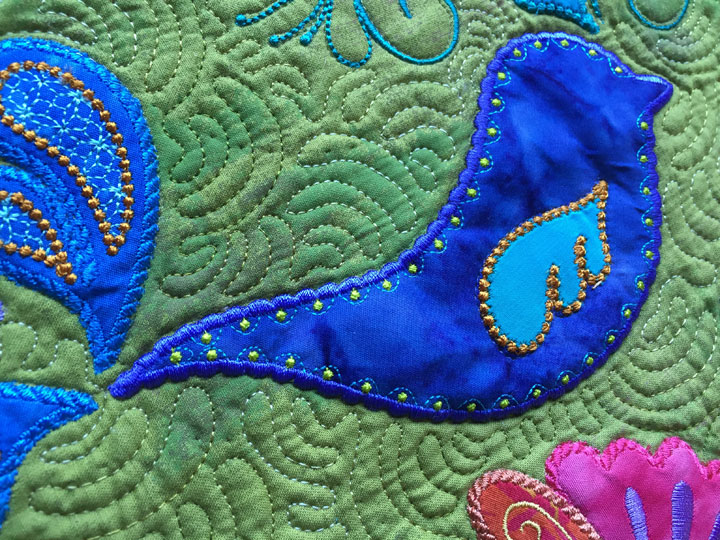 In “real life,” those thread beads really look 3D and you want to reach out and touch them.
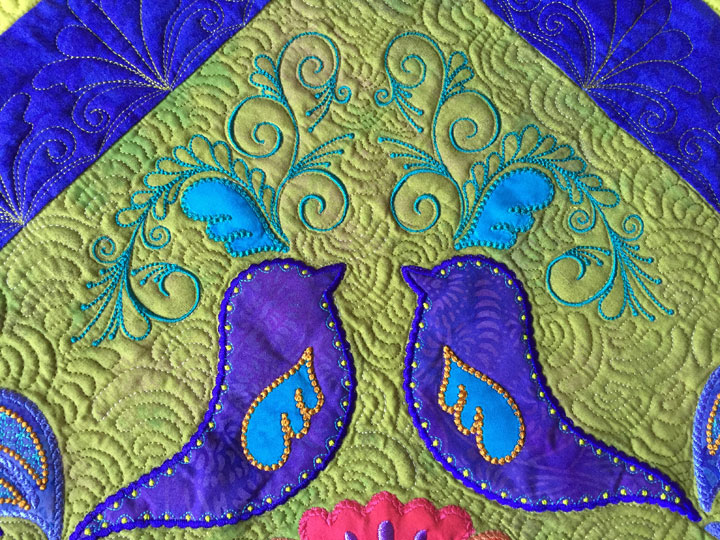
My favorite part of this section are the headdresses on the birds. Normally, I free motion quilt the headdress, but by doing it as an embroidered feature when it’s just in the “block stage,” the headdress detail is really magnified and it also takes on a 3-D effect since the thread is not pulled down into the batting:
In “real life,” those thread beads really look 3D and you want to reach out and touch them.
My favorite part of this section are the headdresses on the birds. Normally, I free motion quilt the headdress, but by doing it as an embroidered feature when it’s just in the “block stage,” the headdress detail is really magnified and it also takes on a 3-D effect since the thread is not pulled down into the batting:
 Can you see why I’ve had so much fun working on this quilt? In Part III, I’ll tell you how to do the next 2 sections. Until then, happy quilting!
Que c’est beau! J’adore votre travail. This is the most beautifull work I have seen until now. This is very much like me. The coloring is beautifull.
Thank you to share with all of us your senstional work.
Merci beaucoup
Montréal,Québec Canada
I finished my Birds quilt and am very happy with it. Your designs stitch out perfectly. Now you have notched it up quite a bit, I have to try another one. Love your quilting.
Patsy, your quilting is outstanding!! I’m totally bonkers over it. But, I have questions… Do you use machine embroidery as a part of the quilts? I wonder if the edging, etc. around the birds, the swirls over the birds heads is actually machine embroidered? Or is a lot of the work just YOU doing the work via free motion and/or sewing machine stitches? I’ve purchased and watched your first Craftsy class and the 2nd one is on my Wishlist but I don’t think you approached these questions. Been following you for several years but I’m still unsure of the process. Do you mind sharing the answers?
Boy, these are beautiful! Even in a photo, I want to reach out and touch the stitches. Keep up the inspiration, please!
Diane