August 30th, 2012
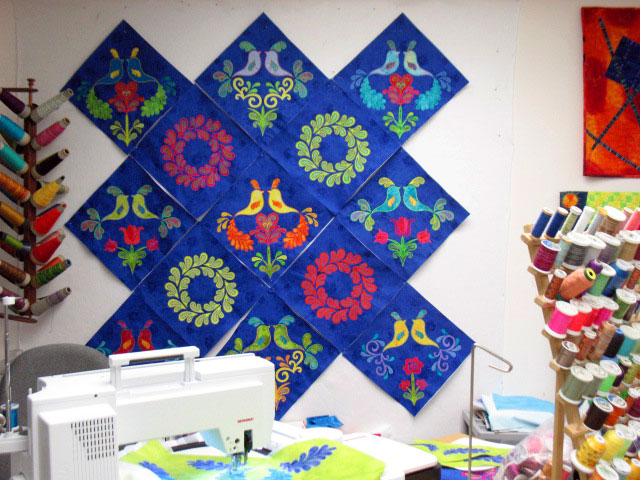
You are probably sick to death of bird blocks, but I’ve spent so much time this spring/summer working with them that they are just part of me now. This is what was hanging on my design wall 4-6 weeks ago. I fell in love with that background fabric and I wish I could find more of it but I think it I’ve missed my chance…drat! Until I was working with machine embroidered applique, it was easy to audition setting block applique designs because I would just cut/fuse one up and throw it on the wall and gaze at it for hours. Not so with machine embroidered applique and not so when you have limited background fabric for the setting blocks! I had to sweat it out while I finished embroidering the giant blocks that would ultimately be cut into fourths to create side setting triangles and the smaller blocks that would be cut to make corner setting triangles. Here’s a shot of a giant block that was about to be chopped up to make side setting triangles:

I breathed a big sigh of relief once I saw the edges starting to fill in, as this picture below shows:
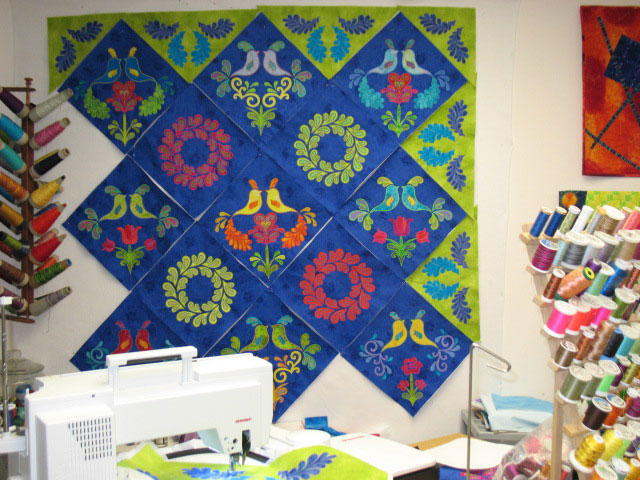
By the time I finished piecing this quilt top, I had fallen head over heels in love with it! I guess I am a sucker for blues and greens together. Here’s a shot of it laying on the floor once I had finished piecing it:
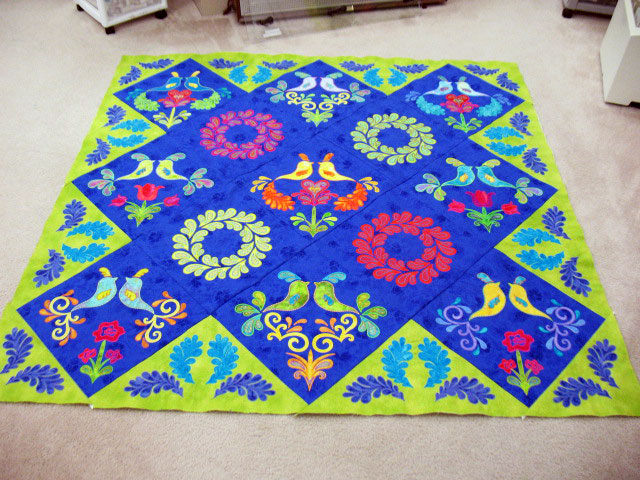
I am encountering new challenges all along the way since I’ve been working with machine embroidered applique quilts. Between the fusible interfacing that’s behind each block, to the stabilizer that’s left behind, to the incredibly beautiful but very dense stitching that decorates all these applique shapes, the quilt tops take on a fair amount of extra weight. Once they get to a certain size, spray basting just isn’t enough to hold them together throughout all the rigors of machine quilting them and cramming them in and out of small harp spaces. If you read my blog, you know I’m not a fan of pins! I ended up having a longarmer (Lisa Spalding of The Quilt Foundry) baste this together for me on her longarm and I’m so glad I did! I used Quilters Dream wool batting and I LOVE this batting! It’s so much softer and loftier than Hobb’s Tuscany or Hobb’s Heirloom so it is now my favorite wool batting. (So much so that we just picked up this wool line in our online store.) It has Merino wool in it and I think that’s what makes it so ooh-la-la licious! Anyways, back to the quilting of this bad boy…
The other day, Sew Cal Gal asked a good question:
I am curious how you feel your eye is being drawn – is it to the machine embroidery or to the free-motion quilting?
No question about it, in my mind, the machine embroidery is the winner, hands down. This is a good question, though, because ever since I’ve started quilting these heavily embroidered quilts, I have felt really challenged in the quilting department. I didn’t use to fret about what to quilt where; it all seemed fairly intuitive to me, but these embroidered quilts are a whole new ball game for me. On the one hand, I don’t want my quilting to compete with the embroidered thread work, but I also want my quilting to add something to the whole piece. One day, when this quilt was on the design wall and nearly finished being pieced, I longingly looked over at it and got teary eyed because I thought there was a good chance I would wreck this quilt by quilting it. I haven’t felt that worried about quilting something in many, many years! At some point, you just have to get yourself into the game and go for it! I’m nearly done quilting this now and I feel really great about it. Here’s an example of adding some subtle points of interest through quilting:
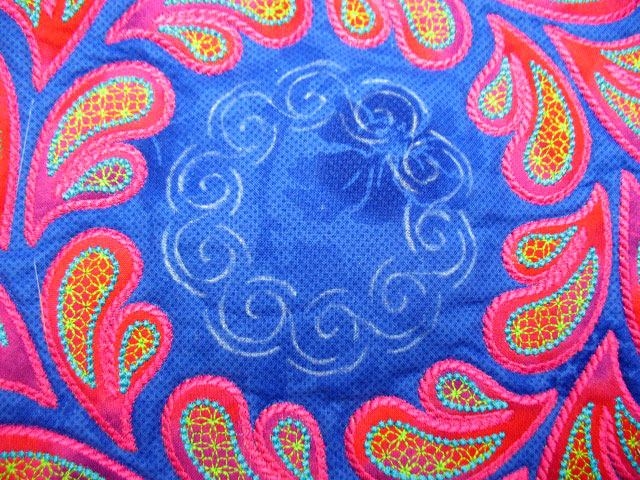
The insides of the wreaths are a great place to echo the wreath motif with a smaller wreath design. Here, you can see that I’ve traced a stencil design (using one of the center designs from our 8, 9 and 10-in square wreath stencil designs) with soap. This is easy to do because all you have to do is line up the stencil center with the center of the block. This next shot shows the internal wreath once it’s been stitched:
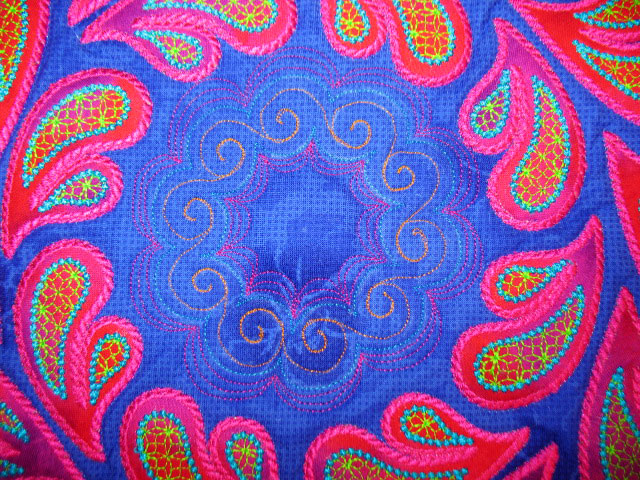
This kind of detail isn’t really noticed unless you’re fairly close to the quilt, so it doesn’t compete with the more obvious embroidered thread work. I’ll post more pics of this quilt in the next few days, so check back…
buy viagra from india
Filed under
Sizzix.
August 25th, 2012
Sorry it has been so long since my last blog post. There’s nothing going on behind the scenes to worry about; I’ve just been way overextended and haven’t had a second to come up with a blog post. Because of vacationing coworkers, I’ve been working many more hours than usual at hospice, so my “free time” has kind of evaporated. I should have a bit more time over the next couple of weeks, though, so my goal is to spend loads of time sewing and hopefully, I will be able to get back to more regular blog posting. I have gotten some sewing done, so here are some shots of a wall hanging I recently made. (Sorry about the not-so-great photos. I didn’t realize until tonight that these photos weren’t very good and I’ve already given this wall hanging away.)
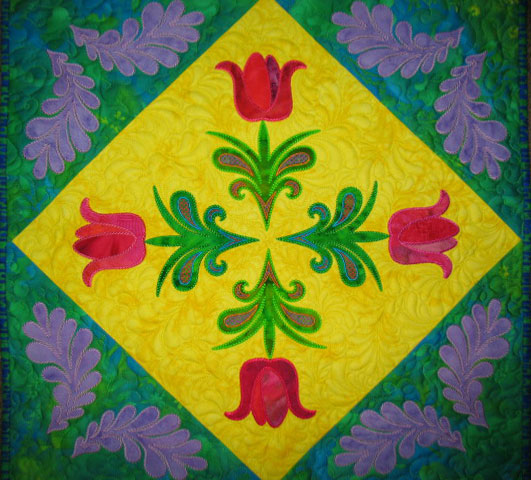
This “tulip quartet” was an experiment in playing around with a single stem of a tulip and I like how it came out. It’s all done as machine embroidered applique and I cut the shapes using my Sizzix Big Shot machine and Appli-K-Kutz dies. The batting is another 2-layer combo. The bottom layer was a Hobb’s silk batting (this is the batting that’s become a disappointment to me when used alone but I’ve got a lot of it that I need to use up.) The top layer is an ultra-thin polyester batting that is sold by the yard at a local fabric store in Asheville. I wish I could tell you who makes it but I don’t know and neither did the store owners! What really blew me away was the incredible texture that was created by adding that ultra-thin layer of polyester batting-it really made the quilting look great! Here is a shot of the background fill quilting in the center square:

These aren’t actually feathers, but the quilting definitely gives you that same luscious feeling that feathers do. It’s the rudimentary version of the “plumify it” background fill design and it really lends a great sense of movement to a quilt. Here is a closeup of a stem shape; this was cut using the “Stylized Stem 2 die.”
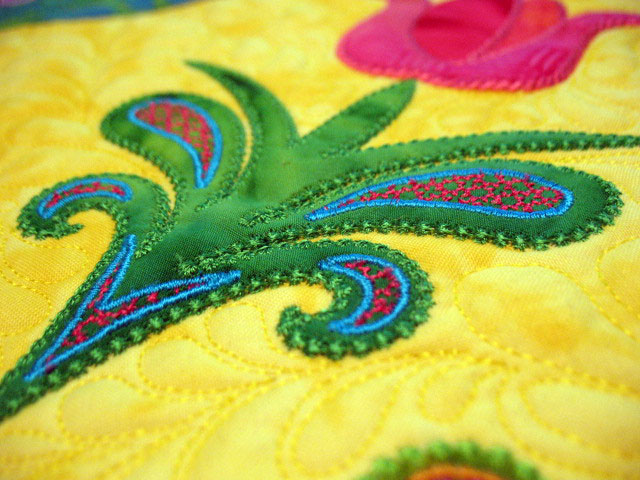
…and you can kind of get a sense of how it poofs out from the background, yet there is no trapunto layer here. Again, this is the beauty of machine embroidered applique. Because all the decorative thread work is done when it’s just a quilt block, the stitching isn’t drawn into the batting layer the way that quilting stitches are. Here’s a closeup of a tulip:
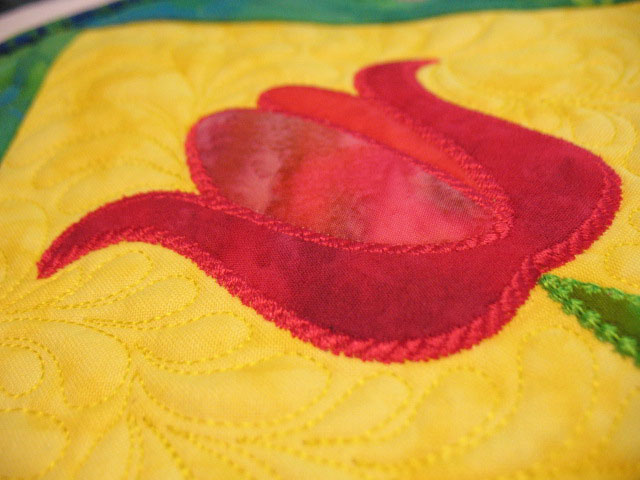
…and here’s a shot of the background quilting in the green/blue corner setting triangle section:
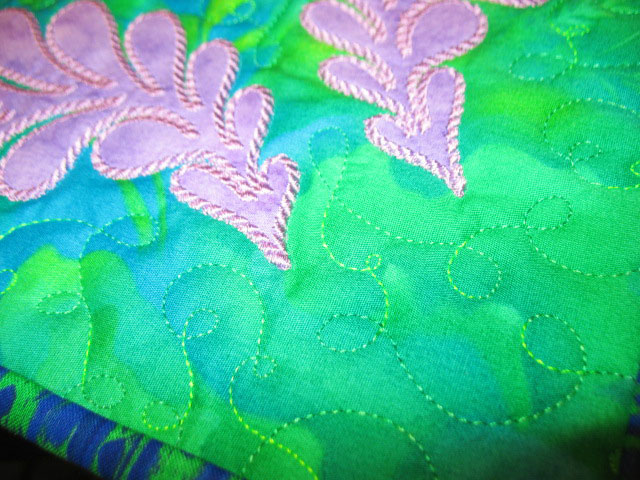
That is just a simple loop-d-loop design but sometimes it can add a wonderfully simplistic but fanciful look to a quilt. I used a YLI Variations thread called “Grass” for that section and it is one of my favorite threads for quilting. This last shot of the feathers will give you a sense of the ” faux-trapunto” effect this machine embroidered applique can lend to a quilt.

There is a line of stitching in Superior Threads Monofilament Thread, (aka invisible thread) that outlines the stitching that finishes the feather edges, but the outline (that you can’t see) is the only quilting done on the feathers. All of the fanci-schmancy thread work that you see on this quilt is the machine embroidered applique! This wall hanging was donated to the Asheville Quilt Guild small quilt auction to raise money for community quilt supplies. If you’d like it, you can bid on it during the auction on the last weekend of September 2012.
purchase cheap cialis
Filed under
Sizzix.


