September 30th, 2014
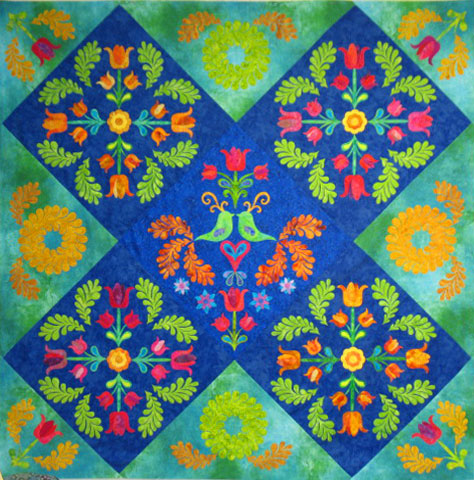
 I got some great news this weekend when I found out that My Thistle Garden won the Best Machine Workmanship Award at the Asheville Quilt Show! I am utterly thrilled to win this award because the Asheville show is a great show with loads of beautiful quilts, so winning this award is really an honor. To celebrate, we’re putting all of our Patsy Thompson Designs products on sale at 20% off through 9 am EDST on Friday, October 10th. To get the discount, just enter celebrate in the discount code box during checkout. The discount will not show up until the very last page during checkout, but it’s there!
The downer news is that our new warehouse manager, Michelle, will be leaving so we have decided to liquidate all of our inventory that is not a Patsy Thompson Designs product. The good news for you is that all this non-PTD inventory is 40% off the MSRP! Once it’s gone, it’s gone, so please scoop up anything that catches your eye! Fabric, thread, batting, notions, etc…it’s all on clearance starting NOW! To obtain this discount, you’ll need to enter the discount code CLEARANCE during checkout. (Note: the store will only allow you to enter 1 discount code per purchase, so you will need to make 2 purchases if you are purchasing clearance items AND PTD products.) To all of you who have shopped in our online store over the years, thanks so much for your patronage and it’s been our pleasure to serve you!
Filed under
Store Updates.
September 26th, 2014
If you’ve ever tried machine quilting a large quilt on a home domestic sewing machine, then you know the frustration that goes along with “Quilt Wrangling,” or trying to maneuver it through your harp space and around your machine as you work various areas of the quilt. Not fun and not easy! I recently began suspending my quilt and was shocked by just how much easier the whole process became. By literally removing the weight of the quilt from process, it becomes quite easy to move the quilt almost effortlessly as you work I first read about it many years ago when Caryl Bryer Fallert posted about her system:
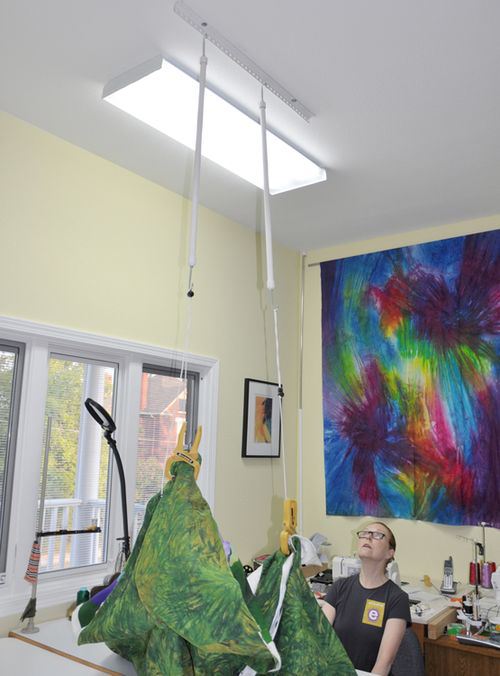
Later, when Leah Day posted about it here, I thought seriously about giving a try because Leah always has really good ideas about free motion quilting. I held off on trying this for years, though, because I didn’t want to mess around with my ceiling but now there are lots of other options. Many years ago, I purchased a set of easily portable quilt display stands from Pals Products with the intention of using them to photograph quilts. For me, they have turned out to be the perfect solution for suspending my quilt as I’m working. The system is composed of 2 telescoping vertical poles on a base and 1 telescoping vertical pole that is held between them. It’s very easy to adjust the height and width to whatever size is comfortable for you and your current project. The photo below shows how I am using these stands for quilt suspension as I’m working on a quilt:
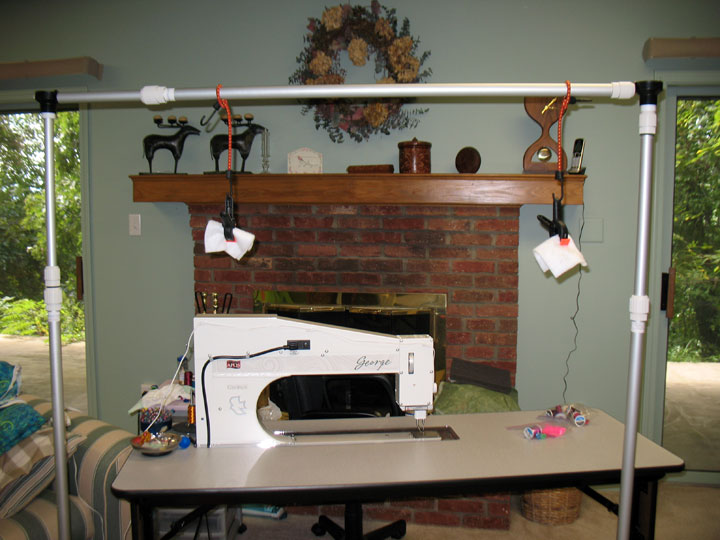
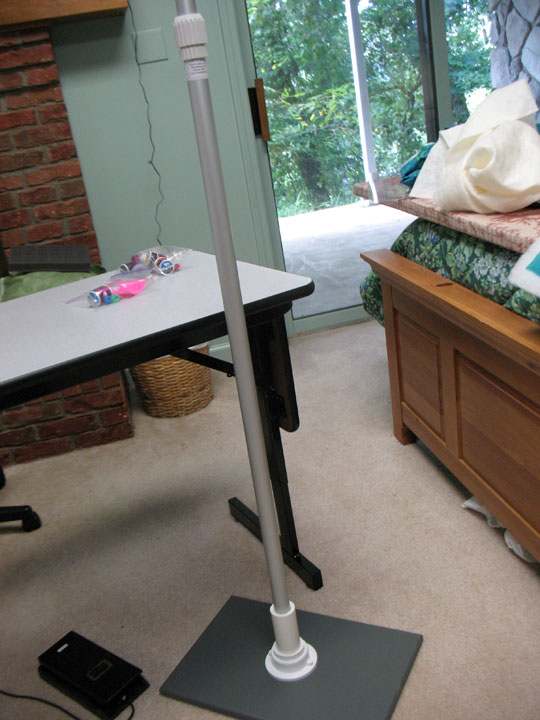
I had originally placed an ironing board behind the table that holds my George machine, and because I set the table height about 6 inches higher than the table, I had a pretty good system going. BUT, I have to say that suspending your quilt in mid air is a total game-changer. No joke and no exaggeration…there is no weight to your quilt and it’s very easy to move that baby all around the machine bed! Let me give you some close up shots of how my system works. First up is the framework of my suspension system. Here is a shot of the “empty version” of my suspension system’s upper section and then the bases:
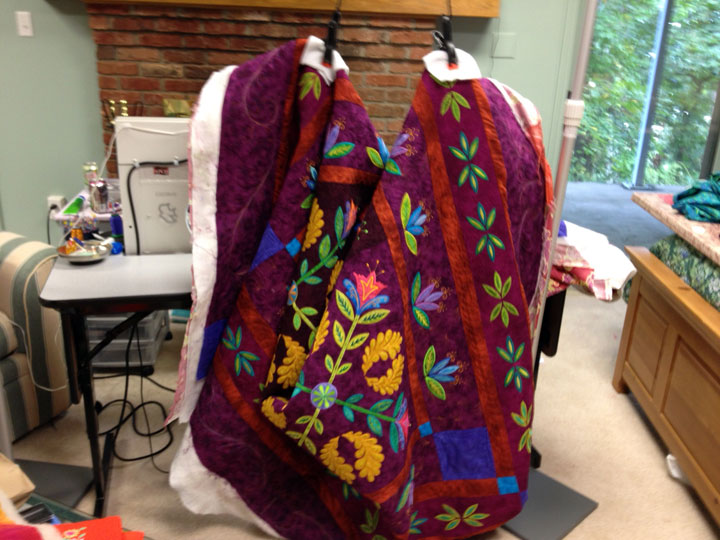
(I should tell you that Pals Products has altered their quilt hanging system from when I bought mine. Click here to see a photo of what their current system looks like.) To hold the quilt, I tied 2 bungee cords around the top (horizontal pole) and then drilled a hole in a pair of spring-action hand clamps so they would fit inside the hooks on the bungee cords. (Truthfully, you don’t need these to be elasticized cords; any strong cord would work.) I place a scrap of polyester batting inside the clamps just to make sure my quilt stays clean. Here’s a close-up of the clamped quilt:

By having the vertical pole of my system within easy reach, I can push one suspended side to an extreme side or move it closer to center quite easily and then sit right back down and get back to my quilting. It never occurred to me that it would be helpful for ruler work, but it really helps there! Of the 4 sides of my ruler foot, I am always trying to avoid holding the ruler on the right side of the foot because it’s hard to control the ruler when it’s so close to the presser foot’s shaft. (The arrow is pointing to my “problem side”):
If my quilt is suspended above the table, it is very easy to simply “twist” the portion of the quilt I’m working on to move it into an orientation that’s easier for ruler work like below:
If you’re looking for a quilt suspension system that’s ready to go, you might want to try Jenoop Quilt Suspenders. This company has ready-made quilt suspension systems (ceiling based or frame based) that are ready to go into action as soon as they arrive on your doorstep! You can find the web site by clicking here. There are things that you can do that will make machine quilting easier and then there are things you can do that will be game changers in your free motion quilting life. Suspending your quilt is a total game changer!
Filed under
Free Motion Quilting, George Sitdown Quilting Machine, ruler work on a HDSM.
September 22nd, 2014
I didn’t get much time to quilt beyond doing some prep work for a demo Ill be doing next weekend at the Asheville Quilt Show in Asheville, NC. I’ll be talking about and demonstrating how to do hyperquilting and trapunto. There isn’t a ton of time so I figured I should use some pretty simple examples. First up, I’ll show how to hyperquilt a traced stencil design. We’ll start off with this stencil shape:

…and first just quilt it “the normal way,” except that I’ll do the spine in 1 color and the plumes in another color like this:

You can kind of start to appreciate the difference that hyperquilting makes in this shot where part of the base has been hyperquilted and the other part has not:

Here it is with the plumes all hyperquilted. I chose this particular stencil because we could do some hyperquilting in the spine as well, but then it hit me there wouldn’t be enough time to do that in the demo, so we’ll stop at this stage:


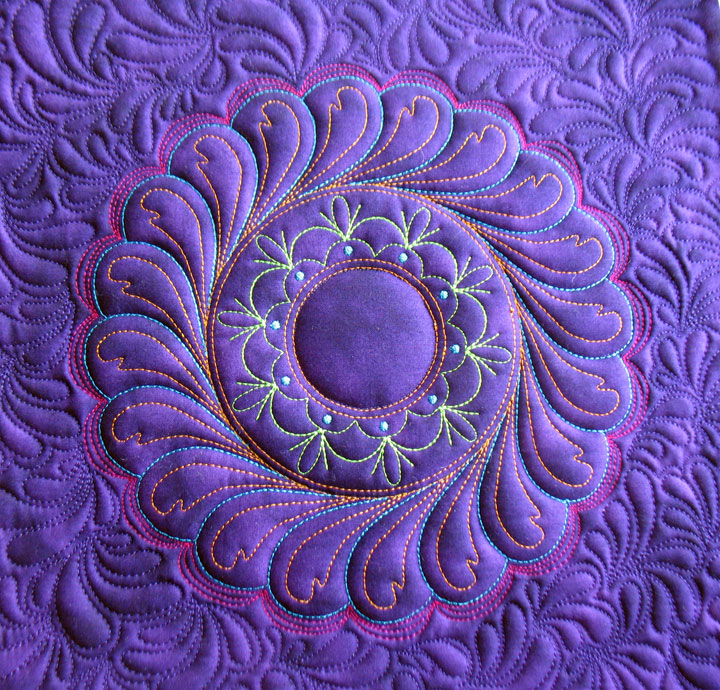
The next part of the demo will be about trapunto. Here’s a different feathered wreath that has been trapuntoed. All that’s happened so far is that it has had some “zones” of the wreath outlined with invisible thread and this is causing the zones to stand out and “read” as separate areas of the wreath:

The next step in making the trapunto more obvious is to stitch fairly close to the edge of the wreath. This causes a relative “flattening” of the area just adjacent to the wreath which makes the wreath appear more protuberant. In this case, I stitched 2 echo lines in lavender thread and this also creates a nice “halo” of color surrounding the wreath:

And in the last phase, the background area is quilted:

If you’re in the Asheville area this weekend, stop by the Asheville Quilt Show as it’s always a great quilt show. My demo is on Saturday at 3pm and it’s FREE!!!
And one more thing…we’re having a sale on some of our threads and we’ve moved a lot into the clearance section of our online store. Sale prices are good through this Fri at 9 am EDST. To find out what’s on sale and what’s been moved into clearance, go here to read about it!
Filed under
Free Motion Quilting, Trapunto.
September 17th, 2014

Woo-hoo! Craftsy is having another one of their great sales and this is your chance to sign up for some interesting classes to hone your quilting skills or learn about another hobby! All Craftsy classes are up to 50% off from 9/18-9/22/14! Remember, if you’re tight on time, you can purchase a class now but not watch it until you have time. Each class is yours for life and you can watch it when your schedule permits! Click here to see what great Craftsy deals are going on during this sale!
Filed under
Craftsy!.
September 16th, 2014
 I said I would be blogging about some of the things that made the “My Thistle Garden” quilt special and one of those special touches was using focal hyperquilting to add a new level of interest to one of the border zones. So, that begs the question, “what is focal hyperquilting?“
Focal hyperquilting is a variant of hyperquilting where certain areas of a background fill design are hyperquilted, whereas other portions of that same background fill design are not. It is a way of making a design richer and more complex and best of all, it is completely unexpected. When you can surprise the viewer like that, it is always a very good thing. I say that because it will always make them take a second look, a closer look, because they think there might be more unexpected surprises. Remember, when you’re creating your quilt, the goal is always to seduce the viewer or draw them in for a closer inspection of your work. Let me show you what I mean. What you see below is a shot of the background fill design in the water lily border section of “My Thistle Garden:”
I said I would be blogging about some of the things that made the “My Thistle Garden” quilt special and one of those special touches was using focal hyperquilting to add a new level of interest to one of the border zones. So, that begs the question, “what is focal hyperquilting?“
Focal hyperquilting is a variant of hyperquilting where certain areas of a background fill design are hyperquilted, whereas other portions of that same background fill design are not. It is a way of making a design richer and more complex and best of all, it is completely unexpected. When you can surprise the viewer like that, it is always a very good thing. I say that because it will always make them take a second look, a closer look, because they think there might be more unexpected surprises. Remember, when you’re creating your quilt, the goal is always to seduce the viewer or draw them in for a closer inspection of your work. Let me show you what I mean. What you see below is a shot of the background fill design in the water lily border section of “My Thistle Garden:”
 …and this shot will give you a little longer expanse of it between applique shapes:
 This background fill design is the rudimentary version of the “Plumify It” quilting design. (That design, as well as several plume-based related designs, are all taught in our DVD called Fast and Free Volume 3 which you can find by clicking here.) That background fill design is beautiful, but I do it all the time, so it’s kind of boring in its present form. By hyperquilting it in a very high contrast thread (in this case, “24 karat gold” rayon thread by Robison Anton), it’s possible to draw a little more attention to it and add a bit of a “celebratory” kind of look to it. Here’s that same border after the focal hyperquilting has been added:
 When you hyperquilt this particular background fill design, you are starting a new thread line (and stopping that same thread line) each time that you work on a new plume unit. This is the “dark side” of focal hyperquilting! To say that this is very tedious work would be an understatement. It creates a nightmare of thread tails that will need to be carried to the backside of the quilt, knotted, and then buried in the batting layer. Here is a shot of just one small section of the “threadtail nightmare” that this kind of work creates:
 AAARRGGGHHHHH!!!!!! This part of the technique is the real challenge of one’s patience, but you just have to write it off as the price of doing detailed work. In the end, this border zone of the quilt was my favorite part because it just looked so cool:
 You would follow all the same rules of regular hyperquilting (i.e. avoid any hint of overcrowding and choose solid color threads with a nice sheen to them), but in this case, you are being selective about which parts of the background fill design you actually hyperquilt. Could you hyperquilt the entire thing? Yes, but I don’t think you’d want to. It would be too showy, too “in-your-face” and it would compete with the intricate thread work in the machine embroidery applique. For this particular background fill design, it would also create a messy look in the outlining around the plume units. If you’re new to the concept of hyperquilting and want to learn more about it, I have a Craftsy class that teaches both hyperquilting and trapunto:
 …and you can find it at an incredible price by clicking here.
Filed under
Free Motion Quilting.

