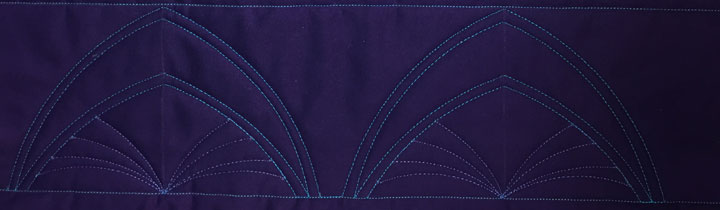
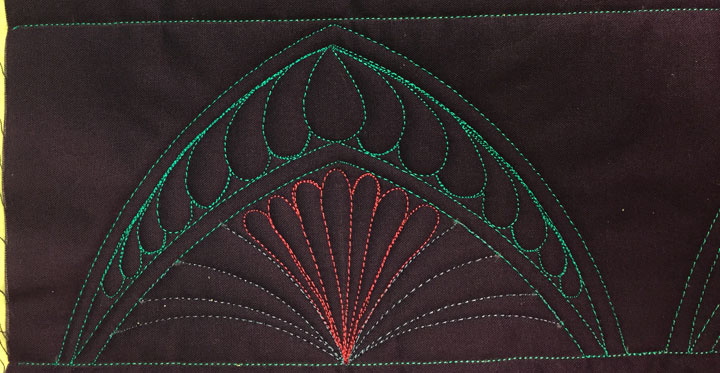
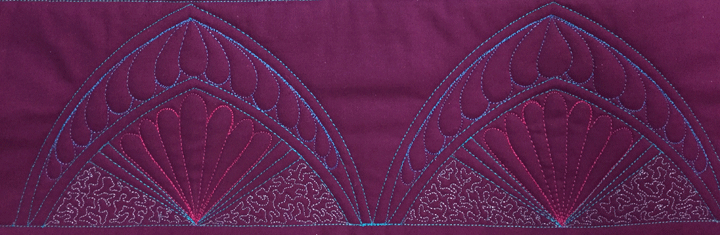
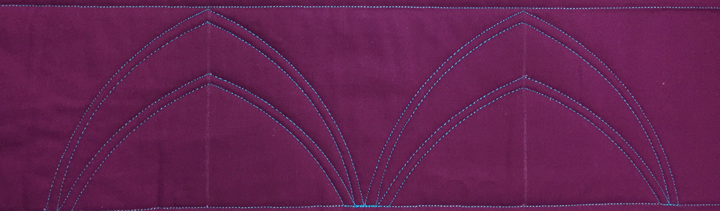
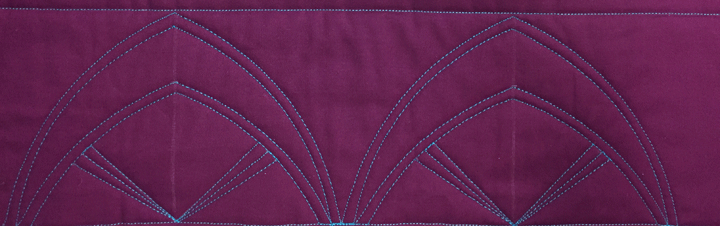
Here are 2 more ruler work arched swag border designs, the first of which is posted above. These both begin with an identical ruler work framework, or “skeleton.” This was created using the PTD 12arc ruler to stitch the “parent” arched swag, then using the PTD 6.5 arc for the “splayed” design in the bottom center area. Here is what the empty framework looked like:
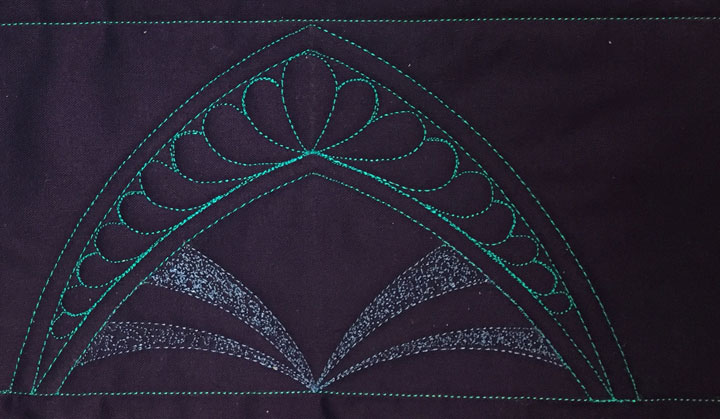
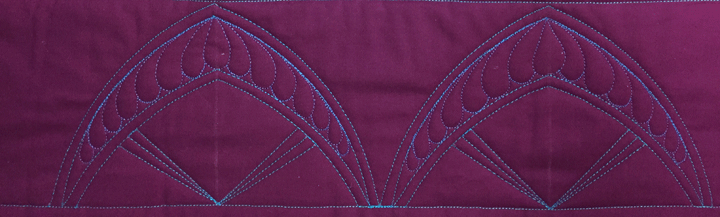
The first thing I did was to fill in every other section in the splayed channels that sprang from the bottom center of the design:
Next up, I quilted an upright featherette to fill the upper tapered channel area:
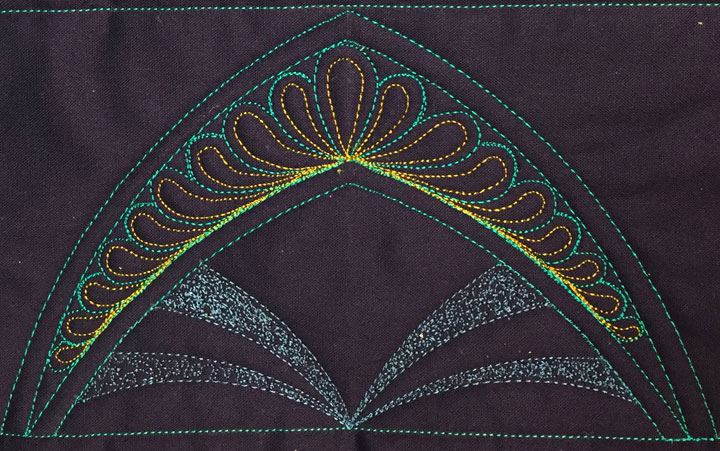
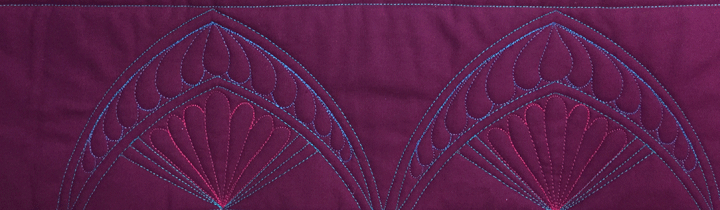
It looked ok but seemed to be missing something, so I hyperquilted the featherette to add a little “bling:”
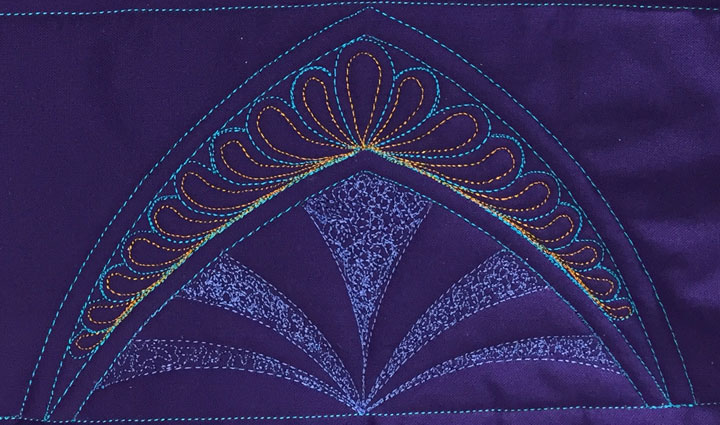
I liked it better but something still seemed “off” to me. I ended up adding 2 additional splay lines in the bottom center area, then filled in the central area. This is what the final version of this one looked like at that point:
Sometimes, it’s surprising how much a little thing like that last maneuver can add! The next shot below is another option for filling in that original skeleton. The top section holds a waterfall featherette as opposed to the upright featherette in the earlier design:
I could just go on and on and on coming up with ways to subdivide arched swag “real estate!”
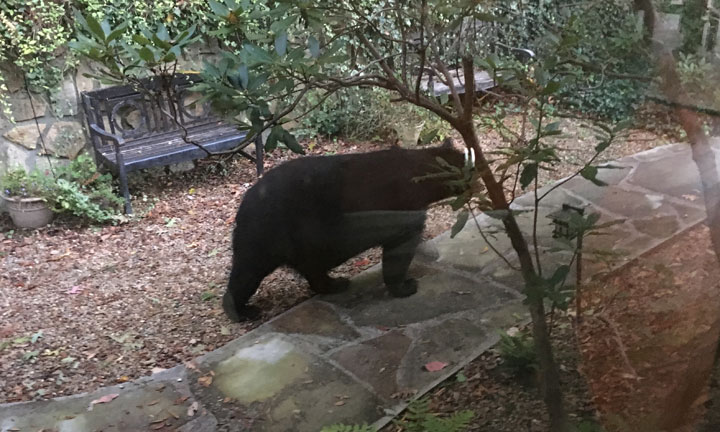
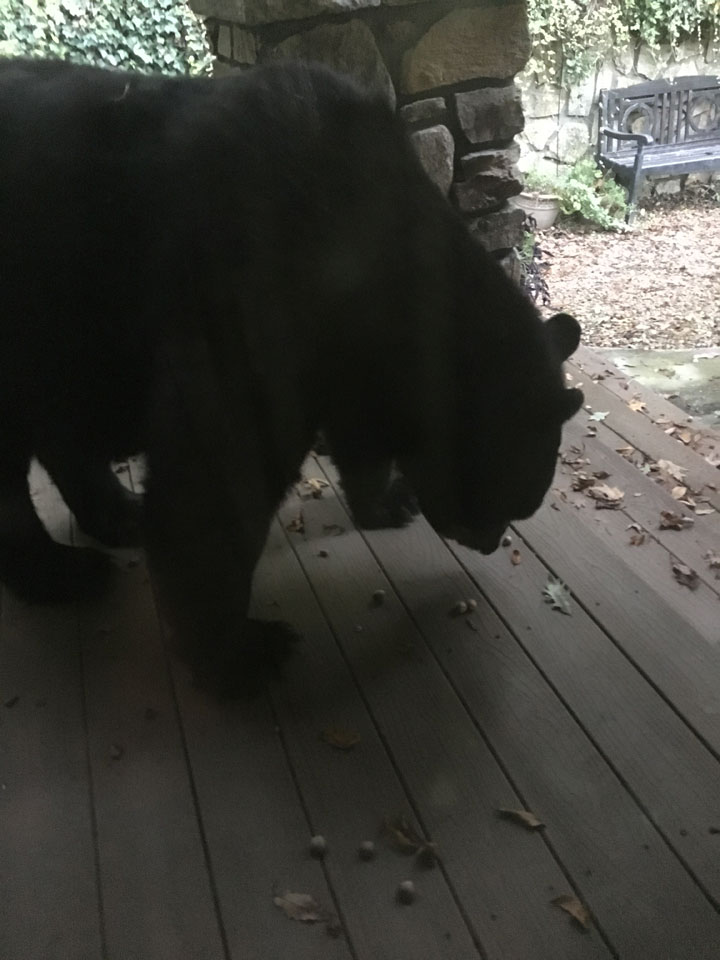
And look who was munching on acorns outside the front entryway this evening…
…he even came right up to our front porch and chomped away, as Ern and I stood watching just 2 feet away inside:
They really are beautiful animals, but we are happy to be on the other side of the door!
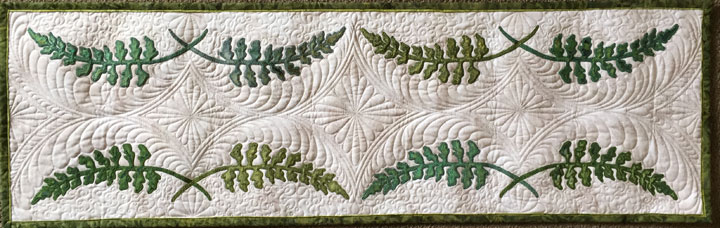
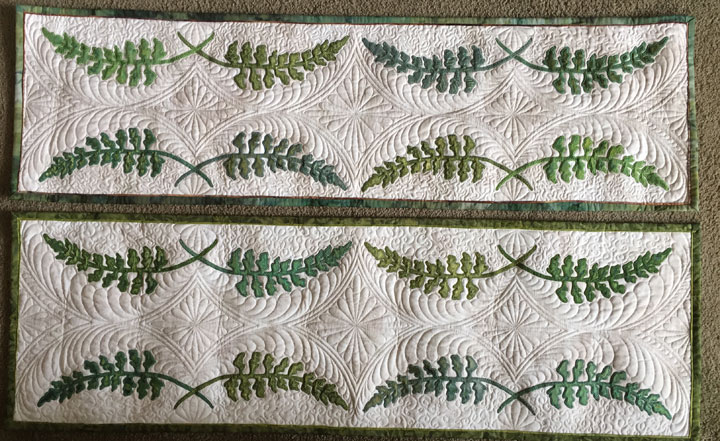
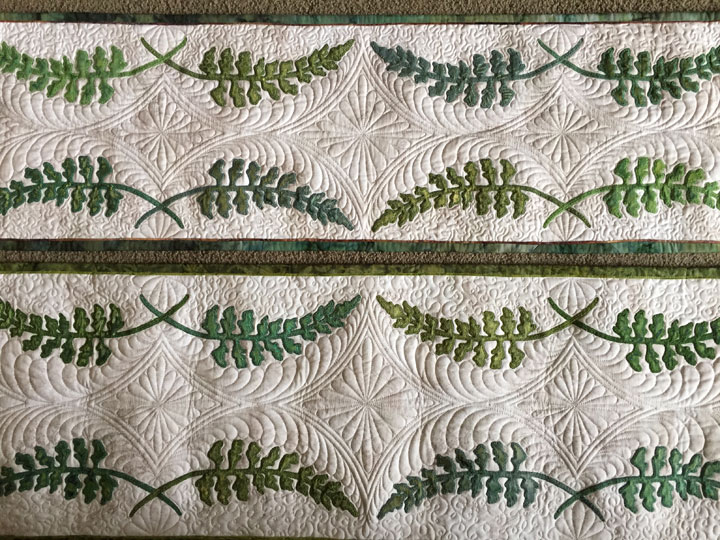
The table runner above probably looks kind of familiar, but it’s actually a first. It’s a variation of a fern table runner I made a few months ago, but it’s a bit wider and the distance between the 2 sides of ferns is a bit wider as well. Here’s a close up of this new one:The ruler work was all done using the PTD 12 arc ruler and the main thread is Glide. The loop-d-loop in the background edges was done using Invisifil. This was because I just wanted a texture there and wanted to avoid drawing attention to that stitching. This next shot shows the 2 table runners next to one another:I am chuckling because I can hardly tell them apart when they’re together, yet I was REALLY bothered by the width of that first table runner and that’s what made me re-create it with a different layout! Here’s a closeup of the two together:I still like the wider one better, even though the difference is kind of subtle! This is a machine embroidery applique design (meaning it’s done on an embroidery machine) that I originally designed as a border design but I like how the design works with the mirror image ferns across from one another. I’m hoping to have this pattern available by Christmas.
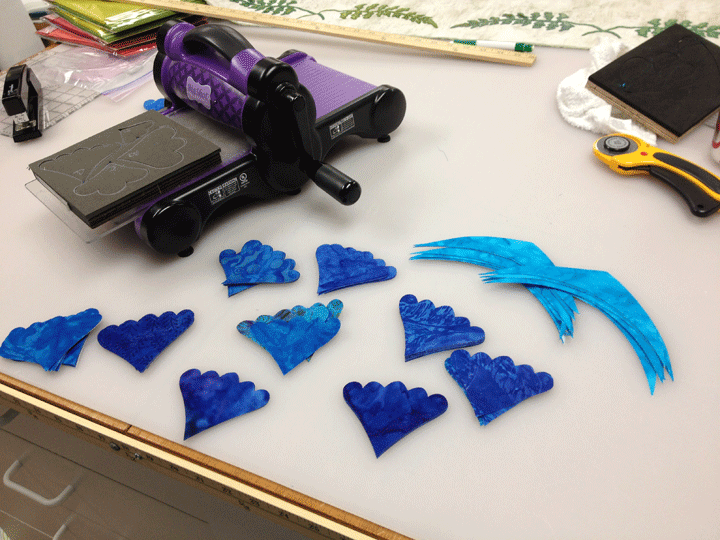
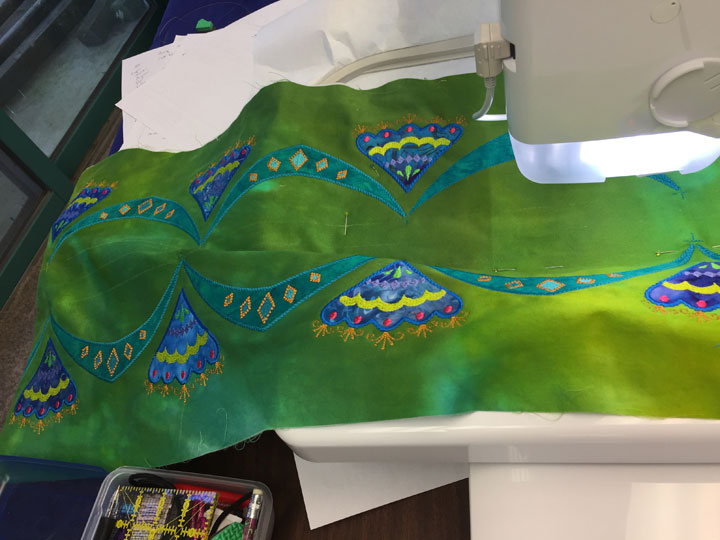
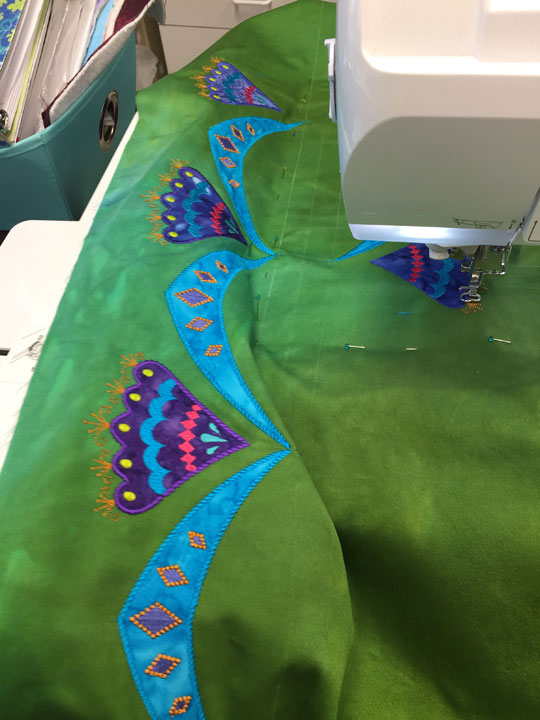
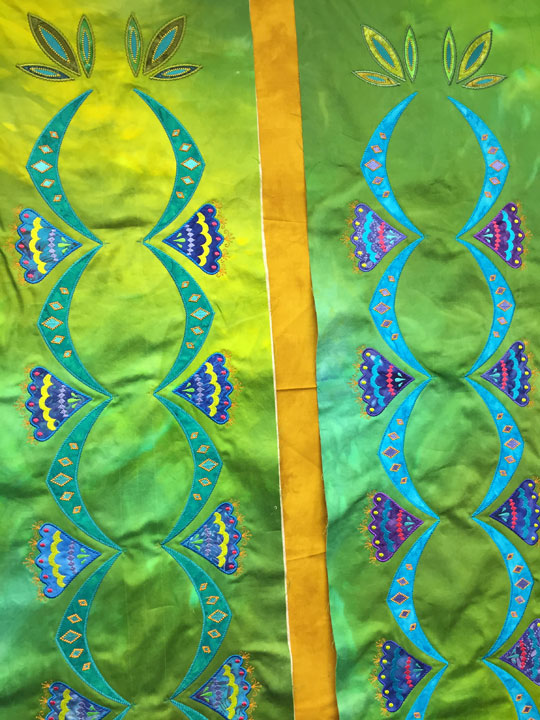
There’s nothing quite as invigorating as beginning a new quit project. I’ve had the center part of this quilt in my head for a few months now, but couldn’t allow myself to begin working on it until I had finished up some other work. Now I can really plow into this! I started by cutting out applique shapes with my Sizzix Big Shot:(This was early on…I cut a WHOLE lot more than this, but it went very quickly using a steel rule die.) My background fabrics were the hand dyed fabrics I dyed recently. Here are my 3 center panels once they’d been backed with a lightweight interfacing and cut to size:(For what it’s worth, I always fuse a lightweight interfacing onto the back of any fabric I’m going to embroider, but cotton sateen is a good fabric to ALWAYS fuse to lightweight stabilizer, even when you’re not going to embroider it. It’s a twill fabric and can be a bit of a “shape-shifter,” if you know what I mean. Once you back it with interfacing, it will not change shapes on you.)Next up, I fired up the old embroidery machines and started many, many hoopings of machine embroidery applique. You can see one of the panels in the next shot as I’m still adding to it:This first panel has jade swags and dark blue flowers. It’s my favorite one. This second panel has turquoise swags and purply/blue flowers. I’m not as in love with this one:I can’t believe I got this far already, but I’ve finished the MEA on the first 2 panels!! Here is a shot of them next to one another on my design wall:The Dijon mustard fabric in between them is in the “auditioning phase”…not sure that is a “go” or not just yet. The third panel will also have jade swags and dark blue flowers. I won’t be able to work on this again for a week, but I’m feeling totally “juiced up” by how far I’ve gotten so far. Here’s a closer up shot that is very off-kilter:
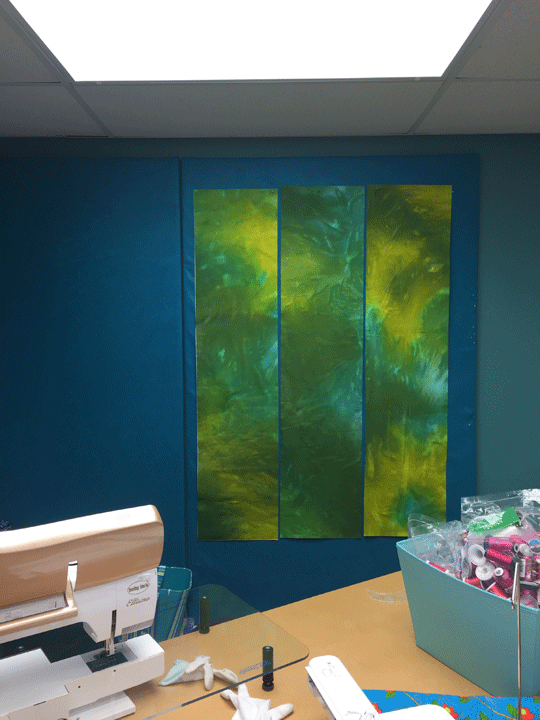
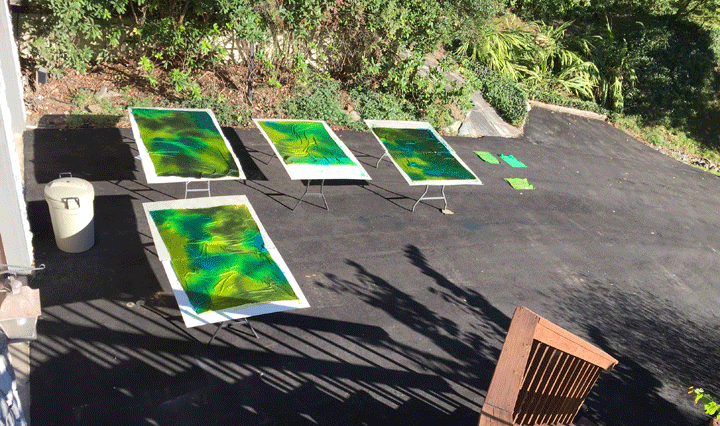
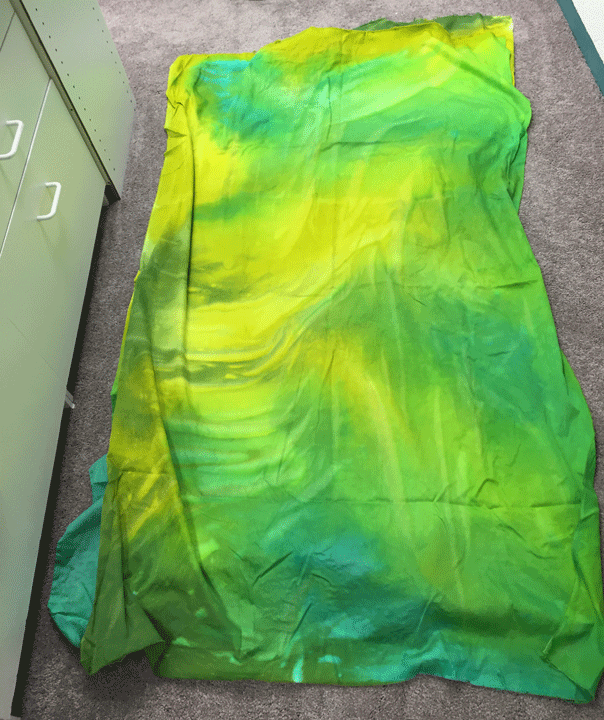
I was about to start a new project and needed 3 long panels of hand dyed fabrics that were predominantly greens. I have lots of already dyed fabrics that fit that bill, but all of it was just a wee bit too short for my needs. Isn’t that always how it goes?! Anyway, I decided to get some late season fabric dyeing going a couple weeks ago and the shot below shows my set up:
This is a quick and easy direct dyeing method, and if it’s something you’ve wondered about trying yourself, here is a quick video lesson on how I do it:
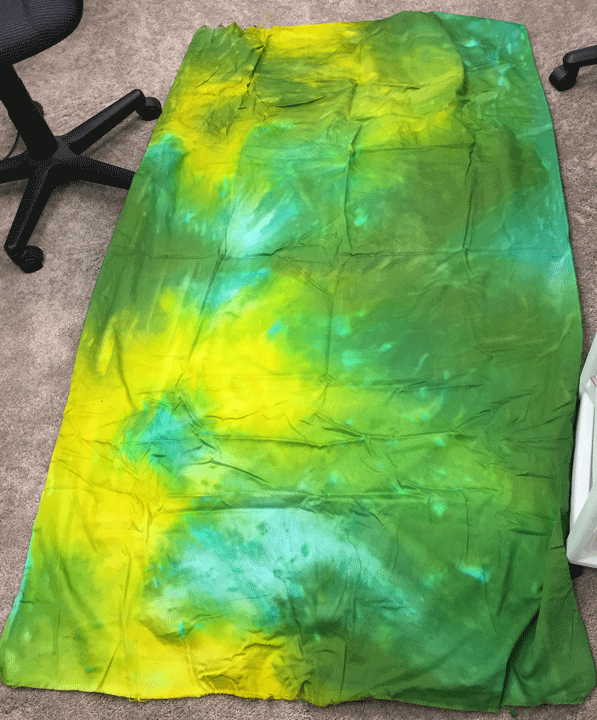
What I want you to see is how the intensity, or saturation of the color, changes once it was washed out. The fabric in the shots above is still a bit wet, and this makes the colors appear somewhat darker. BUT, the post washing shots below will give you an idea of how old dye powders result in less than saturated colors in the final product:
This next shot is the darkest piece of all, yet look how light it is:
These are all still very use-able, but darn, I miss that intense color saturation! Here is the darkest one all sliced up and ready as 3 panels for my next project:
I’m not wild about my fill-in choice for the lower section, but I can see a lot of variations on this that could be quite cool! Here is how to make an arched swag border like this:Step #1: The basic ruler work framework is an arched swag using the PTD 12 arc ruler, then I added a 1/4 inch parallel channel followed by a 1 1/4 inch tapered channel, and then another 1/4 in parallel channel:Step #2: Using a straight line ruler, I added a right angle that intersects the bottom center base and straddled it equally, then added (2) 1/4 inch tapered channels on either side of the right angle:Step 3: Fill-in begins! First, I stitched a waterfall featherette in the top section:Step 4: I added a basic upright featherette in the center bottom section:Step 5: I added a small stipple in the outer 2 bottom sections, just to add a new color. This is the portion I’m not wild about, but I have lots of other ideas I will play with later:This blog has been sorely neglected over the past few months and that has not been my intention. I have been doing so much traveling that I haven’t had much time in my sewing room. To make up for this drought, I promise that today’s post is the first of 3 posts this week! I will do better!!!!