

Nov 09 13
A Few Machine Embroidery Tips
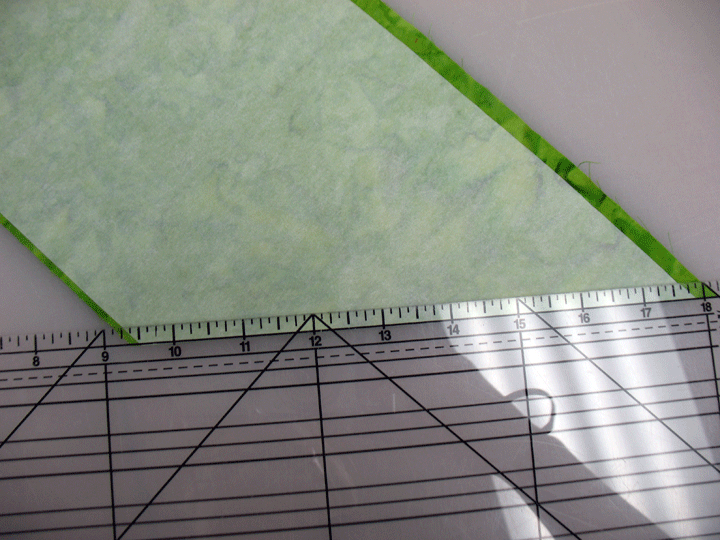
As I’ve been working to get my 4 long borders stitched, it occurs to me that all of us have things we do all the time to save time or to create an effect and we should be sharing this stuff. So, today I’m going to blog about a couple of tips that help me. First up, aren’t you always looking for ways to save time in your sewing room? We all have so many ideas of projects we’d love to create, and coming up with the time to do them is the hard part. One thing that kind of drives me nuts are thread stops in embroidery where you need to swap thread colors. Don’t get me wrong…I am a total thread lover and I get my kicks having lots of different thread colors in all my pieces, but if there isn’t a good reason to change colors, I don’t want to take the time. So, when I’m stitching out placement outlines for applique shapes, there’s no way that I’m going to swap out my thread color for every new applique shape. The way I get around it is that I chose a thread color that matches (or nearly matches) my background fabric color, and then I stitch ALL my placement outlines in that 1 color. Here’s an example and you’ll have to look hard to see all the outlines:

My second tip is also in the above photo. Do you see how I’m fusing a curved stem inside those stem outlines? There’s no need to cut out curved stems. The stem in this design is 1/4 inch thick, so if you simply cut 1/4 inch strips on the bias, they will bend/curve into whatever shape you’d like, and this will save fabric. These babies are easy to cut as below:
My next tip has to do with creating an effect. When you set up your machine into embroidery mode, it will have a default tension setting. The tension setting in embroidery is set so that the bobbin tension is a bit higher than the top needle tension and this is to ensure that bobbin thread does not show on the top of the embroidery. But, just like in free motion embroidery, you can mess around with the tension settings to create effects that matter to you. When I stitch motifs like the grapevine curly-cue below, I want that grapevine to be more protuberant, so I lower my top tension by 2 notches (i.e. from my default setting of 4.0 to 3.6) and this allows my top thread to protrude out a bit. Think of how this grapevine will look once I quilt just outside it with invisible thread…ooh-la-la:

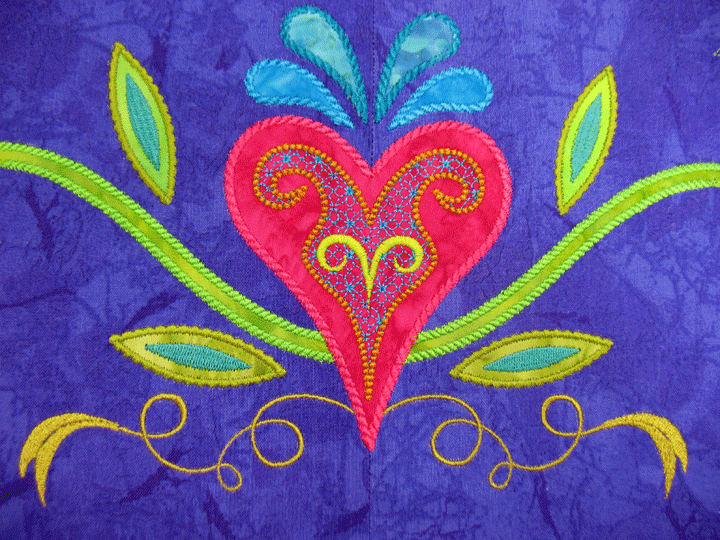
(By the way, the same thing is true for the internal fill design inside those leaves.) Could you also use heavier embroidery thread to make that grapevine curley-cue pop out a bit more? You betcha! If you’re thinking about getting into machine embroidery applique but you’re kind of on the fence about it, check out the before and after pictures below. This “before shot” shows the applique shapes fused into place for the center portion of this border design:
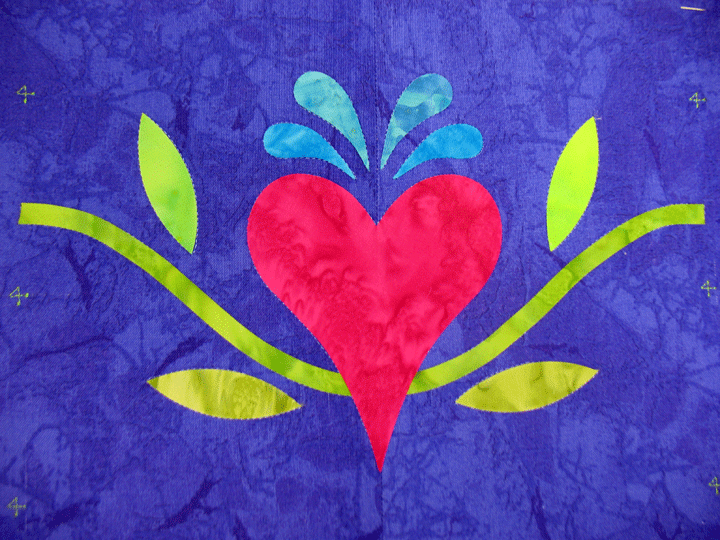
…and this “after shot” shows the contribution that thread makes:
Now it’s time to turn the tables…what are your favorite machine embroidery tips?
This one of the best products in the market with the added value that refrigeration is not necessary. Levitra generic vs! You are guaranteed to find our products safe and best for your purposes.
Awesome Patsy! I’m just getting into machine embroidery and it sometimes feels like I have to learn this craft all over again! I agree that the machine embroidery added to your appliques dresses it up in a totally unique way and I’m loving the ability to stitch on two projects at once. Thanks for the tips!
Great tips!!! Thank you!
Smiles,
Kelly
Don’t settle for the outline stitches your digitising software provides you with, make your own or at least tweak the ones that are there to make them your own
If you use different thread weights make sure you adjust your density
Combine shiny and dull threads and don’t forget to play with angle of fills
When doing a fill area open up the fill (a lot less density) and stitch 2-3 colours on top of each other altering the angle of the fill. (Remove the underlay when you do this)
Oh there are just so many possibilities that a lifetime is not enough. I know I have started way to late in mine to try it all even though I have been playing this game for nearly 20 years. And that is what it is all about: Playing!
Wonderful tips and inspirational projects. I agree with you, thread does make a difference in our projects. And machine embroidery machines (and designers of digitized designs) are just starting to knock on the doors of the wonderful world of quilting. Your quilt designs and embroidery designs are the best of the best! I am truly drooling wanting to stitch these out and create beauty using your machine embroidery designs and overall quilt designs too! Love them all.
SewCalGal
http://www.sewcalgal.blogspot.com
Hi Patsy! Love these tips. They look fabulous.
[…] blog post where you can pick up some great Machine Embroidery Tips. Here’s a link: A Few Machine Embroidery TipsRemember that each and every retail purchase that you make in our store is being tabulated to count […]