November 20th, 2011
I have fallen way behind in answering questions, so I thought I’d use a blog post to answer a number of them. Most recently, Susan asked:
Patsy, On top picture how did u affix the fine fern leaves onto the backrground after u fused them on ? Satin stitch? They are sooo intricate…………
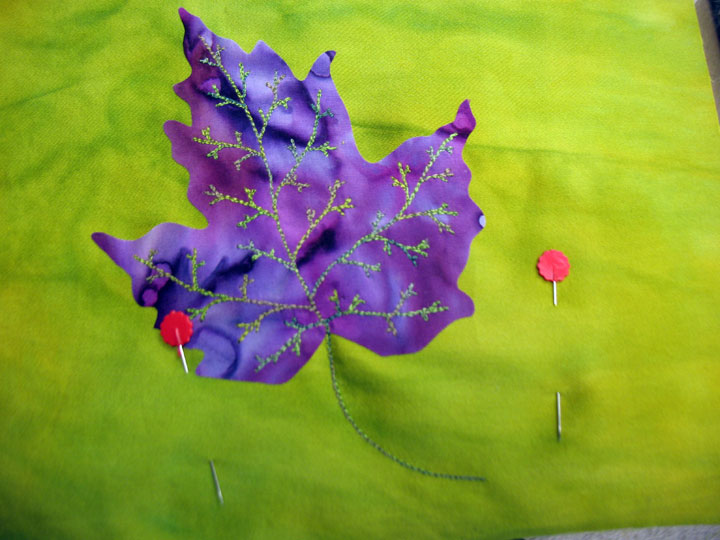
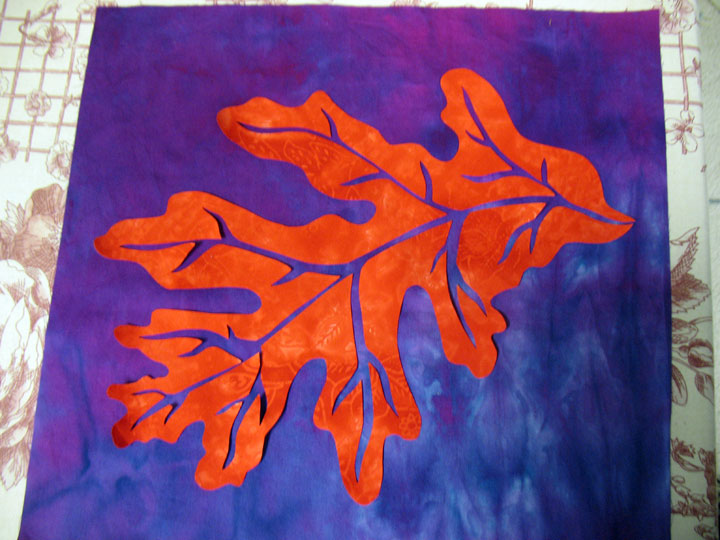
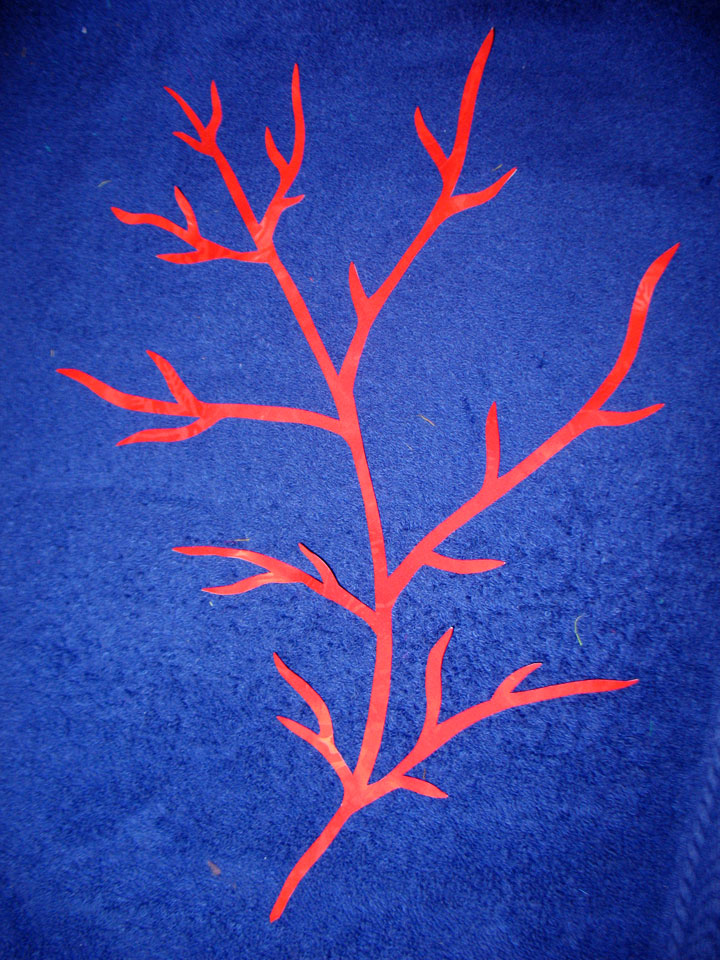
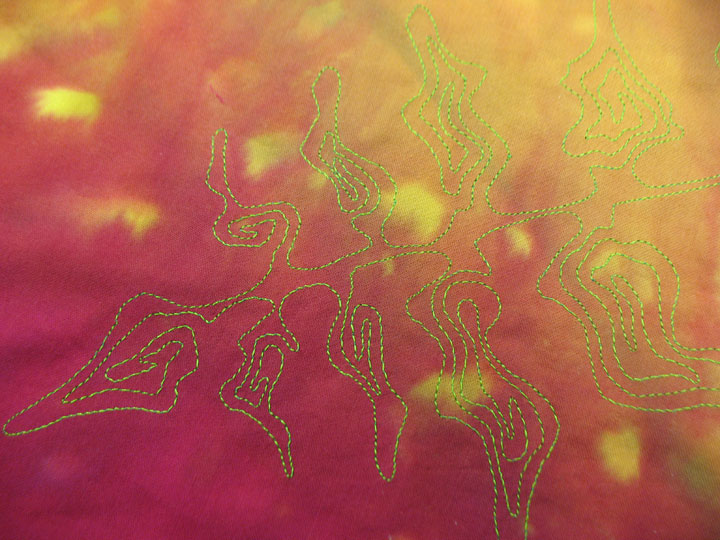
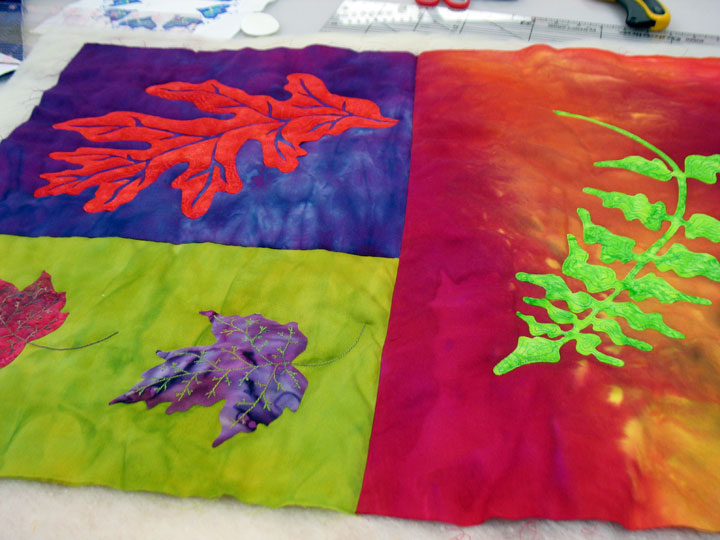
I’ve never used a satin stitch to finish the edges of something this delicate; I’m thinking that the satin stitch would likely overpower (and maybe even shred) the most delicate portions of the stem lines. Instead, I free motion embroider the fern, usually using a combination of the irregular swirl design in the leaf sections and just “in-lining” in the very narrow stem lines. The project I showed in that recent post is now in NC and I’m in OH, so here’s a shot of another fern from another project finished in this way:

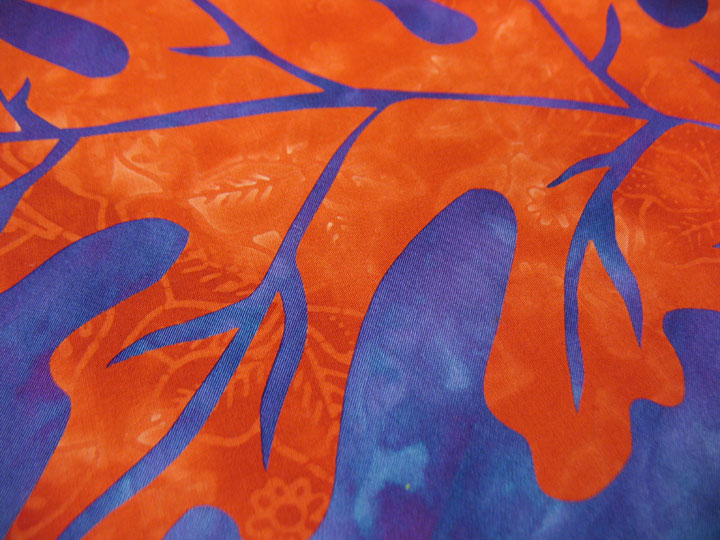
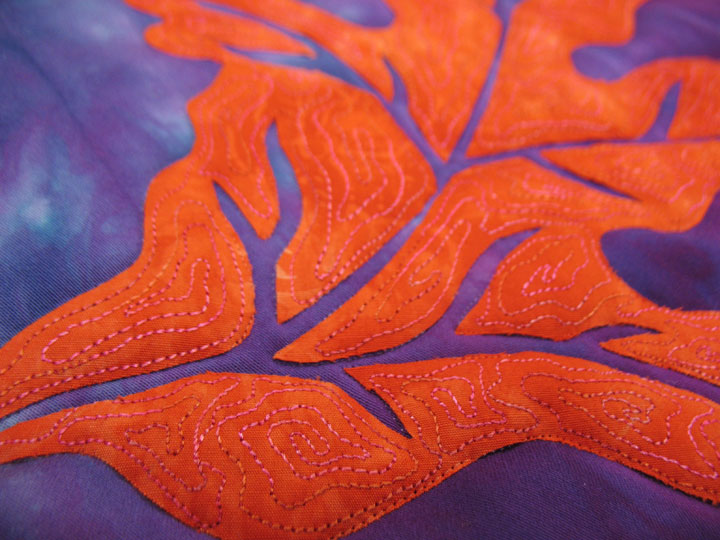
…and here’s a closeup shot of another fern that will probably give you a better sense of that stitching:

In an earlier post about using heavy size 12 pearl cotton embroidery thread in the top needle, Lisa wrote:
Very nice. I wouldn’t think that the pearl cotton would go through your tension so easily or that it would fray. Is that what the silicone does for the thread?
Yes, that’s exactly why I would use the Silicone. It will lubricate the thread and the thread will flow through the tension discs more easily, minimizing the risks of thread shredding or breaking. In this case, it’s because the thread is so big and heavy. In the case of metallic threads, I use it because the threads are so fragile and delicate. Again, you don’t have to use this liquid silicone in either of the above mentioned scenarios. And one more thing about these big, heavy threads. Someone had written to me about how “furry” that Caron Collection thread looked. That thread is relatively furry; you can see that a bit better in this photo that shows the Caron Collection thread next to DMC size 12 pearl cotton thread:

The furriness would not stop me from using it, though. Sometimes, you want threads that have varying textures on your quilt, and that furriness is sometimes a sought-after attribute. The Caron Collection also makes a very plump embroidery thread that is a blend of wool and silk (talk about furry!) and the whole reason I use that thread is for that wonderful texture! Think of these threads as over-sized versions of the commercial quilting threads on the market. Look at some King Tut thread next to a Sulky Blendable thread. They are both 100% cotton threads, yet they are completely different. One is ultra-smooth and will flow through your machine like butter, and the other is not so smooth and is fairly furry.
And many, many people wrote to me asking to explain the EKG stitching. That really made me chuckle, because I feel like I’m always posting about it, so I’m thinking that everyone is bored to death reading about it! Here’s a re-print of a post from a couple of years ago that explains it:
The Mysteries of The EKG Edge Finishing Design Are Revealed!

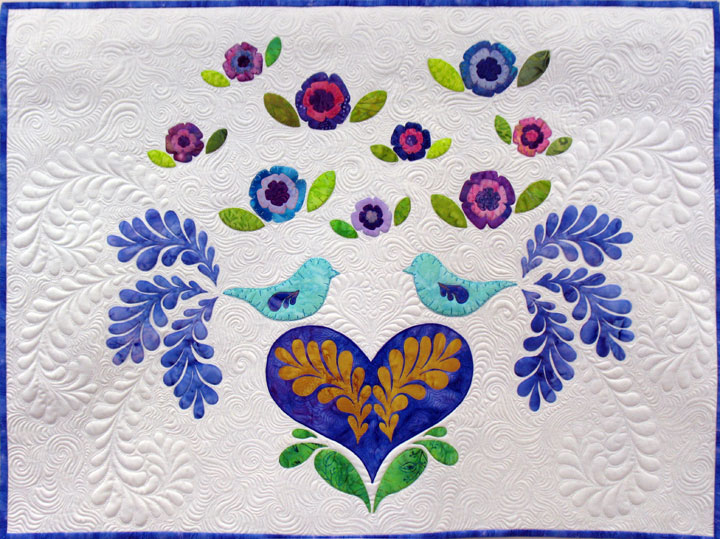
I frequently receive emails inquiring about the EKG stitching that I often use to finish off the edge of applique shapes, like the edging on the tulip above. I received this sweet email just the other day:
Hello,
I received regularely your news letters.
Your work is beautyful and I learn many things from you, I am a beguiner in the
quilting thing.
Please, I want to now what is this beautyful stich you do around your flower or
leave, is it a free hand stich or a machine stich and if so which one
Thank you for your help
rosanne
Rosanne,
Your note is so touching to me that I thought I would do a post on this finishing design because although it looks like it would be tough to do, it is as easy as pie! On top of that, it is very fun!
First, know that this is a design you will create-it is not a programmed embroidery stitch on your sewing machine. I call it the EKG design because it makes me think of an EKG pattern, kind of like a run of V-fib. Here is how to do it:
1. set up your machine for free motion work using the straight stitch (the way you set it uo for FMQ).
2. you begin your stitching at the inside edge of any applique shape. The design is created by gently moving the quilt slightly back and forth as you travel along that inside edge, all the while creating “V” shapes. Notice that the “V’s” vary in length and also in how wide they are:

3. As you travel along that outer applique edge, your goal is to keep the “V’s” perpendicular to the edge. If you need to pivot your piece as you work to keep yourself oriented, that’s ok! See how I was trying to stay perpendicular as I moved around the heart below:

4. The more “irregular” the lengths/widths of the “V’s,” the more interesting your work will be. Never let the length of a “V” exceed more than 1/2 the width of the applique piece you’re working in. Most of the time, you won’t come anywhere near that. When you are working inside a “skinny” applique shape (like a long stem), NEVER let a “V” from one side intersect a “V” from the other side as this will look messy.

You can use this finishing design on just about any shape. In general, I try to use a thread color that is related to the fabric color, but I try NOT to match it. In mean, gosh, I’m going to all this extra trouble to do this stitching, so I want to make sure people SEE it! Because of that, I usually pick a color that’s just a bit different. I wish I could say that I had invented this technique, but I did not. I learned it many years ago in a class by a wonderful quilter named Laura Heine. If you ever have the opportunity to take a class from her, do it!
One more thing about this…you can do this as a QUILTING technique, but I mainly us it as a FREE MOTION EMBROIDERY technique. In other words, I do all this stitching when the piece is just a quilt top…there is no bulk because there is no batting and because no portion of the stitch falls outside the fusible applique, I do not need to use a stabilizer. Once it’s in the final quilt sandwich, I stitch just outside the edge of the applique shapes with invisible thread and it creates a very cool texture. This technique really is worth trying if you haven’t yet.
And one more thing…there are just about 12 hours left to enter the Beam ‘n Read Give-Away! To enter, just leave a comment by 11:59 pm (eastern time) tonight on the Beam ‘n Read Give-Away post from last Monday! (scroll down 2 posts to find it!)
Filed under
Free Motion Embroidery, Free Motion Quilting, Tips & Tricks.


 It’s been pretty quiet here on my blog because I have been indisposed for awhile. We have a beloved family member who is dying and we have been caring for him at home with the help of our local hospice. This means that I have not done any sewing or quilting for weeks, so that’s why you haven’t heard from me. In the meantime, I’m going to post some photos of some free motion quilting designs that might help get you inspired to play around with your sewing machines. This is the only way I know to “stay in touch” while we go through this family journey.
People often ask me how I choose quilting threads for a given project. Sometimes, the most striking thread combination is a subtle one. The photo below is a quilted pillow cover and the quilting is a white polyester thread on a 100% white cotton background:
It’s been pretty quiet here on my blog because I have been indisposed for awhile. We have a beloved family member who is dying and we have been caring for him at home with the help of our local hospice. This means that I have not done any sewing or quilting for weeks, so that’s why you haven’t heard from me. In the meantime, I’m going to post some photos of some free motion quilting designs that might help get you inspired to play around with your sewing machines. This is the only way I know to “stay in touch” while we go through this family journey.
People often ask me how I choose quilting threads for a given project. Sometimes, the most striking thread combination is a subtle one. The photo below is a quilted pillow cover and the quilting is a white polyester thread on a 100% white cotton background:
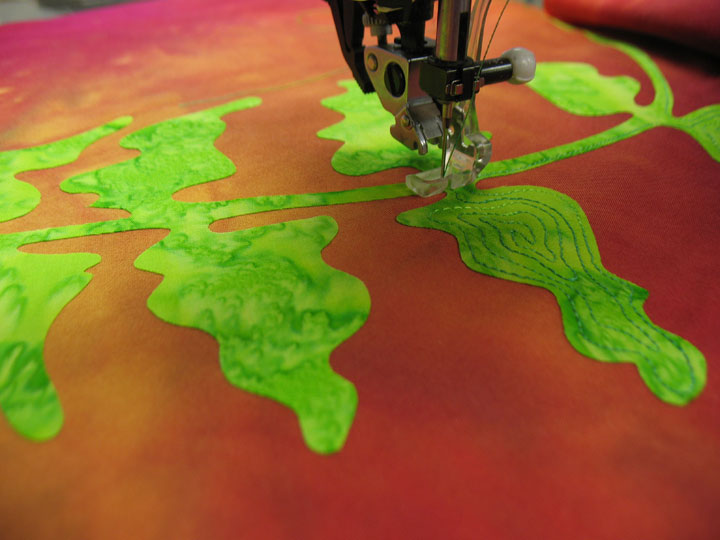
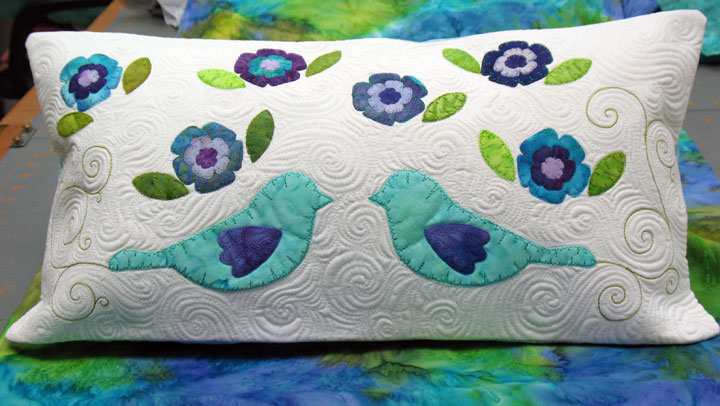 The swirls that you see in green thread are actually not quilted. Those were free motion embroidered when this was just a top. Once the pillow case was placed in the final quilt sandwich, I stitched around the green thread swirls with invisible thread, and this makes them a little bit protuberant, which makes them a bit more noticeable. All the other thread work that you see along the edges of the applique shapes was also done as free motion embroidery, not as quilting. That is why those applique shapes seems to “pop out” just a bit. The slight 3-D effect is a bit more noticeable in this shot of the front of the pillow cover before I inserted it over the pillow:
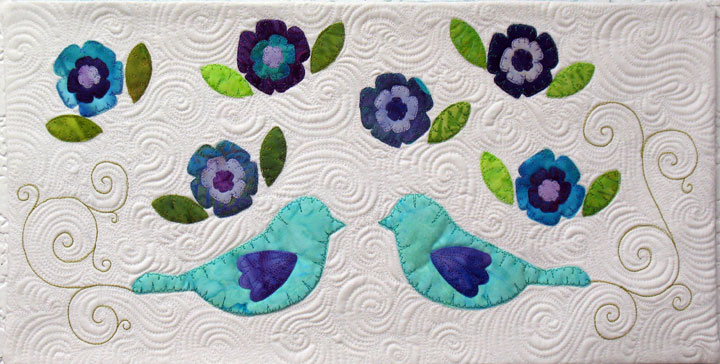 This next shot is of a small wall hanging that also has a white background:
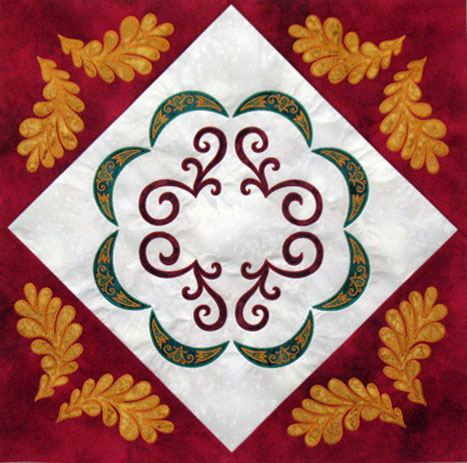
 The quilting on this quilt is similar to the earlier one, although the quilting seems a bit more noticeable, doesn’t it? That’s because the background white fabric is a white cotton sateen. Cotton sateens all have a slight luster to them, so once they are quilted, they throw off more shadows. That’s a fancy way of saying that fabrics with a luster or sheen will always make your quilting appear more dramatic. Here’s a close up:
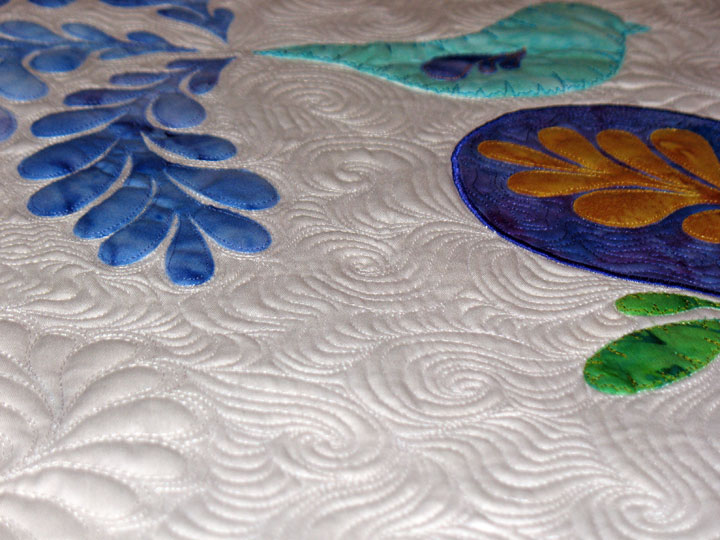 See what I mean? This makes me think of royal icing and someone has taken a toothpick and drawn a fine line design. When the goal of the quilting is solely to create a luscious texture and not to draw attention to the stitched line itself, think of matching the thread color to the background fabric or coming pretty close to a match. Here’s some more white polyester thread on a white cotton sateen background:
 and another:
 One more:
 So nice to touch base with other quilters here; I feel a bit “cut-off” from my quilting life. Hope to be in touch again soon.