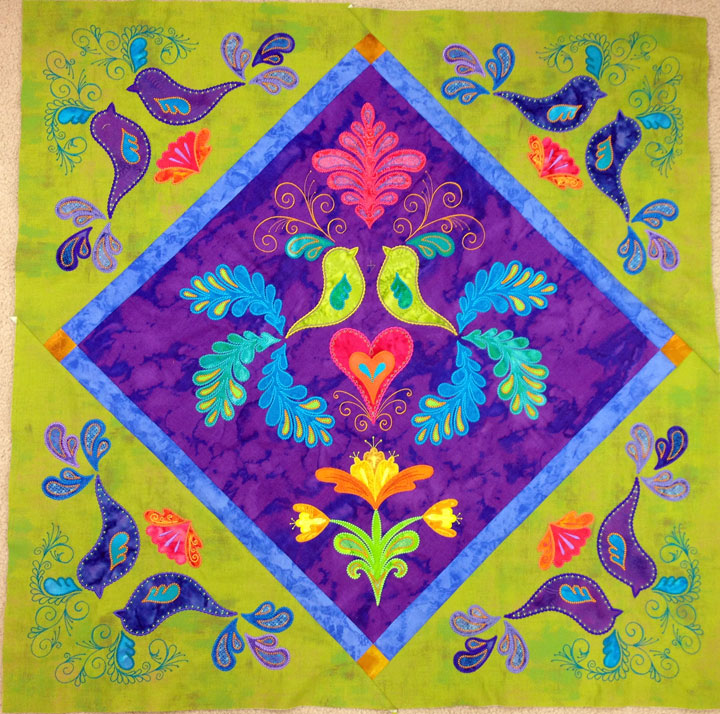
May 6th, 2018
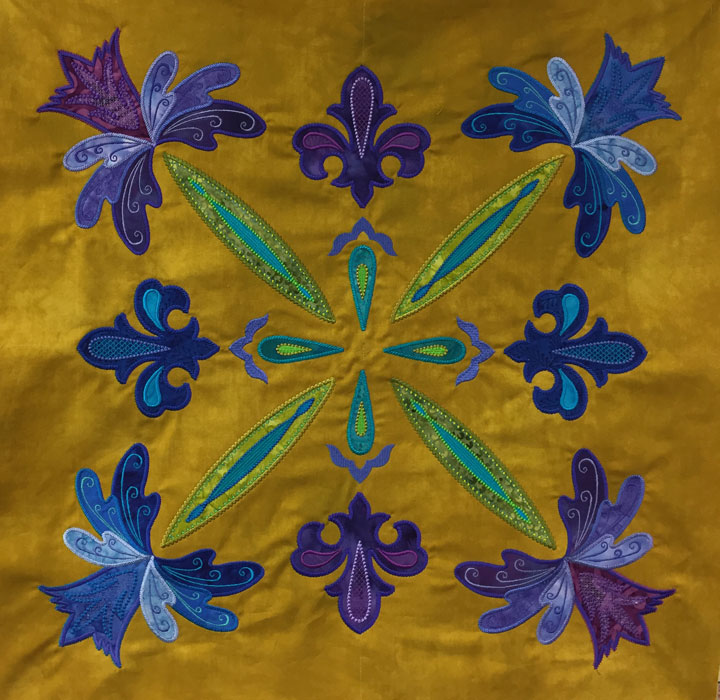
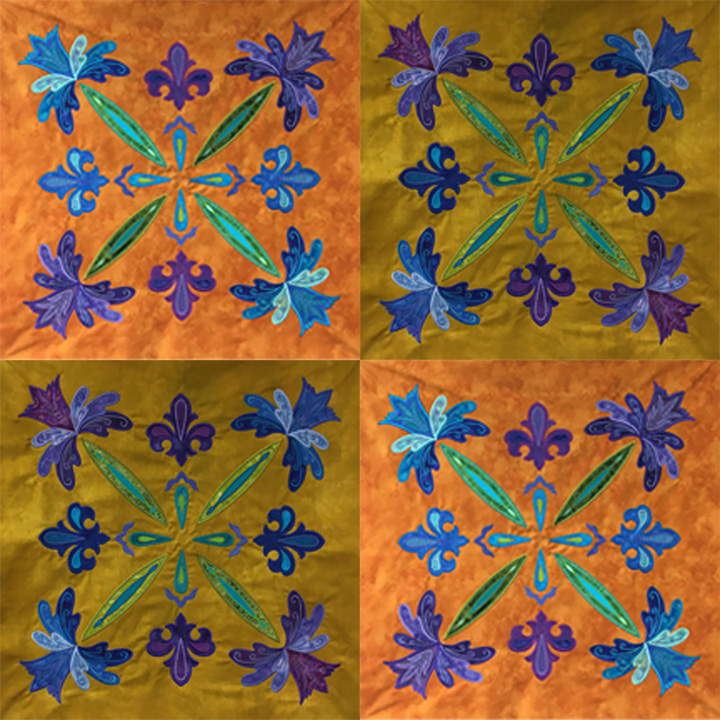
I’ve been experimenting with a new large quilt block design and I’m calling it the Fantasy Flower Block. This is another machine embroidery applique block, (meaning that it is appliqued and embroidered using an embroidery machine), and after multiple revisions, I’ve settled on the final block above. This a large block, (24 inches square), and it’s created in 4 hoopings. Each block takes nearly 3 full days of dedicated work to complete. All of the applique shapes were cut on my Sizzix Big Shot machine except for the stems, which were traced and cut by hand. I like some of the details so I tried to take some close ups to show them. Here is a close up of one of the flowers:

The center-most part of the flower (i.e. the thistle part of the flower), has a dual edge border treatment that I’ve never tried before. I was trying to add a sense of “prickliness” or a “menacing nature” to that thistle, so we added those spikey edges. I like the contrast of having an adjacent satin stitch right up against that prickly edge. I also really like the stems. Here is a shot of 4 stems converging in the center area:

(Sorry, you need to ignore that center crosshair! I guess I forgot to remove it before taking the photo!) Each block holds 2 pairs of identical stems. Here’s a shot of one color option on this block:
…and here’s a shot of another stem in a different colorway:
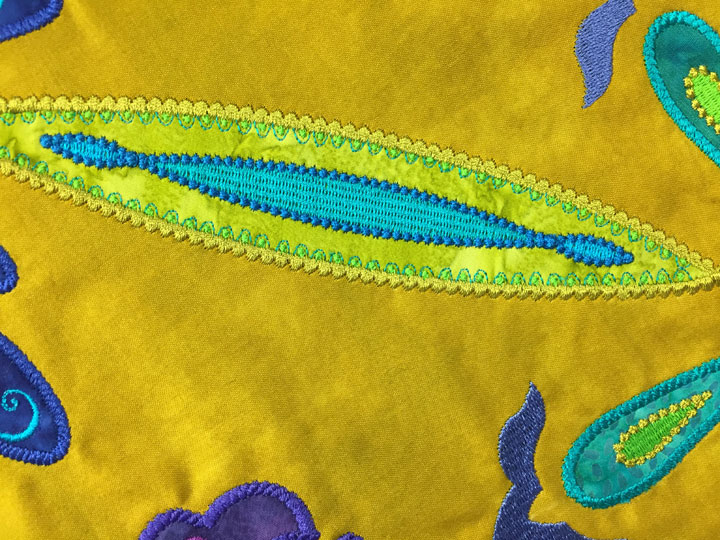
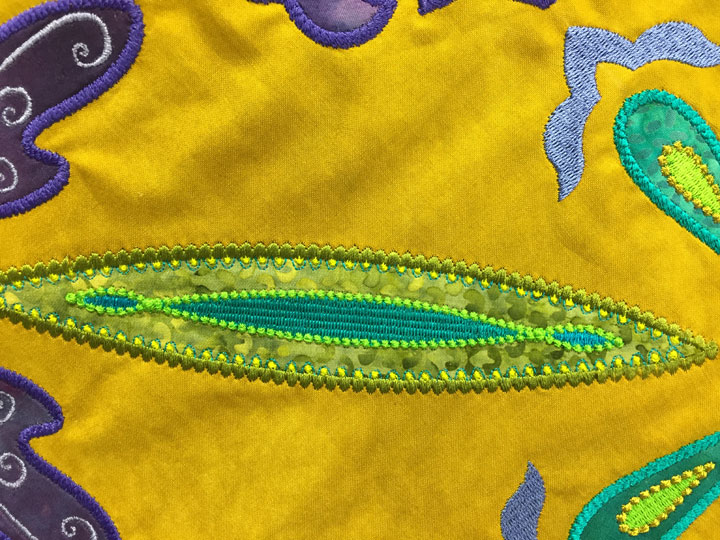
Here is a close up of a portion of a stem so you can see the details better:

I’ve used this same dual edge finishing design many times now, but it never ceases to amaze me! I love the complexity of this design so I’m sure you’ll see me use it again. Here’s a shot of one of the fleur-de-lis shapes; their embroidered details are pretty “vanilla,” but I needed some “quiet places” on the block:

…and here’s a shot of the whole block using a little bit of a different background fabric:
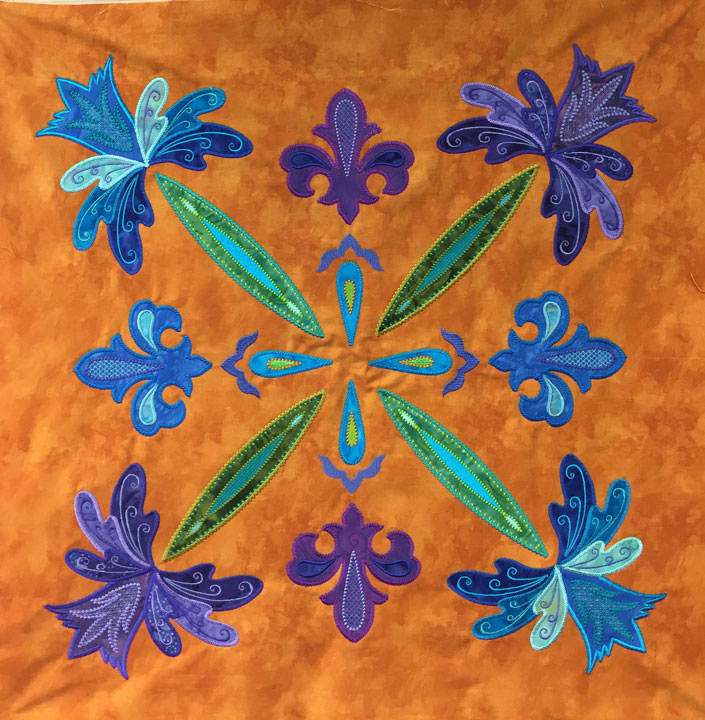
I’ve finished the 4 blocks that will make the center portion of the quilt. The center will measure 47 1/2 inches square. I’m hoping to begin working on a border design in the next few days…can’t wait!
Filed under
Machine Embroidered Applique, Sizzix.
October 21st, 2017
There’s nothing quite as invigorating as beginning a new quit project. I’ve had the center part of this quilt in my head for a few months now, but couldn’t allow myself to begin working on it until I had finished up some other work. Now I can really plow into this! I started by cutting out applique shapes with my Sizzix Big Shot:
 (This was early on…I cut a WHOLE lot more than this, but it went very quickly using a steel rule die.) My background fabrics were the hand dyed fabrics I dyed recently. Here are my 3 center panels once they’d been backed with a lightweight interfacing and cut to size:
 (For what it’s worth, I always fuse a lightweight interfacing onto the back of any fabric I’m going to embroider, but cotton sateen is a good fabric to ALWAYS fuse to lightweight stabilizer, even when you’re not going to embroider it. It’s a twill fabric and can be a bit of a “shape-shifter,” if you know what I mean. Once you back it with interfacing, it will not change shapes on you.)
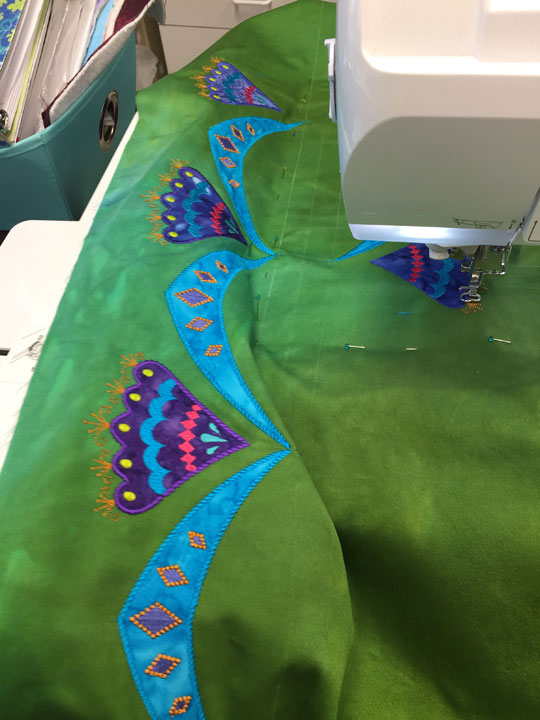
Next up, I fired up the old embroidery machines and started many, many hoopings of machine embroidery applique. You can see one of the panels in the next shot as I’m still adding to it:
(For what it’s worth, I always fuse a lightweight interfacing onto the back of any fabric I’m going to embroider, but cotton sateen is a good fabric to ALWAYS fuse to lightweight stabilizer, even when you’re not going to embroider it. It’s a twill fabric and can be a bit of a “shape-shifter,” if you know what I mean. Once you back it with interfacing, it will not change shapes on you.)
Next up, I fired up the old embroidery machines and started many, many hoopings of machine embroidery applique. You can see one of the panels in the next shot as I’m still adding to it:
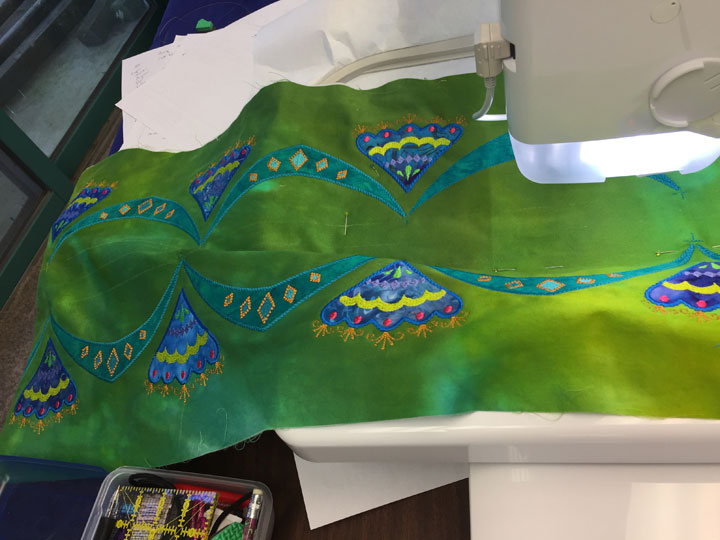 This first panel has jade swags and dark blue flowers. It’s my favorite one. This second panel has turquoise swags and purply/blue flowers. I’m not as in love with this one:
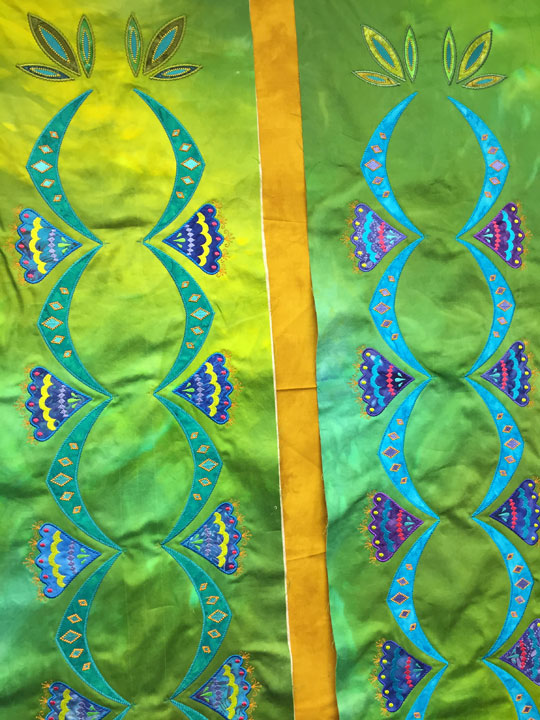
 I can’t believe I got this far already, but I’ve finished the MEA on the first 2 panels!! Here is a shot of them next to one another on my design wall:
 The Dijon mustard fabric in between them is in the “auditioning phase”…not sure that is a “go” or not just yet. The third panel will also have jade swags and dark blue flowers. I won’t be able to work on this again for a week, but I’m feeling totally “juiced up” by how far I’ve gotten so far. Here’s a closer up shot that is very off-kilter:
Filed under
Fabric Dyeing, Machine Embroidered Applique, Sizzix.
August 5th, 2016
I haven’t posted in about a million years because I haven’t been making anything worthy of a post. Except for prep work for classes and demos, this week was really the first sewing/quilting I’ve done in the last 2 1/2 months. How sad is that?! I’ll tell you, it’s pretty darn sad and I feel like a basic part of my soul has been sorely neglected. Between deadlines, travel, and unexpected family illnesses, life has been kind of topsy-turvy for quite awhile now and I’m feeling a strong need to get things back into balance. Fortunately, I’ve had a little time the past few days to spend in my sewing room and my creative spirit is feeling alive again.
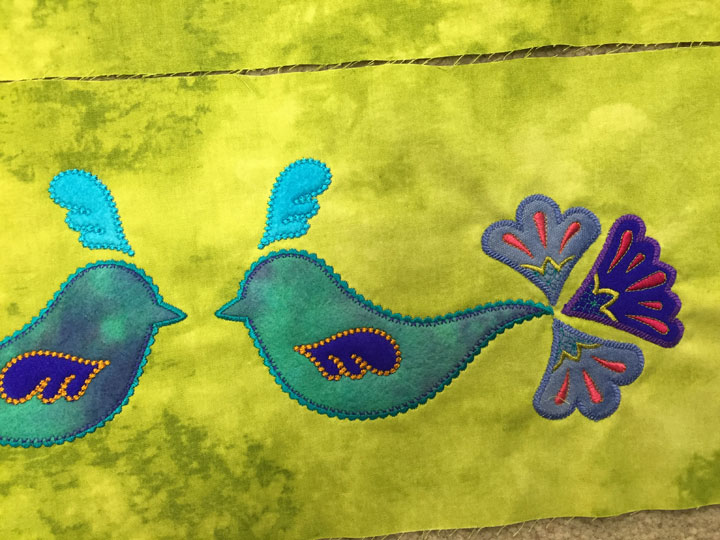
I made a couple of blocks that I intended to use for 2 sides of a tote bag, but now I’m re-thinking how I will use them. This shot shows both of them and they are MEA blocks that were made using “alternative textiles” for the applique shapes:
 In this case, I used woven wools, wool felts, velvet, bamboo felt, and blended rayon/wool felt for the applique shapes; all of them are hand dyes. All of these textiles add tremendous texture/depth to the finished piece but it’s very hard to capture that in a photo. Because they are much thicker than traditional cottons, I’ve found that fusing them to fusible web serves no purpose. (They are so thick that the mini irons really can’t heat the fusible sufficiently to melt it.) Instead, I adhere them to the fabric using a glue stick pencil like one of these:
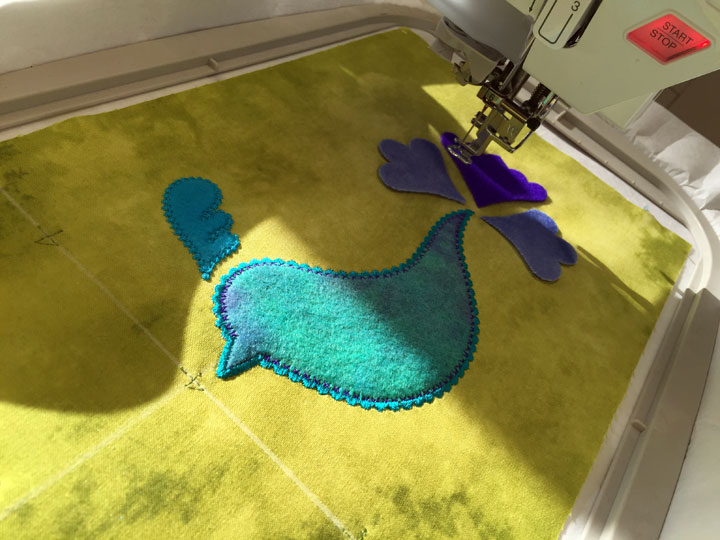
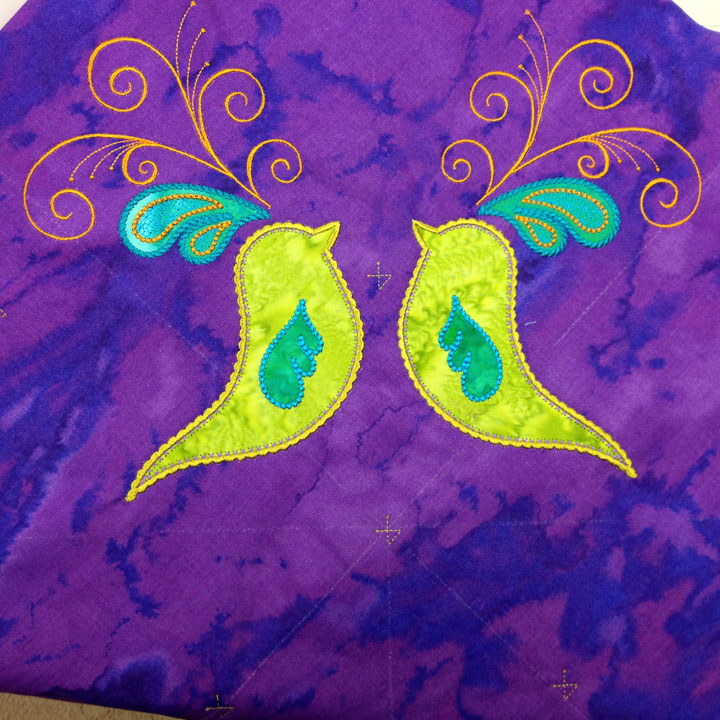
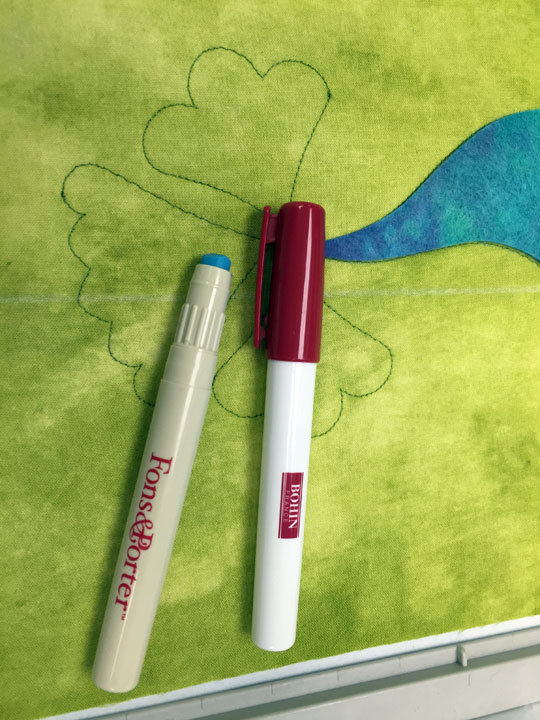 I try to outline just inside the perimeter with a line of glue, and then throw a few more glue “streaks” inside the shape. In the photo below, the blue that you see inside the bird outline is what the glue looks like when it first goes on (it dries clear.)
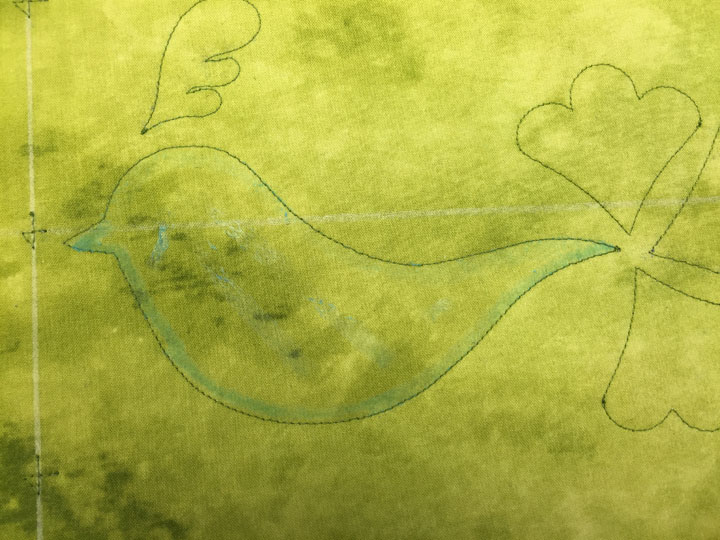 (Don’t be distracted by the white soap lines. Those are used for aligning the fabric block on the stabilizer and they are gone at the end of the project.) Each bird is appliqued/embroidered in 1 hooping and you can start to get a little feeling for the 3-D texture in this next shot where there’s a little embroidery completed:
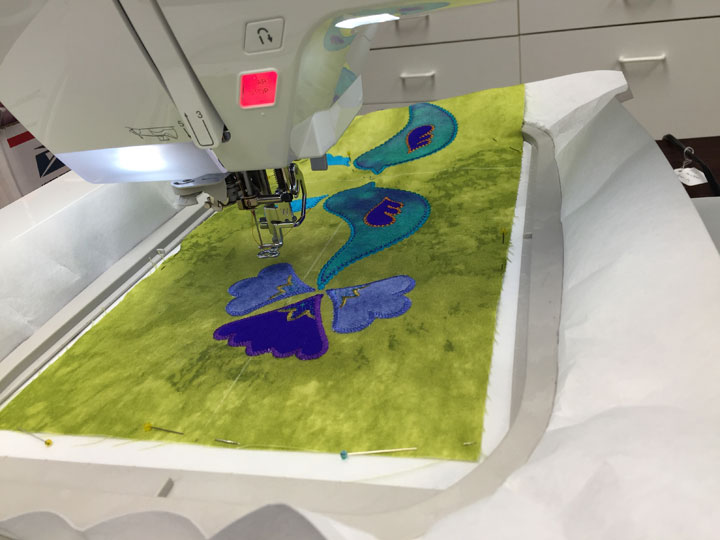
 …and here’s a shot toward the end of the 2nd hooping where the 2nd bird is being worked on:
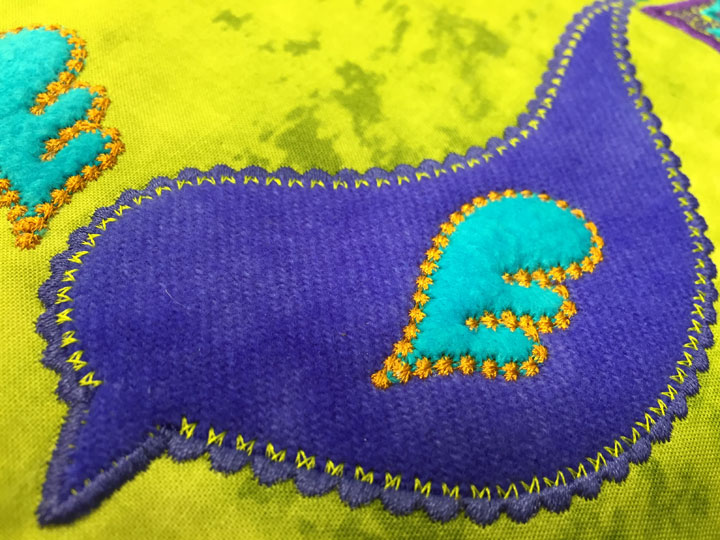
 I ended up making the 2 blocks in different colors since you can only see one side of a tote bag at once. In this early closeup of the other block, you get a better sense of the texture in that the wing felt really plumps up nicely once the edge finishing is done:
 Here’s a shot of that whole bird all decorated:
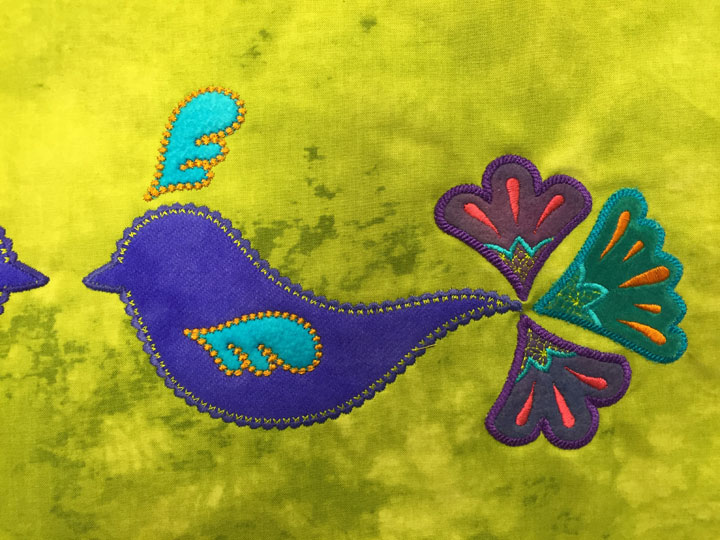 …and here’s a close up shot of the other colorway of bird:
 Now I just need to decide how I’ll use these guys!
In other news, the PTD Ruler Work Starter packs are back in stock and you can find them by clicking here. The Turrets 2 and Turrets 3 rulers are also back in stock and you can find them by clicking here.
Now I just need to decide how I’ll use these guys!
In other news, the PTD Ruler Work Starter packs are back in stock and you can find them by clicking here. The Turrets 2 and Turrets 3 rulers are also back in stock and you can find them by clicking here.
Filed under
Free Motion Quilting, Machine Embroidered Applique, Sizzix.
October 6th, 2015
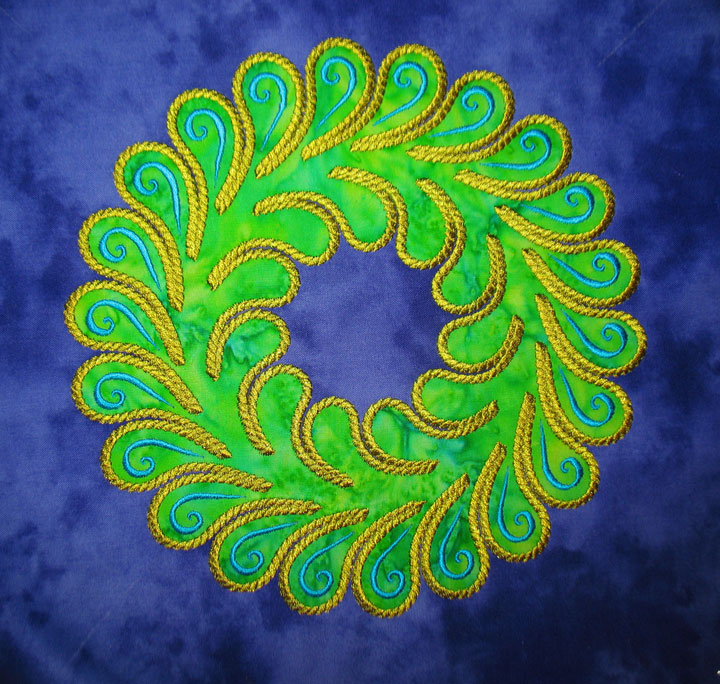
 I was able to get a little MEA done in the last 10 days, mainly finishing up the testing of some block designs. When you have designs that can be stitched in multiple sizes of hoops, you have to keep testing out the files in all the various hoop sizes, so before you know it, they are kind of multiplying and you end up with tons of a given type of block. Here’s a Christmasy version of this appliqued wreath:
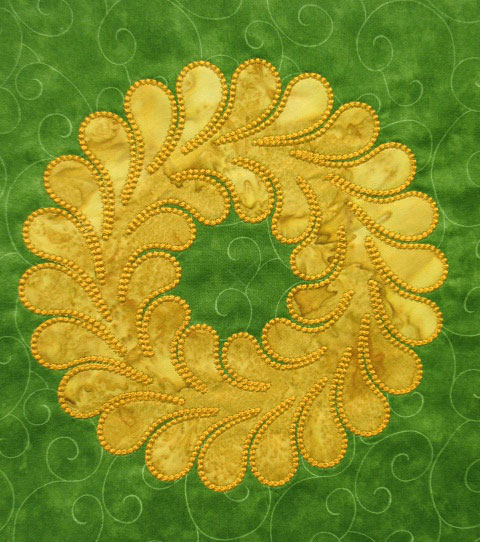 That’s actually from a couple of years ago. These wreaths are a single applique shape that were cut on my Sizzix machine using the Appli-K-Kutz 8 1/2 inch Wreath Die. Here’s another version of the same applique shape, but it has a different edge finishing stitch as well as an internal design:
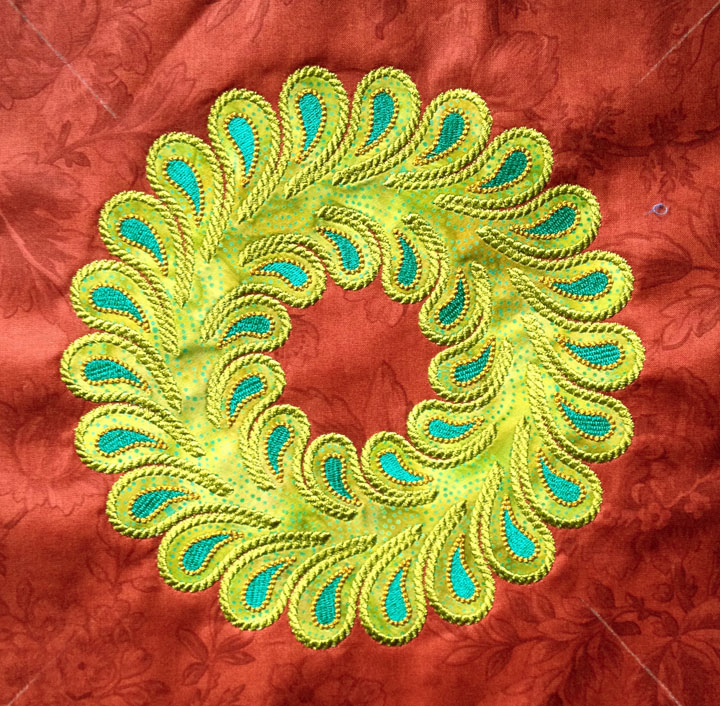 (Ignore the white lines; those are soap marks I use for registration lines when I float my fabric in the hoop. They are now history!) Here’s the same wreath with a different internal design but same edge finishing stitch:
 …and here’s an example of the same internal design as above but with the candle wicking edge finishing stitch:
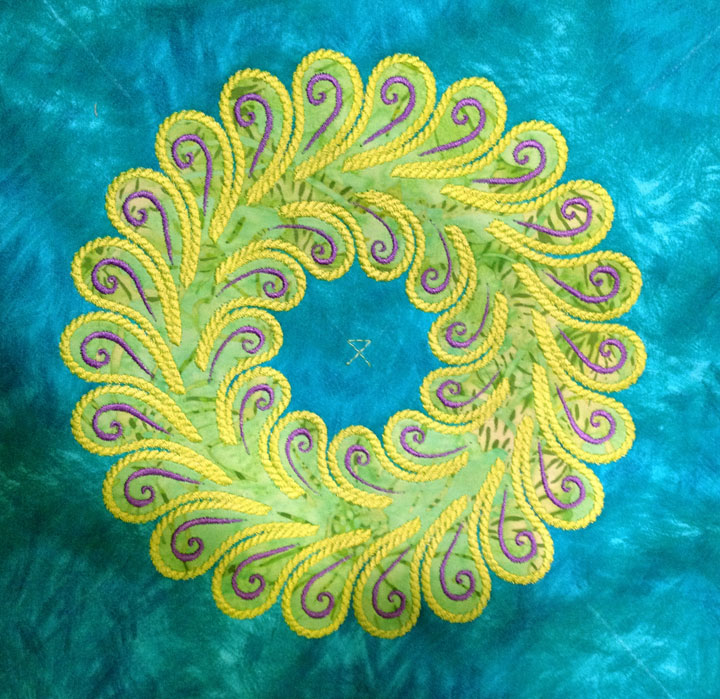
 …and here’s what it looks like if you only add that internal design to one side of the wreath:
 And here’s another internal design! This time, the internal design is a series of one-sided feathers inside each plume:
 These wreaths are multiplying! The shot below isn’t even all of them, but I think this grouping will make a nice quilt with the blocks set on point:
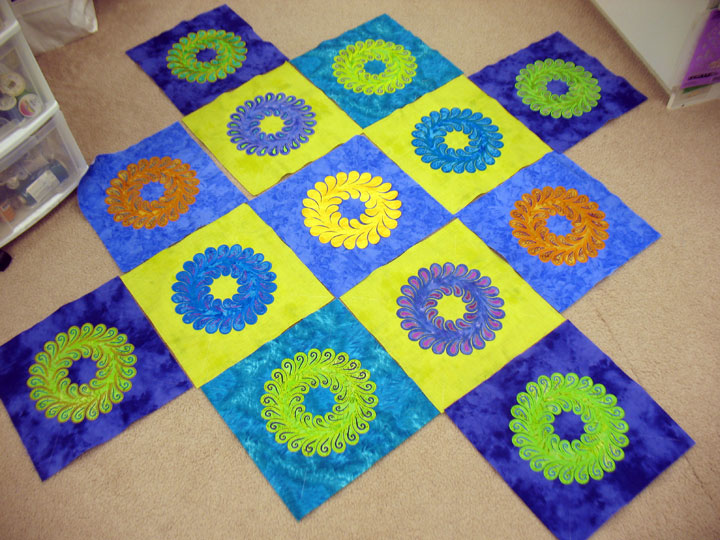 I see some fun ruler work in those spaces between wreaths…!
Filed under
Appli-K-Kutz Fabric Cutting Dies, Machine Embroidered Applique, Sizzix.
May 25th, 2015
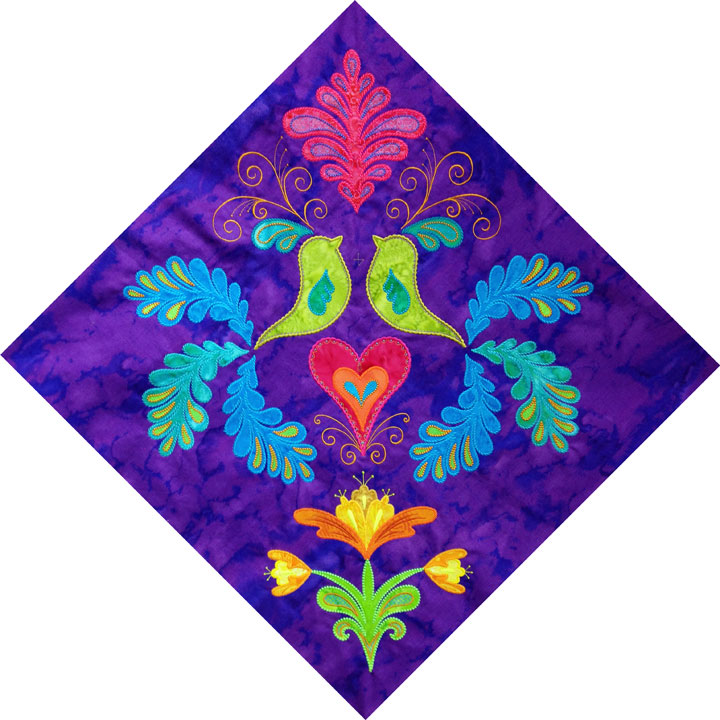 Do you remember this applique block from a couple months ago? This was actually my first test stitch-out of the files to create this block. It’s had some minor tweaking done but I really liked how this preliminary stitch-out looked and didn’t want to waste it. So, I’m using this 22-inch block as the center of a new applique quilt. The shapes are all die-cut applique shapes that were cut out using my Sizzix Big Shot cutter. Using die cut shapes for MEA works great, because the shapes are always exactly the same and they fit perfectly into the placement outlines that are stitched by the embroidery machine. I’m kind of ashamed to say that working in this way has spoiled me.
Anyway, back to this current quilt. If you read my blog, then you know that I love to free motion quilt. A lot of times, I’ll create some of my quilting motifs so that they “play off” of applique shapes. An example would be the headdresses on these birds:
Do you remember this applique block from a couple months ago? This was actually my first test stitch-out of the files to create this block. It’s had some minor tweaking done but I really liked how this preliminary stitch-out looked and didn’t want to waste it. So, I’m using this 22-inch block as the center of a new applique quilt. The shapes are all die-cut applique shapes that were cut out using my Sizzix Big Shot cutter. Using die cut shapes for MEA works great, because the shapes are always exactly the same and they fit perfectly into the placement outlines that are stitched by the embroidery machine. I’m kind of ashamed to say that working in this way has spoiled me.
Anyway, back to this current quilt. If you read my blog, then you know that I love to free motion quilt. A lot of times, I’ll create some of my quilting motifs so that they “play off” of applique shapes. An example would be the headdresses on these birds:
 This time, I thought I’d try adding some of this kind of thread detail into the embroidery file. This means that once I get this whole quilt pieced and thrown into the final quilt sandwich, that thread work will kind of protrude outward if I stitch just outside it w/invisible thread. Here’s an example of incorporating it into the embroidery file instead. (The photo below shows the block only partially embroidered):
 I really loved how that came out, so I went a bit nutso when I designed the headresses for the birds in the corner setting triangles. Check out THIS thread detail:
 Doing that type of thread work as part of the embroidery has 2 benefits for me:
-in the final finished quilt, the thread work will be more protuberant as opposed to having it kind of sink into the batting when it’s done as free motion quilting; and
-Because it’s done on the embroidery machine, it can be a much heavier line of stitching than the single line of stitching I can create with free motion quilting. There’s a price to be paid for this, though. For someone who loves to quilt, I am severely limiting the amount of “free space” available for quilting. That means the final quilting will not be nearly as much fun for me.
I had to go through a few renditions of this corner setting triangle block to get to this one and I’m very happy with the end result. I ended up adding a “frame” to the center block:
Doing that type of thread work as part of the embroidery has 2 benefits for me:
-in the final finished quilt, the thread work will be more protuberant as opposed to having it kind of sink into the batting when it’s done as free motion quilting; and
-Because it’s done on the embroidery machine, it can be a much heavier line of stitching than the single line of stitching I can create with free motion quilting. There’s a price to be paid for this, though. For someone who loves to quilt, I am severely limiting the amount of “free space” available for quilting. That means the final quilting will not be nearly as much fun for me.
I had to go through a few renditions of this corner setting triangle block to get to this one and I’m very happy with the end result. I ended up adding a “frame” to the center block:
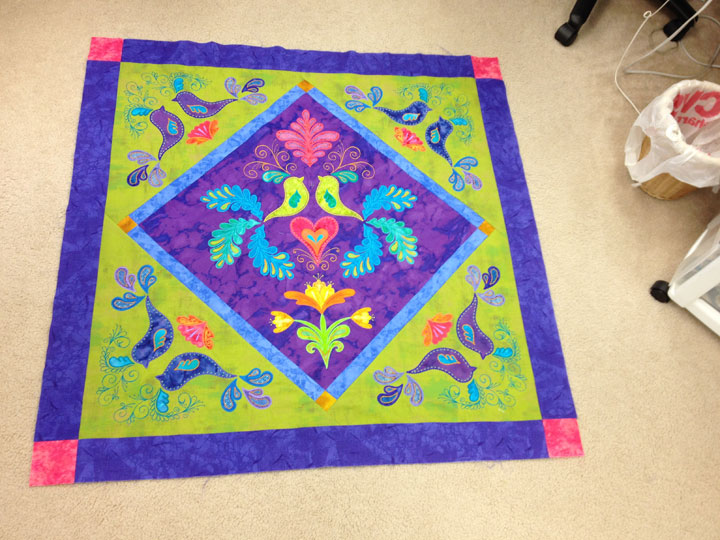
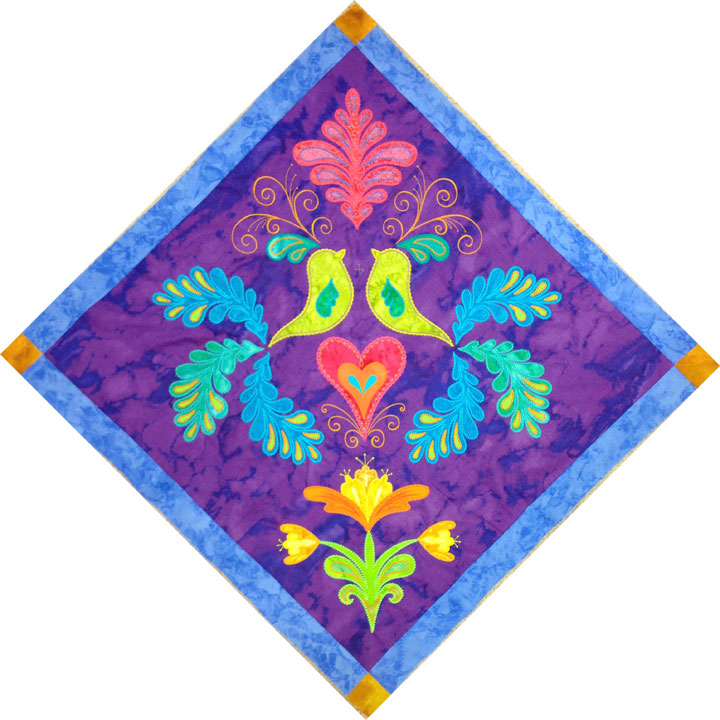 And here’s what it looked like once I’d added the corner triangles:
 (Sorry; the pics aren’t so great because they’re all taken with the piece lying on the floor rather than flat on a wall.) Here’s what it looked like once I had added the next border as a frame:
 I have at least 3 more borders planned for this quilt. My fingers are crossed that I can get at least 2 of them done in the next week…
Filed under
Machine Embroidered Applique, Sizzix.

