August 3rd, 2014
I’ve been playing around some more, coming up with a few more block options for this group of blocks that stem from my original Pennsylvania Amish block concept. These are blocks of varying sizes that all work well together in that shapes are repeated in different ways, so there is a common theme. As I’m coming up with new block options, they are done in different colorways, so all these particular blocks are not intended to be used together in the same quilt. This has been a fun thing to play with from my end. This first group of blocks are derived from PA Amish Block #1. Let’s call this block the PA Amish #1Parent Block:
 This next block is child block #1:
 Child Block #2 is the same as child block #1 except that the block design is set differently on the block:
 (I don’t know about you, but I much prefer child #2.) And last but not least, here is grandchild #1:
 Now this next set of blocks are derived from a related but different block that I’m calling PA Dutch Block #2 Parent Block:
 Child #1 is:
 …and Grandchild #1 is:
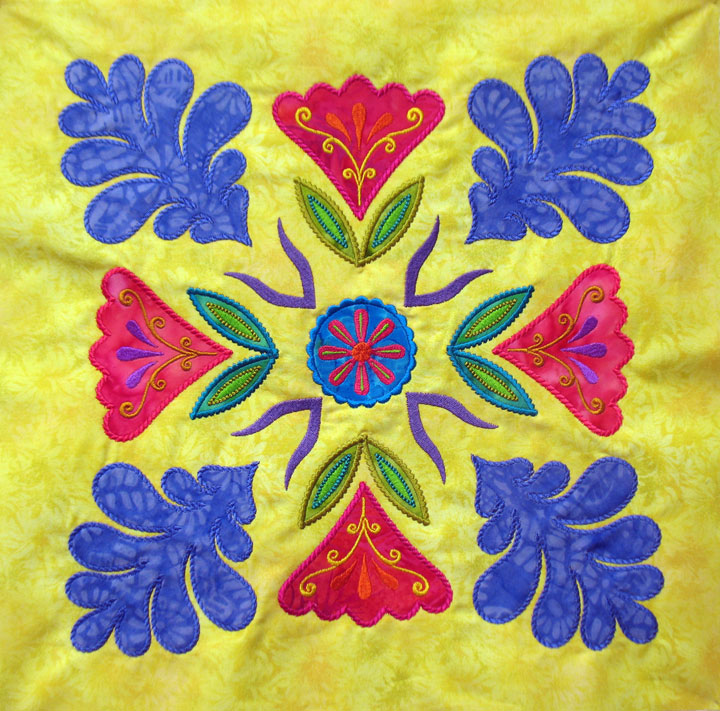
 That last block is much prettier in real life than in this photo. The flowers are all made in purples and blues but the photo doesn’t distinguish between these colors. (The background is grey, too, my new experimental color.) Do you see that blank space in the center of the block? If you know me, you know it won’t stay blank for long! The nice part about the way I do MEA is that it allows me the freedom to “drop” any design into whatever place on a block that I wish. in this case, it would be very easy to plop a trapuntoed quilt design (stitched on the embroidery machine) right into that empty space…stay tuned!
Anyway, I am having some fun with these and a number of quilted projects are in my head. Wish I had more time to just play wound like this…
That last block is much prettier in real life than in this photo. The flowers are all made in purples and blues but the photo doesn’t distinguish between these colors. (The background is grey, too, my new experimental color.) Do you see that blank space in the center of the block? If you know me, you know it won’t stay blank for long! The nice part about the way I do MEA is that it allows me the freedom to “drop” any design into whatever place on a block that I wish. in this case, it would be very easy to plop a trapuntoed quilt design (stitched on the embroidery machine) right into that empty space…stay tuned!
Anyway, I am having some fun with these and a number of quilted projects are in my head. Wish I had more time to just play wound like this…
Filed under
Appli-K-Kutz Fabric Cutting Dies, Machine Embroidered Applique, Sizzix.
July 3rd, 2014
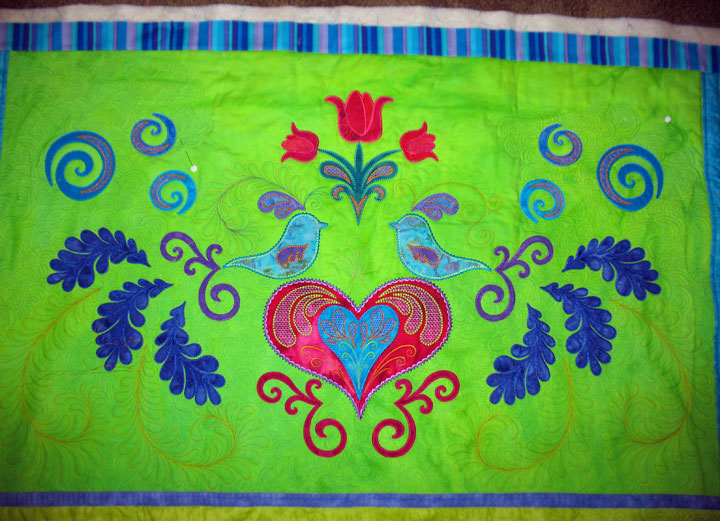
 I got a wonderful surprise last week in that I received an invitation to teach at Babylock Tech in August. This is the annual Babylock convention where dealers go to learn about the new machines being introduced and also learn new techniques that can be used on sewing/embroidery machines. There was a catch, though…my classes could only be 3 hours long. Trust me, when you have 30 people in a class who need to hoop/re-hoop several times, get up and walk over to fusing stations repeatedly to fuse their pieces, and get up to walk to alignment stations multiple times to sit and align the fabric block correctly on the hoop, 3 hours is not much time. Soooo, my challenge last weekend was to design a project for the class where they’d have enough exposure to my multi-hooping technique to learn it, all within a 3-hour period. The “Springtime Bouquet Purse/Tote” above is the outcome of my weekend. Both the front and back have a central MEA panel that requires 2 hoopings, so the class will allow them to do 4 hoopings using my technique. My next challenge is figuring out how to set the class up so that all 4 hoopings are feasible, but I think I have that part nailed. (They’ll need to complete the rest of the purse on their own time once they get back home.)
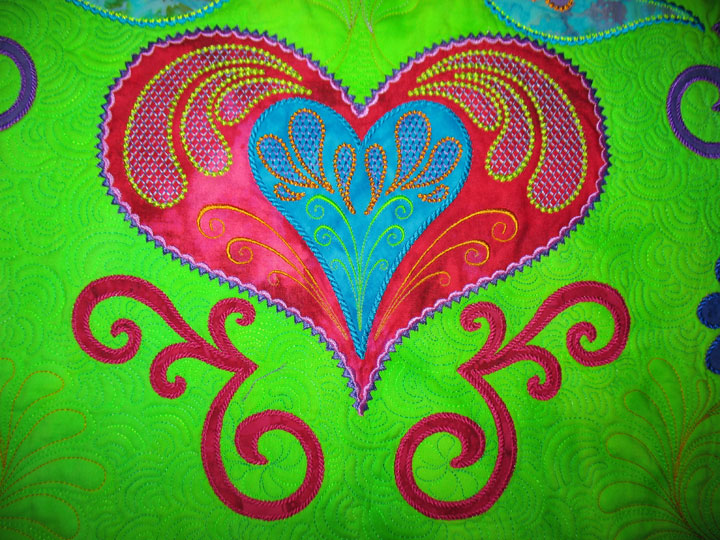
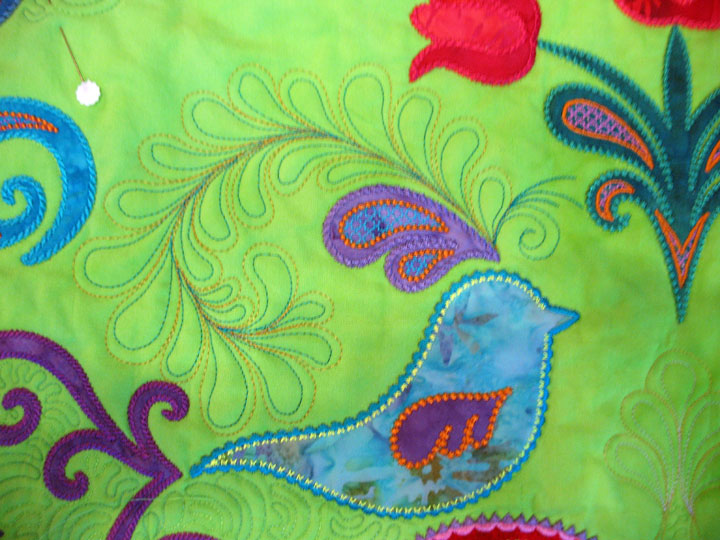
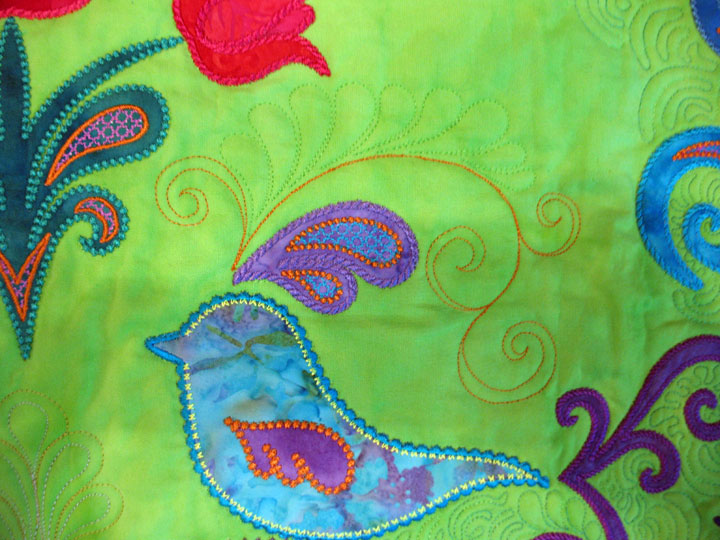
Here is what the front/back panels look like once pieced and sandwiched for machine quilting:
I got a wonderful surprise last week in that I received an invitation to teach at Babylock Tech in August. This is the annual Babylock convention where dealers go to learn about the new machines being introduced and also learn new techniques that can be used on sewing/embroidery machines. There was a catch, though…my classes could only be 3 hours long. Trust me, when you have 30 people in a class who need to hoop/re-hoop several times, get up and walk over to fusing stations repeatedly to fuse their pieces, and get up to walk to alignment stations multiple times to sit and align the fabric block correctly on the hoop, 3 hours is not much time. Soooo, my challenge last weekend was to design a project for the class where they’d have enough exposure to my multi-hooping technique to learn it, all within a 3-hour period. The “Springtime Bouquet Purse/Tote” above is the outcome of my weekend. Both the front and back have a central MEA panel that requires 2 hoopings, so the class will allow them to do 4 hoopings using my technique. My next challenge is figuring out how to set the class up so that all 4 hoopings are feasible, but I think I have that part nailed. (They’ll need to complete the rest of the purse on their own time once they get back home.)
Here is what the front/back panels look like once pieced and sandwiched for machine quilting:
 I thought mirror image feathers emanating from each side of the stem’s base would look nice, but you can barely see them with the thread color I chose:
 This shot of the batting side shows the quilting better:
 I switched to a thread color with a bit more contrast and stitched swirls in the upper section, then a loop-d-loop design in the borders:
 Truthfully, I wasn’t happy with the quilting choices I made, but I just had to keep going since the real issue for me was whether or not the proportions of this project were going to work to create an enticing class project. I sewed my 2 sides together, created boxed corners at the base, then sewed my ruffle and handles to the top edge. (I had fused a medium weight interfacing to the wrong side of the ruffle before I pressed it in half. That step is important because once the lining is added, I want that ruffle to stand up and STAY up, and the interfacing will allow that to happen):
 I put that part of the project aside and created my front and back lining with pockets and sewed those sides together, then created the same boxed corners at the base. Lastly, I added magnetic snaps in the center of each side of the lining. (You can see the metal snap in the photo below.) This is the point where you attach the lining to the good side of the project. You place the tote (good side facing outward) inside the lining (good side facing inward) and pin the top edges together, as shown below:
 I sewed them together, leaving an opening of around 8 inches long, as shown below:
 You reach into the opening with your hand and gently turn the tote inside out, so the good sides are now exposed:
 Just push the lining down into the tote, then pin the opening shut and hand sew that opening so it’s closed permanently. The last thing to do is to topstitch along the edge, and voila, a very sweet purse/tote:
If you know a Babylock dealer, please ask them to come to my class…I promise it will be fun and educational!
Just push the lining down into the tote, then pin the opening shut and hand sew that opening so it’s closed permanently. The last thing to do is to topstitch along the edge, and voila, a very sweet purse/tote:
If you know a Babylock dealer, please ask them to come to my class…I promise it will be fun and educational!
Filed under
Appli-K-Kutz Fabric Cutting Dies, Free Motion Quilting, Machine Embroidered Applique, Sizzix.
April 4th, 2014
I am going through what seems to be a never-ending purge in my sewing room. It is so gratifying to get rid of stuff that’s not being used and I think I’ve given away at least 75 yards of fabric and all kinds of crafting supplies in the last 2 months. I came upon a bunch of light blue and white print fabrics that I’d totally forgotten about and they must be at least 15 years old. This is just some of them:
 I have given away so much on Freecycle that I was starting to feel guilty, like I should MAKE something out of some of this stuff! (I mean, I bought all this at one time with a specific vision in my head for how I’d use it, so shouldn’t I hold myself accountable to use some of it for SOMETHING?!) Anyway, I somehow felt I should make at least 1 quilt from this blue/white fabric grouping. I did something that was a first for me. I got our my trusty Sizzix Big Shot Pro and used it to cut 9 1/2 inch fabric blocks. (Sizzix had a big sale last year and I lucked out and got a 9 1/2 inch square fabric die for only $10! Can you beat that price?!!) In no time at all, I had a stack of blocks that were all identical in size:
 …and then I cut some white square blocks in the same size:
 It’s funny because I use my small Sizzix Big Shot all the time to cut applique shapes but I’ve never cut fabric for piecing before. I have to say that this is a really fast and convenient way to get your quilt pieces cut FAST! Anyway, I wanted to make a quilt I could whip up pretty quickly because I’m really only making this quilt because I’ve guilted myself into it, and on top of that, I’m really not into pastel colors at all. So, I decided to make a quick chevron quilt. This is really easy to make if you start with squares. You place right sides together and then stitch all along the 4 sides using a 1/4 inch seam like this:
 Then, lay the stitched block on your cutting table and carefully cut along the diagonal twice, as below:
 In as quick as a wink, you’ve got lots of these blocks ready to use:
 …so just press them open and you have (4) quarter square triangle blocks for each pair of squares that you started with. Pretty darn cool and pretty darn quick! Here’s a mock up of my Chevron quilt on the design wall. I may still add 1-2 more rows vertically and I will likely add a small border as well:
 I’m psyched because I’ve always wanted to quilt a chevron quilt top and now I’ll have the chance. I still have many of those quarter square triangle blocks left over and there are all kinds of things I can do with them. Here are a couple of giant – sized stars:
 Now I’ve gone from having all this fabric I didn’t want to having all these etra blocks I need to do something with…I can’t win! And did I forget to mention that there’s a give-away?! I am unearthing so much stuff that I just won’t ever use so I thought maybe I should give some stuff away on my blog. Here’s today’s offering: many, many of spools of variegated rayon thread, great for machine quilting and/or machine embroidery:
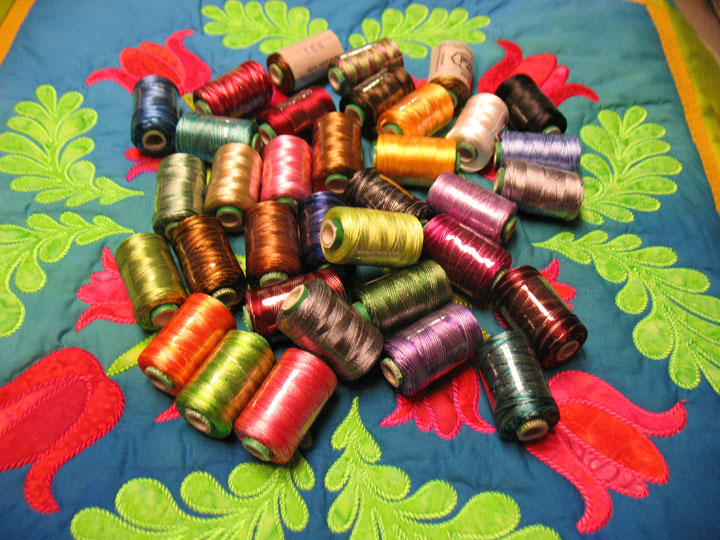 That’s a lot of thread! I remember buying the lot of thread on ebay but I’ve never touched it so perhaps you might be able to use it! All you need to do to enter the give away is to leave a comment to this post, telling me what kinds of things you’d like to learn about threads, any type of thread. Post your comment by midnight, eastern daylight savings time, on Fri 4/18/14, and you’ll be entered into the drawing. Winner pays for shipping but the thread is free!
Filed under
Sizzix, Tips & Tricks.


 Today’s stop on the blog hop is Gene Black’s blog! Gene has done a great tutorial that shows you how to get the most out of a digitized file by selectively eliminating certain stitching sequences. He has taken the feathered star digitized quilting motif and created multiple offshoot designs from it by choosing which sequences to stitch and which to leave out. He is working with the feathered star shown below:
 …but he’s taking it to a whole new place! Check out his post by clicking here and don’t forget to enter his give away for a free downloadable digitized design from our store!
I have a weakness for pin cushions, partly because they are small and cute and partly because they are so fast to make. I have been meaning to do some machine embroidery applique using hand dyed wool and bamboo felts and finally got around to it last Sunday. Is this not the most adorable pin cushion you’ve ever seen:
…but he’s taking it to a whole new place! Check out his post by clicking here and don’t forget to enter his give away for a free downloadable digitized design from our store!
I have a weakness for pin cushions, partly because they are small and cute and partly because they are so fast to make. I have been meaning to do some machine embroidery applique using hand dyed wool and bamboo felts and finally got around to it last Sunday. Is this not the most adorable pin cushion you’ve ever seen:
 The thing that I love about it is all the 3-D texture created by the felted portions. It’s really hard to capture that in a photo:
 The flower/petal pair unit is stitched in a single hooping and I merely substituted the hand dyed felts for fabric. I began with a 6 in x 6 in piece of green fabric for my background and once it had been appliqued/embroidered, I quilted it using a scrap of batting. I cut the shapes using Appli-K-Kutz dies on my Sizzix machine so that part went very fast. Here’s a shot of it once it had been quilted:
 I attached it to another piece of 6 in x 6 in quilted fabric and then stuffed it with poly pellet beads and voila! These make wonderful gifts for fellow quilters and sewists! Who doesn’t love a pincushion?