The first 8 months of 2016 have been a whirlwind and my head is still spinning from it all. In the midst of all that has been going on, we were on a waiting list to have my sewing room painted for a number of months. I have wanted to do this for eons but kept putting it off because of the sheer dread of having to move all the crap that’s in there so the painting could happen. The last time I painted this room I did it myself and it was around 15 years ago. The work involved in moving all this stuff lasted for days so I felt ok about paying a professional painter to do it because I went through enough “suffering” that writing a check seemed like the easy part! I took a bold step and went with a deep green (that has a lot of blue in it, as you can see above.) This color is a Sherwin-Williams color called “Lagoon.” The shot above is part of the main back wall that you see when you enter the room. Those small wall hangings are by Melody Johnson and they are mounted on felt-covered foam insulation from Lowe’s, and they are held in place with Command Strips that leave no marks when you later remove them. (That blue felt comes on a 72 inch wide bolt at Joann’s.) I love that the room now had a bit of an “art gallery” kind of feel to it, and words cannot describe the rush I get from being surrounded by such yummy colors.In the past, I always just staple-gunned a large piece of white felt to my wall to use for a design wall. Ernie said the room was now too nice for that, so I covered (2) 4 ft x 8 ft sheets of foam insulation with another color of felt, this time an aqua marine from Fabric.com (I don’t normally buy from them but it was the only place I could find this color of felt.). The shot above shows part of the new design wall before I’d put anything on it. Don’t think that covering these with felt is hard. Here’s a shot of part of one of them from the backside so you’ll know about the messy part that’s hidden: This next shot shows some pieces up on the new design wall. These are all “leftovers,” or test stitch-out pieces from when I did the first stitching of a new machine embroidery applique design. They are adding up so I’m trying to put some together into a hodge-podge quilt:(This is also the view I have when I sit at my Pfaff and piece…pretty sweet, huh?!) This table is my main sewing table for piecing and quilting. I can tell you with complete sincerity that it hasn’t been this neat in about a million years! This next shot is the view from the other side of the table, as you look into the walkway to get to the other machine on the opposite side of the table:The white structures on that side wall are shoe stands filled with clear plastic shoe boxes of sewing notions and you can see that the shorter one is holding some completed quilt blocks that are currently “in play.” (I guess that means I’m still dreaming about exactly how I will use them):On the opposite side are some shelves and drawers that still need to be reviewed:This large table is a very cheapo version of a sewing machine setup. There are 4 short file cabinets that are very lightweight and cheap and were purchased decades ago at Kmart. There is a hollow door straddled atop each pair of file cabinets. I sewed that way for many years and Ernie said he was slowly being driven insane by having to video tape me quilting on these vibrating hollow doors, so he talked me into placing a sheet of MDF (medium density fiberboard)on top of each door about 5 years ago. That was very good advice! I am embarrassed to show you how much thread I have but this will give you a sense of my “habit.” (In my defense, I really DO USE this stuff!). Here’s how I’m organizing my thread now:I had it just in large plastic zip lock bags for years but they frequently spilled, so I’d throw those bags into boxes to stabilize them. Once the room got painted and had such great colors, those boxes didn’t fit in, so I broke down and bought these fabric covered aqua tote boxes from Bed, Bath, & Beyond. (They always suck me in with those darn coupons…) I try to subdivide my colors so I can find them faster. As an example below, one bag had dark bluish purples, one bag has dark maroonish purples, and the center bag has light purples of any type:I’ll show you other parts of my revamped sewing room in future posts. I am one lucky person to have this wonderful space to work in.In completely unrelated news, we are due to “go live” with our new web site later today (Monday, August 29, 2016). Please bear with us as there will likely be some hiccups. If you are having trouble finding something on the new site, please email me and I’ll see if I can find it for you!
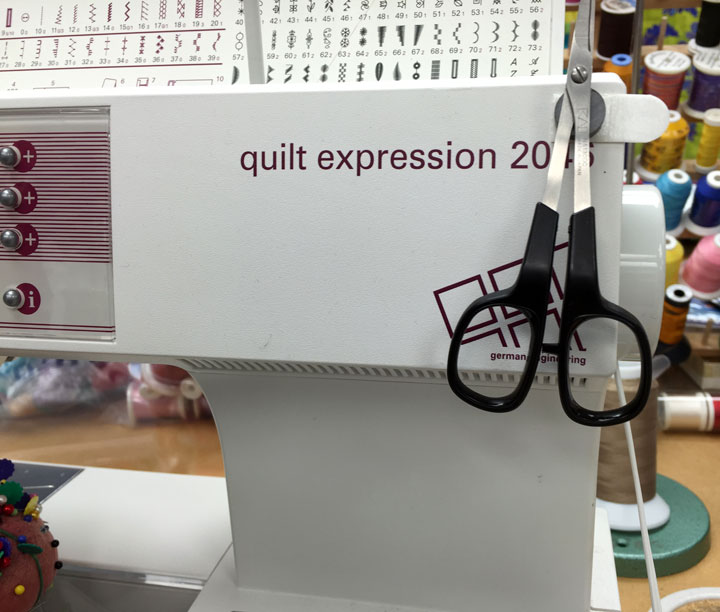
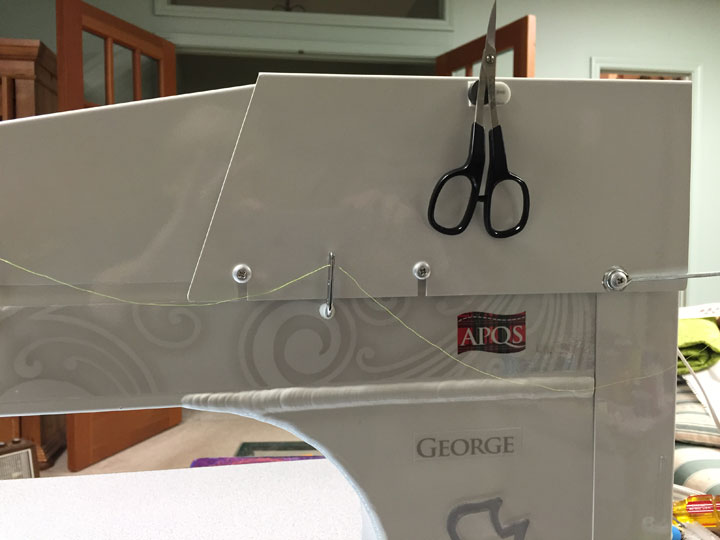
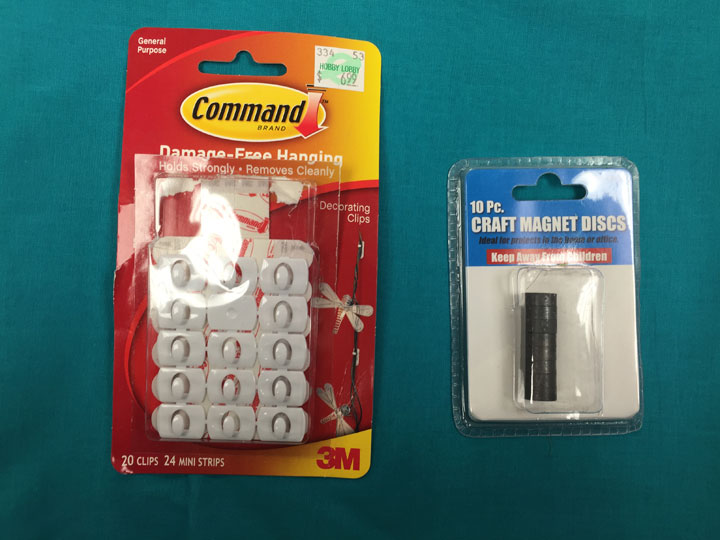
I have been very disappointed in the suction cup magnets that are sold to hold small scissors on the sewing machine because the suction cups seem to fail really often. That kind of thing drives me nuts! But, I came up with a cheap work-around a couple months ago and have been using it on multiple machines and it has never failed on any machine. Here’s a shot on my Pfaff:…and here’s a shot on my George:You can set this up yourself really easily. I use the super small command strips that come in a packet of 20 and I use 1 small rare earth magnet. (These are super-strong magnets that are very small.) You can find them pretty easily nowadays and I think I bought mine at Harbor Freight and Tool. Here’s what the supplies look like:(There are several magnets left in that packet, so know that they are pretty small.) You only need a small piece of that Command adhesive, so feel free to trim it if you’d rather have less of it showing. The nice thing about the command strip is that it comes off easily by pulling the tab, and it leaves no residue. (Don’t be distracted by the small plastic clips in that photo above; you don’t use those clips in this system, only the adhesive strips. Those clips are great, though, for holding power cords, etc from lights attached to the sewing machine.) Here’s a shot of the setup without any scissors attached:2/6/16 Addendum: I have received 2 emails of concern about the risk of placing strong magnets near a computerized sewing machine. Here is a copy of the email from Mary Ann:
I just read in another blog that those small magnets are disruptive to electronic equipment. Mary Corbet at needlenthread blog wrote: Another con: if you use electronic equipment around your embroidery – camera, smart phone, tablet – a neodymium magnet can cause damage to those things. Craft magnets that are a lot weaker aren’t too dangerous, but the very strong neodymium magnets can cause problems with electronics. I’m always very aware of the location of my magnets in relation to my camera and the like. Just be careful around that very expensive quilting/sewing machine.
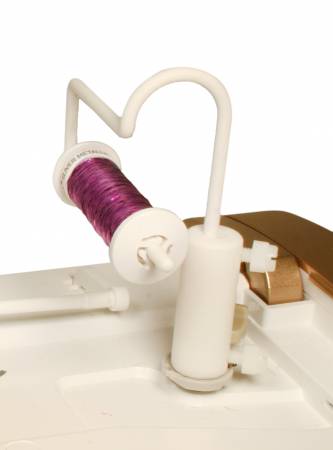
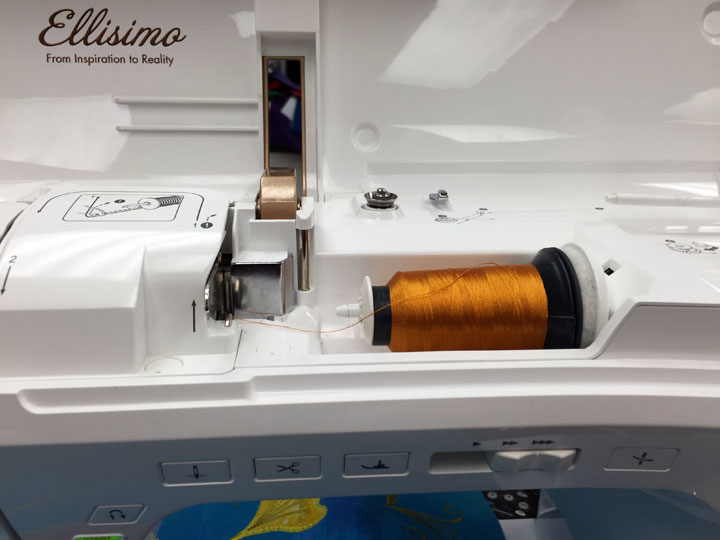
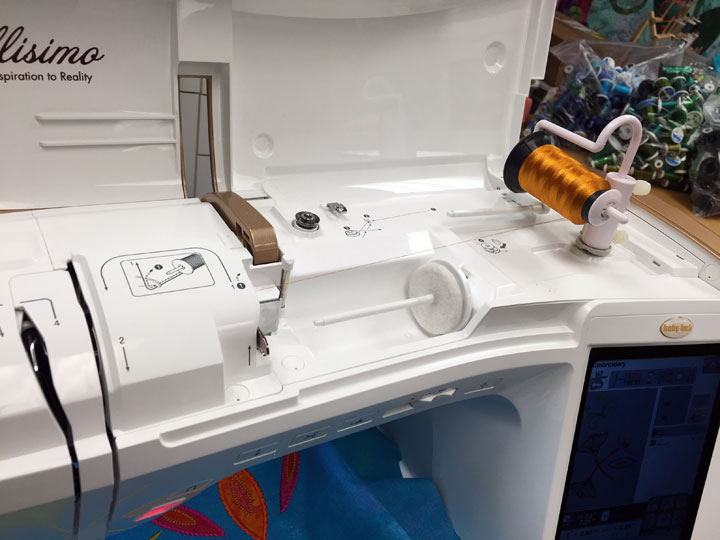
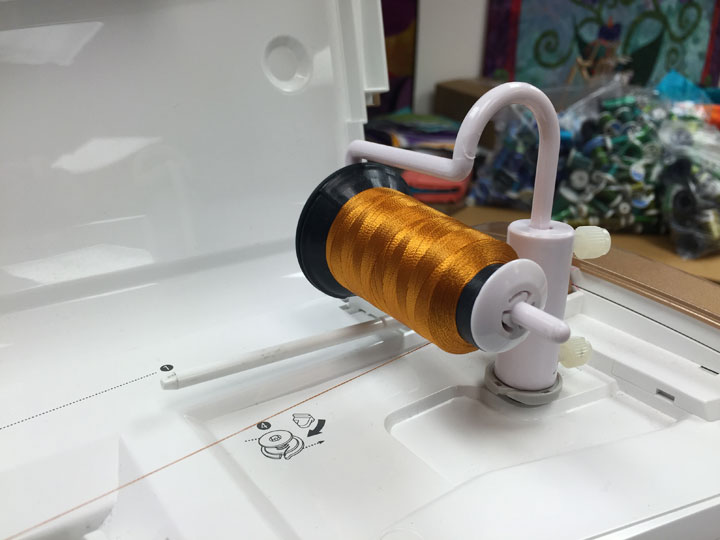
I’m not really sure what to think about all this. I proceeded with my magnet system because this question had come up in a class at a Pfaff dealer some time ago, and the dealer said it was not something to worry about. In truth, I have heard from other sources that it can be a problem, but I guess I figured that it was ok because this dealer said it was. When I read about it on the internet, I am seeing some contradictory info, so I’m not sure what is right. If you are thinking about doing this with your machine, please talk with your dealer first to get his/her advice about the safety of it with your machine. My husband does woodworking and he has these very heavy lights that attach to his machines with very large, very heavy magnets and he has never been told not to place these onto computerized woodworking machines; they are sold and marketed for that very purpose! For myself, I think I will leave these up on the machines that have them since nothing bad has happened in the many months they’ve been in place, but I will not place them on any other machines. Next, I wanted to let you know about a product I started using 4-5 months ago. It’s called The Thread Director and here’s what it looks like:This is a small gizmo that fits onto your bobbin winder base in order to create a new spool holder that orients the spool in a completely different orientation. The reason I got this was because on my Ellisimo, I have trouble sometimes with mini-cone shaped spools like this one:It happens mainly when I’m embroidering, but the thread can get hung up between the spool’s tip and the spool cap and when it does, really bad stuff happens. I mean, REALLY bad suff happens!! So, by adding a new spool holder in a different orientation that stems from the bobbin winder, that problem is solved:…and here’s a closeup shot so you can see it better:It’s easy to put on and take off (easy-to-follow directions come with it, as well as a few spool caps in various sizes), but I just leave it in place except when I need to wind a bobbin. This is a generic alternative spool holder, made for all kinds of domestic sewing machines, not just Babylock. We recently started carrying it in our store and you can find it by clicking here. In the mean time, keep quilting and enjoy the weekend! I am hoping for some quality time for quilting…
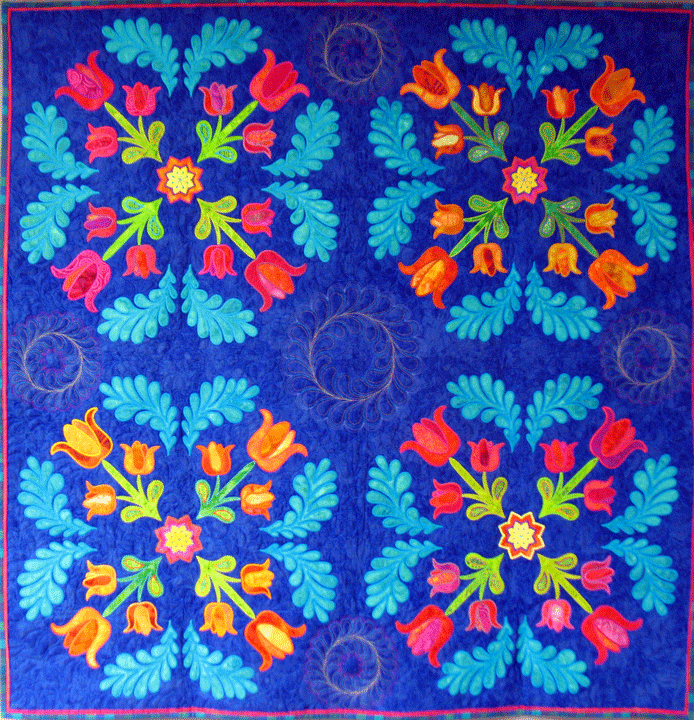
I decided I was getting too carried away with curves so I decided to play around with designs that were more focused on straight lines and angles. Unfortunately, when I updated my phone, I lost a lot of my recent photos, so I’m without any photos for the earlier parts of this design. I started again with a feathered wreath in the center of the block, then added markings for a temporary circle around it. I used one template to create the more “plunging” scallops and then went back in with another template to stitch the scallops with a very subtle plunge. I wish I could tell you which templates I used but the only documentation I had was in my photos!Next, I created a series of triangles that sprang from the circle where each scallop began/ended. I had to make the triangles in 2 sizes because it wasn’t possible to fit them all inside the block if they were all the same size. Once that was done, I added an inside line to each of the triangles. I can’t stress how important it is to have 2 lines of stitching. I say that because creating a channel between them adds a new level of interest/complexity to the design. Here’s a photo of what things looked like at this point:Now all the basic “framework” or skeleton of the design was complete. I think of this as “the bones” of the design and nothing can really happen until this framework has been laid out. What’s left at this point is lots of fun fill-in work! First up, I stitched turquoise feathers inside the larger triangles. This was easy because I used my center lines as my spine guidelines:Then I stitched feathers inside the smaller triangles using a slightly different color of thread but it’s hard to tell that:…and then I added a row of pearls inside the scallops and hyperquilted the feathers. That little bit of stitching made the whole block a lot more interesting:Here’s a side view:I stitched the “inchworm” design just outside the wreath and inside the scallops. This added a new zone of color and also made the trapunto stand out more:And then I finally got to stitch some fill in quilting all around the outside. I kind of melded a few different FMQ designs into a background fill design that came out like this:I added some Swarovski crystals to it (very sparingly) and then whipped it up into a tote bag:In real life, the crystals are very sparkly and show up well but they are hardly seen in my still photos. If you’ve never added crystals to a quilt, it’s very easy, fast, and fun and we made a quickie video to show how to do it:
I know, I know, it’s only mid-September! I don’t really even want to start THINKING about the holidays yet, but they’ll be here before we know it. If you’re like me, you’ll want to make some gifts yourself, and who can resist felted wool pin cushions like these:These are so easy and so fast to make and quilters and sewists love to receive them! If you’ve never made these before, we made a short video tutorial that shows you how to do it from start to finish. If you’re looking for some colorful wool roving to make them with, check out the wool roving in our online store by clicking right here. And now for the tutorial, so you can see how easy it is for yourself:
Filed under
gift making, Tips & Tricks.
Comments Off on Have You Started Making Gifts for the Holidays Yet?
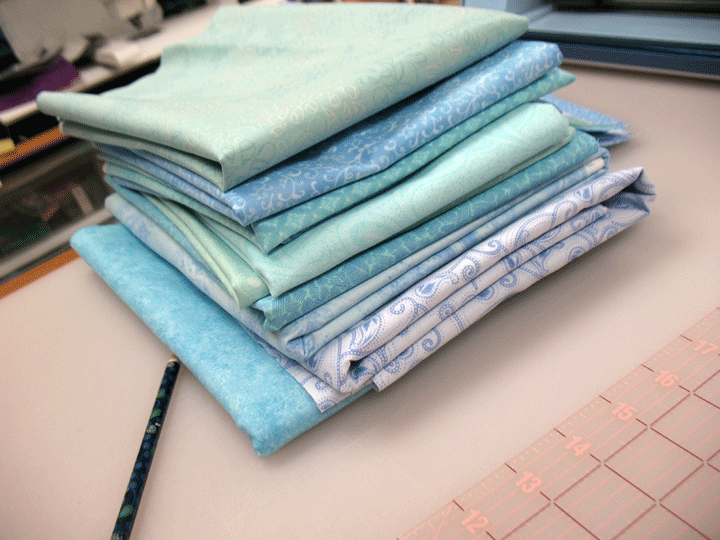
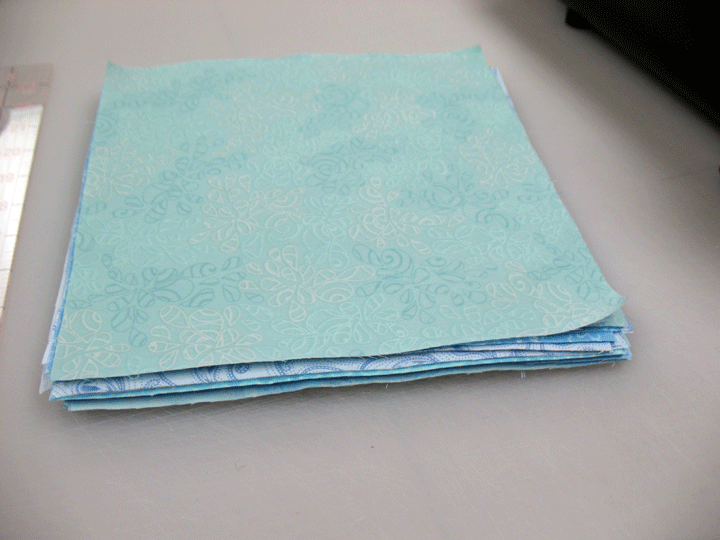
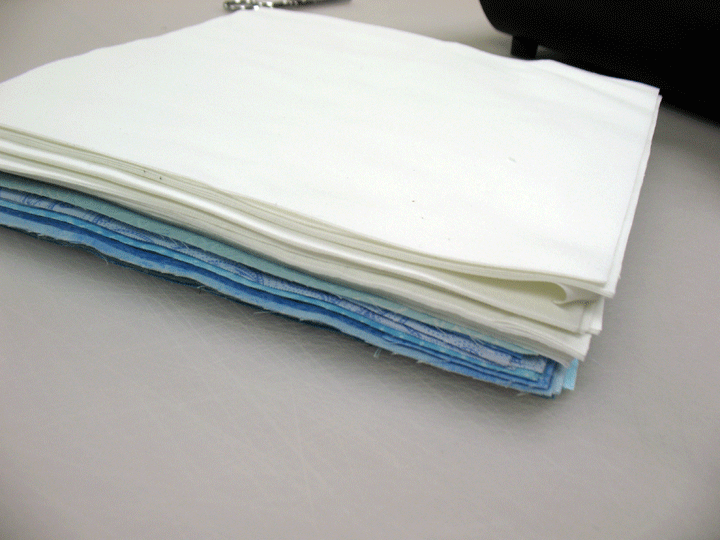
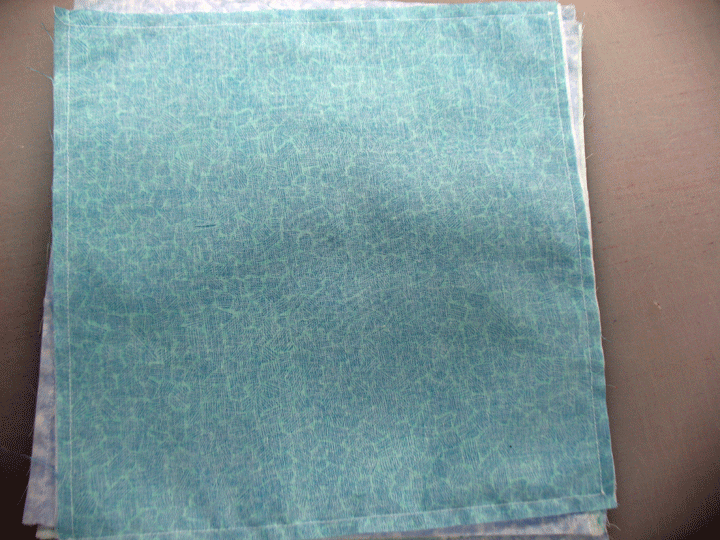
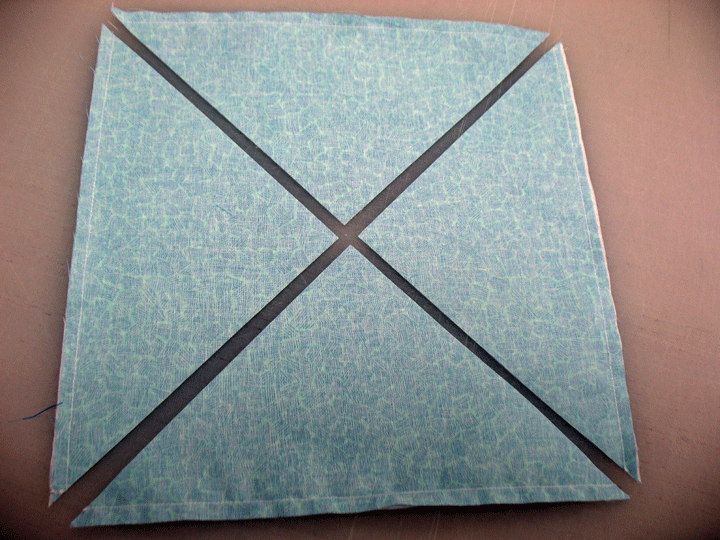
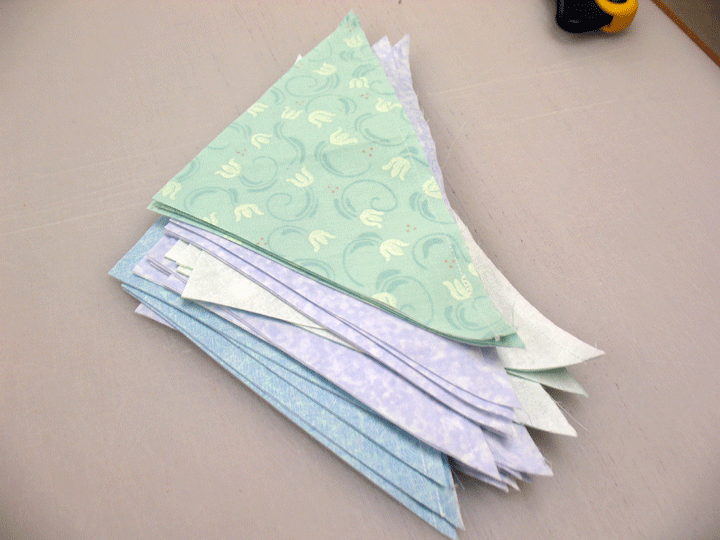
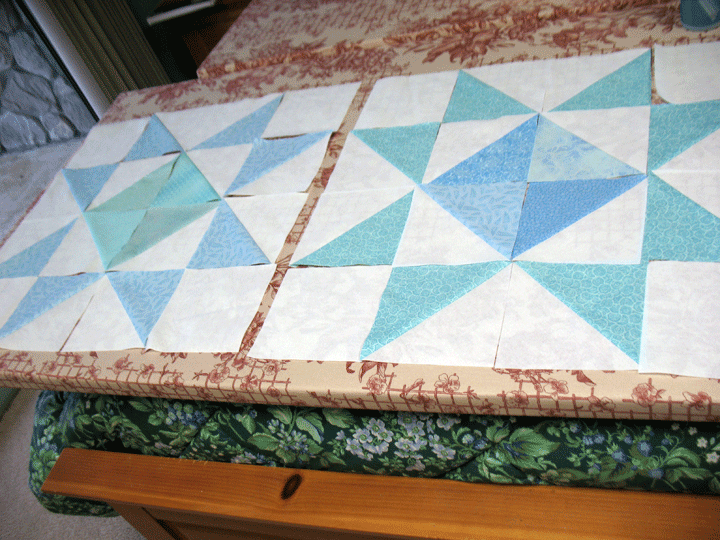
I am going through what seems to be a never-ending purge in my sewing room. It is so gratifying to get rid of stuff that’s not being used and I think I’ve given away at least 75 yards of fabric and all kinds of crafting supplies in the last 2 months. I came upon a bunch of light blue and white print fabrics that I’d totally forgotten about and they must be at least 15 years old. This is just some of them:I have given away so much on Freecycle that I was starting to feel guilty, like I should MAKE something out of some of this stuff! (I mean, I bought all this at one time with a specific vision in my head for how I’d use it, so shouldn’t I hold myself accountable to use some of it for SOMETHING?!) Anyway, I somehow felt I should make at least 1 quilt from this blue/white fabric grouping. I did something that was a first for me. I got our my trusty Sizzix Big Shot Pro and used it to cut 9 1/2 inch fabric blocks. (Sizzix had a big sale last year and I lucked out and got a 9 1/2 inch square fabric die for only $10! Can you beat that price?!!) In no time at all, I had a stack of blocks that were all identical in size:…and then I cut some white square blocks in the same size:It’s funny because I use my small Sizzix Big Shot all the time to cut applique shapes but I’ve never cut fabric for piecing before. I have to say that this is a really fast and convenient way to get your quilt pieces cut FAST! Anyway, I wanted to make a quilt I could whip up pretty quickly because I’m really only making this quilt because I’ve guilted myself into it, and on top of that, I’m really not into pastel colors at all. So, I decided to make a quick chevron quilt. This is really easy to make if you start with squares. You place right sides together and then stitch all along the 4 sides using a 1/4 inch seam like this:Then, lay the stitched block on your cutting table and carefully cut along the diagonal twice, as below:In as quick as a wink, you’ve got lots of these blocks ready to use:…so just press them open and you have (4) quarter square triangle blocks for each pair of squares that you started with. Pretty darn cool and pretty darn quick! Here’s a mock up of my Chevron quilt on the design wall. I may still add 1-2 more rows vertically and I will likely add a small border as well:I’m psyched because I’ve always wanted to quilt a chevron quilt top and now I’ll have the chance. I still have many of those quarter square triangle blocks left over and there are all kinds of things I can do with them. Here are a couple of giant – sized stars:Now I’ve gone from having all this fabric I didn’t want to having all these etra blocks I need to do something with…I can’t win! And did I forget to mention that there’s a give-away?! I am unearthing so much stuff that I just won’t ever use so I thought maybe I should give some stuff away on my blog. Here’s today’s offering: many, many of spools of variegated rayon thread, great for machine quilting and/or machine embroidery:That’s a lot of thread! I remember buying the lot of thread on ebay but I’ve never touched it so perhaps you might be able to use it! All you need to do to enter the give away is to leave a comment to this post, telling me what kinds of things you’d like to learn about threads, any type of thread. Post your comment by midnight, eastern daylight savings time, on Fri 4/18/14, and you’ll be entered into the drawing. Winner pays for shipping but the thread is free!


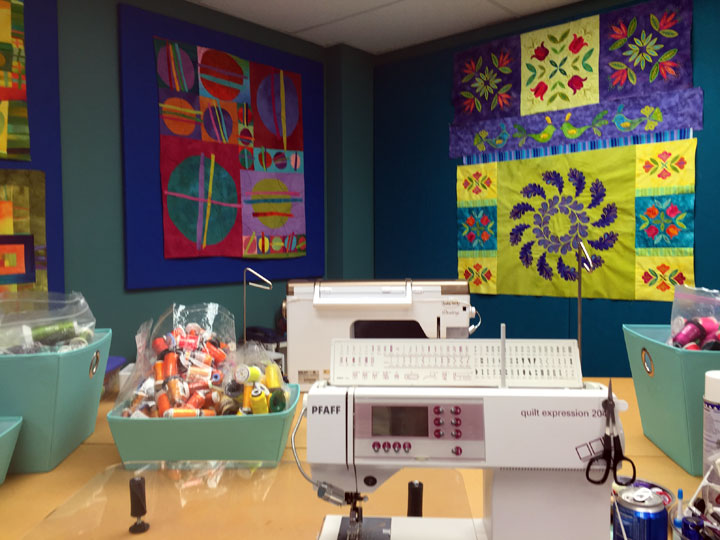
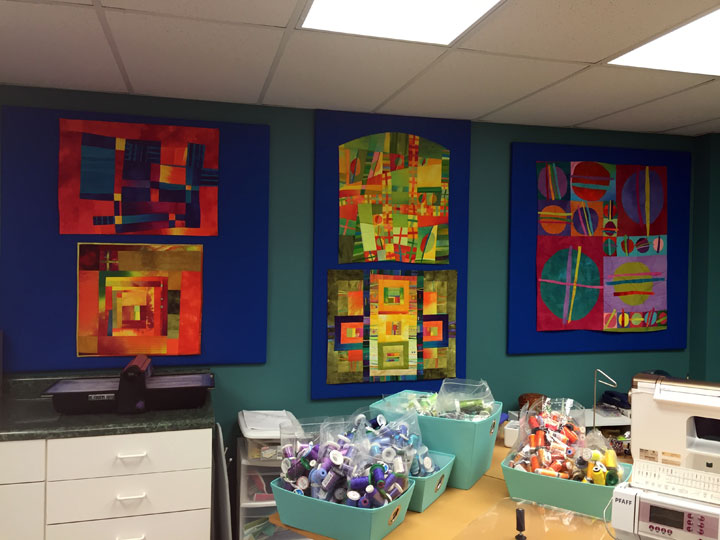 The first 8 months of 2016 have been a whirlwind and my head is still spinning from it all. In the midst of all that has been going on, we were on a waiting list to have my sewing room painted for a number of months. I have wanted to do this for eons but kept putting it off because of the sheer dread of having to move all the crap that’s in there so the painting could happen. The last time I painted this room I did it myself and it was around 15 years ago. The work involved in moving all this stuff lasted for days so I felt ok about paying a professional painter to do it because I went through enough “suffering” that writing a check seemed like the easy part! I took a bold step and went with a deep green (that has a lot of blue in it, as you can see above.) This color is a Sherwin-Williams color called “Lagoon.” The shot above is part of the main back wall that you see when you enter the room. Those small wall hangings are by Melody Johnson and they are mounted on felt-covered foam insulation from Lowe’s, and they are held in place with Command Strips that leave no marks when you later remove them. (That blue felt comes on a 72 inch wide bolt at Joann’s.) I love that the room now had a bit of an “art gallery” kind of feel to it, and words cannot describe the rush I get from being surrounded by such yummy colors.
 In the past, I always just staple-gunned a large piece of white felt to my wall to use for a design wall. Ernie said the room was now too nice for that, so I covered (2) 4 ft x 8 ft sheets of foam insulation with another color of felt, this time an aqua marine from Fabric.com (I don’t normally buy from them but it was the only place I could find this color of felt.). The shot above shows part of the new design wall before I’d put anything on it. Don’t think that covering these with felt is hard. Here’s a shot of part of one of them from the backside so you’ll know about the messy part that’s hidden:
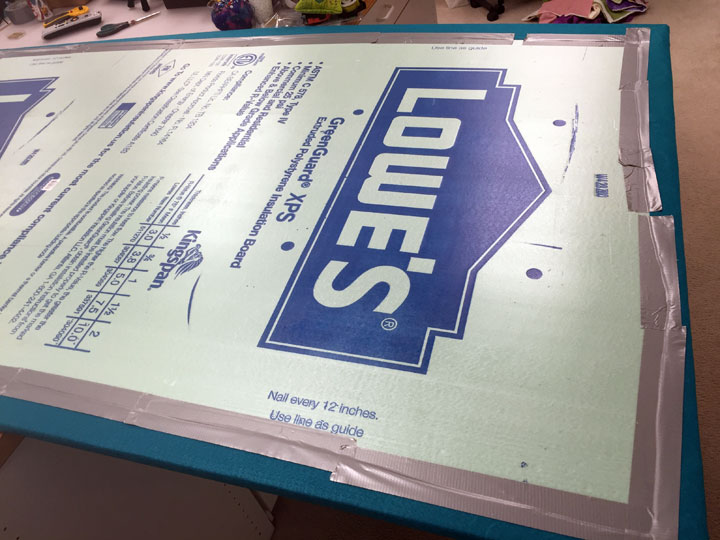 This next shot shows some pieces up on the new design wall. These are all “leftovers,” or test stitch-out pieces from when I did the first stitching of a new machine embroidery applique design. They are adding up so I’m trying to put some together into a hodge-podge quilt:
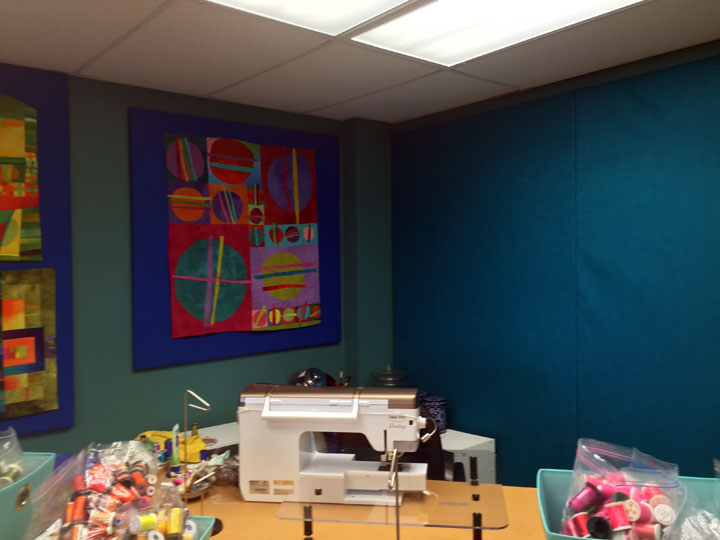
 (This is also the view I have when I sit at my Pfaff and piece…pretty sweet, huh?!) This table is my main sewing table for piecing and quilting. I can tell you with complete sincerity that it hasn’t been this neat in about a million years! This next shot is the view from the other side of the table, as you look into the walkway to get to the other machine on the opposite side of the table:
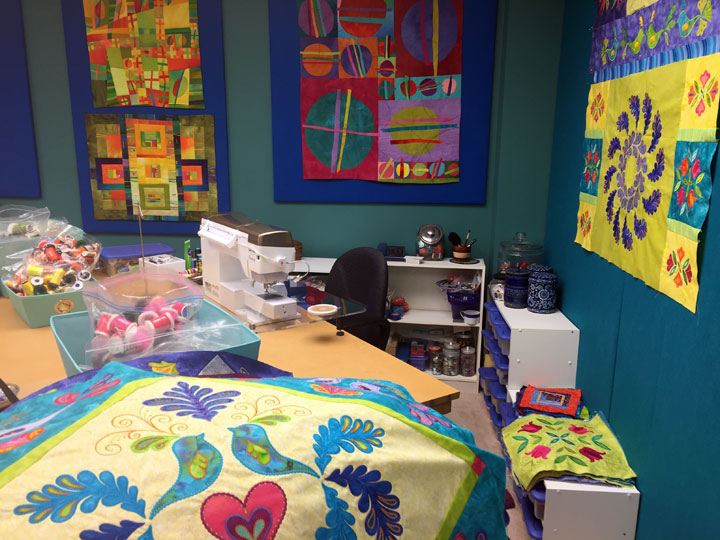 The white structures on that side wall are shoe stands filled with clear plastic shoe boxes of sewing notions and you can see that the shorter one is holding some completed quilt blocks that are currently “in play.” (I guess that means I’m still dreaming about exactly how I will use them):
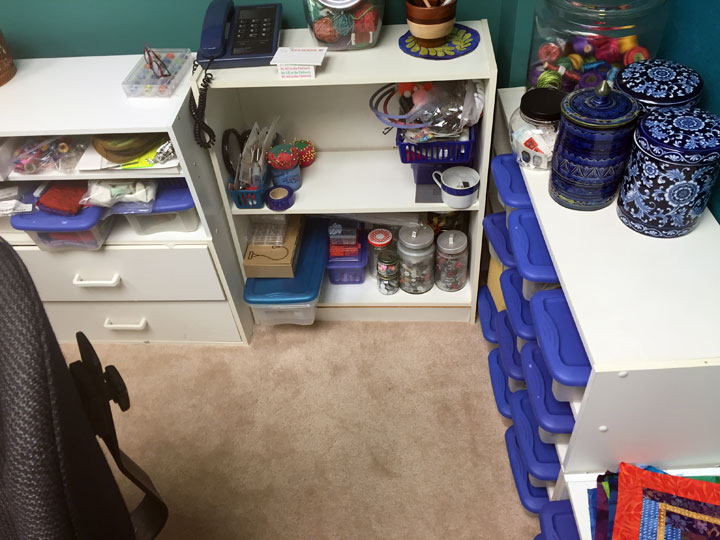
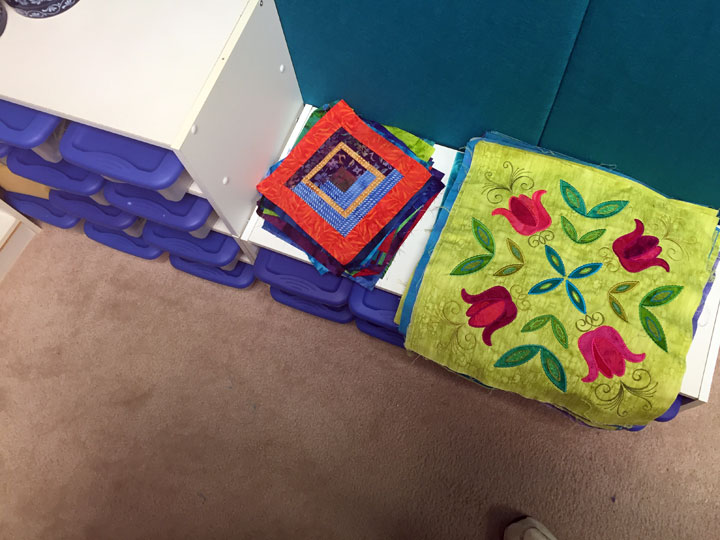 On the opposite side are some shelves and drawers that still need to be reviewed:
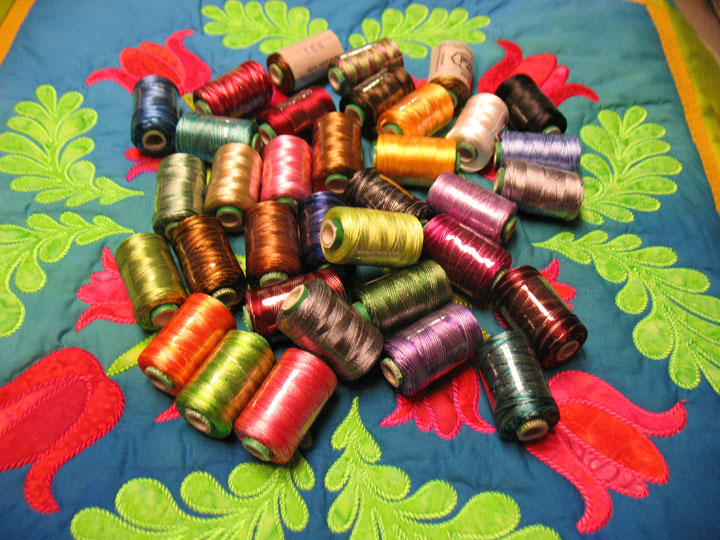
 This large table is a very cheapo version of a sewing machine setup. There are 4 short file cabinets that are very lightweight and cheap and were purchased decades ago at Kmart. There is a hollow door straddled atop each pair of file cabinets. I sewed that way for many years and Ernie said he was slowly being driven insane by having to video tape me quilting on these vibrating hollow doors, so he talked me into placing a sheet of MDF (medium density fiberboard)on top of each door about 5 years ago. That was very good advice! I am embarrassed to show you how much thread I have but this will give you a sense of my “habit.” (In my defense, I really DO USE this stuff!). Here’s how I’m organizing my thread now:
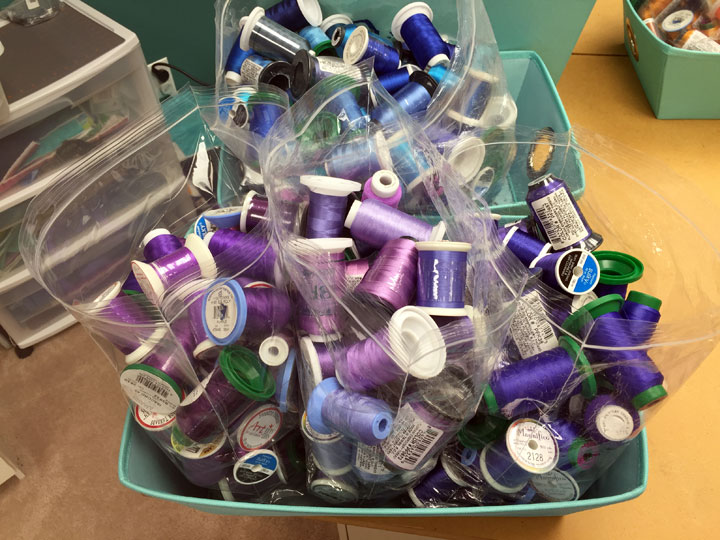
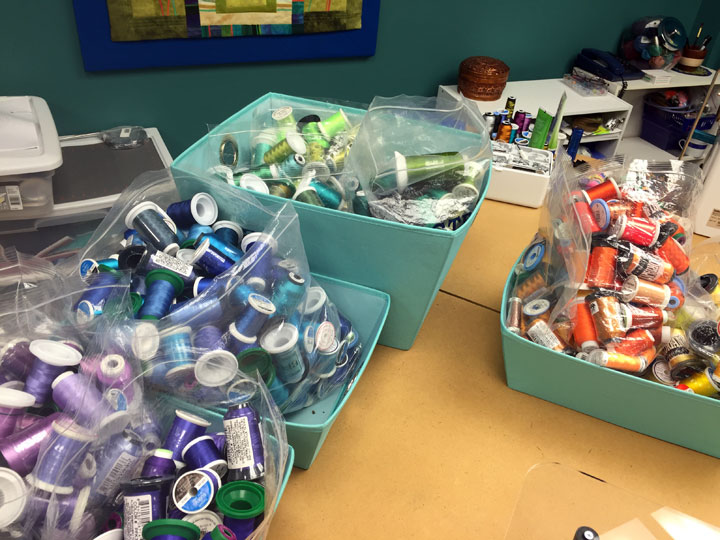 I had it just in large plastic zip lock bags for years but they frequently spilled, so I’d throw those bags into boxes to stabilize them. Once the room got painted and had such great colors, those boxes didn’t fit in, so I broke down and bought these fabric covered aqua tote boxes from Bed, Bath, & Beyond. (They always suck me in with those darn coupons…) I try to subdivide my colors so I can find them faster. As an example below, one bag had dark bluish purples, one bag has dark maroonish purples, and the center bag has light purples of any type:
 I’ll show you other parts of my revamped sewing room in future posts. I am one lucky person to have this wonderful space to work in.
In completely unrelated news, we are due to “go live” with our new web site later today (Monday, August 29, 2016). Please bear with us as there will likely be some hiccups. If you are having trouble finding something on the new site, please email me and I’ll see if I can find it for you!
I’ll show you other parts of my revamped sewing room in future posts. I am one lucky person to have this wonderful space to work in.
In completely unrelated news, we are due to “go live” with our new web site later today (Monday, August 29, 2016). Please bear with us as there will likely be some hiccups. If you are having trouble finding something on the new site, please email me and I’ll see if I can find it for you!