

Treasured Notions and Tools
November 24th, 2013
Whenever I’m with a group of quilters, I always end up hearing about a great product that someone uses all the time and I’ve never heard of it before. I’m betting that each of us has tools and notions that we use all the time that most of our friends know nothing about. Because of that, I’m going to post periodically about tools and notions that I use all the time. Tonight is the first such post.
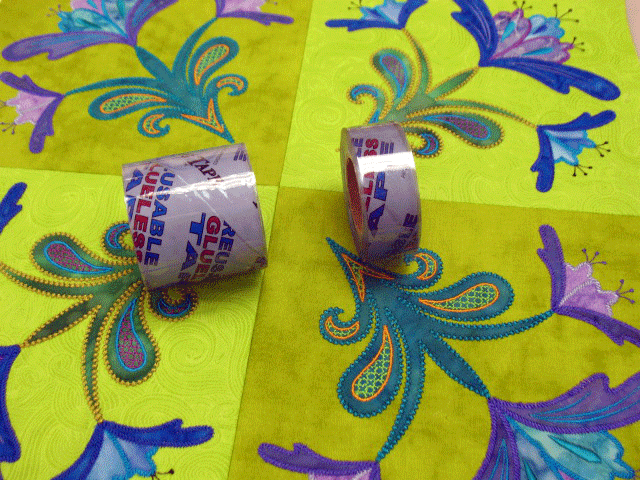
I am a thread person…there is thread coming out of the rafters in my sewing room! One thing that drives me nuts is unwinding spools, so I use a product called Hugo’s Amazing Tape to keep my thread in order. Here are 2 rolls of the tape, a 2 3/8 inch wide roll and a 1 inch wide roll. These are my 2 favorite sizes:
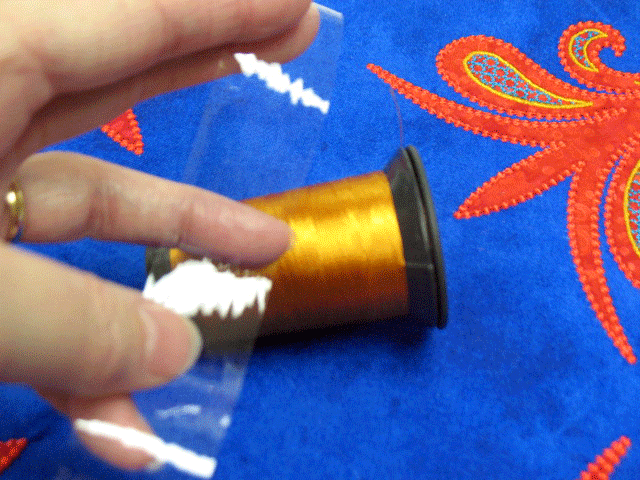
 This is vinyl tape on a roll that clings to itself, so it’s a great way to keep a spool of thread from unwinding. I use the 1 inch wide tape to seal traditional sizes of spools:
 and you just unroll a little expanse of it in your hand:
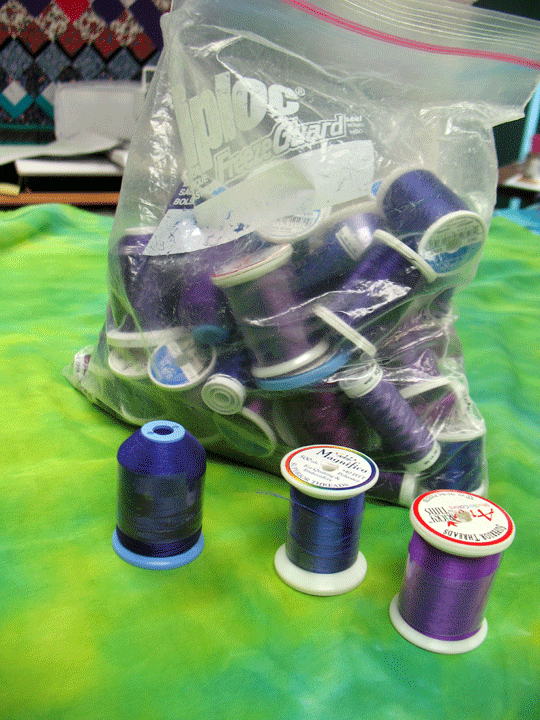
 Once you’ve secured your spools with Hugo’s Amazing Tape, it’s easy to just throw them into a ziplock bag or whatever and take them to a class:
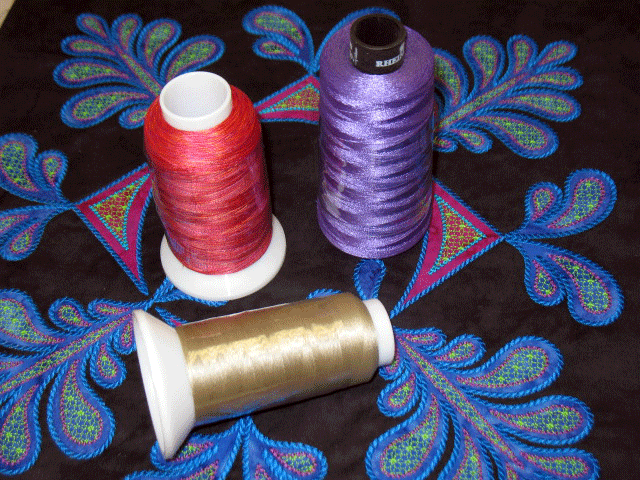
 I use the wider 2 3/8 inch wide tape on larger cones:
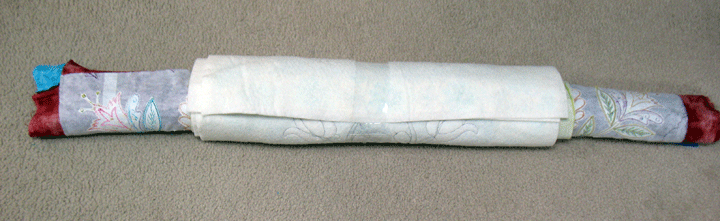
 and it’s also useful on lots of other stuff. I travel a lot and don’t want to have my blocks become all wrinkled, so I roll them around an empty cardboard roll and secure the whole thing with Hugo’s tape. Here, I’ve got the 52 in x 52 in center section of a quilt surrounded by large quilt blocks and the quilted front of a tote bag all rolled up and secured with Hugo’s Amazing Tape:
 It works on all those partial rolls of wrapping paper that we’ve all got as well! This is a product I use virtually every day. You can find the 2 3/8 inch wide rolls here and you can find the 1 inch wide rolls here. It also comes in blue version (so that it’s easier to find the ends of it!) and you can find that version here.
I have my whole family taking these now. My daughter experiences less stomach aches and everyone has less gas. Generic levitra without prescription! You should be able to talk with a human being, including a licensed pharmacist, to answer questions about your prescription.


