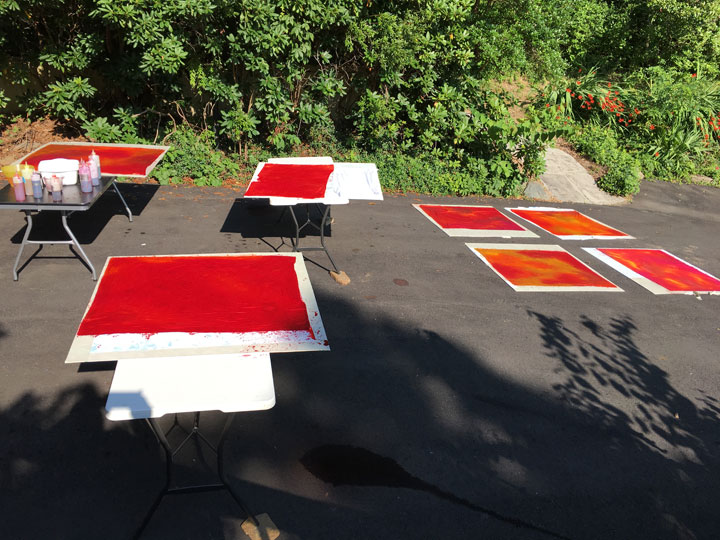
I had a glorious day, dyeing fabric out in the hot sun:
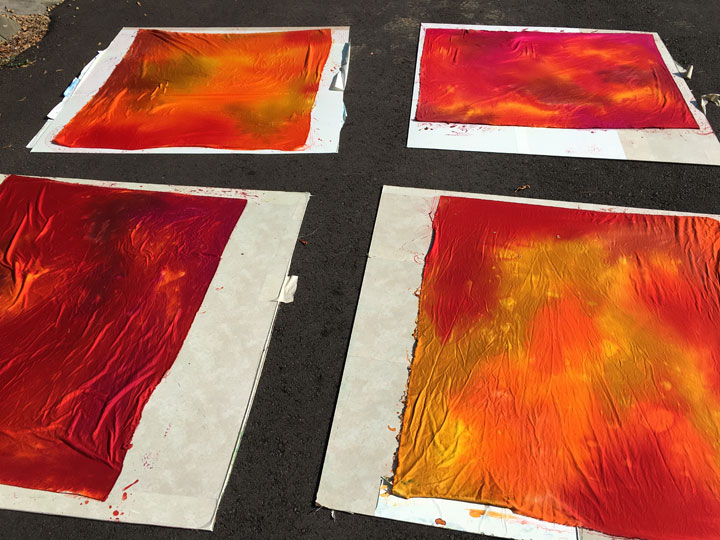
These are 1 yard pieces of cotton sateen that I use for backgrounds of applique scenes. These 4 baking on the blacktop are nearly dry, so the colors are close to what they should be once washed:
I also dyed several smaller pieces of 100% Egyptian cotton to use for applique shapes. Those have much less variegation of color in them:
Most of the dye powders I worked with today are over 10 years old, so I’m not allowing myself to get excited yet because old dye powder usually means not so great color. Several of my dye platters were still damp when I brought my stuff in this evening, so the washout will have to wait until tomorrow…I just hate waiting!
P.S. The washout went great and all my luscious reds and oranges are still luscious and saturated colors after the washout!! Yippee!!
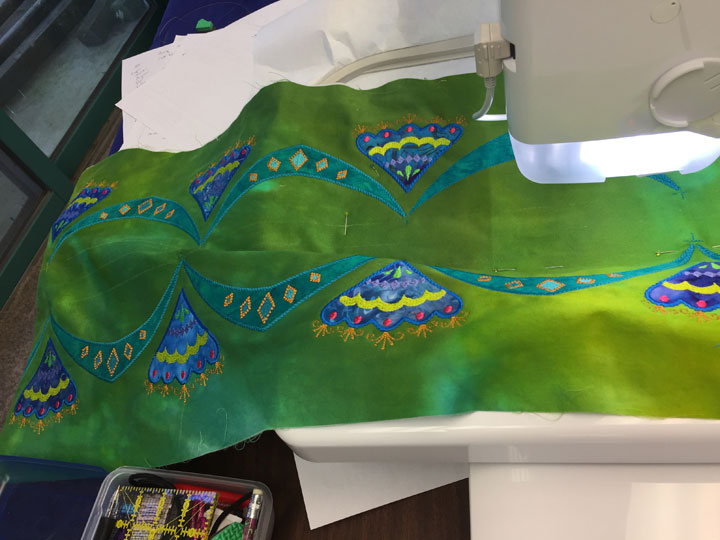
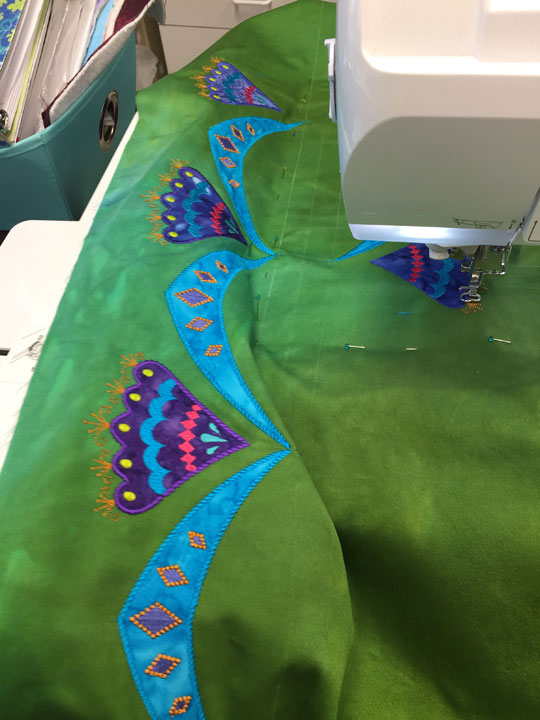
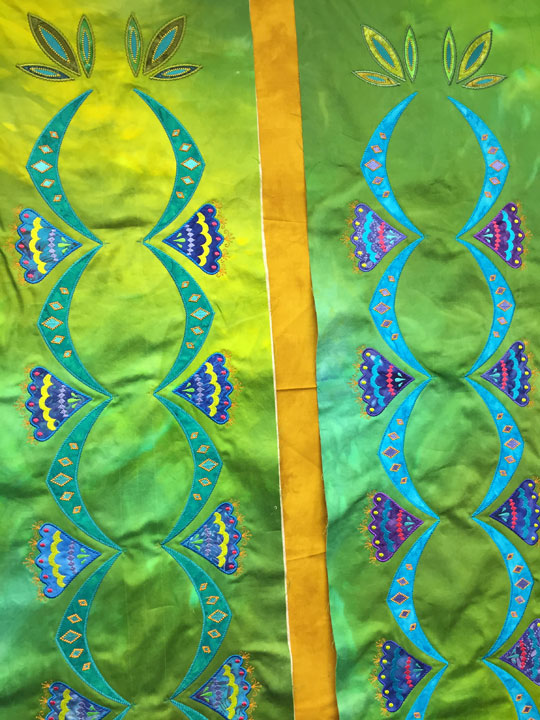
There’s nothing quite as invigorating as beginning a new quit project. I’ve had the center part of this quilt in my head for a few months now, but couldn’t allow myself to begin working on it until I had finished up some other work. Now I can really plow into this! I started by cutting out applique shapes with my Sizzix Big Shot:(This was early on…I cut a WHOLE lot more than this, but it went very quickly using a steel rule die.) My background fabrics were the hand dyed fabrics I dyed recently. Here are my 3 center panels once they’d been backed with a lightweight interfacing and cut to size:(For what it’s worth, I always fuse a lightweight interfacing onto the back of any fabric I’m going to embroider, but cotton sateen is a good fabric to ALWAYS fuse to lightweight stabilizer, even when you’re not going to embroider it. It’s a twill fabric and can be a bit of a “shape-shifter,” if you know what I mean. Once you back it with interfacing, it will not change shapes on you.)Next up, I fired up the old embroidery machines and started many, many hoopings of machine embroidery applique. You can see one of the panels in the next shot as I’m still adding to it:This first panel has jade swags and dark blue flowers. It’s my favorite one. This second panel has turquoise swags and purply/blue flowers. I’m not as in love with this one:I can’t believe I got this far already, but I’ve finished the MEA on the first 2 panels!! Here is a shot of them next to one another on my design wall:The Dijon mustard fabric in between them is in the “auditioning phase”…not sure that is a “go” or not just yet. The third panel will also have jade swags and dark blue flowers. I won’t be able to work on this again for a week, but I’m feeling totally “juiced up” by how far I’ve gotten so far. Here’s a closer up shot that is very off-kilter:
I was about to start a new project and needed 3 long panels of hand dyed fabrics that were predominantly greens. I have lots of already dyed fabrics that fit that bill, but all of it was just a wee bit too short for my needs. Isn’t that always how it goes?! Anyway, I decided to get some late season fabric dyeing going a couple weeks ago and the shot below shows my set up:
This is a quick and easy direct dyeing method, and if it’s something you’ve wondered about trying yourself, here is a quick video lesson on how I do it:
What I want you to see is how the intensity, or saturation of the color, changes once it was washed out. The fabric in the shots above is still a bit wet, and this makes the colors appear somewhat darker. BUT, the post washing shots below will give you an idea of how old dye powders result in less than saturated colors in the final product:
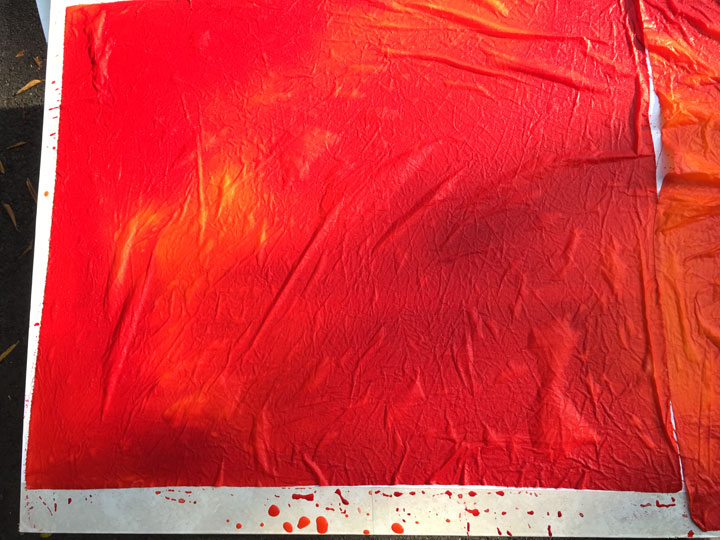
This next shot is the darkest piece of all, yet look how light it is:
These are all still very use-able, but darn, I miss that intense color saturation! Here is the darkest one all sliced up and ready as 3 panels for my next project:
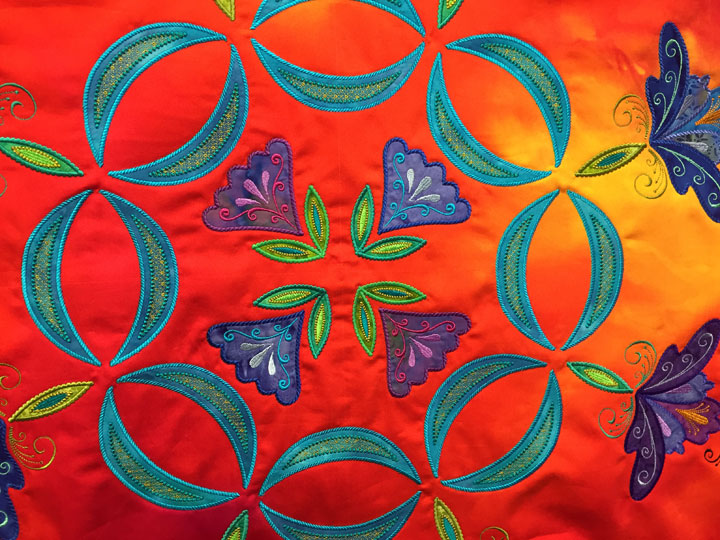
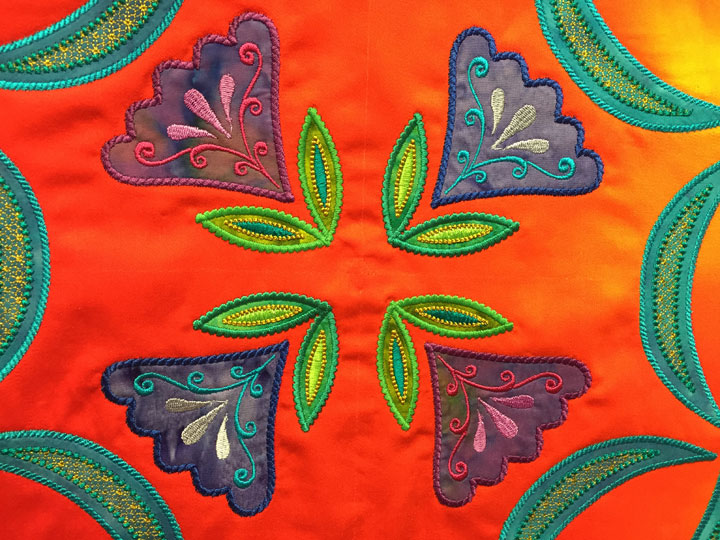
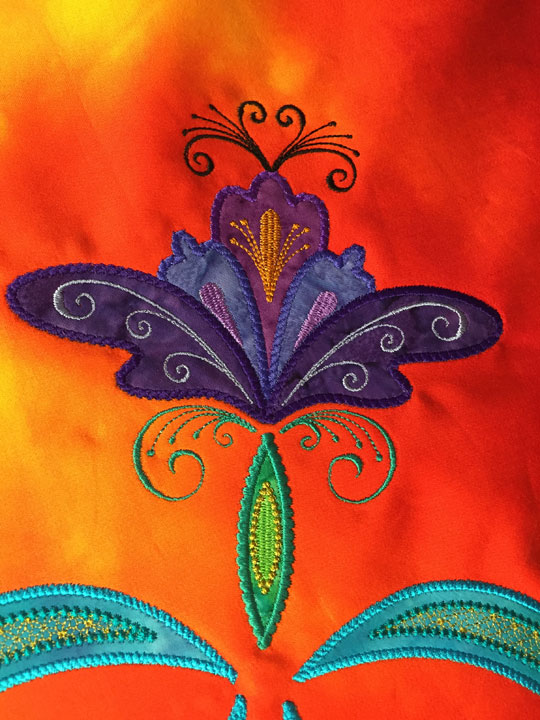
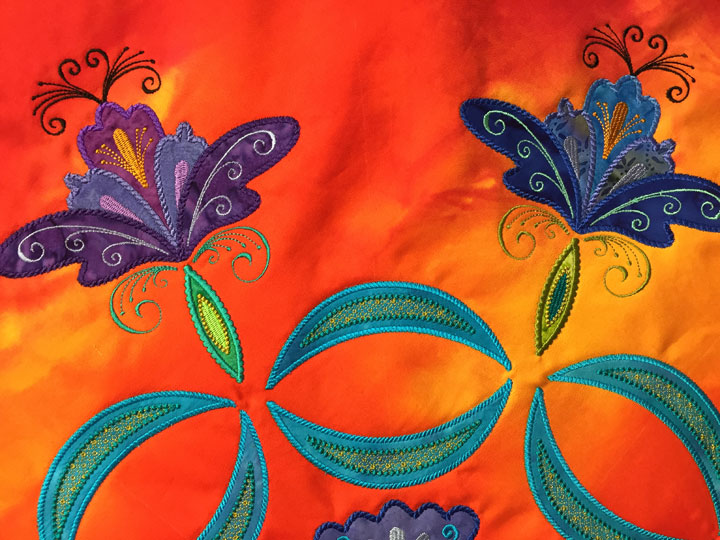
I probably should have warned you that you might need sunglasses to safely view the photos in this blog post! The block above is a 35 inch square machine embroidery applique block created on my embroidery machine over many days last week. It is appliqued/embroidered on a piece of hand-dyed cotton sateen that has been sitting in a drawer for a few years, just waiting for the right design. I love, love, love the rich, saturated colors here and the way they bleed into one another. This kind of fabric dyeing is actually very easy to do, and I’ll give you a link at the end of this post to a short video tutorial we made a few years ago that shows you exactly how to do it. In the meantime, though, here are some close up shots of this center block:The “circle” that surrounds the center flower quartet is made of 5 inch swag pairs. I was more understated than usual in my thread color choices for the swag pairs but I’m glad I was because the background fabric colors are so strong. Here is a close up shot of the center floral design:(I still need to trim some jump stitches in those center flowers: I just noticed those now!) I really like the outermost flowers that encircle the block. I was trying to make every other flower more of a “purple theme” and then every other flower a “blue theme.” Here’s a “blue themed” one:…and here’s a “purple themed” one:I have been doing MEA for about 4 years now (maybe it’s been 5, I can’t remember), but it still never ceases to amaze me just how much intricate detail and texture the thread work can add to an applique design. I am enthralled by the swirled thread work on these. Here are a couple of them together in one shot:Working with all this fabulous color last week was a treat for my soul. It’s making me feel like I need to use up more of my yummy hand dyed fabrics because they make me feel so alive as I’m working with them.If you’re interested in trying some hand dyeing yourself, this video shows you every single step I use to make fabrics like these:
Give it a try…your quilting will never be the same!
Color is everything to me and to most quilters and there’s nothing more invigorating than seeing brilliant colors develop right if front of your eyes! I am asked all the time how I dye the background fabrics that I use on many of my quilts:
It’s all much easier than you’d think! We are now officially in the best season for fabric dyeing here in the old USA, so I thought it might be fun to make a video showing exactly how I dye background fabrics like these. Thanks to my husband, Ernie, you can watch a video that lays it all out clearly right here.(I’ve tested this link in firefox, internet explorer, chrome, and safari and it worked for me each time, but I’ve heard from a few folks who have not been able to use the link. If this happens to you, try this url address as a cut/paste option instead:https://www.youtube.com/watch?v=M8bzgKeT4Ss&feature=youtu.be