November 3rd, 2015
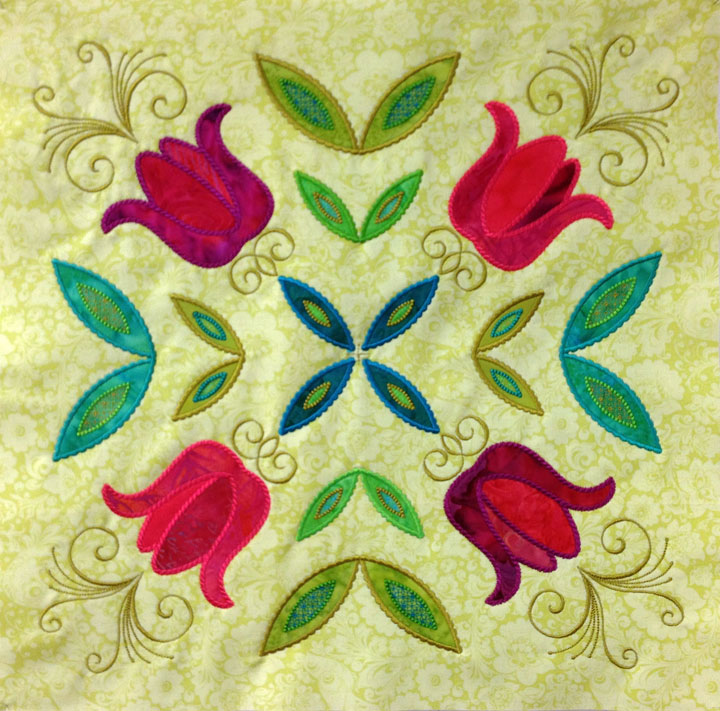
 This is a new quilt block design I’ve been working on. (Please excuse the crosshairs that still remain; I haven’t gotten around to removing them yet.) I’ve been making some designs using leaf shapes and this one features the large ginkgo leaf from the ginkgo leaf Appli-K-Kutz dies we used to carry. I like how delicate they are. It’s interesting to me that the arrangement of the stems forms a secondary design that my eye wants to follow. Here’s a closeup of the center section:
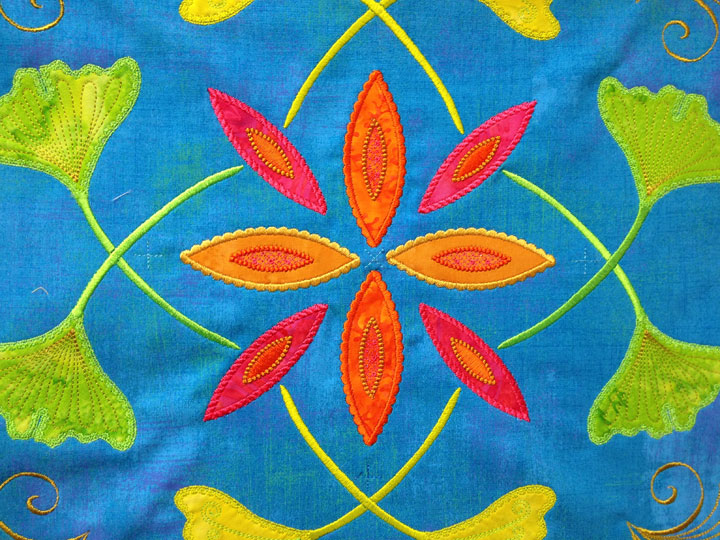 In the photo above, you can see that one pair of ginkgo leaves has an internal design that looks like plumes that emanate from the center/bottom portion of the leaf. The opposite pair of leaves have a swirl design inside:
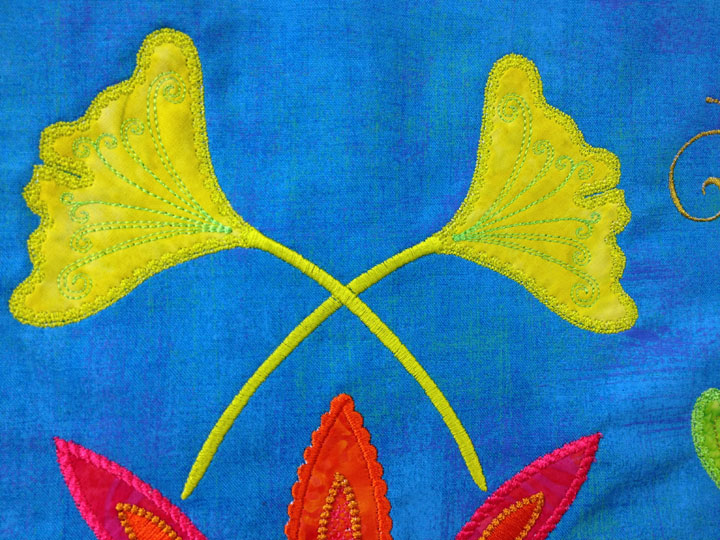 Check out the edge finishing on the ginkgo leaves. It’s kind of a lacey inside scallop variation but I like the delicacy of it. In each of the 4 corners of the block, there is a swirl that sits on the diagonal:
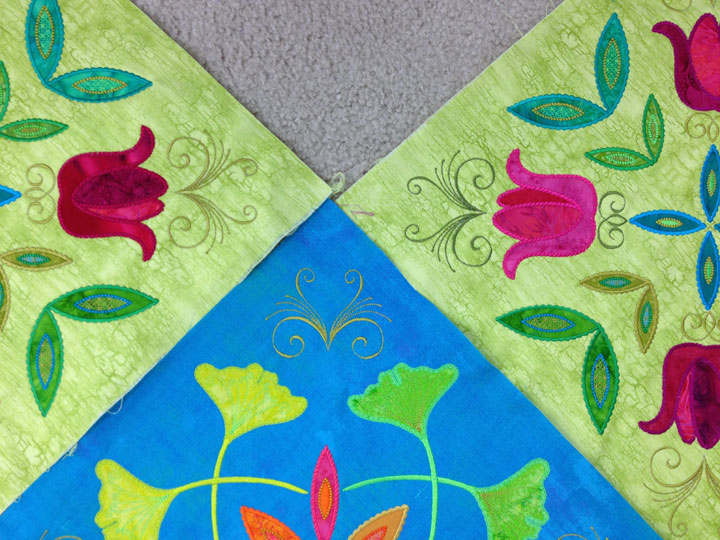
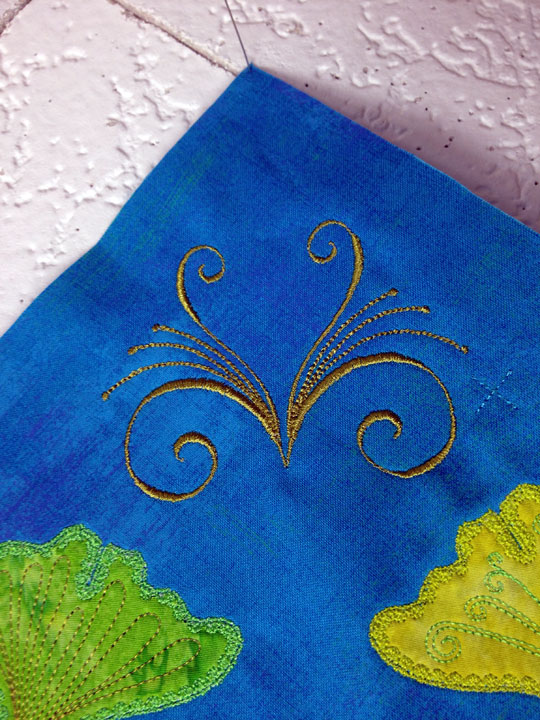 That swirl is positioned in the exact same position it occupies in another block I made about a year ago. Here, you can see that swirl in the 4 corners of this tulip block:
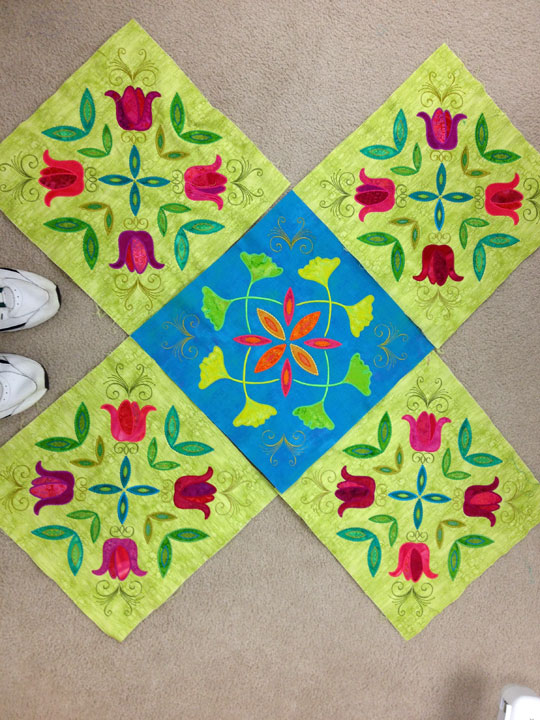
 I figured that these 2 blocks might look nice together and if I had that swirl in the same spot in both block types, they’d form a neat secondary design each time that 4 of them came together. Plus, it also meant I could make some kind of cool ruler work design on the inside of the structure that the 4 of them created! Here is a shot from my design wall as I started playing with it. In my head, I assumed I’d place them on point but I do not like the way the ginkgo block looks when set on point:
 You can kind of get an idea of what I mean about swirls from different blocks “meeting up” in the photo below that shows 3 of them next to one another:
 I still like the block types together, but the on point setting just doesn’t work for me. I’ve decided that setting the blocks on square is the way to go. Here’s a mock up of them on my design wall once I’d completed 2 of them:
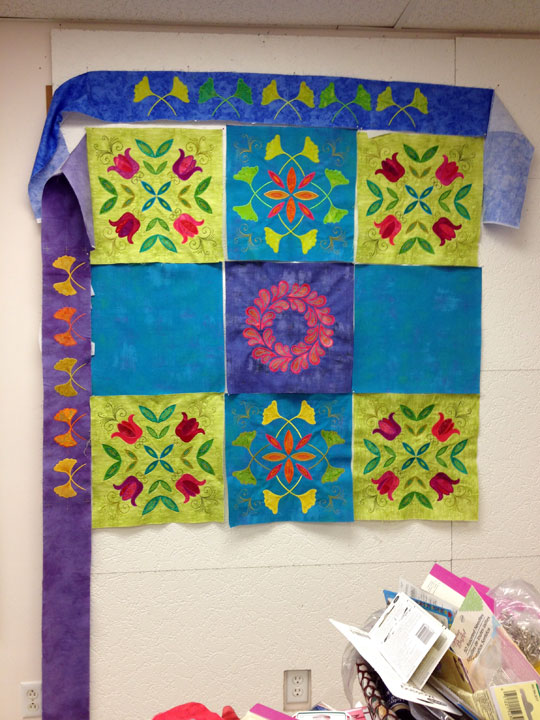 The 2 ginkgo leaf borders that are dangling around them weren’t made for this quilt. They were my test stitch-outs for a new border design. One of them uses the large ginkgo leaf and the other uses the medium ginkgo leaf. I hung them here just to get an idea of whether the “flow” of the borders might work with these blocks. You probably recognize that center block as my old feathered wreath MEA block. I’m going to add a swirl in all 4 corners of that block, too, so it can have that same “meet up” effect as the other swirl blocks. So…what’s on your design wall these days?
Filed under
Appli-K-Kutz Fabric Cutting Dies, Machine Embroidered Applique.
October 6th, 2015
 I was able to get a little MEA done in the last 10 days, mainly finishing up the testing of some block designs. When you have designs that can be stitched in multiple sizes of hoops, you have to keep testing out the files in all the various hoop sizes, so before you know it, they are kind of multiplying and you end up with tons of a given type of block. Here’s a Christmasy version of this appliqued wreath:
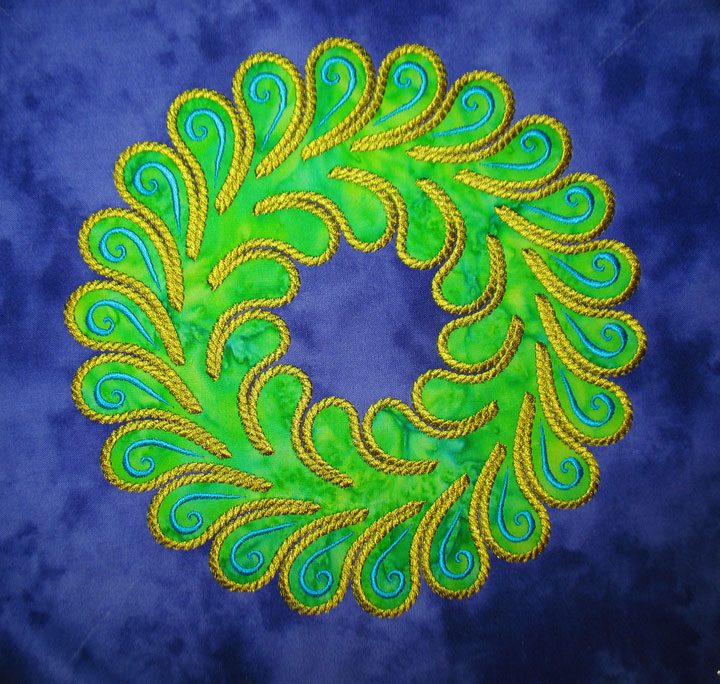
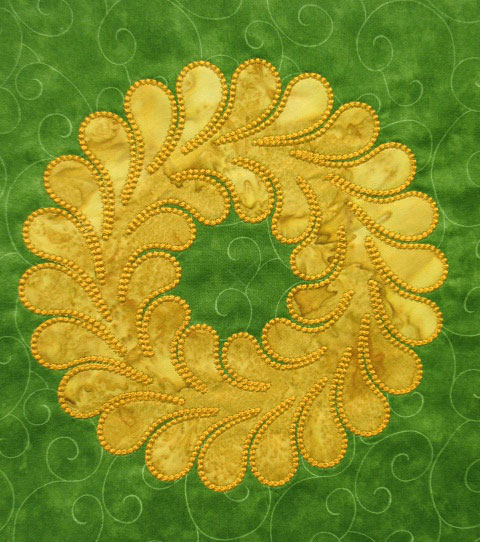 That’s actually from a couple of years ago. These wreaths are a single applique shape that were cut on my Sizzix machine using the Appli-K-Kutz 8 1/2 inch Wreath Die. Here’s another version of the same applique shape, but it has a different edge finishing stitch as well as an internal design:
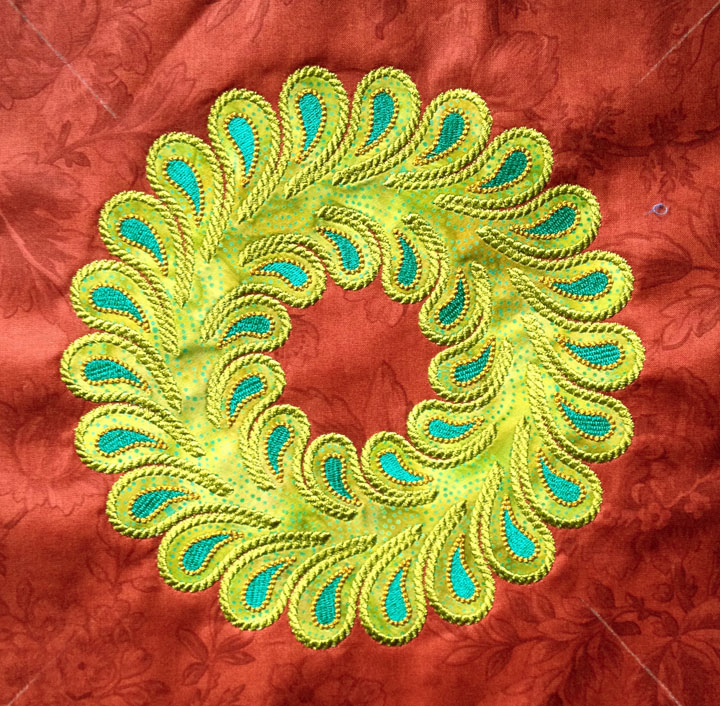 (Ignore the white lines; those are soap marks I use for registration lines when I float my fabric in the hoop. They are now history!) Here’s the same wreath with a different internal design but same edge finishing stitch:
 …and here’s an example of the same internal design as above but with the candle wicking edge finishing stitch:
 …and here’s what it looks like if you only add that internal design to one side of the wreath:
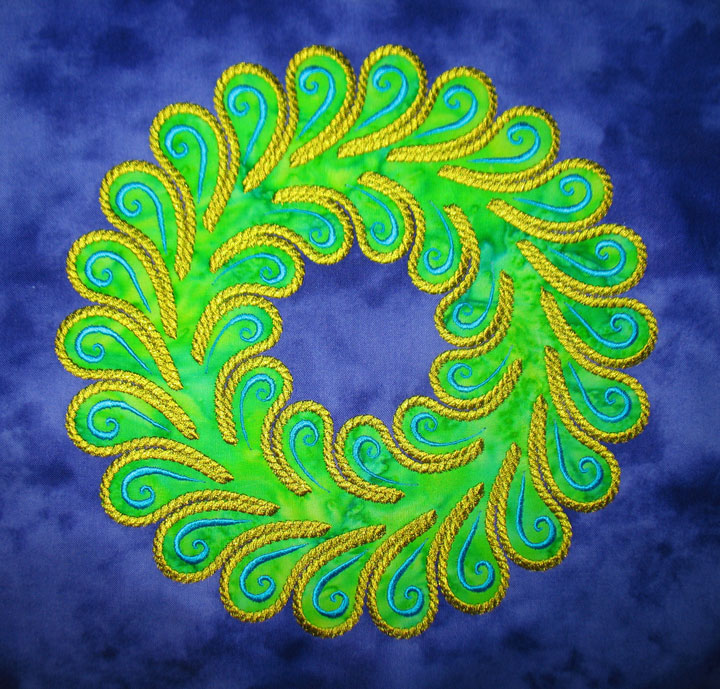
 And here’s another internal design! This time, the internal design is a series of one-sided feathers inside each plume:
 These wreaths are multiplying! The shot below isn’t even all of them, but I think this grouping will make a nice quilt with the blocks set on point:
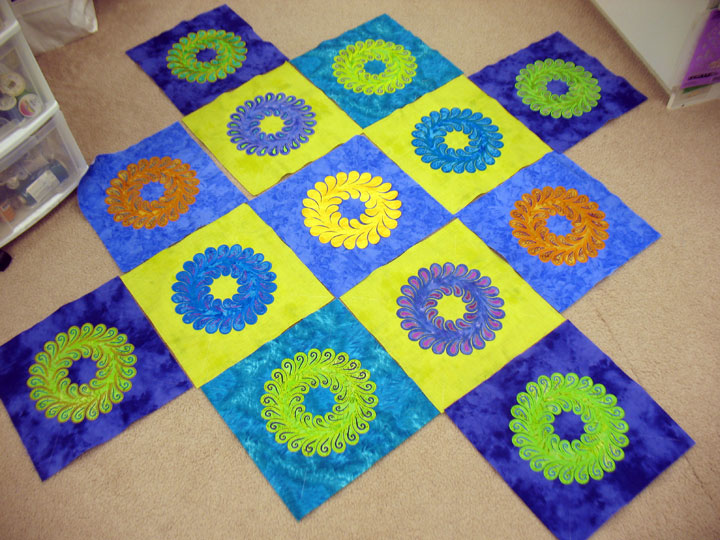 I see some fun ruler work in those spaces between wreaths…!
Filed under
Appli-K-Kutz Fabric Cutting Dies, Machine Embroidered Applique, Sizzix.
July 21st, 2015
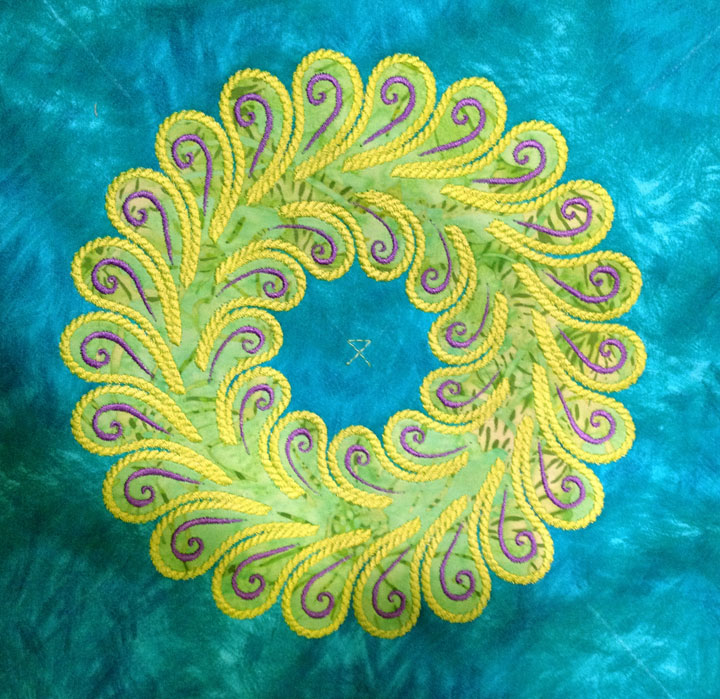
This week is pretty packed full of stuff, so I just don’t have time to sew. I was able to do the test stitch out of a machine embroidery applique design because I could get some other work done as the embroidery machine stitched away. This one uses the Appli-K-Kutz 8 1/2 inch feathered wreath die shape:
 This next photo is a shot of it with only the outer plumes decorated with swirls. I like that look as well:
 And here’s a tangential view of the whole thing stitched:

Filed under
Appli-K-Kutz Fabric Cutting Dies, Machine Embroidered Applique.
November 12th, 2014

It’s the 3rd day of the I Have a Notion Machine Embroidery Blog Hop and today’s post is by Marjorie of Marjorie’s Quilting Bee Blog. She created 2 small wall hangings/table toppers that are each created using an easy multi-hooping technique and they came out beautifully! Here are the pictures of what she created:

…and here’s version 2 where she has played with the orientations of the swirls. This one almost has a sense of movement because of the positioning of those swirls:

Gosh she did a beautiful job! To read about how she did it and to enter for a chance at a free digitized design give away, head on over to her blog by clicking here. While you’re at her site, be sure to check out her online shop because Marjorie creates her own digitized designs and you may well find just the right designs for your next project! And here’s the line up for the whole week again:
Before I sign off, I wanted to check back in about the project I was working on last week. I had a few days of sweating bullets as I went to finish the sides and corners of this wall hanging with setting triangles:

You can kind of see my dilemma in this next shot. Because the setting triangles always “begin life” larger than they will actually be at the end (the excess is trimmed once all setting triangles have been added), it’s dicey when you digitize the applique shape placement because you won’t know their positions are too close to the edge until you’ve stitched everything out and pieced it all together. Here is what it looked like after the side setting triangles were in place:

Check out where the arrow falls in this closeup of a side setting triangle in the next photo:

The nail-biting part was not knowing if those applique shapes near the edge would end up being cut off in the final trimming or, if they weren’t cut off, would they be so close to the edge that the design wouldn’t work and I’d have to start over? In the end, it worked out ok. This next shot is after the corner setting triangles were added and everything was trimmed:

You can see that those outermost applique shapes will barely be out of the way of the seam, but I think it will work. This will be the center section of a much larger quilt, but it will be left alone for awhile. I have a couple other projects that I’m going to focus on in the short term. Now get yourself over to Marjorie’s blog!
Filed under
Appli-K-Kutz Fabric Cutting Dies, Machine Embroidered Applique.