

May 25 15
Latest Machine Embroidery Applique Project
 Do you remember this applique block from a couple months ago? This was actually my first test stitch-out of the files to create this block. It’s had some minor tweaking done but I really liked how this preliminary stitch-out looked and didn’t want to waste it. So, I’m using this 22-inch block as the center of a new applique quilt. The shapes are all die-cut applique shapes that were cut out using my Sizzix Big Shot cutter. Using die cut shapes for MEA works great, because the shapes are always exactly the same and they fit perfectly into the placement outlines that are stitched by the embroidery machine. I’m kind of ashamed to say that working in this way has spoiled me.
Anyway, back to this current quilt. If you read my blog, then you know that I love to free motion quilt. A lot of times, I’ll create some of my quilting motifs so that they “play off” of applique shapes. An example would be the headdresses on these birds:
Do you remember this applique block from a couple months ago? This was actually my first test stitch-out of the files to create this block. It’s had some minor tweaking done but I really liked how this preliminary stitch-out looked and didn’t want to waste it. So, I’m using this 22-inch block as the center of a new applique quilt. The shapes are all die-cut applique shapes that were cut out using my Sizzix Big Shot cutter. Using die cut shapes for MEA works great, because the shapes are always exactly the same and they fit perfectly into the placement outlines that are stitched by the embroidery machine. I’m kind of ashamed to say that working in this way has spoiled me.
Anyway, back to this current quilt. If you read my blog, then you know that I love to free motion quilt. A lot of times, I’ll create some of my quilting motifs so that they “play off” of applique shapes. An example would be the headdresses on these birds:
 This time, I thought I’d try adding some of this kind of thread detail into the embroidery file. This means that once I get this whole quilt pieced and thrown into the final quilt sandwich, that thread work will kind of protrude outward if I stitch just outside it w/invisible thread. Here’s an example of incorporating it into the embroidery file instead. (The photo below shows the block only partially embroidered):
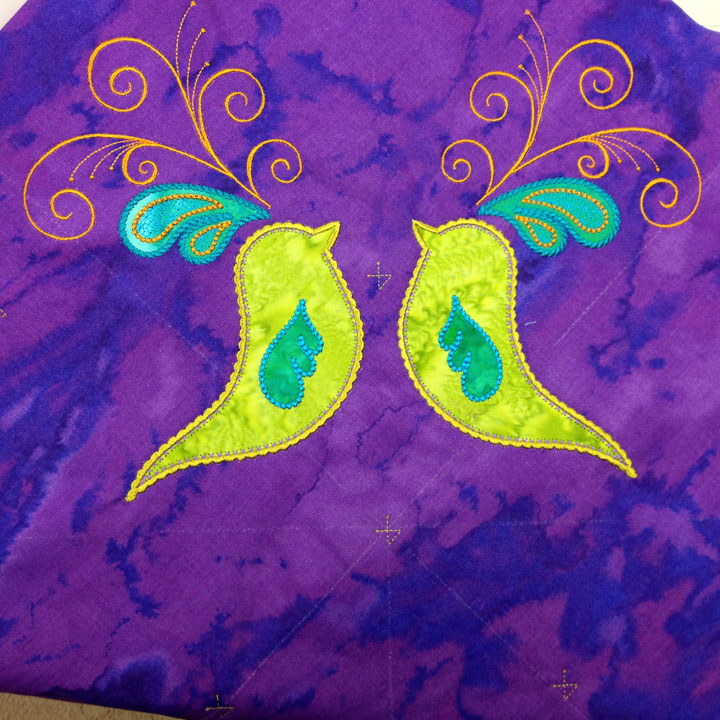 I really loved how that came out, so I went a bit nutso when I designed the headresses for the birds in the corner setting triangles. Check out THIS thread detail:
 Doing that type of thread work as part of the embroidery has 2 benefits for me:
-in the final finished quilt, the thread work will be more protuberant as opposed to having it kind of sink into the batting when it’s done as free motion quilting; and
-Because it’s done on the embroidery machine, it can be a much heavier line of stitching than the single line of stitching I can create with free motion quilting. There’s a price to be paid for this, though. For someone who loves to quilt, I am severely limiting the amount of “free space” available for quilting. That means the final quilting will not be nearly as much fun for me.
I had to go through a few renditions of this corner setting triangle block to get to this one and I’m very happy with the end result. I ended up adding a “frame” to the center block:
Doing that type of thread work as part of the embroidery has 2 benefits for me:
-in the final finished quilt, the thread work will be more protuberant as opposed to having it kind of sink into the batting when it’s done as free motion quilting; and
-Because it’s done on the embroidery machine, it can be a much heavier line of stitching than the single line of stitching I can create with free motion quilting. There’s a price to be paid for this, though. For someone who loves to quilt, I am severely limiting the amount of “free space” available for quilting. That means the final quilting will not be nearly as much fun for me.
I had to go through a few renditions of this corner setting triangle block to get to this one and I’m very happy with the end result. I ended up adding a “frame” to the center block:
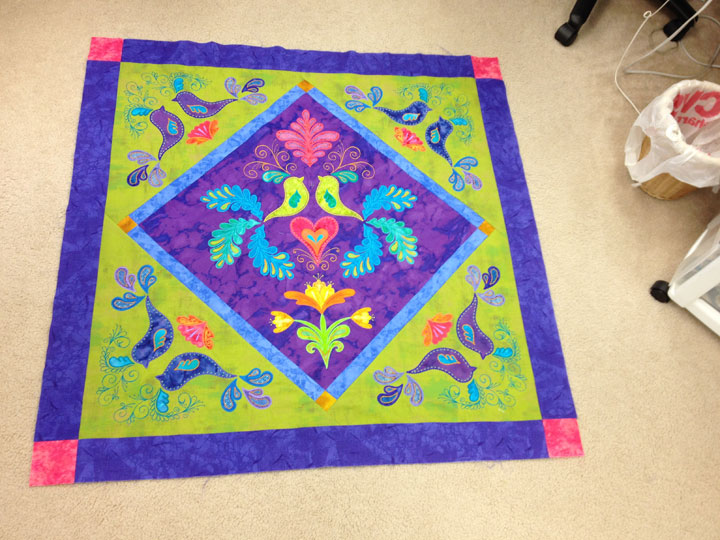
 And here’s what it looked like once I’d added the corner triangles:
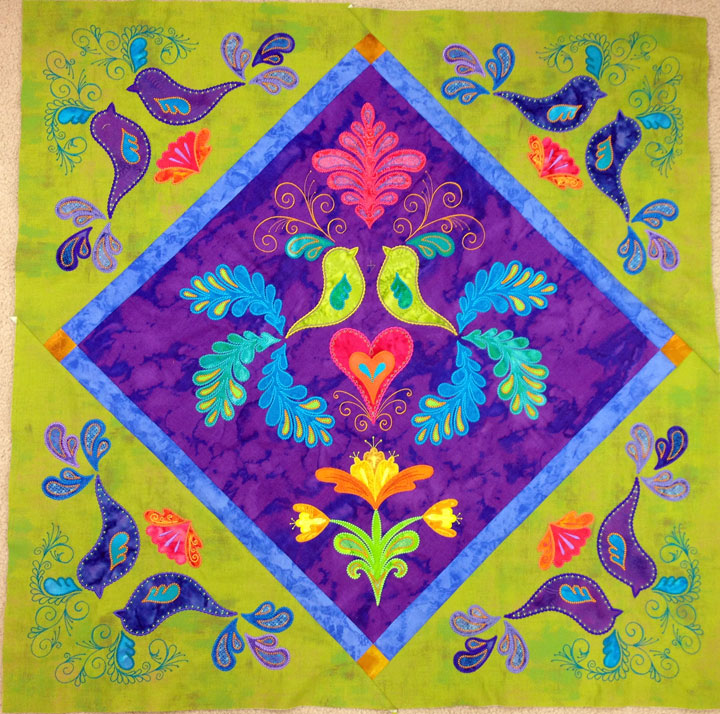 (Sorry; the pics aren’t so great because they’re all taken with the piece lying on the floor rather than flat on a wall.) Here’s what it looked like once I had added the next border as a frame:
 I have at least 3 more borders planned for this quilt. My fingers are crossed that I can get at least 2 of them done in the next week…
love nutso
This is just beautiful, Patsy — as usual!! Will you be bringing it to Bonclarken this weekend? I do so wish I could take your course, but I am grateful to be attending at all! Thanks so much for continuing to teach all who will listen. I am learning so muc from you!
I could so get carried away with MEA! But I’m restraining myself as I don’t have an embroidery machine. I have access to them at work though, so it is very tempting! Love what you’re doing here.
Beautiful as usual! Love it!
Lovely
Unbelievably beautiful
Are you ever coming to Vancouver Island BC to give classes? I would give my eyetooth (if I had one):-) to be able to take a class with you.