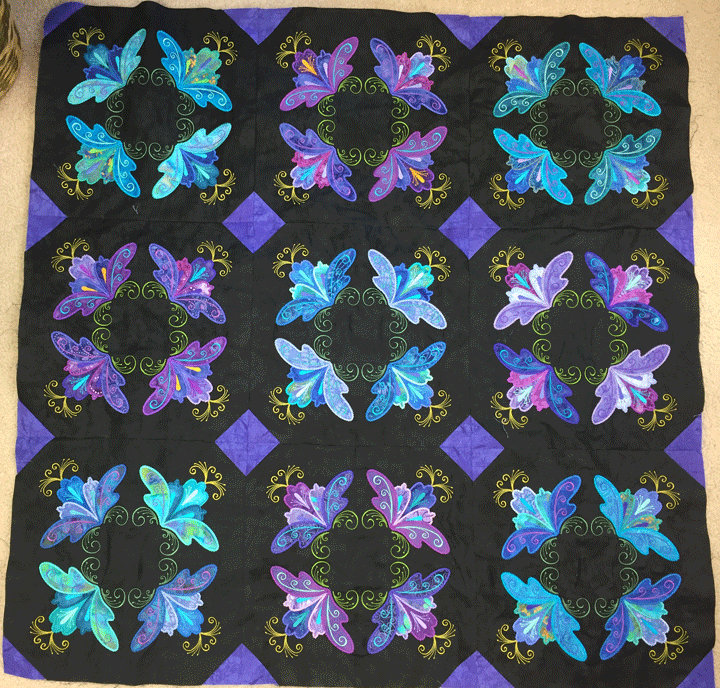
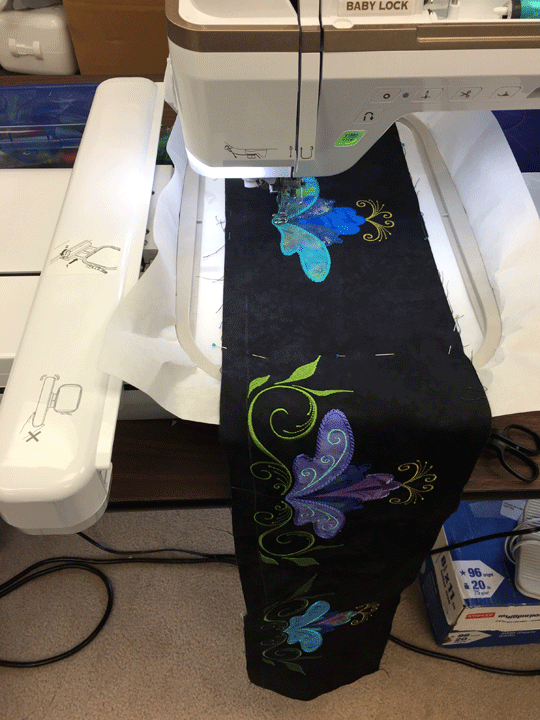
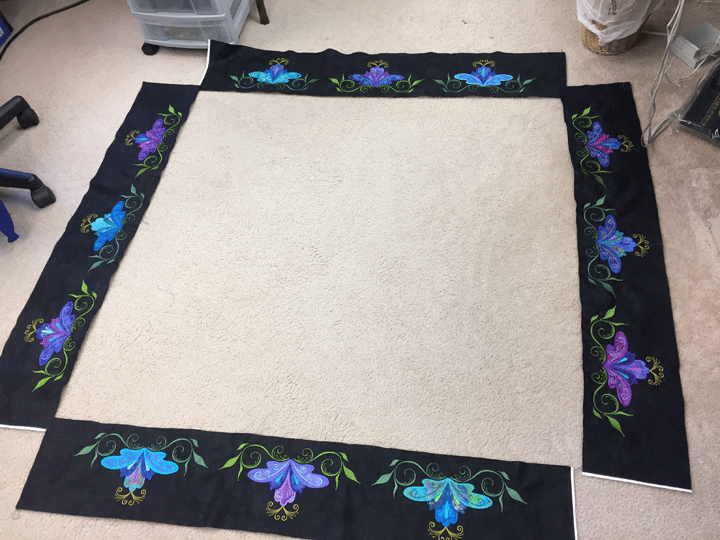
A Border Design in a Table Runner Format

June 30th, 2017
 
green-tr1
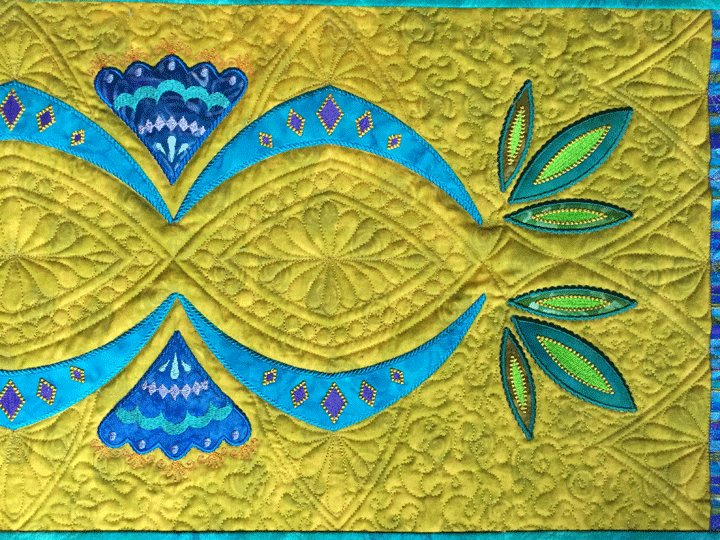
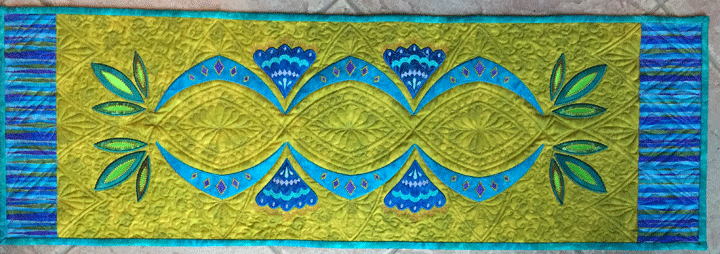
This is a new machine embroidery applique border design, but I set it in a mirror-image format to use it as a table runner here.  The swags and flowers can actually be repeated countless times so that it can fit pretty much any border size.  Here is a closer shot of some of the ruler work quilting:
 
green-tr2
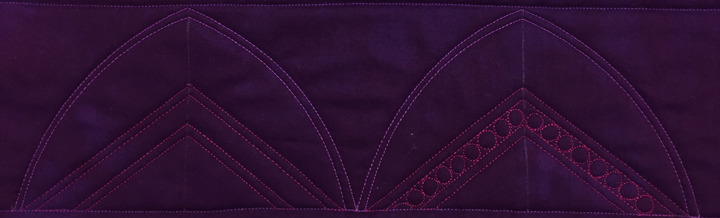
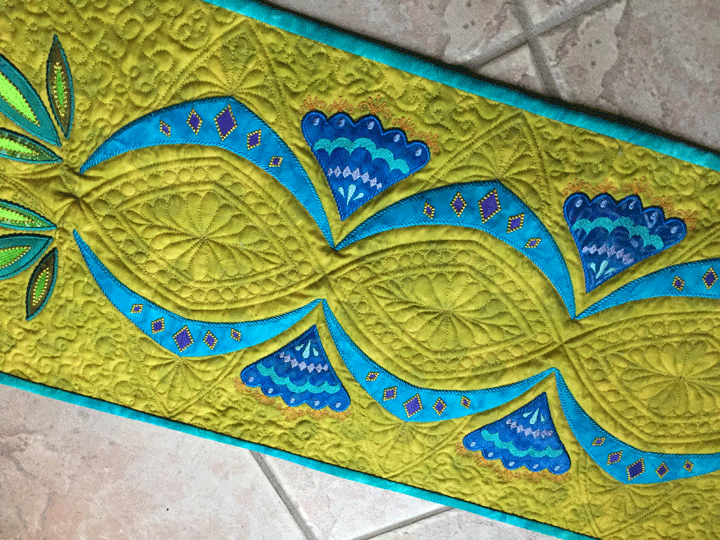
The end sections of the pea-green areas have some arc ruler work that was stitched without thought about what I would put in the blue sections at end side:
 
green-tr4
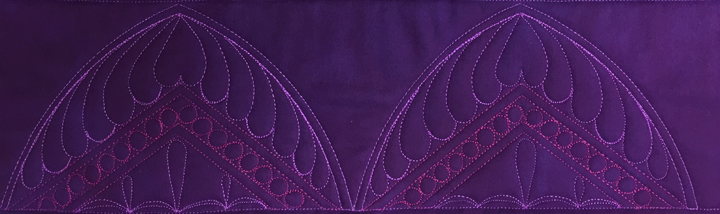
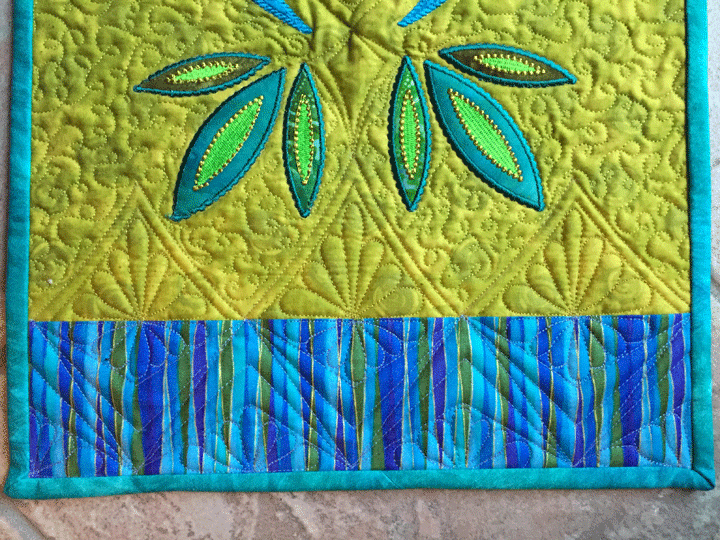
When I went to quilt the blue sections, I did a double Art Deco border design and then threw featherettes into the center triangle zones.  Even though the blue areas are stitched in a different color thread, it appears that the designs blend seamlessly into one another:
 
green-tr3
 
This stitched up very quickly and was fun all the way through…
 
green-tr5
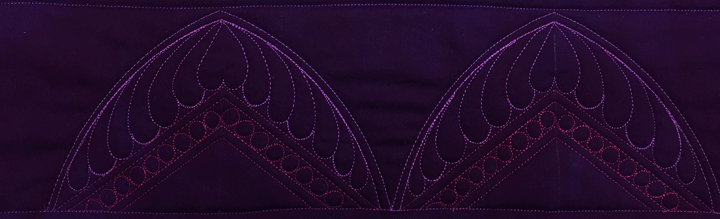
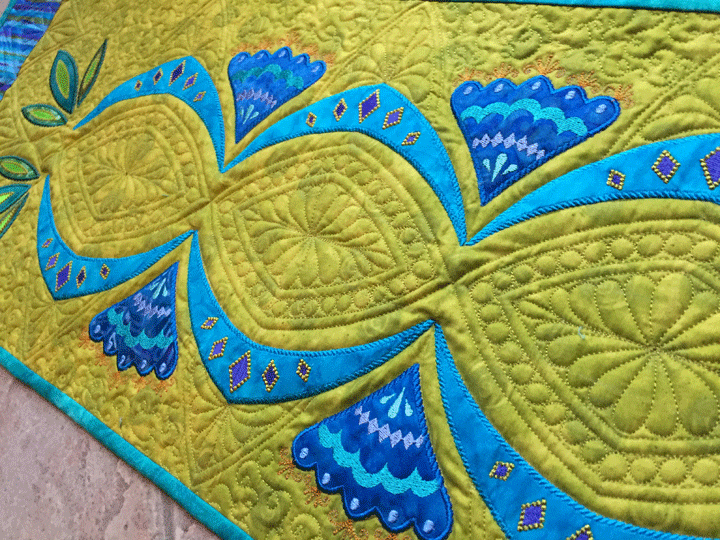
Love, love, love all the textures here:
 
green-tr1

Another Ruler Work Border Design

June 24th, 2017
 
border1a
I can’t stop playing with this stuff!  This design couples curves and straight line quilting in the same border swag design.  It starts out as a basic arched swag border design with a scant 1/4 inch channel.  I used my PTD 12 arc ruler for this.  The next step is to add the straight line channels and I used the PTD straight lie ruler for that.  There is a 1/4 inch channel, then a 1/2 inch channel, then another 1/4 inch channel.  In this next shot, you can see the framework in one arched swag and the beginning of the fill-in work on the other:
 
border-1b
You can see that I swapped thread colors as I moved to a new zone.  That’s not necessary but I am a thread lover so it adds to the fun of stitching this stuff out.  In this next shot, you can see that more fill-in work is done:
 
border1c
…and then the final fill-in is added and I used my original thread color for the final section:
 
border1a
(Sorry about the colors changing.  The final shot is the “real color.”)

Picking Up an Abandoned Project

June 22nd, 2017
 
blk-flow2
 
Last Fall, I created several blocks like the ones above for the center of a quilt.  I finished them up  and here’s what they looked like when I laid them out on the floor:
 
blk-flowers1
I added a small triangle at each of the corners of each block, and here’s how they look all pieced together:
 
blk-flowers2
I finally got back to it recently and started working on the first appliqued border.  Here you can see one of the borders in process:
 
blk-borders1
I am lucky and can embroider more than one border at once; here is a shot that shows 2 borders being worked on simultaneously:
 
blk-borders2
…and here are all 4 borders laid out on the floor:
 
blk-blorders3
This has been an odd month.  I spent the first part of the month traveling and teaching, so there was no time to sew outside of doing class demos.  We drove to NC last week and I was really looking forward to a few weeks of intense sewing/quilting.  When we opened our garage door, we found that a leak from the kitchen had waterlogged the ceiling in the garage (suspended ceiling of ceiling tiles) and the tiles had all broken into wet pieces and fallen down.  The insulation was soaked as well.  The floor was covered with smelly water and a “paste-like” mess from degrading ceiling tiles.  Lovely!  We went upstairs and found that about a quarter of the wood floor in the dining room was soaked, as was about a quarter of the kitchen tiles.  The culprit that caused all this was a tiny, pin-hole sized crack in the plastic tubing that carries water to the ice maker in the refrigerator.  (We have since learned this is a common problem and can be avoided by replacing that tubing with a small piece of braided steel tubing that costs between $12-$25.)  We ended up calling one of those disaster recovery teams and they rigged up this interesting system to dry things out.  Here’s a shot that gives you an idea of what things looked like from upstairs:
 
water1
This was a drying/de-humidifcation process that went on for several days.  From the garage below, a small “room” was walled off and heated/dehumidified to help dry the wood and tiles that were above.  Here are 2 shots of the garage set-up:
 
water2
…and here’s a shot of what was in the room:
 
water3
These machines all worked for 24 hours/day and it was like being on a tarmac for many days because of all the noise.  The people who helped us were WONDERFUL (1-800-water damage)  and we are happy to say that everything really did dry out and we didn’t have to rip up the wood floors or the tiles!  It is so nice to be back to a normal routine with silence again and I am looking forward to some productive time in my sewing room!!