

Jun 30 13
Creating a Feathered Frame for an Important Quilt Block-Part I
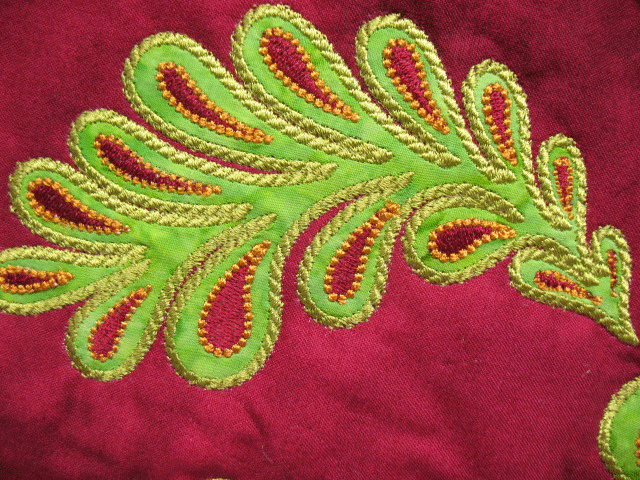
Sometimes you really want to showcase or highlight a quilt block and a one way to do this is to create a feathered frame surrounding the block. These always look complex and rich but they are usually pretty easy to construct if you break down the steps taken to create them. In this case, I wanted to create a feathered frame to highlight the center block in this quilt: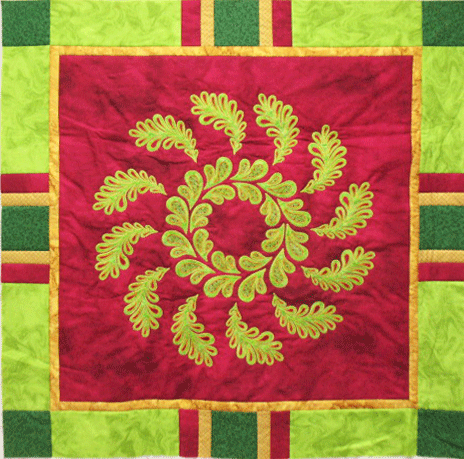 (Sorry about all the wrinkles, but this quilt had been folded up in a suitcase for a few days when I took this photo!) When you’re creating something like this, you have to take some cues from the block itself. The large feathered wreath inside it has very, very heavy thread work in it, and that gives the wreath kind of a “celebratory” look. Here’s a close up of one of the feathers on the outer ring so you’ll understand what I mean:
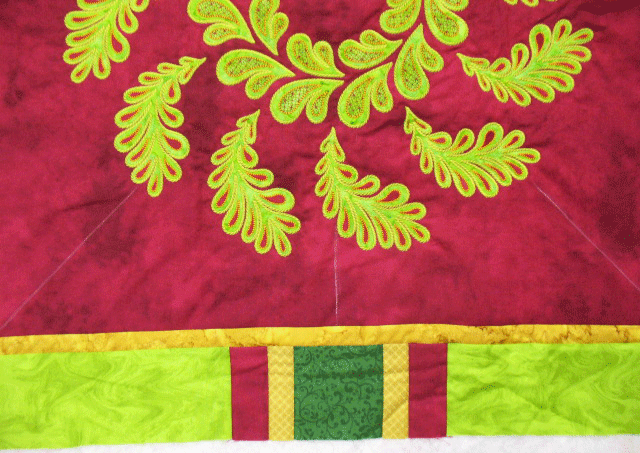
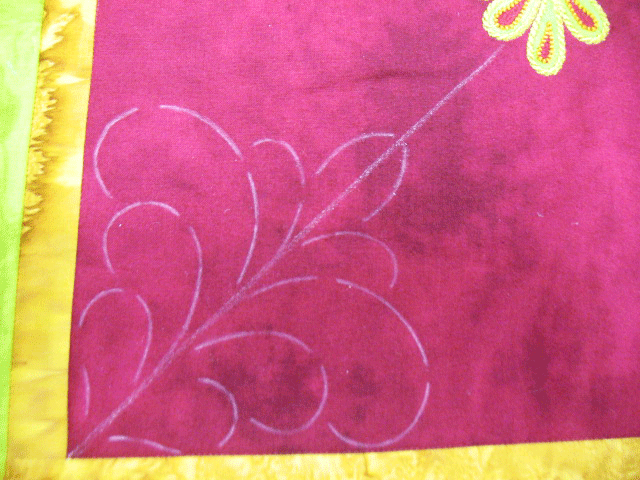
 Whatever I do in this frame area, it needs to fit with the “feel” of the block. I’ll need my quilting to be pretty showy in accordance with that “celebratory look,” but I don’t want my quilting to compete with the embroidery. The embroidered applique needs to be “center stage.” The first thing I did was to mark temporary lines that divided the quilt into 8 equal sections. I marked a diagonal line from each corner to its opposite side and also marked a line from the center of each side to the opposite side. You can see what 1 side looks like here:
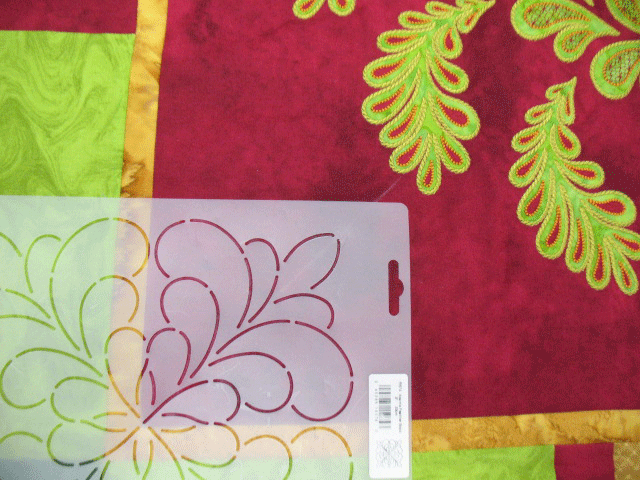
 I want to create some type of structure emanating from each corner, and I’ll later use that structure to flow feathers toward the center of each side. You can use all kinds of things for a structure like this. I’m in a big hurry, so I’m taking the easy way out by using a portion of a stencil to give me the 4 corner structures. I’m using the Feather Adante Stencil and I begin by placing 1 quadrant of this stencil in a corner, and lining it up with the diagonal line I marked in soap earlier:
 …and here it is traced with a soapstone maker:
 …and here it is stitched:
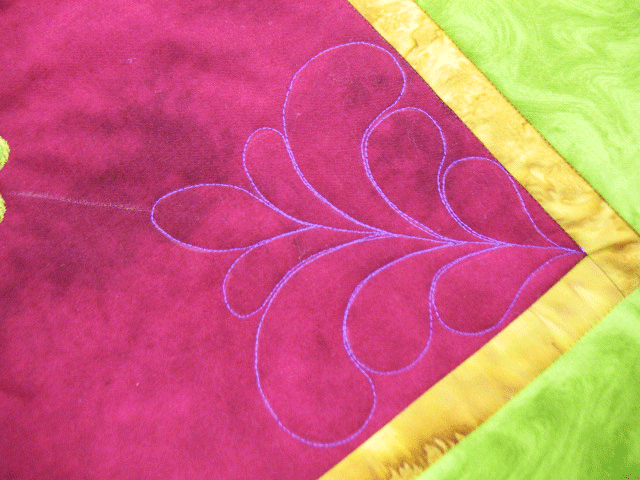 The thread color above looks more dramatic in the photo than it really is, but it is a thread color that has reasonable contrast with the background fabric. This is what I meant when I said I needed to keep with the “celebratory” nature of the block. This just wouldn’t be a good place to have the threads match or nearly match the background fabric. Next up, I cranked up the celebratory fee big time by hyperquilting each of the corner structures. I used Robison Anton 24 karat gold rayon thread for this, and I use this particular thread for hyperquilting more than any other thread:
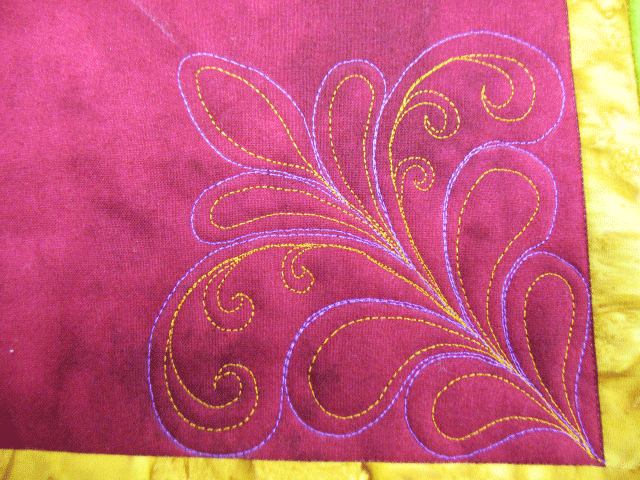 Isn’t it amazing just how much that hyperquilting can add?!
The next step is to create the “bones” of the frame. Again, this is much easier than it might seem. I use a flexible curve ruler and place 1 end next to where I want to begin my feather and then I bend it into nice curves that will have my feather travel to where I want it to end. In this case, I want my feathers to meet (or “kiss,” as I call it) in the middle of each side. Here’s a shot of my ruler bent into the curve that I’ll be using:
Isn’t it amazing just how much that hyperquilting can add?!
The next step is to create the “bones” of the frame. Again, this is much easier than it might seem. I use a flexible curve ruler and place 1 end next to where I want to begin my feather and then I bend it into nice curves that will have my feather travel to where I want it to end. In this case, I want my feathers to meet (or “kiss,” as I call it) in the middle of each side. Here’s a shot of my ruler bent into the curve that I’ll be using:
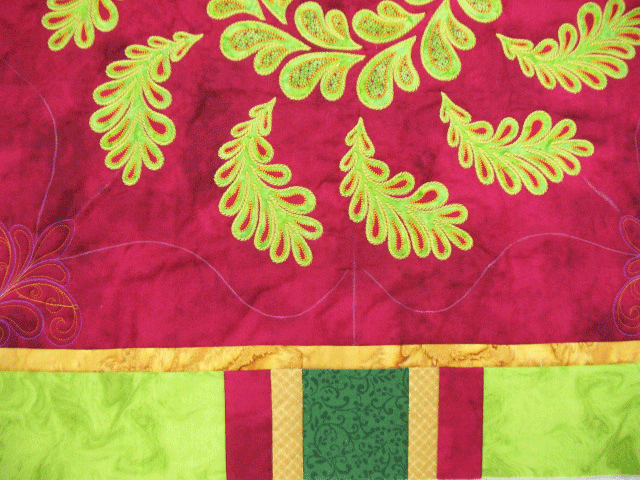
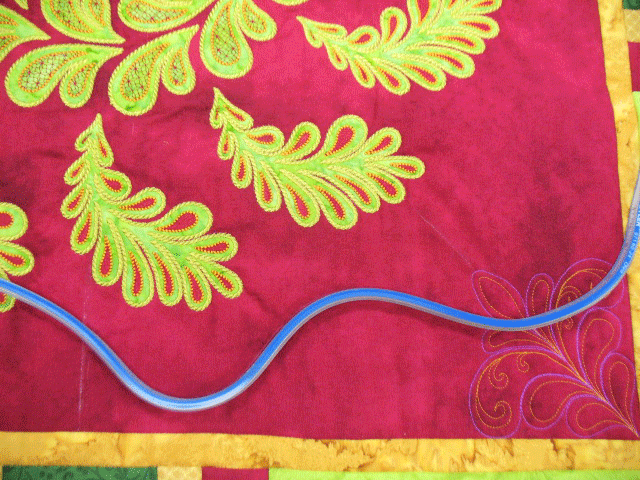 (You can flow feathers from many things, but if you are flowing them from another feather, know that it will always work to have a feather flow from between 2 plumes. Notice that the ruler is strategically placed between 2 plumes in the photo above.) I traced along the edge of this curve with a temporary marker, then repeated this on all 4 sides. Once done, I gently flipped my ruler over and then traced the mirror image curves on the opposite side of all 4 sides of the quilt. This creates a lovely flowing frame that surrounds the entire block. I couldn’t get a shot of the entire block that had enough detail to show the markings on all 4 sides, but you can get an idea of what I mean in this photo showing one side of the quilt:
 I know you don’t have much sense of a frame yet, but check back later this week for Part 2 of creating a feathered frame…!
buying viagra online from canada
Patsy I love it! Thank you so much for sharing… Can’t wait for part 2.
This is beautiful! Thanks for sharing and can’t wait to see what is next! 🙂