Sep 08 13
Designing Quilt Blocks and Designing Quilts
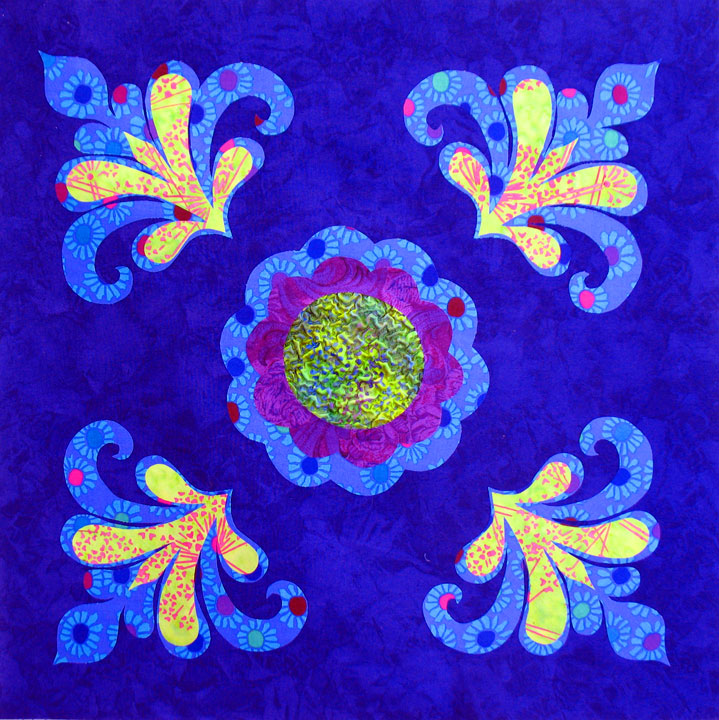
The more quilters I meet, the more I realize that we all “see” things differently. I have been quilting for more than 35 years now, and I have designed my quilts using an “as-you-go” design method from the start. This has always what been what seemed to come naturally to me, and I was really surprised the first time a friend showed me a piece of graph paper where she had drawn out and colored all the pieces of a quilt she was designing. I immediately thought “I could never work like that,” yet as I think about it, her method really fits better with the way I do pretty much everything else in my life. I pre-plan and outline everything, so I’m not really sure where this spontaneous method of designing comes from. But, it works for me and is still fun for me, so I thought I’d share how I come up with designs. This next quilt block is a very good example of my basic approach:
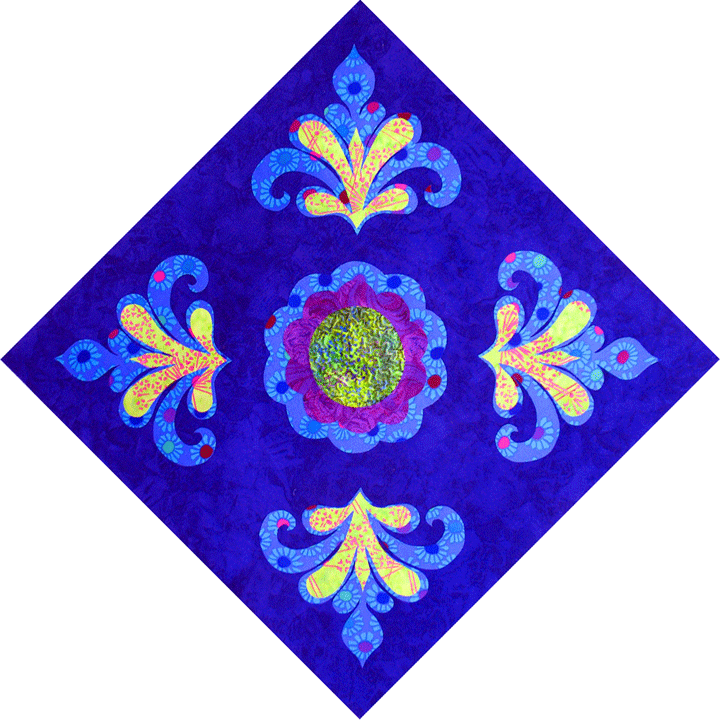
I began by cutting a block in the size I wanted, then drew a light soap line from each corner to the opposite corner, creating a large “X” across the block. This divides the block into 4 equal quadrants and creates the groundwork to create a design that is set on point inside a block that is set on square. Again, this gets back to how you visualize things. I could set this whole block on point, and now the design inside it would appear different as in the image below:
But, for the sake of making this easier to understand, let’s go back to that first orientation:
Once I have those quadrants outlined, I have an idea of how large a space I want to fill. Since the point of intersection is the center of the block, anything I place there will be in the dead center. In this case, I wanted to place that large daisy in the center. My mom gave me a brightly painted wooden mirror in that shape when I was about 13 years old, and whenever I have gone back to visit her, I have seen that brightly colored mirror. My mom moved a few years ago and we needed to clean out her house, so I took that mirror home and traced its shape to get my center flower and the smaller flower inside it. The only thing I did to alter it was to texturize some fabric with Texture Magic and I used that to fill the center-most section. If you’ve never used Texture Magic, here is a link to a video we made about how to use it.
So, back to designing this block…I plopped my center flower in that center position and this left “blank space” in the 4 diagonals that spring from the center. I took a ruler to measure the length of a quadrant, then I folded a piece of paper in half and placed 2 pencil marks on it that gave me a rough idea of a starting base point for my design and my upper ending point, or “tip” of my design. (I deliberately made the length of these marks less than the measured length of a quadrant since I didn’t want to overcrowd the block.) I drew one side of the light blue shapes above in pencil, then I cut them out along the folded side to ensure I had a design with symmetry. I placed my paper version in one corner to make sure it would fit, then used my paper template to trace around onto Wonder Under fusible web and then fused/cut my fabric applique pieces. I did that same thing for the smaller yellow shapes that you see inside the light blue shapes.
For years, I made my quilt blocks in this way, then finished to edges with some type of decorative stitching. In the last 2 years, though, I’ve been almost exclusively making machine embroidery applique blocks. I’ve had to switch some of my work habits for these, and the process takes much longer because there is a lot of “tweaking” that happens along the way. This next example is of a block whose designing began about 4 1/2 months ago and it is still not completely done. I first created a “mock up” of the block but I used muslin for the background since this mock up will never be finished:
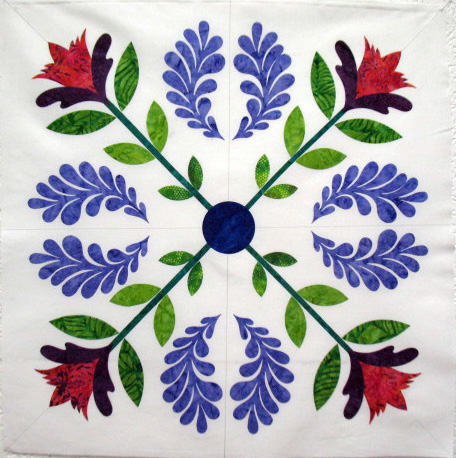
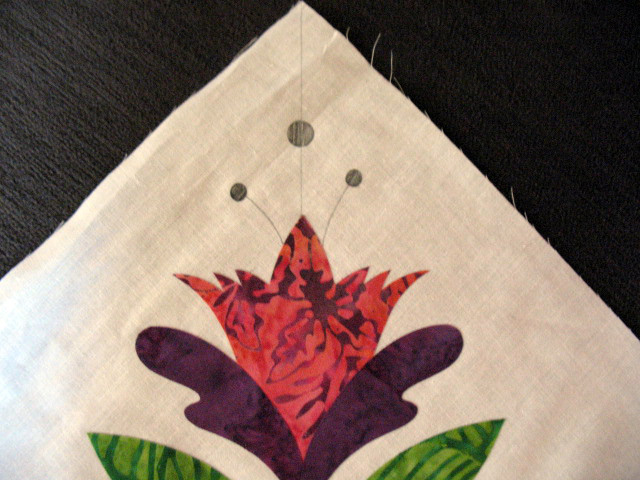
If you look closely, you will see that this block has been divided into 8 quadrants, as there are pencil lines from each corner to the opposite corner as well as from the midpoint of each side to the opposite side. This is a very large, 23 1/2 inch square block. What you see above are the various applique shapes that collectively form this block, but there are other decorative issues when it comes to designed a MEA block. For example, each corner will have some stitched lines to denote the stamen of each flower and you can see that in the close up photo below:
I am mainly working with shapes cut from Appli-K-Kutz dies that were cut on my Sizzix Big Shot machine, so that makes this part of creating a “mock up block” fairly easy. BUT… this is only the beginning!
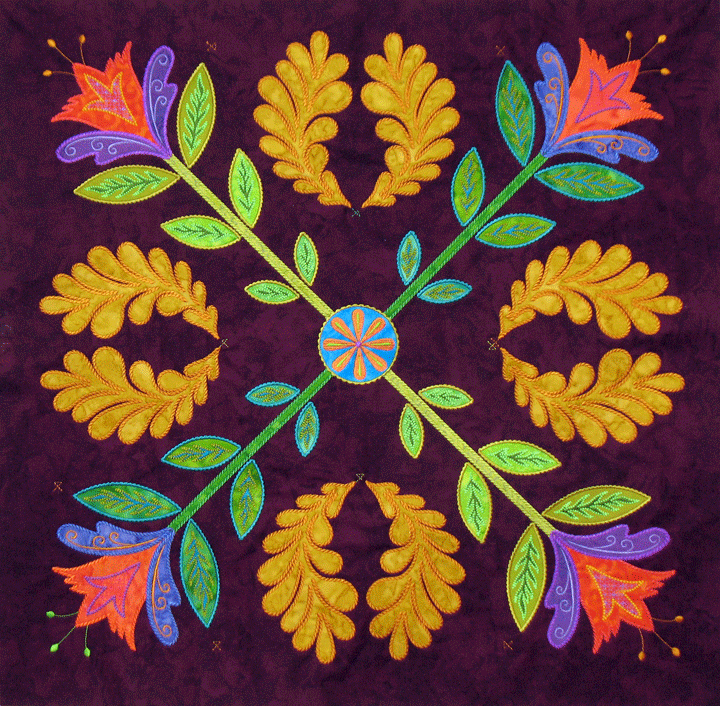
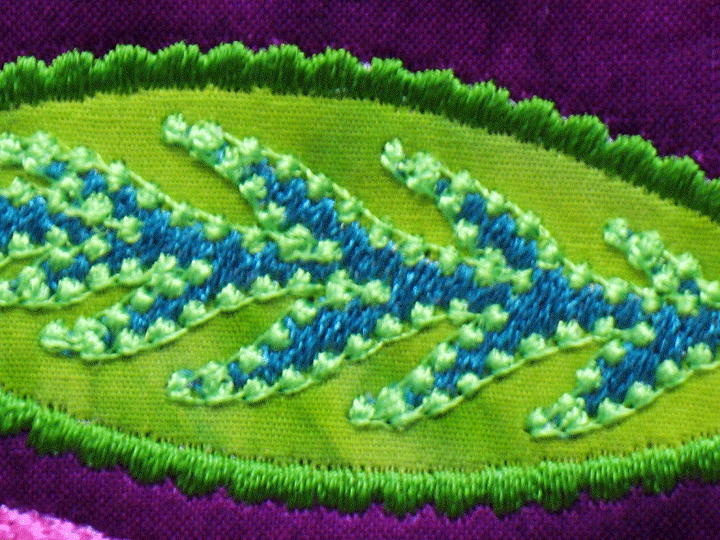
On top of all this, some of the applique shapes will have designs inside them, (all created with thread), like the leaves, all parts of the flowers, and the center circle, so it takes me awhile to determine what those “internal” designs will be. Once I’ve figured out the “internal designs” and chosen all the decorative stitching that will be applied in all the different spots around and inside the applique shapes, I send all that info and my mockup block photo to a digitizer. I can do basic digitizing, but nothing close to designs this complex, so I’m really grateful to be working with a wonderful digitizer. Once the block has been digitized, I do many stitch-outs and this is where the tweaking begins. Sometimes, it is little things, like learning that a decorative stitch needs to be shortened a little so it looks more appealing, as you can see in the photo below:
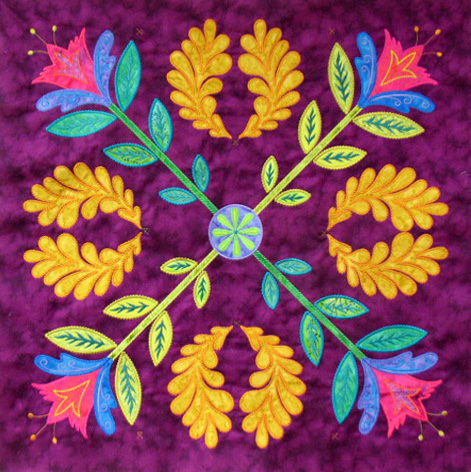
Other times, it is a major overhaul. Can you spot the problem in the block photo below?
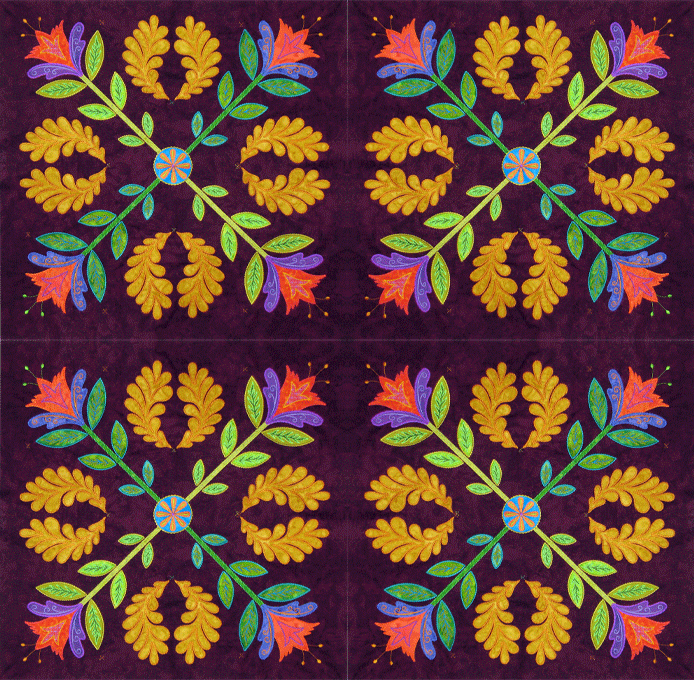
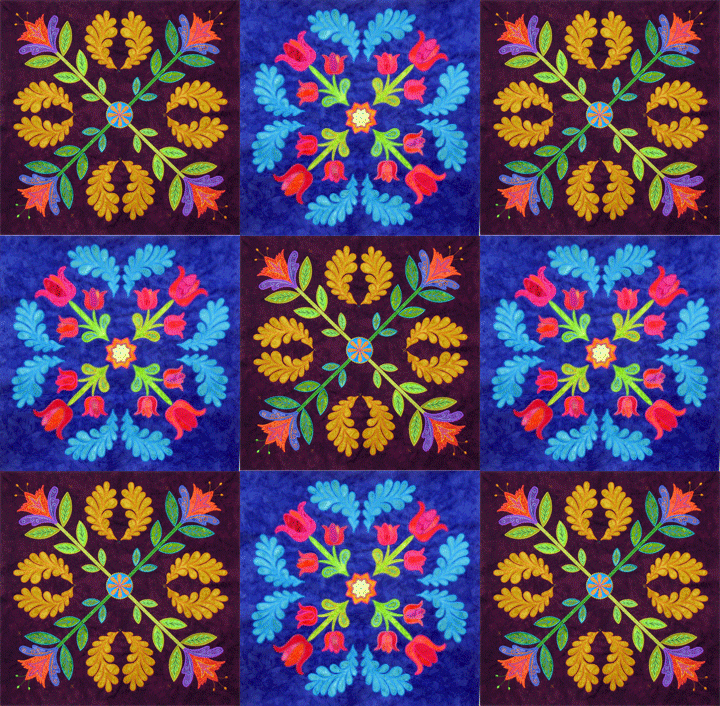
This one’s harder to spot, but if you look closely, you’ll see that the pair of feathers in the 3:00 position is so close together they are nearly touching. This is because the way we had the registration marks configured, if a person made a small error in alignment on an early hooping, it would be magnified as more hoopings occurred. It’s tough to see, but if you look closely, you’ll see that some of the flowers aren’t exactly aligned along the corner diagonals and this is all part of the same error. This is a big deal problem to correct, especially when you consider that this block is so large it takes a good 2 1/2 days of very focused work to stitch out! So, it’s back to the drawing board and a whole new series of stitch-outs! But, in the meantime, I can play with a “raw block” and get myself excited about possibilities. A few of these are shown below, the first one being a simple 4 patch quilt which would finish at 46 1/2 inches if nothing further were added to it:
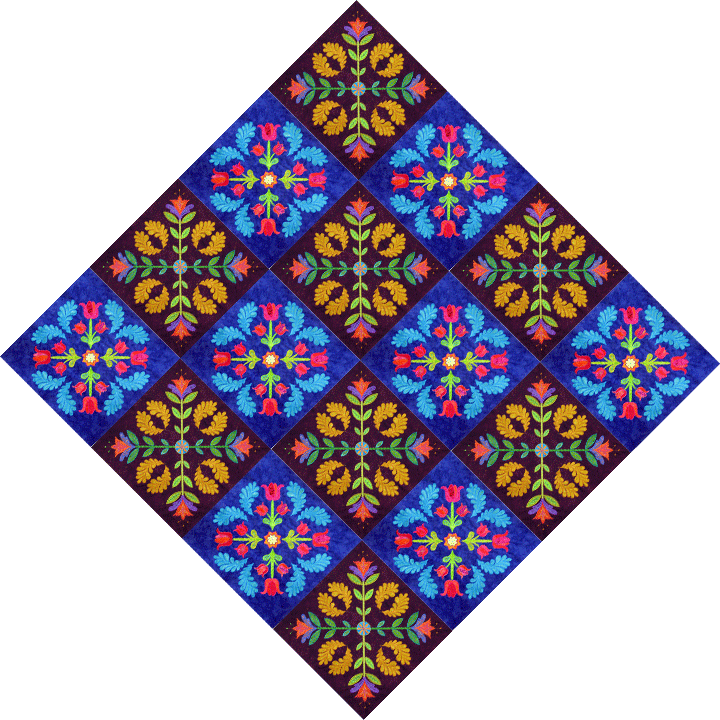
(Every time I see this image, I think to myself that this would be a beautiful postage stamp! Of course, you could make this as a 9-patch, 12-patch, etc. Here’s another example of an interesting quilt created when this block is paired with another large block I made a couple years ago:
…and here’s the same quilt with the blocks set on point:
It has become so easy to “play” with images that it’s a wonder we do anything else anymore. Until my next post, happy quilting!
My husband used to start everyday with the product and it really works. Buy 25mg viagra? Our goal is to provide medications at discount rates to everyone who is affected by expensive local prices.


I agree, playing can be so much fun, but the design process does take much longer than a lot of people realize. And your method of embroidering on top of applique is gorgeous, but seems like it would be time consuming to line up. Great insight to your design processes.
Love seeing how you design your blocks … thank you!
[…] Patsy Thompson Designs, Ltd. » Designing Quilt Blocks and Designing Quilts. […]