Sep 02 13
Playing with Rulers on a HDSM
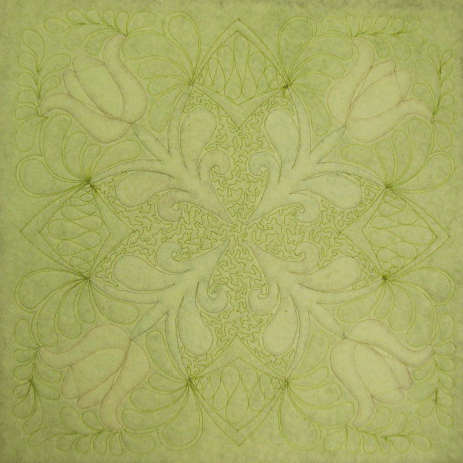
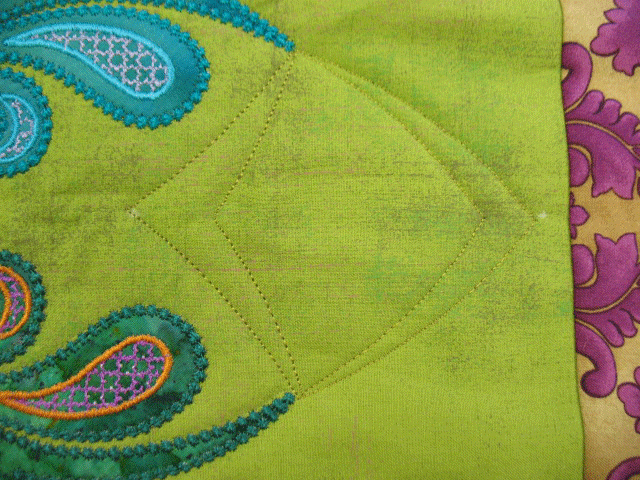
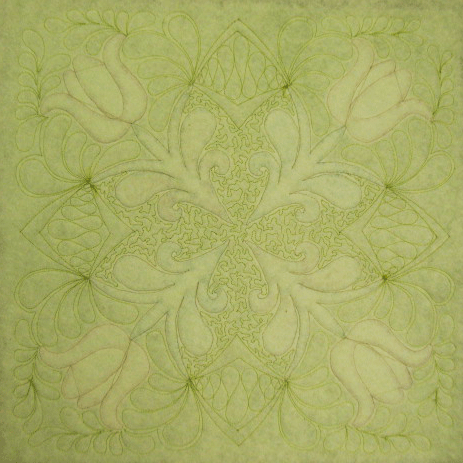
Sadly, this is one time that showing you a picture of the front of this tote won’t tantalize you because although it looks really nice in person, the quilting doesn’t show up well enough in the photo to even really see it. You can kind of get a feel for it from the backside, though:
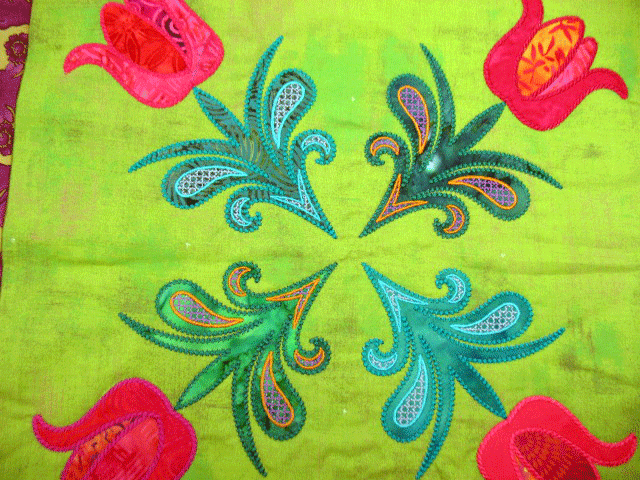
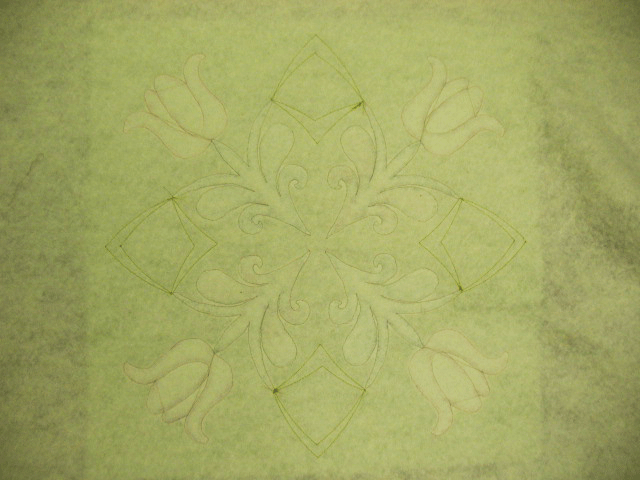
This all started because I wanted an opportunity to play around with an acrylic ruler on my HDSM. This is the center section of a tote bag I’m making, and I wanted to use a ruler to create a secondary design:
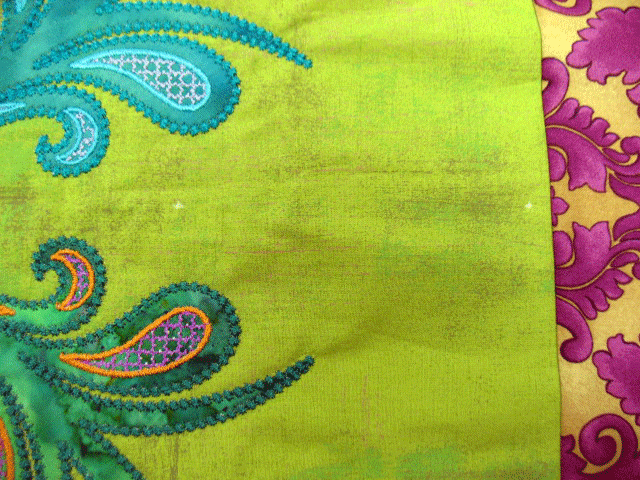
Part of the thrill of working w/rulers is no marking or next-to-no marking. I started with only these 2 tiny white marks on each side as my guide:
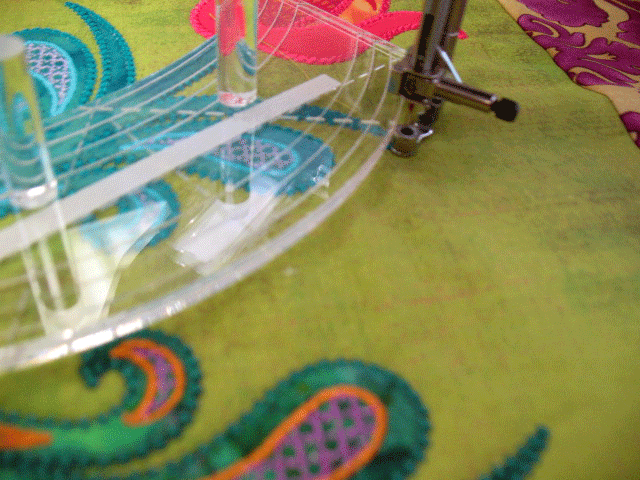
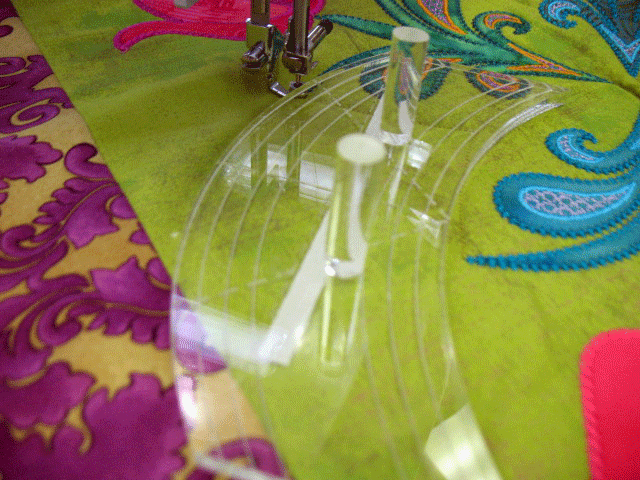
Between those white dots and the points on the stem shapes, my goal was to create a secondary design. To start, I laid my ruler so that it would give me a curved line that would start and end at roughly those places. This is where the learning curve comes in…you can really only develop a sense of the correct allowance by practicing (just like when you first learned how to FMQ), so you have to go into it accepting that you’re going to make some mistakes along the way. Here’s a shot of the ruler laid out and if you look, you’ll see that there’s an allowance (i.e. “empty space”) by the dot. (There’s also an empty space by the stem tip but you can’t see it because of the free motion foot):
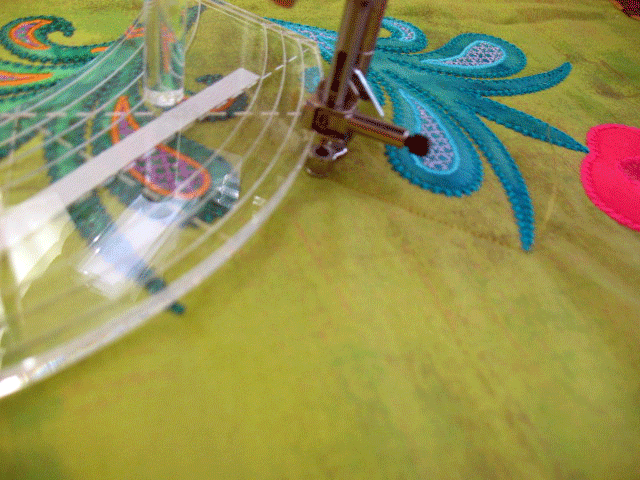
Take a close look at the free motion foot. That is an improvised foot (aka a home-made foot) that I created by using the Babylock/Brother Free Motion Foot C and super-gluing a 1/4 inch high cylinder to the top of it. My hope is that all these sewing machine companies will start developing feet for us HDSM users to allow us to do this ruler work, but in the meantime, we have to get inventive. I held that ruler with my left hand as I moved the quilt with both my hands. Deliberately running the edge of your foot along the edge of the ruler will get you a nice, smooth, curved line. I should also tell you that the ruler I was using here is called the 6 1/2 inch Fine Line Continuous Curve Ruler and you can read about it here.
Once that first curve was stitched, I moved my ruler between the next 2 points:
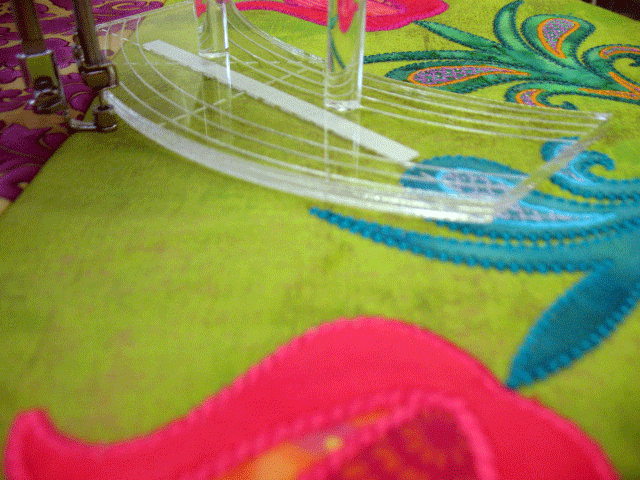
…and then I stitched that second curve. These first 2 curves were convex curves, but for the next 2, I wanted to stitch concave curves. Notice that the curve will be different in this next configuration:
For this curve, I held the ruler with both hands and this was surprisingly easy. For the 4th side, it played out the same way:
That completed all 4 sides and my next move was to go back in to each shape and do the same thing on a bit smaller scale. This allowed me to create a channel. That channel is VERY important because without it, your quilting is pretty much lost. Here’s what the 4 shapes looked like once they were completed:
The backside at this point looked like this:
From there, I added a plume-based fill design that sprang from each side of these curved “units,” then filled the curved units with a “Grandma’s ribbon candy” design, then filled the center section with stippling to set it off from the rest. I used 2 different green polyester threads but they are both so close to the background fabric that you can’t tell and my thread choice is my only regret It looks very nice in person but the photos just don’t show the quilting on the front well enough, so here’s a shot of the back:
If there is any part of you thinking about trying this, go for it! It is loads of fun and even though it’s a bit humbling because you’ll make a lot of errors, it really allows you to create some very interesting quilting designs. It’s harder to hold the larger rulers and for me, the 6 1/2 in curved ruler and the smallest size of the straight ruler are very easy to manage. Good luck!
I have tried many brands of products and this is definitely the best I have used. Buy diflucan online? That is why we pay attention to the quality of the medications.


I bought one of those curved rulers awhile back – I really need to pull it out and practice with it. Strange how my skills don’t get any better with it when I don’t use it??!! Your little design is just perfect, and seemingly, so easy! PPP!
I like how you work. It’s always beautiful design and yes, I’m trying every day et often with you as teacher. Thank you!
Oh my goodness Patsy you are always taking things to the next level! I am sitting here trying to figure out how you held the ruler in place AND moved your fabric without the ruler moving. LOVE to see a video of this! Pretty please?
Head spinning,
Karen
Hi Patsy, as always, just gorgeous work! What does HDSM stand for? Home domestic sewing machine??? Hyper dense (quilting) sewing machine??!!
Wow…I just started investigating tools for HDSM FMQ after a couple years of free motion quilting. This is exactly what I was looking for….
Hi Patsy, I heard about your blog from Amy’s Free Motion. Interesting the way you adapted your FM foot. What is a “cylinder”? From picture, it looks like a “bolt”. Thank you.