

Oct 29 13
Preliminary Stitch out of a New Border Design and Heads Up on a Blog Hop With a Give-Away!
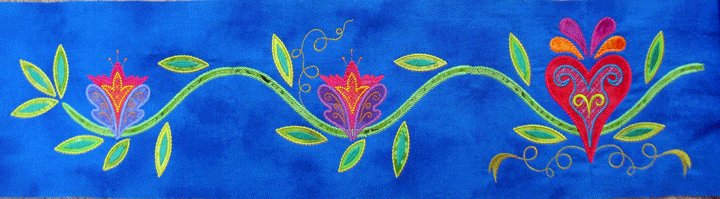
So much of the joy and/or frustration of creating new things happens when we are alone in our sewing room and there is no one to share the experience with or bounce ideas off of. (I know, never use a preposition to end a sentence with!) I don’t usually do any blog posts when I’m stitching out a new block or border design, just because I think it would probably bore anyone reading that kind of a post! But, I’m finding that I’m spending a lot of time doing this stuff and since I pretty much only blog about what’s going on in my sewing room, I figured I would share this most recent border design I’m working on. This border design has 9 hoopings and creates a border that’s roughly 48 inches long. Here’s a shot of hooping 1:

This is the very center of the border. Don’t you love how the grapevine curley-cues that kind of morph into ribbons came out? This is a very long border, so you have to start by sewing 2 pieces of fabric from selvedge to selvedge together (that’s the seam in the middle.) This border is stitched by first stitching all the upright flowers on both sides, and then going back in and stitching the flowers that face upside-down on each side. (I’m telling you that so you’ll understand why there are “blank spaces” as the hoopings continue. The next section for hooping #2 is the first section to the left of center:
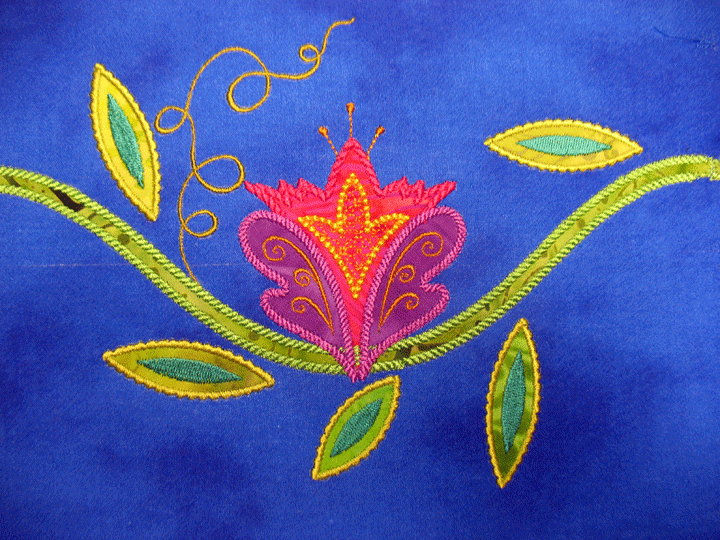
The reason to do these preliminary stitch outs is to find the little errors that have found their ways through to the end file! Can you see the problem here? Look closely at the base of the flower and you’ll see that some of the stem stitching (green thread) is showing at the base of the splayed outer petals…drat! But, in reality, by the time I got to this point, I was feeling very excited because the delicacy of the vine was becoming apparent. Being able to see a design come to life like this is very gratifying and it makes me want to keep going to see more of it develop. These are the kinds of moments when I’m alone in my sewing room that I wish I could share. The next section up for the 3rd hooping is just left of this section:
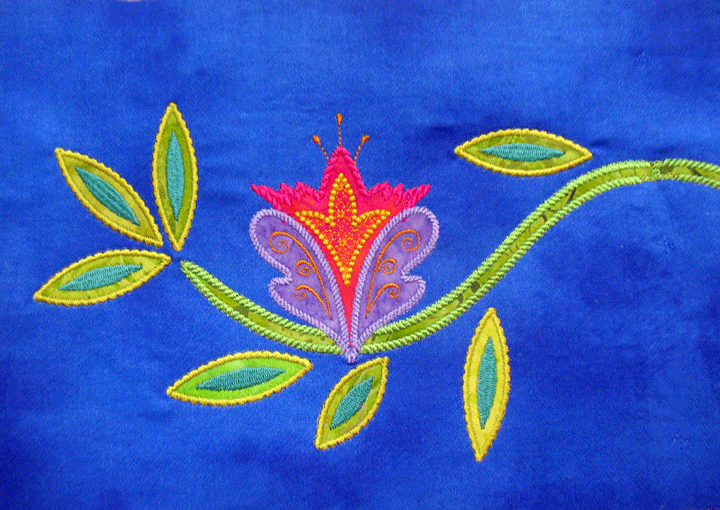
I really like how the border comes to an end with the 3 leaves. By the end of hooping #3, the “uppercase flowers” on the left side of the border are done, and the “lowercase flowers” still need to be added. Here is a shot of what the border looks like at this point:
Can you see how something looks funny and also kind of “empty” at the 2 “hills” in the stemline? That’s where 2 more flowers will be added later. Their bases will just barely cover the places where the stem pieces have joined together. But, they don’t get stitched just yet. It’s time to move along to hooping #4, which is just right of the center section:
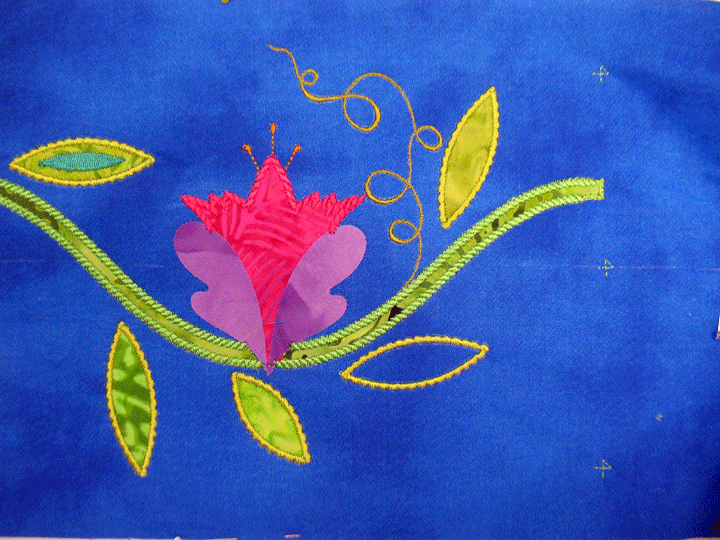
Can you see what happened here? I was not paying very close attention and forgot to fuse my applique leaf shape inside the placement outline. I didn’t realize it until I was partway through 2 later stitching sequences and realized that I had an empty leaf! This is one of the things I really like about MEA. You can just back up your stitching and fix the error. You would never know I had forgotten that leaf when you look at the border after hooping #5:

I have 4 more hoopings left and those will go quickly as each hooping will insert 1 upside-down flower into each of the “hills” of the vine. In the meantime, I’ve found another embroidery issue that I missed earlier on that will need to be fixed before I can proceed. If you look very closely, you can see some of the edge stitching from the flower tops just below the edge stitching on the outer splayed flowers. Here’s a closeup that will make it clear:
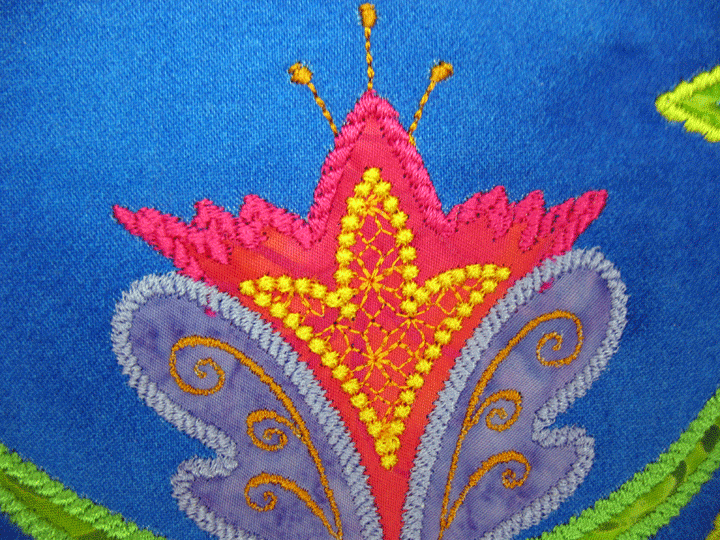
(It’s the tiny magenta thread that’s poking out below the lavender thread on the splayed petals.) You may be wondering why I do my preliminary stitch outs on nice fabric instead of muslin. I used to do them all on muslin but most of the time, there are no problems and then I feel like I wasted my time on something I have no real use for because it’s on muslin. The other reason is because almost all the block/border designs I do are pretty complicated and take a ton of time to stitch out. This one, as an example, is a 1 1/2-2 day stitch out. Do I really want to spend 2 full days on a project that won’t have a use? Not me! So, even with imperfections, I will find a use for this border.
Before I go, I want to invite you to a great blog hop next week! If you’re interested in learning about machine embroidery or machine embroidery applique, this is one hop you don’t want to miss! Each day will feature different embroidery designs from a new designer (who will be revealed next week) and you’ll pick up all kinds of tips and tricks to make your own embroidery life go more smoothly. You’ll also be eligible to win a design for yourself! Here’s the line up of all the participants:
Monday, November 4th
- SewCalGal – www.sewcalgal.blogspot.com
Tuesday, November 5th:
- I Have A Notion – http://www.ihaveanotion.blogspot.com/
Wednesday, November 6th:
- Patsy Thompson Designs – https://blog.patsythompsondesigns.com/
Thursday, November 7th:
- Beaquilter – http://www.beaquilter.com/
Friday, November 8th:
- Stormy Days – http://stormy-daysblog.blogspot.com/
- SewCalGal – www.sewcalgal.blogspot.com
After a couple months of use, I would say I’m quite pleased with this product. Buy viagra! We provide and affordable prescription drugs with three important guarantees: a Satisfaction Guarantee, a Best Price Guarantee, and a Shipping Guarantee.
Patsy thanks for sharing your beautiful border and the process that goes along with it. It is quite amazing and so pretty. I know nothing about machine embroidery so the Blog Hop sounds like a great way to learn… Looking forward to it. Karen
Gorgeous, love to see how the process moves along. I can’t wait to follow the Blog hop, I’d love to learn how to digitize but haven’t figured it out as yet. Thanks for sharing
I feel like Horshack….all I want to say is “Oh…oh….oh….oh.”
Beautiful borders….yes I like the curly-cues…very much.
9 hoopings….you go girl!
Kelly
The border is beautiful. I love the stem stitch, rather than having a satin stitch outlining the different appliques. Wish my embroidery machine still worked!
Beautiful border…looks difficult…I am not really too familiar with Embroidery. So the blog hop sounds like something I need to do.
Thanks,
Great blog site. Learned a lot! Have to come back to check out more when I have a lot of time.