Oct 02 14
Lessons in Machine Embroidery Applique: Embroidering a Single Applique Shape in the Center of the Fabric Block
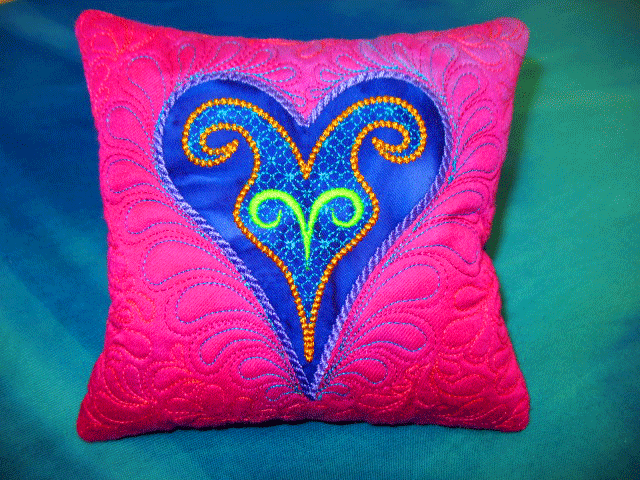 I had so many people ask me questions about how “My Thistle Garden” quilt was created that I am going to do a series of posts about how machine embroidery applique is done. When I started doing machine embroidery applique (MEA) on an embroidery machine, my goal was to be able to applique/embroider large blocks which held applique scenes made up of many, many applique shapes. Doing this kind of work requires many separate hoopings to applique/embroider various parts of the block. It was essential that I had a consistent/reliable system to ensure that everything would match up from one hooping to the next. The way I achieve is that I never actually hoop the fabric block itself. Instead, only the stabilizer is hooped and then the fabric block is “floated” on top of the stabilizer after being placed in a very specific position on that stabilizer. That “very specific position” is determined by registration marks/guidelines that are stitched directly onto the stabilizer as well as markings that I make on the fabric block. To illustrate this, I’m going to show you the steps involved in appliquing/embroidering a single applique shape that is positioned in the dead center of the fabric block. I’ll be illustrating this with the heart design above, which can be found as a downloadable file from our online store which can be found by clicking here.
Step 1: Prepare the fabric block for MEA– Think of the stabilizer as stabilizing the applique shapes but the fabric block itself also needs some form of “stabilization.” I do this by fusing 1 layer of interfacing to the back of the fabric block and for most quilting cotton fabrics, I use Pellon Designer’s Lite 845 FW for lightweight to midweight fabrics and you can find this in the store by clicking here. I’m using a 6 in x 6 in fabric block for this and you can see that I’ve used small scraps of this interfacing with a slight overlap. This interfacing is so lightweight that it won’t alter the hand of the fabric block at all:
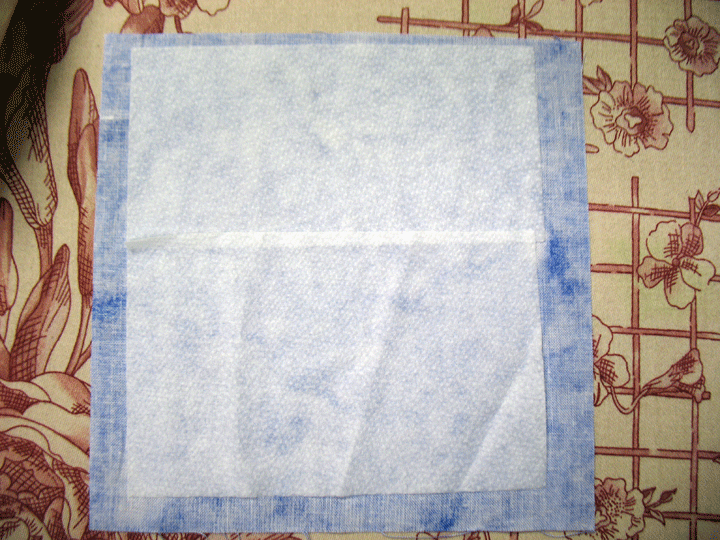 Of course, the glue side is facing the fabric. I cover this w/a pressing cloth (i.e. a piece of muslin), then spritz it with water. I then use a dry iron and fuse the interfacing to the back side. The block is now stabilized!
Step 2: Marking the fabric block– I’ve decided to have this heart fall directly in the center of the block, so I draw a line (with a temporary marker) from the midpoint of each side to the opposite side. I use a sliver of white Dove soap that I’ve rescued from the shower for this and I keep an old vegetable peeler in my sewing room to keep the edge sharp. Here’s one side that’s been marked:
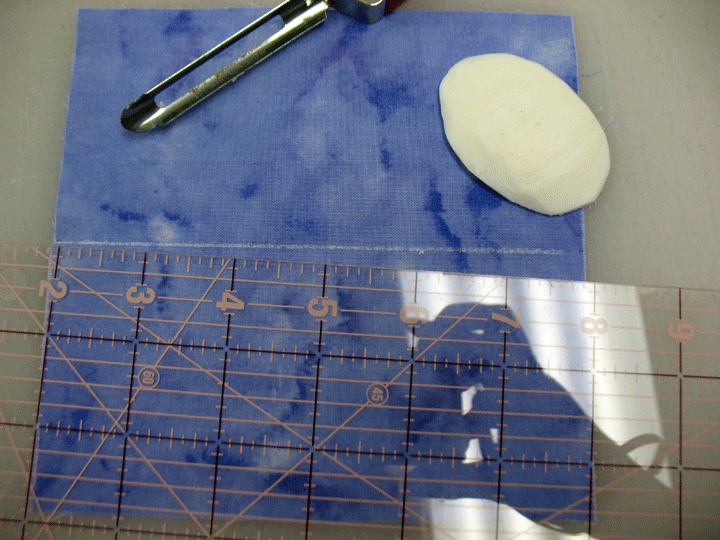 Here’s what the block looks like once I’m done marking:
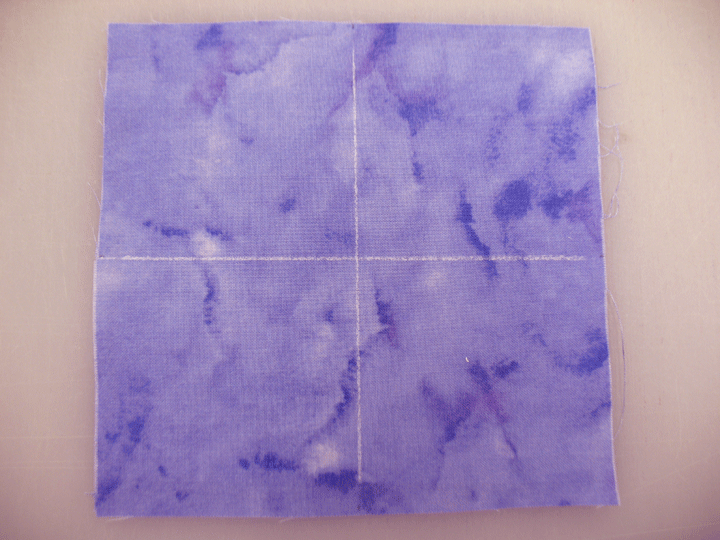 Know that the point of intersection of the 2 soap lines is the very center of the quilt block. The center is always easy to determine and makes a good reference point for alignment. (I should tell you that soap is the ideal marker for this. When you fuse applique shapes, there will be times when you will be unable to avoid touching the marked lines with your mini iron. Many temporary markers (i.e. chalk, many disppearing ink pens, etc) become PERMANENT when heat is applied. What happens to soap? It disappears!!)
Step 3: Hooping-Hoop 1 layer of medium weight cut away stabilizer onto your hoop. You can find my favorite cutaway stabilizer for MEA by clicking here. Place the hoop onto your machine.
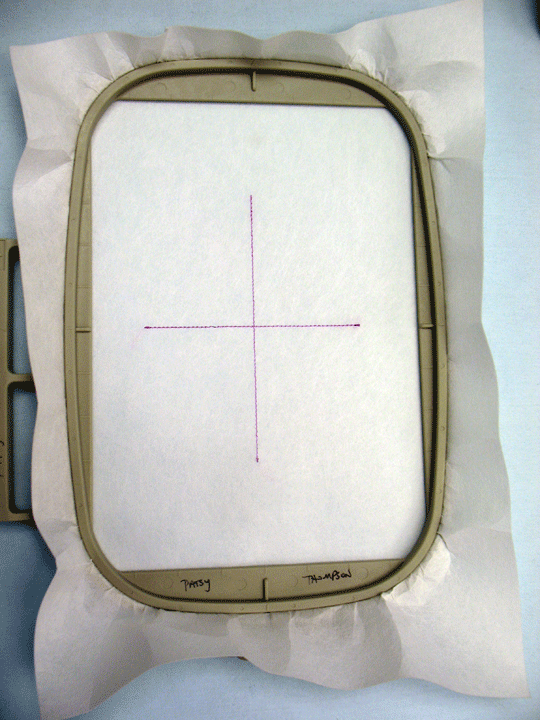
Step 4: Stitching registration marks onto the stabilizer-Sometimes a design file will come to you with registration cross hairs built into the file but most of the time they don’t. You can download (FOR FREE) a file to stitch a crosshair in the center of your hooped stabilizer from the free downloads section on the homepage of our web site by clicking here. (Scroll to the very bottom of that page and click on the machine embroidery files section. This will give you access to a zip file that holds many different file formats to stitch this crosshair.) This next photo shows you what the hoop looks like when you have stitched this file out:
 Step 5: Aligning the fabric block on top of the hooped stabilizer-You are going to use 2 types of straight pins for this step and they are both shown in the photo below. The lower pin, the one that has a truly flat head, is very important. Don’t try to skimp here and use something with even a small head; it really needs to be a flat-headed straight pin! The second pin, the one with an extra long shaft and a small ball at the tip, is optional meaning you could substitute many other pins for this one.
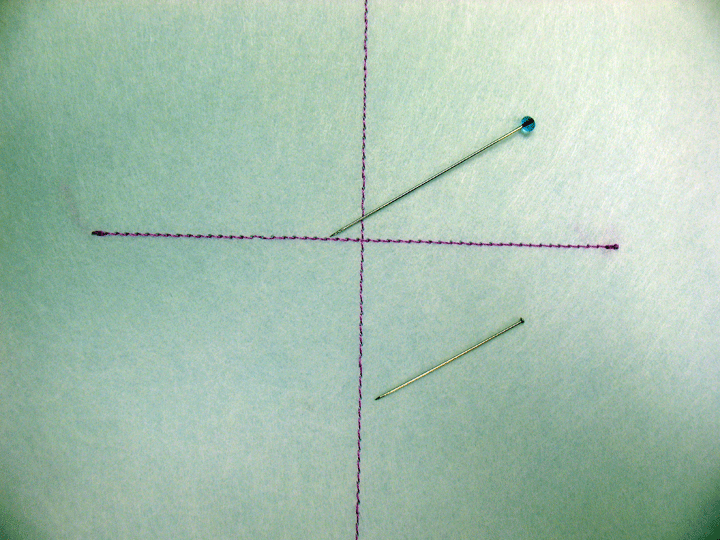 To begin the alignment, pick up the flat headed straight pin with your dominant hand. Working from underneath the stabilizer, pierce the dead center of the intersection of the crosshairs on the hooped stabilizer, then pierce the dead center of the intersecting lines at the center of your fabric block. Rest the hoop flat on the table surface, then place a foam pin anchor onto the pin to stabilize it. It will now look like this:
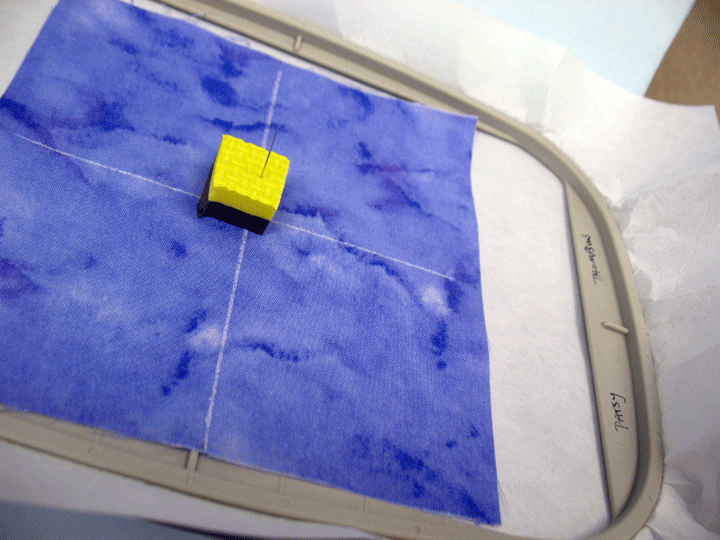 Can you see that we have just begun to “assign” the center of the fabric block to the center of the hoop? To complete this, you’ll again work from beneath the stabilizer and pierce the end of one of the stitched lines on the stabilize, then pierce the corresponding place on the marked line of the fabric block. How will you know that you’ve pierced the correct place on the fabric block line? You’ll know you’re in a good spot if the pin can stand straight up and the fabric lies flat. If both of those things don’t happen, pull the pin back and try another spot on the soap line. Once you’ve got the right spot, place a foam pin anchor onto that pin to stabilize it. Repeat this until at you’ve got at least 4 of the 5 points aligned as shown below:
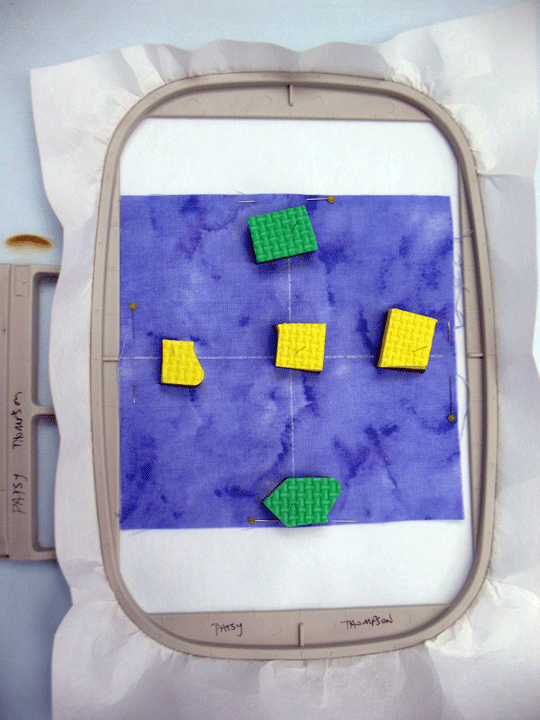 Notice in the photo above that I’ve placed 4 of those extra long pins on the extreme edges of the fabric block. These will keep the fabric in place during embroidery. I like them because the pins are extra long and the balls are tiny. (If you use pins with larger tips, they could get hit by the presser foot during embroidery.)
Step 6: Beginning the applique/embroidery-Remove the foam pin anchors and the pins inside them, then return hoop to the machine. Run the next stitching sequence and remove hoop from machine. Hoop will now look like this:
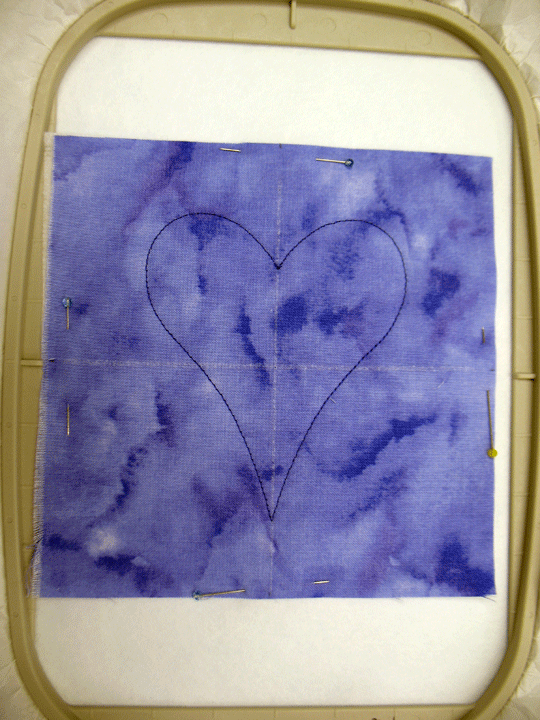 This is the placement outline for the heart shape. It says “fuse the applique shape right inside these lines!” Remember that embroidery machines are all about precision, so take care to really fuse that shape just inside the placement outline. (If you don’t, the stitches won’t fall where you want them to fall, so be precise in your fusing! Once you’ve fused your applique in place, return the hoop to the machine and stitch the remaining sequences, changing thread color each time the machine stops. Remember, the thread colors in MEA files have no meaning (as opposed to the meaning they have in traditional embroidery) since no one knows what colors of fabrics you are using. This is where the fun of MEA comes in…you get to chose the colors! here’s what this block looks like once it’s done:
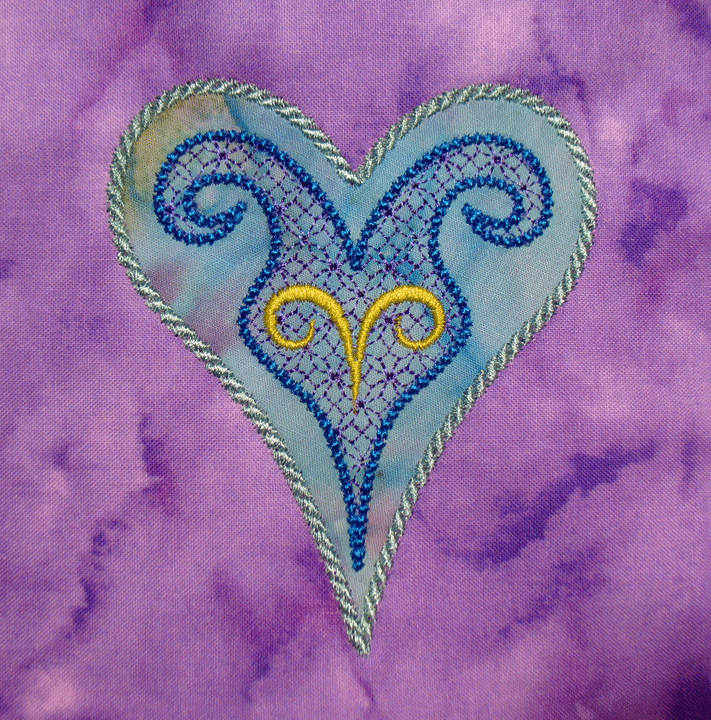 Just cut away the stabilizer from the backside, and you’re done!
So this first lesson taught you how to applique/embroider a single applique shape onto the center of a fabric block. This is very basic (and very easy) but it is the first step in learning how to control placement of shapes on a block. Stay tuned because there will be more to come!


Thank you so much for taking the time to do this, Patty!!
Patsy, I’m so sorry I misspelled your name! It’s early. ::smacking forehead::
Great machine embroidery lesson. And what a beautiful design too! Love it!
SewCalGal
http://www.sewcalgal.blogspot.com
Thank you so much. The foam to anchor the pin is brilliant.
Thanks for the detailed explanation!
This is just what I need, you are a master at explaining things. Thanks so much!
Patsy,
This is the first time I can really say the lightbulb came on for me. You are a true teacher. Thank you, I’m looking forward to the rest of the tutorials.