

Sep 22 15
Amish and Aztec Styles Collide!

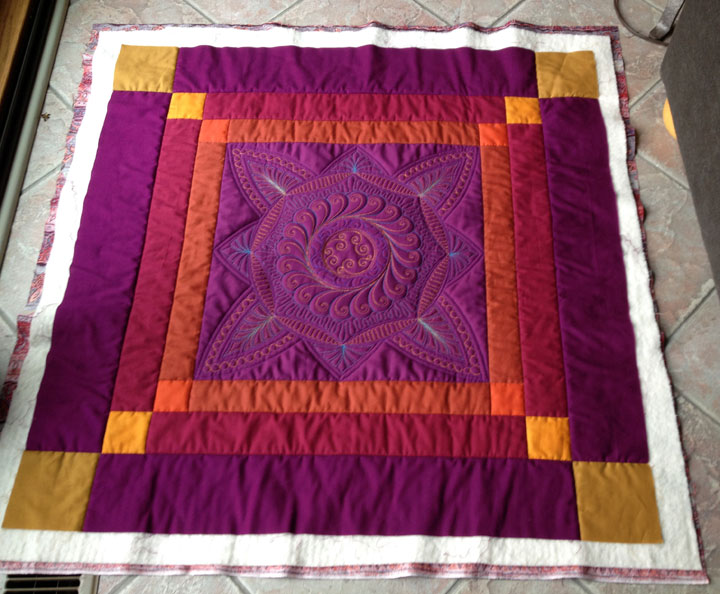
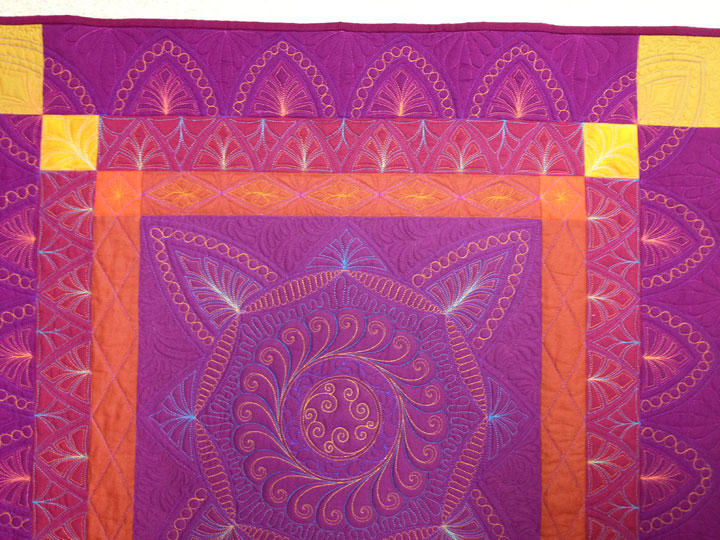
I finally finished the quilting on this baby a few weeks ago. It began life as a simple Amish quilt but I think its personality has been transformed through quilting. I threw it together so I’d have something to mess around with in trying out some ruler work ideas and I love how it came out. It’s in warm colors and all my photos look a little different because they were all taken in different lighting, but know that these photos are all the same quilt!
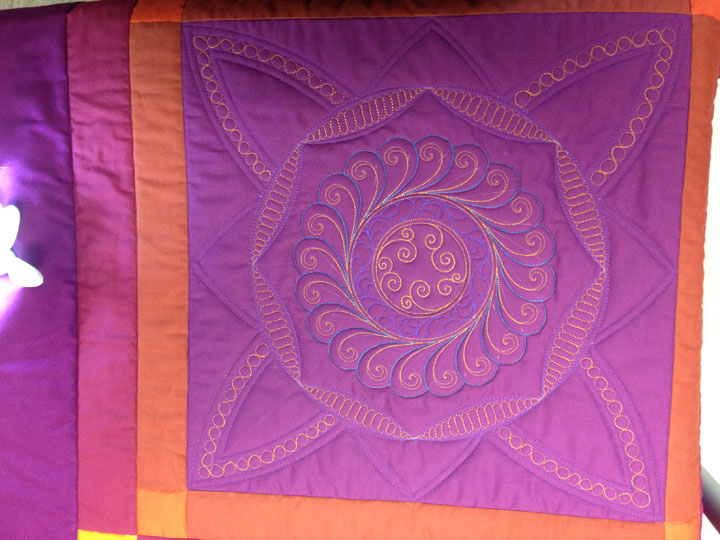
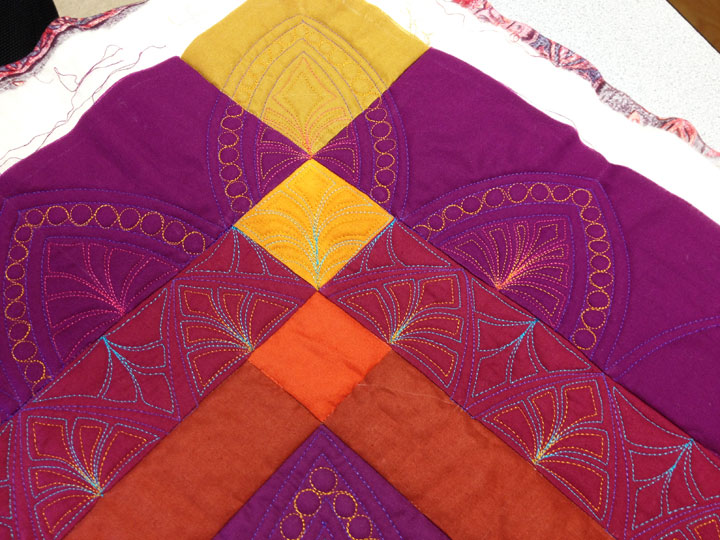
I began by playing around with framing a trapuntoed feathered wreath in the center block. I drew a temporary circle around the wreath and then used that as my basis to create a ring of melon shapes with my Quilters Groove curve rulers that I later filled with “capsules.” I used the same Quilters Groove curve rulers to then create a framework of arches that sprang from that ring of melon shape:
And here, some of the fill-in work has occurred:
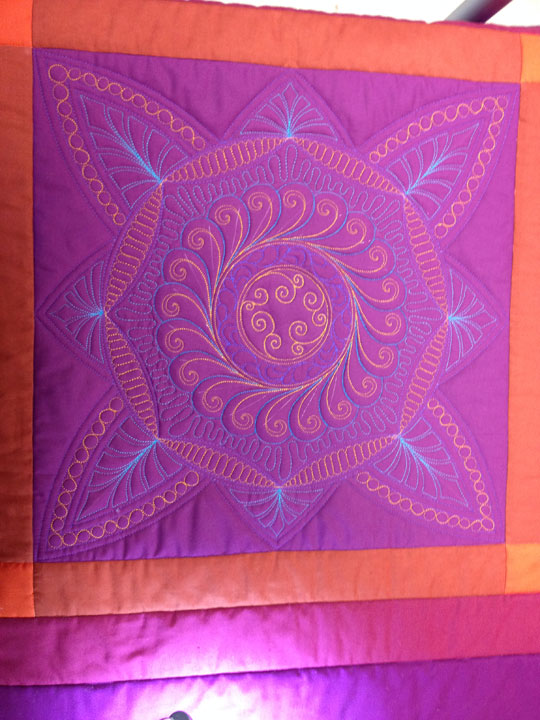
And here the center section is done:
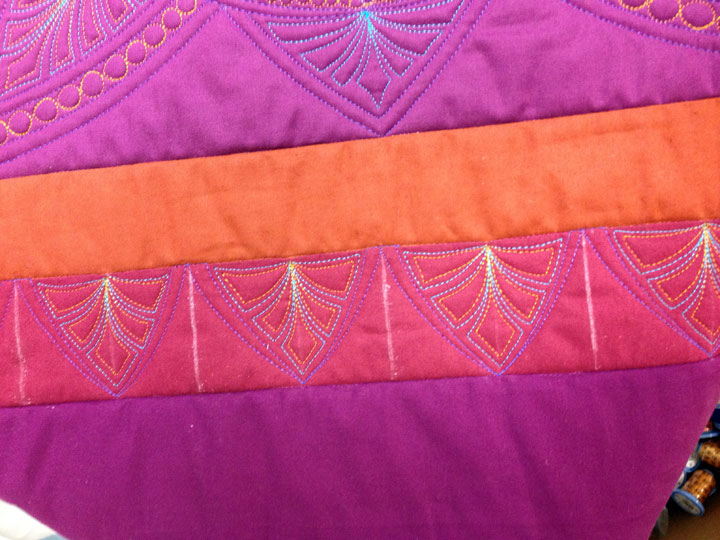
I had no idea what I wanted to do in that narrowest border zone, so I left it blank as I forged ahead. I again used my Quilters Groove rulers to create the short arches in the middle border zone. Here, the arches have been filled with what I call “Aztec featherettes,” and then those Aztec featherettes have been hyperquilted:
When I first made those small arches, I was only thinking about them in one orientation. As I moved the quilt around during quilting, I realized that the opposite side had another type of “inverted arches” that was begging to be filled with featherettes as well. These are very easy to quickly stitch as a fill in design. Here’s a shot of how I set myself up to get some stitching done fast by marking a temporary soap line down the center of each arch:
…and here’s what they look like once they’re stitched out:
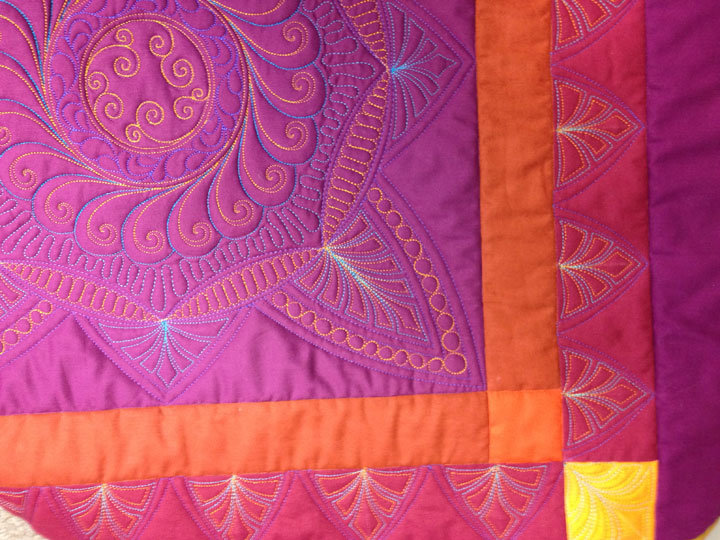
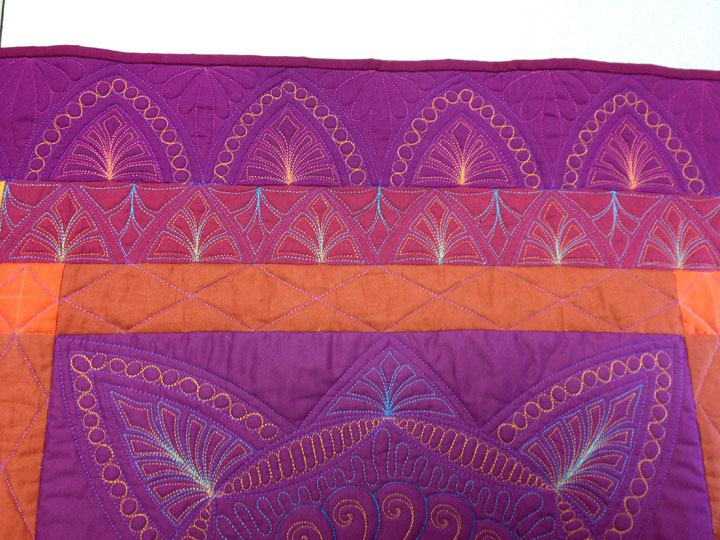
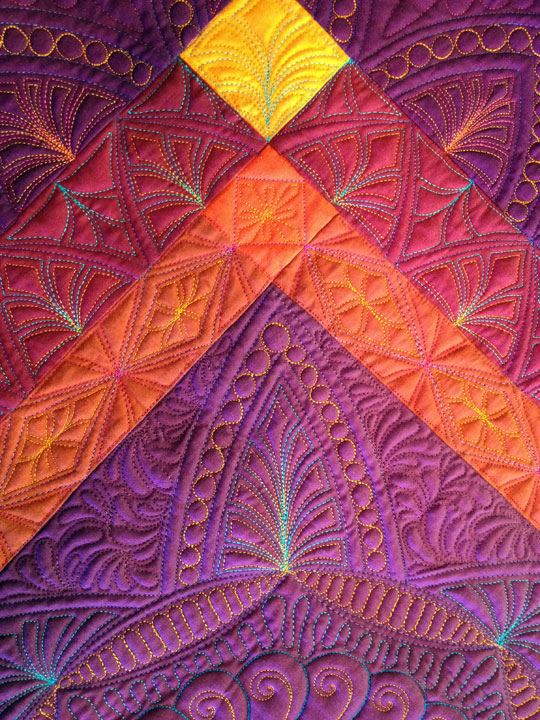
I thought about hyperquilting them as well but then decided they looked more interesting if they were left alone and therefore made a border design that wasn’t quite “expected.” Next up, I moved to the outermost border zone. This was wider so I knew I had enough space to make larger arches that could have multiple channels, some of which could be filled. The first step in doing this is creating all the channels within the arches along all 4 sides of the border, and I again made these arches with my Quilters Groove rulers as well:
Once that framework was up, it was time to start the fill-in work:
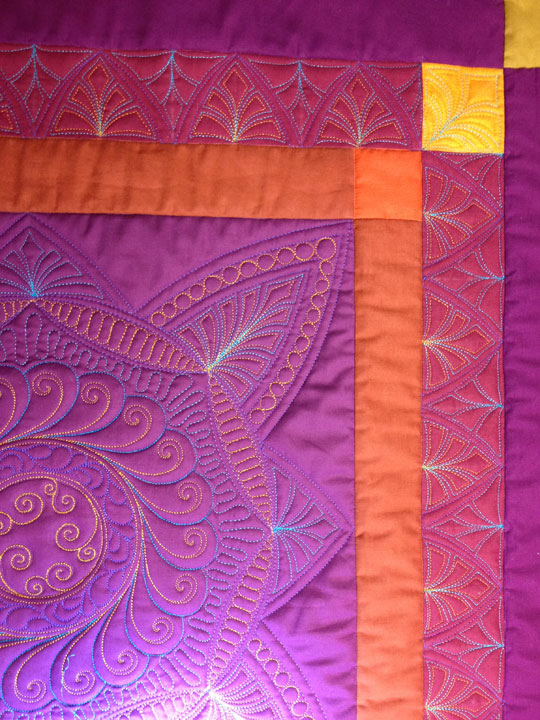
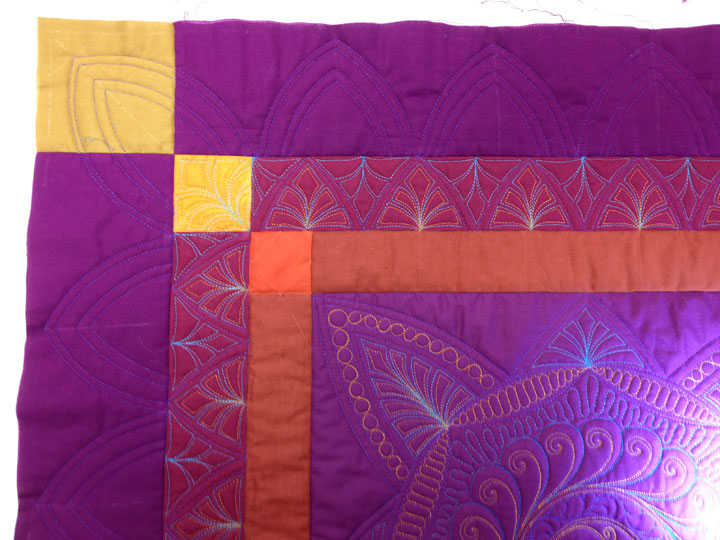
Again, my “system” for filling in a space with any kind of featherette is always to mark temporary soap lines that run vertically down the center of the empty space. (You can see that in the far left side of the above photo in the empty arches.) I find that line to be very helpful in not only centering the design, but also in keeping me working “on the perpendicular.” You can see that the corner featherettes are just a little bit different because the shape I was filling was different from the main border zone spaces:
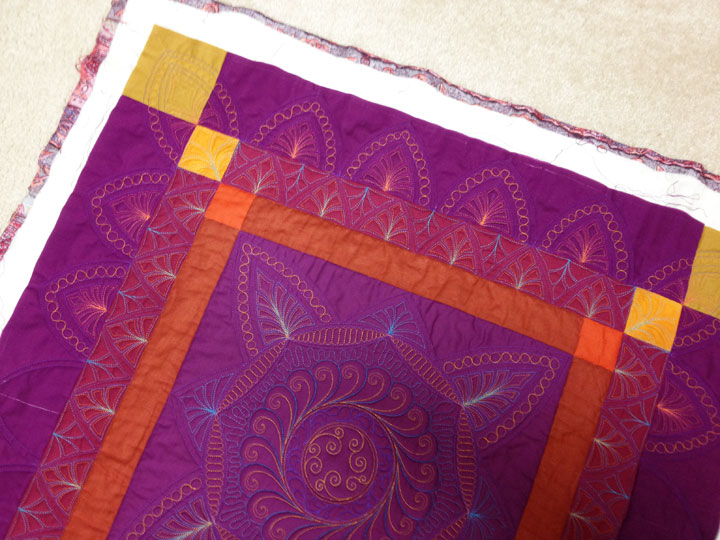
I ended up filling the space between the arches with a basic traditional featherette and I was very torn about whether I should do this because it was not in keeping with the Aztec theme of the quilt. Once they were in, I was soooo glad I’d stitched them because they really looked great! I had not planned to quilt anything to fill the empty spaces within the centermost block, but once I’d stitched those featherettes around the outside edge, I realized that I’d have to fill in that area with stitching because it was too empty compared to all the dense quilting everywhere else. I don’t have a photo for this phase, but in the finished photo, I’m referring to the outermost featherettes in the outermost border and also to the “plumify it” background quilting in the center block:

The final thing I did was to fill that narrow, innermost border. I used my Line Tamer straight edge ruler for that (although any straight edge ruler would work). I started by creating a simple diamond border:
In the next round, I used the same color of thread and converted it to a double diamond border w/tapered edges, again using my Line Tamer ruler. (Sorry no picture of that.) I then swapped to a high contrast gold polyester thread (Floriani) and filled the diamonds with an Aztec diamond shape:
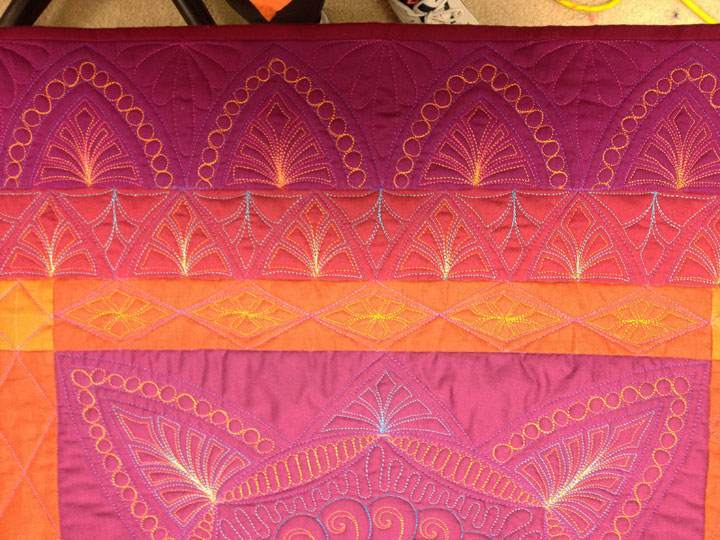
And in the last round of stitching, I swapped to another color of polyester thread and filled in the spaces between the diamonds with triangles:
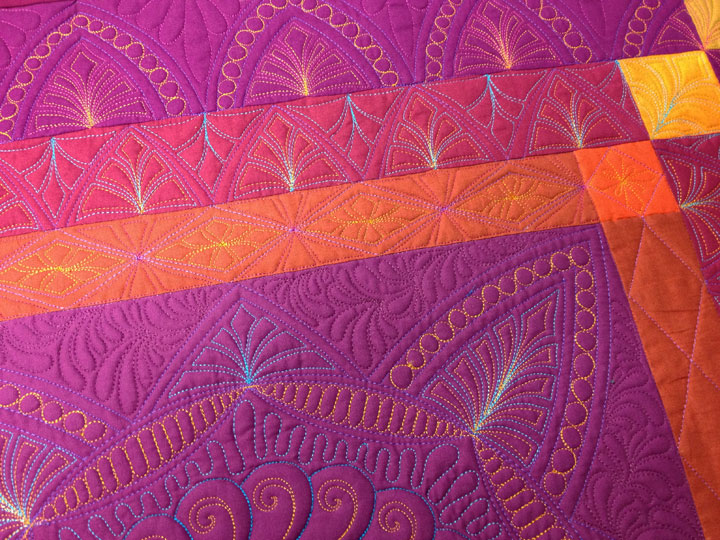
In this photo, you can kind of get a sense of the differences between completely filled border (center section) and border only partially filled with just the simple diamond border (both sides):
It was so much fun to quilt this quilt and I’m kind of sad to see it all the way done because our time together is over, although I love how it came out at the end! Before I go, just a reminder to enter our giveaway by posting a comment to my previous post about a big announcement toward the end of the week. If you guess it correctly, you may win something very special and I’m paying the shipping, regardless of where in the world you live. To enter, click on this link because you need to post a comment to this particular blog post!
Good luck, but remember, you must enter in order to WIN!! Have a great week and keep on quilting!
Total #CreativeGoodness. You’ve sold me on the benefits of incorporating rulers into our FMQ. Absolutely beautiful.
QuiltShopGal
http://www.quiltshopgal.com
This quilt is spectacular, Patsy — your choice of colors really speaks to me. Love it, love it, love it!
Diane
Gorgeous, Patsy! I’m going to have to investigate some of those Quilters Groove rulers, as well as the Line Tamer.
Yet another gorgeous quilt, Patsy! Thanks for taking time to share your process. Can’t wait to hear your secret at the end of the week!
Wow! That looks amazing!
How about a new line of stencils?
After taking craftsy class l am addicted to your work. Not disappointed this time either. Love it. Australia
i love this “clash” and i’d say it’s a beautiful success… love all of it; nicely and gorgeously executed!!
Nothing to say but WOW! so pretty and it is really nice to see you go step by step through your process. I’ll have to look into that ruler process some more. Are you coming out with your owns set of rulers?