

Nov 27 15
Part 2 of 2nd Westalee Circle Ruler Work Experiment
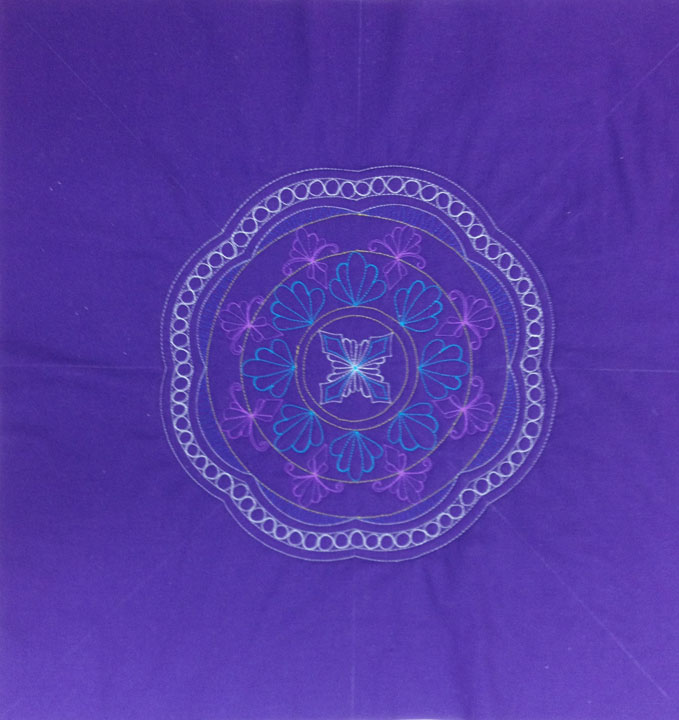
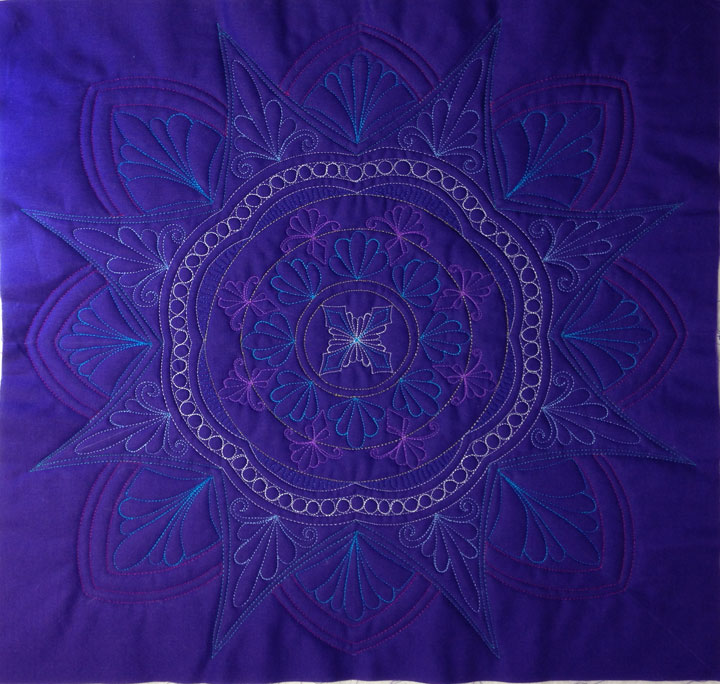
When I left off on the last post about this design, we’d competed the quilting on the center portions of all the circle areas and were ready to move ahead. This is where we finished up last time:
Using the faint soap lines in the photo above, as well as new soap lines marking the center between each existing pair of soap lines, it’s pretty easy to start creating new designs that spring from the outside of the current design. Even though it isn’t a circle anymore, if you keep working with it as if it’s still a circle, you can elaborate on that circular symmetry. I used one of the Quilters Groove Arc Rulers to stitch the arcs below that kind of bow inward, but you could do the same thing using any arc ruler:
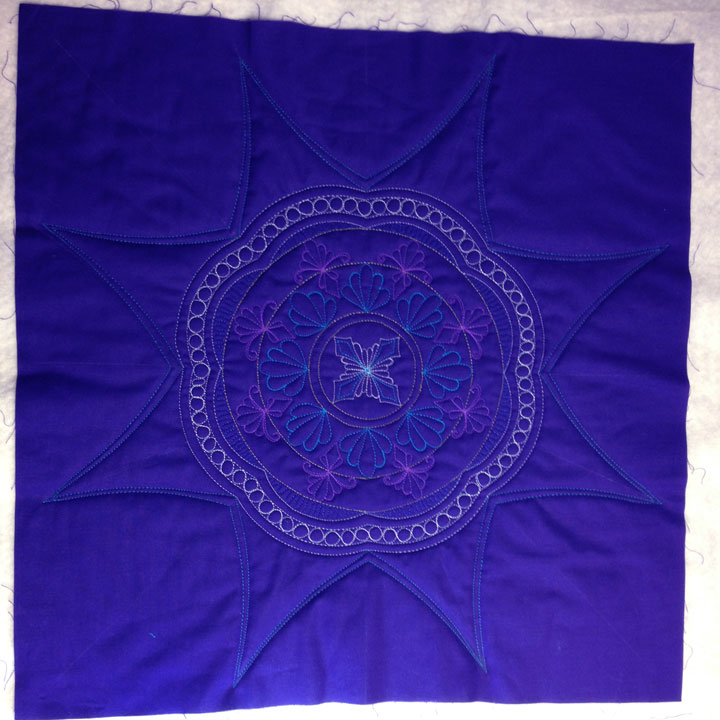
(The way I made them all the same height was I figured out what the longest height possible was to allow me an empty binding zone, and then made a small mark at that point all around the circle.) Next up, I stitched arcs bowing outward in between each of these. Again, these are made in similar ways and the result is determined by the direction you place the arc in before you start stitching:
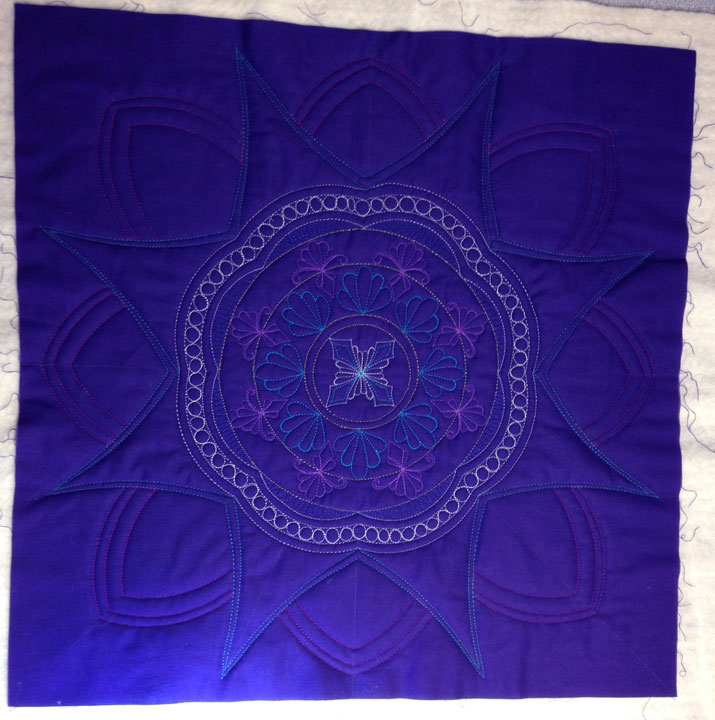
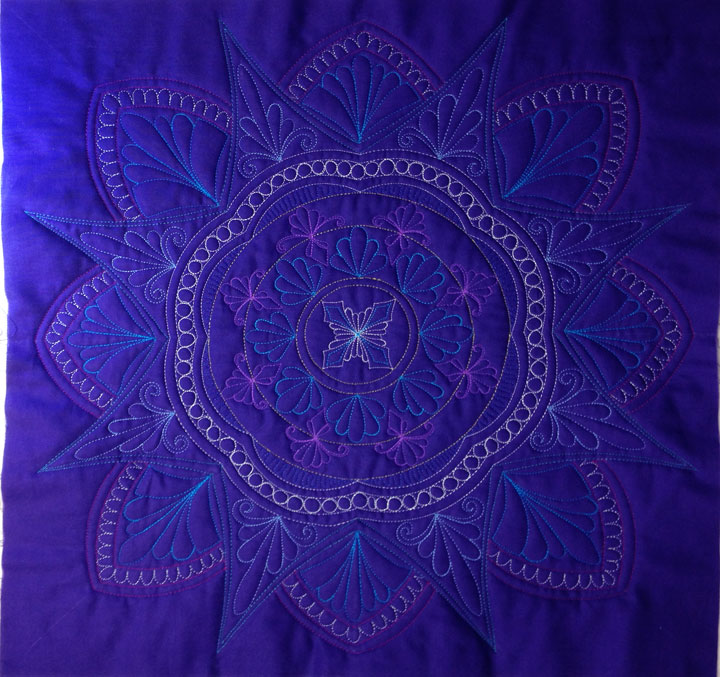
Now for some fun fill-in work! I started by stitching small featherettes inside the short/wide arches and used a turquoise rayon thread to make sure the detail would show. If you go into this kind of fill-in work with the goal of taking up all available space, they go pretty quickly and appear fairly symmetric. If you are new to this kind of work and want to learn how to do it, the stitching of featherettes is taught in my DVD called Ruler Work for the Sit-Down Quilter and also in my newest Craftsy class called Ultimate Free Motion Feathers. (Here’s a permanent link for a $20 discount for that class.) Here’s what those arches look like once filled:
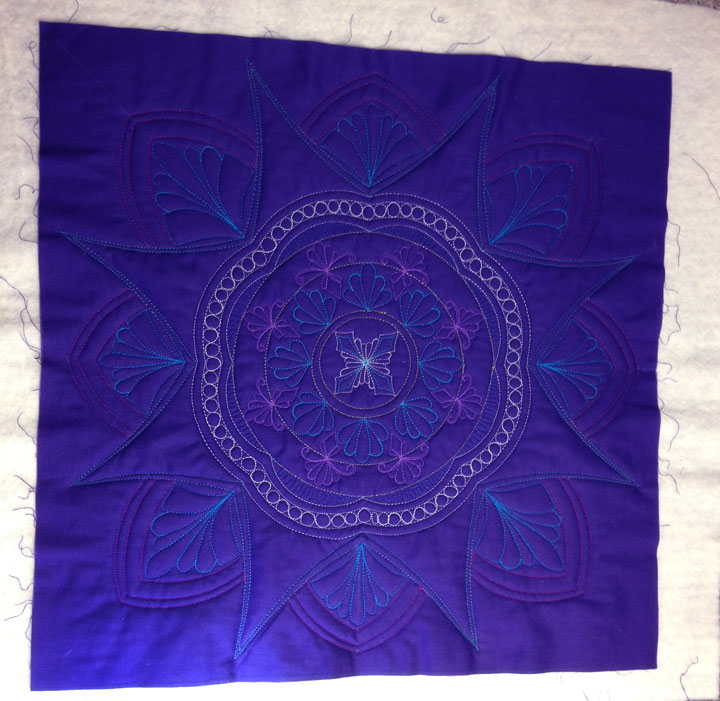
I swapped threads and loaded a light lavender into the top needle to create the featherettes inside the remaining arches. Here’s a shot once all those were stitched:
I then threw in the “fingertips” design inside the 1/2 inch channel in the shorter/wider arches. I really like how it forms the sense of a continuous ring even though it is repeatedly interrupted by the other arches:
…and here’s a closeup so you can see the differences in the featherettes more clearly:
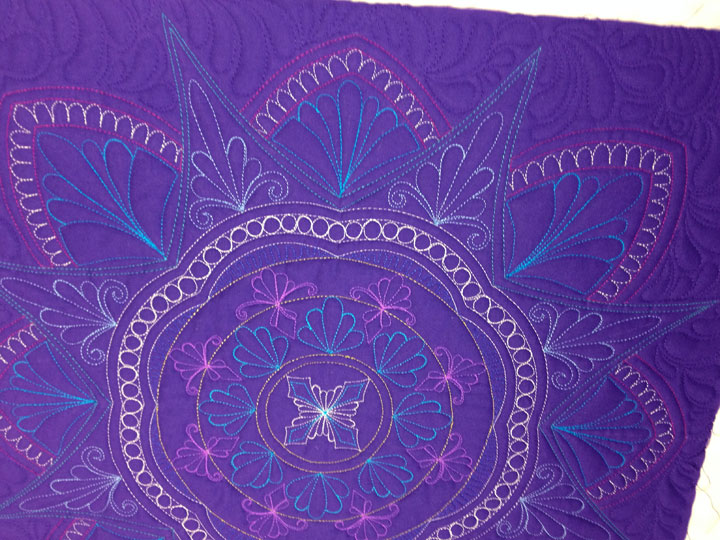
Notice how 95% of my “fill-in” designs are featherettes, yet they don’t feel “old” or over-used because each zone of featherettes is a little different from the neighboring one. That is something I really love about featherettes. All it takes is a minor change in proportion or to throw in a new element (i.e. a swirl, etc), and you’ve got a design that looks new and fresh. I had to go back in and add hyperquilting into at least 1 of the outer arches. Here’s a closeup where only one featherette has been hyperquilted and I think you’ll see how much it adds:
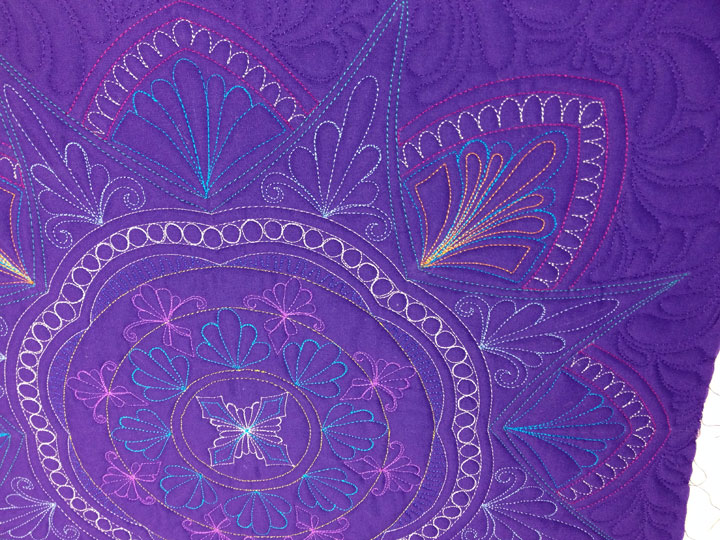
I finished up by hyperquilting the remaining featherettes in that one zone of arches, then added “plumify it” as my background fill design outside of the enchilada:

Again, designs like this that appear complex are really not so tough if you can envision them as component parts and just work on one area at a time. Happy belated Thanksgiving and I hope you are surrounded by family and friends. Thanks so much for taking the time to read my blog…you are the whole reason it exists!
Really beautiful. Thanks for sharing, and all your info on the Westalee foot. I am enjoying using mine, although I was sent the small version from Westalee when I told them I had the 830. Wish I had the medium version, but am making the short version work with some adjustments! I do hope Bernina comes out with their version soon!
I only just discovered you and am certain I will be a steady follower! Your quilting is so gorgeous and inspirational to me! Thanks for sharing.
Great work again, Patsy. Thanks for sharing so much information. Hope you had a lovely Thanksgiving.
Thank you for sharing your skills. I have just bought your class FMQ and ruler work on HDSM. Still waiting for my ruler foot from westerlee. Your work is gorgeous!!!!!!