

Jan 29 16
Ruler Work and Feathers
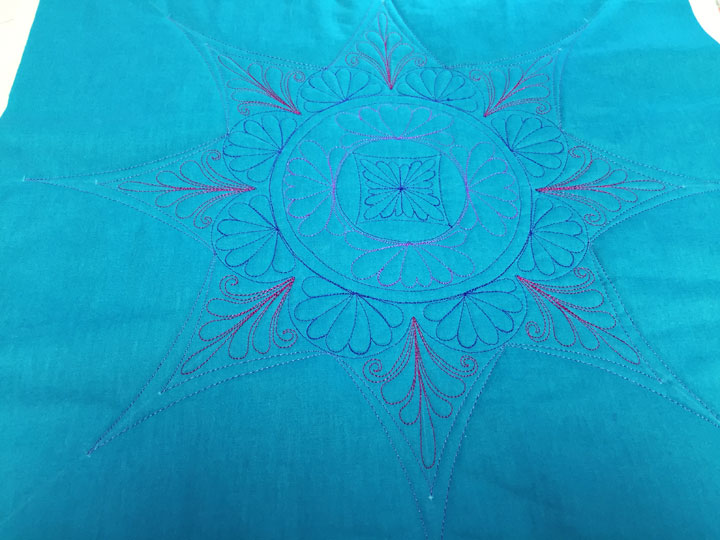 I spent some time playing around today and never got to finish what I was making, but the photo above shows where I left off. I learn a lot when I just get some play time with a quilt sandwich and have the goal of just playing, not really trying to make anything in particular. I always begin by making soap lines from each corner to the opposite corner and from the center of each side to the center of the opposite side:
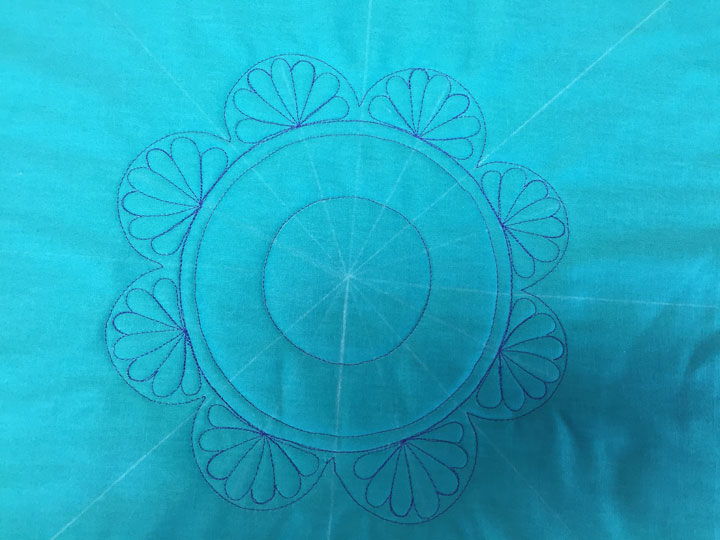
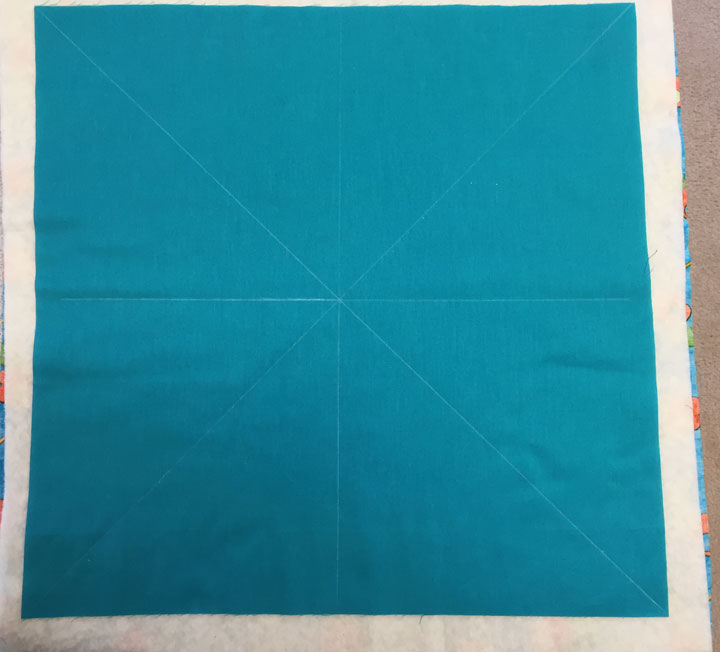 These soap lines will guide me in keeping my design “clean” and symmetric as I come up with new layers of design. This afternoon, I started by creating 3 concentric circles and the outline of a large “daisy:”
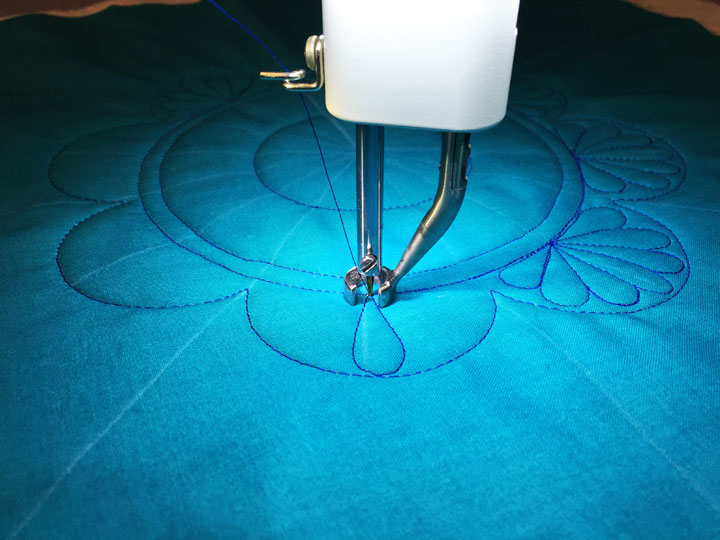
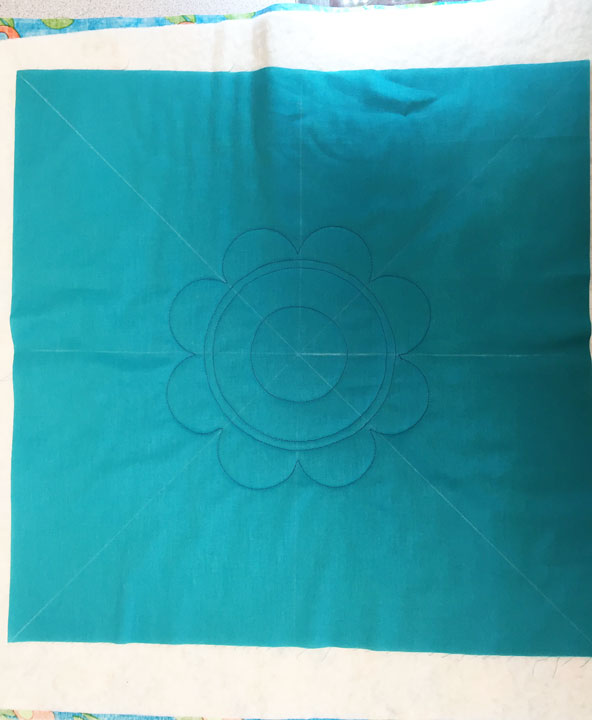 In this case, the largest circle does not quite meet up with the bases of those petals. I find I can get away with this in situations where I want to enlarge a space I want to fill with a featherette. I then added a small featherette inside the “petals.” You can make these fairly symmetric by:
-always stitching the center plume first; and
-using the bumpback feather stitching method as you add on the plumes to each side. In this shot you can see what I mean:
In this case, the largest circle does not quite meet up with the bases of those petals. I find I can get away with this in situations where I want to enlarge a space I want to fill with a featherette. I then added a small featherette inside the “petals.” You can make these fairly symmetric by:
-always stitching the center plume first; and
-using the bumpback feather stitching method as you add on the plumes to each side. In this shot you can see what I mean:
 …and in this shot, all those original petal shapes have been filled with featherettes and the design is already beginning to look interesting. This is the power of featherwork:
 In the photo above, do you notice that the outermost circle is darker and more “definitive” appearing than the others? This is because I used that circle as my “travel line” as I moved from the base of one featherette to the next. This way, I could do all that work in one thread line. Next, I swapped to a different thread color, (this isn’t necessary but is part of my “thread-lusting affliction”), and I stitched 4 featherettes inside the next zone:
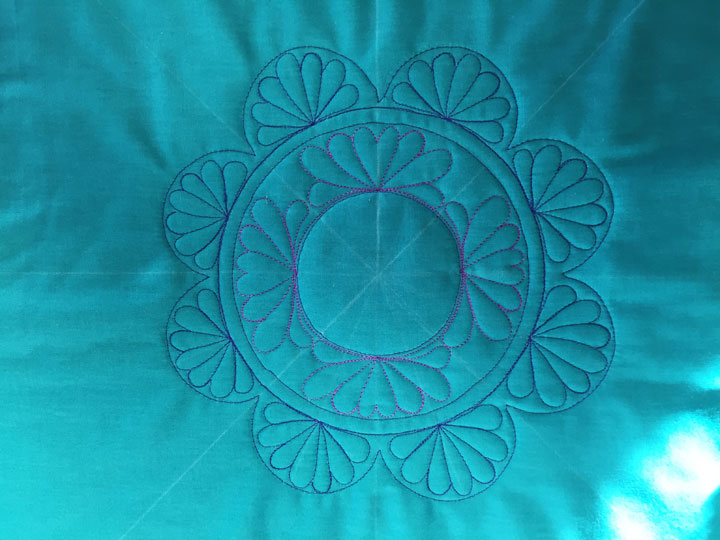 In this case, I used a heart shape for the center position, and I oriented my outermost plumes so they leaned in for a kiss with the neighboring plume. I did this so the overall design would be a bit more interesting than just having similar featherettes in all the zones. I wanted to finish up the center section of this design, so I used an arc ruler and my soap lines to make a small indented “box,” and then threw a featherette inside that box:
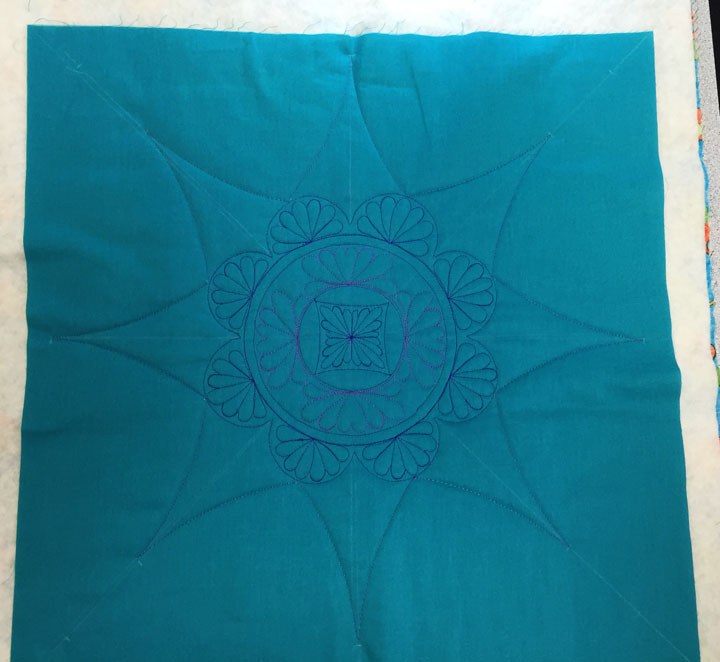
 At this point, the design is just shy of 9 inches in diameter, so it would work in blocks from about 9 1/2 in square up to blocks that were 12 inches square. Not bad for a little playing around in the afternoon! My next moves won’t look too good yet, because I ran out of time, but I’ll show you the next 2 steps I took. I used an arc ruler to create indented triangles that sprang from this center design (note that there is a solitary line for the triangles in the first photo but in the 2nd photo, there are 2 lines with a channel between them for these triangles. I point this out because taking the time to add that second channel really makes the design so much more interesting):
 and now with 2 lines and one channel:
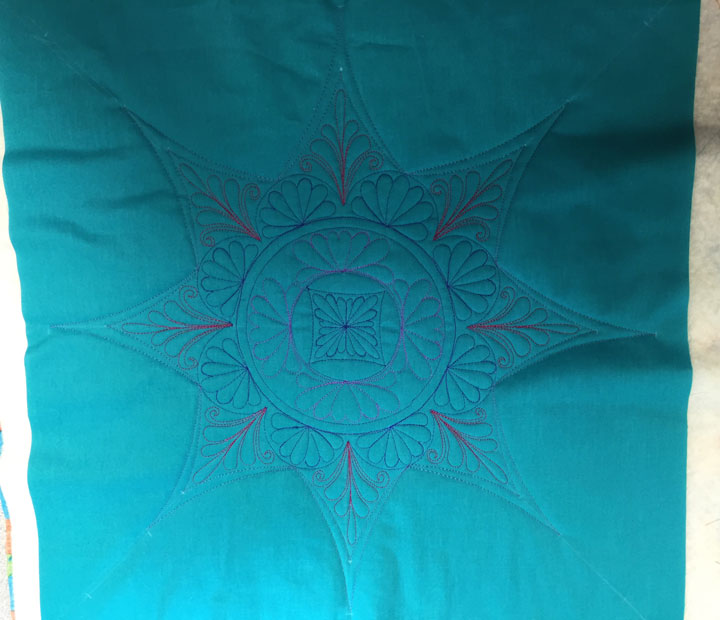
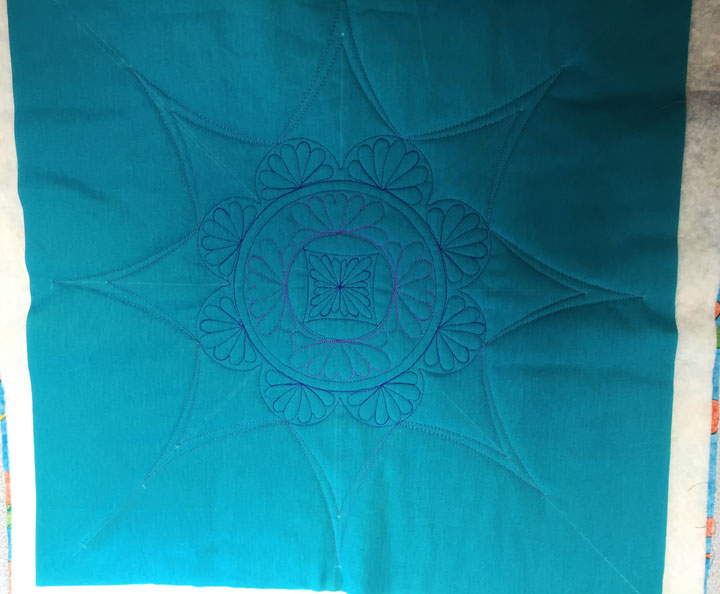 In my final move, I used the basic freeform feather method to stitch a straight feather inside each indented triangle:
 I have some ideas about how to finish this up, so hopefully I will get to it in the next few days!
I’m going upstairs to try this – you make it look so easy, so I hope I have some fun sewing this out. Thanks, Patsy.
so lovely seeing your process and makes it far less daunting to try…. love your work
Hugz
Do you give personal classes
I would love to take classes whither people