

May 29 16
Ruler Workus Interruptus
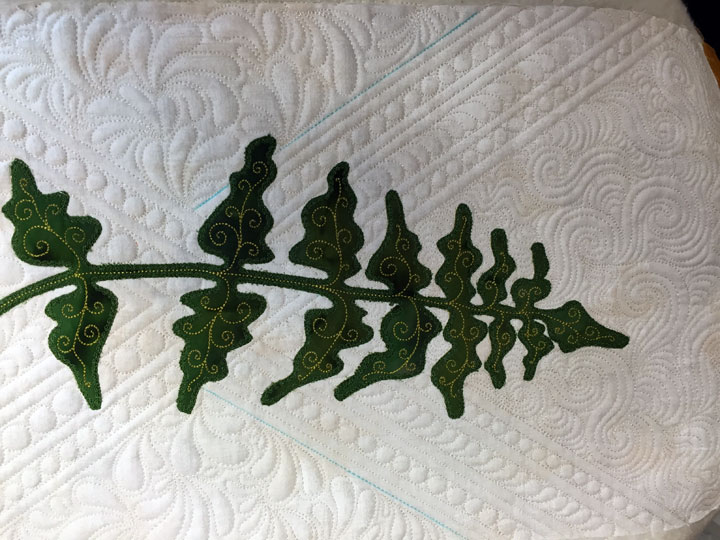
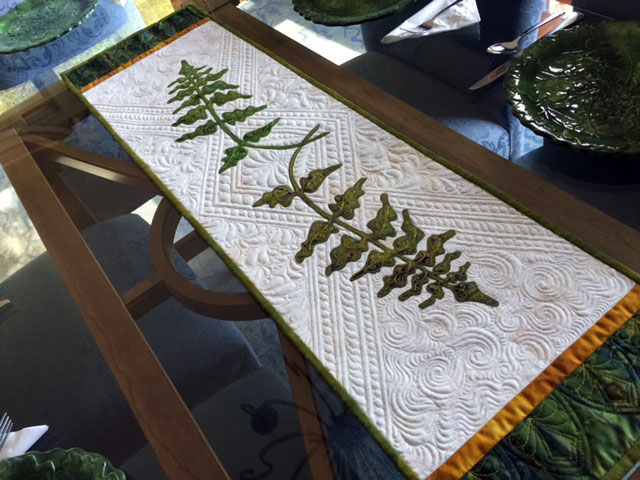 This quilted table runner was the first time I had to deal with creating a ruler work design that was repeatedly interrupted by applique shapes. Normally, I design ruler work designs so they surround or envelope applique shapes and the two designs are complementary but separate. When I made the center block of this table runner, it just seemed natural that the ruler work design should spring from the center and radiate outward. To do that, I had to figure out how to stitch this design in the face of numerous interruptions. I’m naming this technique “ruler workus interruptus” to make it sound Latin-y and fancy, like “coitus interruptus.” This closeup of the center area gives a better idea of what I mean:
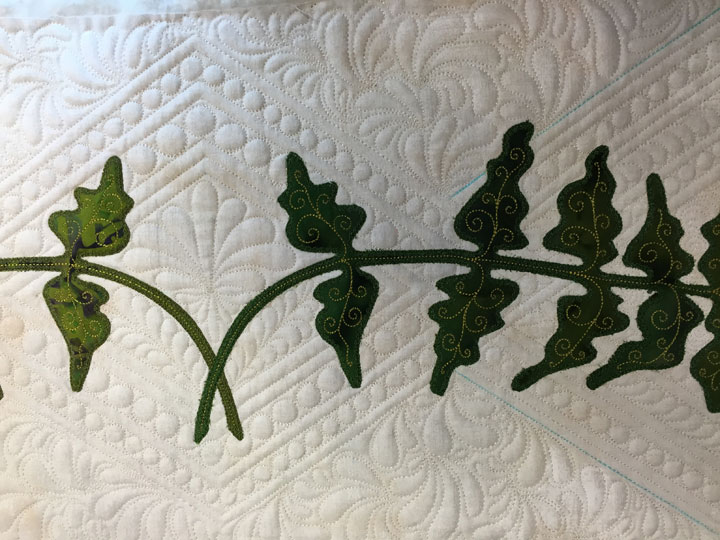 As you can see, stitching a framework that created the illusion of straight lines that flowed through applique shapes was the goal. As a sit-down quilter doing ruler work, it’s imperative to hold the ruler on the quilt in a consistent position or the stitched line will diverge from its intended placement. How can you do that if you have to keep stopping and then re-starting a new line of stitching?
I could only think of one solution, and you can see it in these photos. It’s kind of hard to see it here in this really early shot:
As you can see, stitching a framework that created the illusion of straight lines that flowed through applique shapes was the goal. As a sit-down quilter doing ruler work, it’s imperative to hold the ruler on the quilt in a consistent position or the stitched line will diverge from its intended placement. How can you do that if you have to keep stopping and then re-starting a new line of stitching?
I could only think of one solution, and you can see it in these photos. It’s kind of hard to see it here in this really early shot:
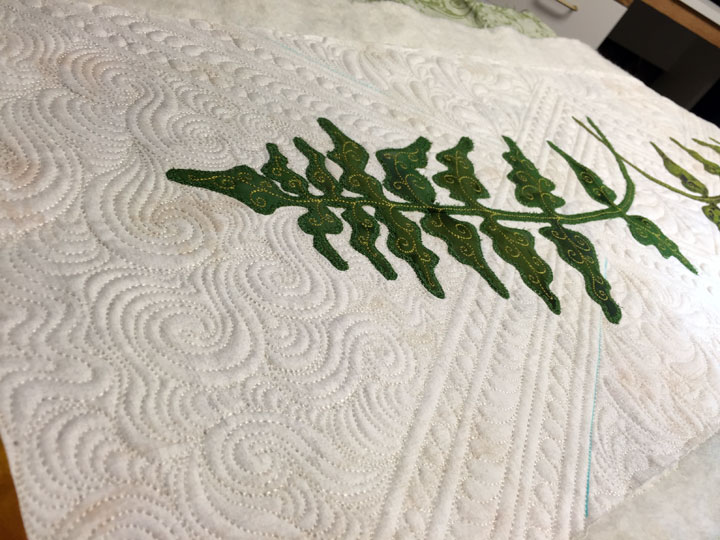
 …but here you can really see it:
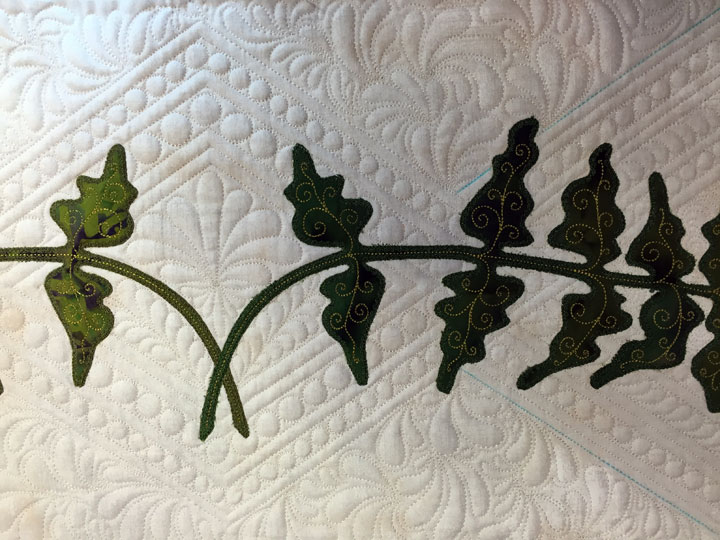
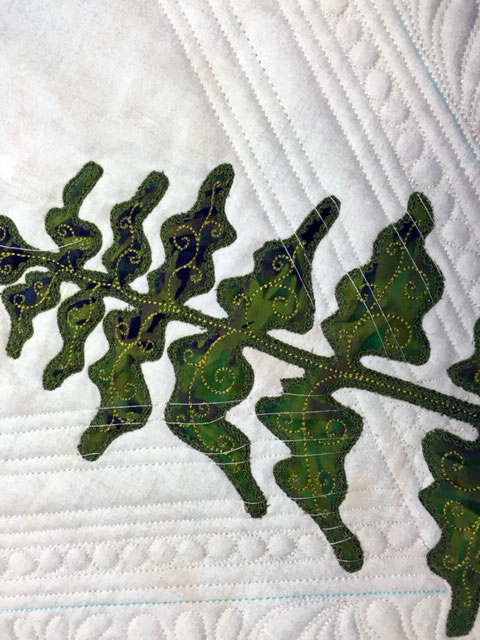 If you’re noticing all those strands of thread, that’s what I’m talking about. The only way I know to keep those lines straight if you’re doing ruler work as a sit-down quilter is to take a series of short stitches before and after each applique interruption and then resume at the other side of the applique, holding the ruler against the quilt in a consistent position all the while. It looks better after the threads have been trimmed away. (I left some short ones at the base of the ferns for comparison’s sake):
 And now for the fun part of filling in that framework and adding some new lines that emanate from the center diamond:
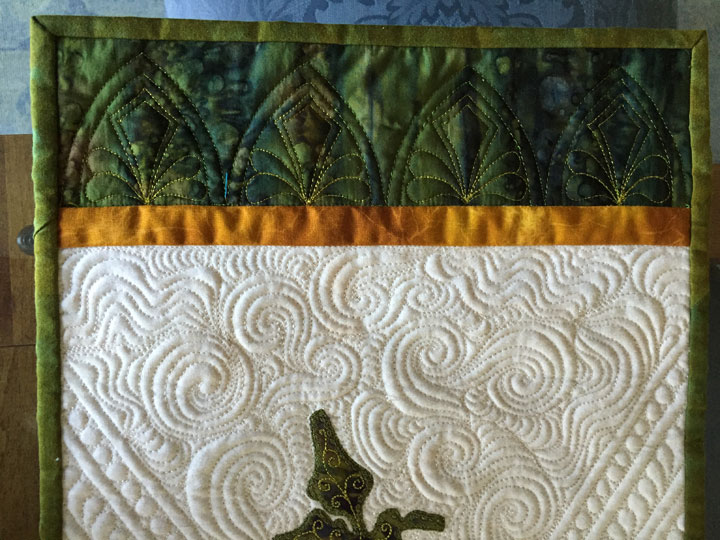
 I threw in a swirl background fill at each of the ends, just to have a different texture:
 I used an arc ruler to create the arched swags on the ends, then filled those in with small featherettes:
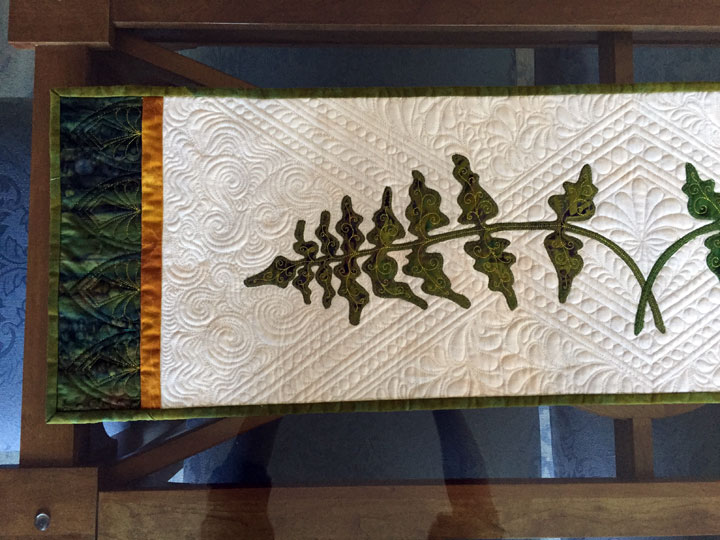
 And the finished runner:

 What’s on your machine bed these days?
This is one of the most helpful postings. I have an applique project ready for quilting, and this has been a great help! I LOVE your work and get so much inspiration from it!! Thank you!!
lovely work…the appliqué really allows the ruler work to show off…a pretty good balance between the two
Longarmers quilt like that too! Keeps all the lines straight. Looks great Patsy!
Lovely. I always enjoy your projects!
The answer to your last question: Papers and supplies that need filing!
This is a great post, Patsy — I do a lot of appliqué, and I’m always trying to think of new ways to quilt around it. Great solution — can’t wait to try it!
Diane
Just beautiful! Thanks for sharing your technique.
Totally minimal applique – totally exquisite ruler work and quilting. Stunning effect. Love it.
This is gorgeous, Patsy. Love your work!
Right now I’m watching your videos on ruler work. Just bought a Bernina 880 with a 12 inch space for quilting. Can’t wait to use all that I learned from your Craftsy classes and blog.
Patsy , you are just going from strength to strength…your quilting is to die for. The table runner is amazing well done you. I have only recently tried whole cloth quilting with Jeanne Harrison and am loving it.I am thankful every day that I persevered with machine free motion quilting thanks to you… it is so much fun. Dorothy Minett
OK, it’s decided…you’re my HERO – the One to Emulate (or at least TRY), da “Leader of da Pack (of FMQ Gurus…). I’m so glad I found your site, books, u-tube videos.
My first attempts at FMQ were “less than lovely”, but I keep trying and one day, 1 day, I shall produce FMQ results that perhaps come close to yours.
This is really beautiful work…and the way you kept the lines straight…ingenious (even though I do hate to “unsew” anything – I’m good at it – practice makes perfect). Thanks for the challenges you put forth for those of us who strive to emulate your work…