

May 17 17
Using Ruler Work to Frame an Important Motif
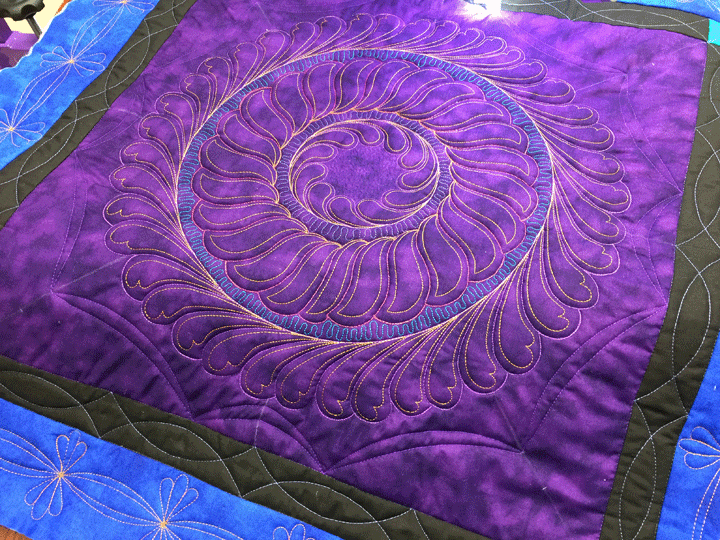
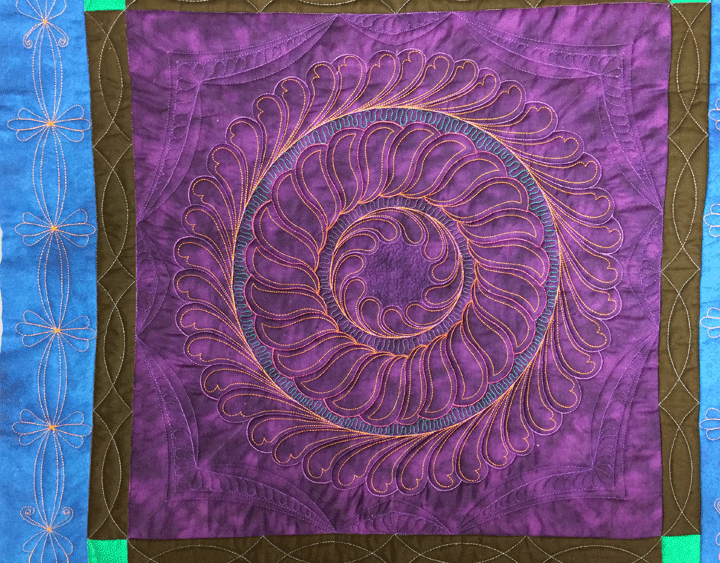
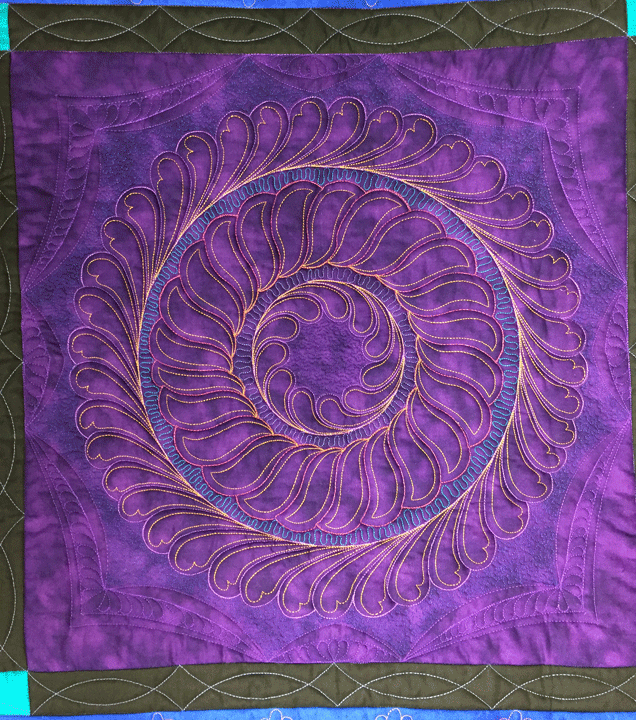
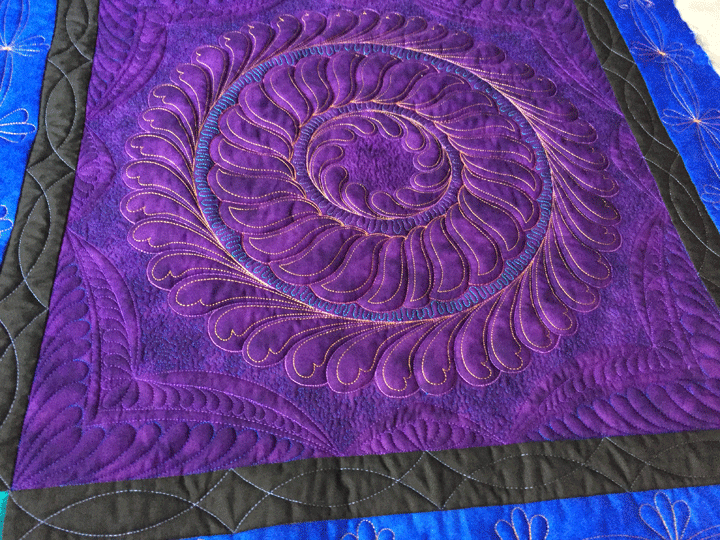
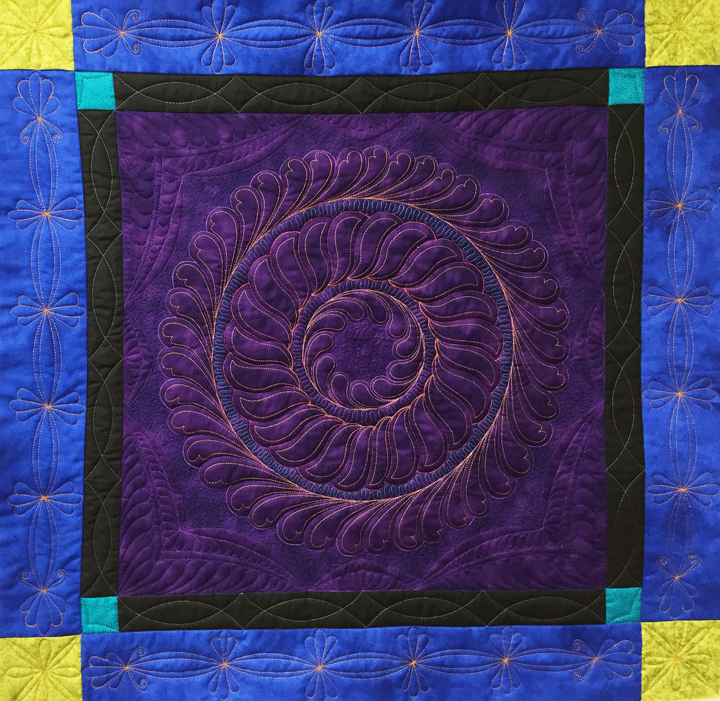 When you have an important motif (and that motif could be a quilted, appliqued, or pieced motif), you can frame it with your quilting design. The trapuntoed feathered wreath in the center block is important, and it’s been highlighted further through framing. Unfortunately, the overall size of my block didn’t leave me much room for framing, but there was enough room for a small frame design.
I began by using my original temporary marks that I used to create the trapuntoed section. The only thing new here, (and it’s hard to see), was that I added small tick marks 2 inches from either side of the short center lines:
When you have an important motif (and that motif could be a quilted, appliqued, or pieced motif), you can frame it with your quilting design. The trapuntoed feathered wreath in the center block is important, and it’s been highlighted further through framing. Unfortunately, the overall size of my block didn’t leave me much room for framing, but there was enough room for a small frame design.
I began by using my original temporary marks that I used to create the trapuntoed section. The only thing new here, (and it’s hard to see), was that I added small tick marks 2 inches from either side of the short center lines:
 I used those marks as my starting/stopping points and then used my PTD 8 arc ruler and PTD 6.5 ruler to create the first round of framework:
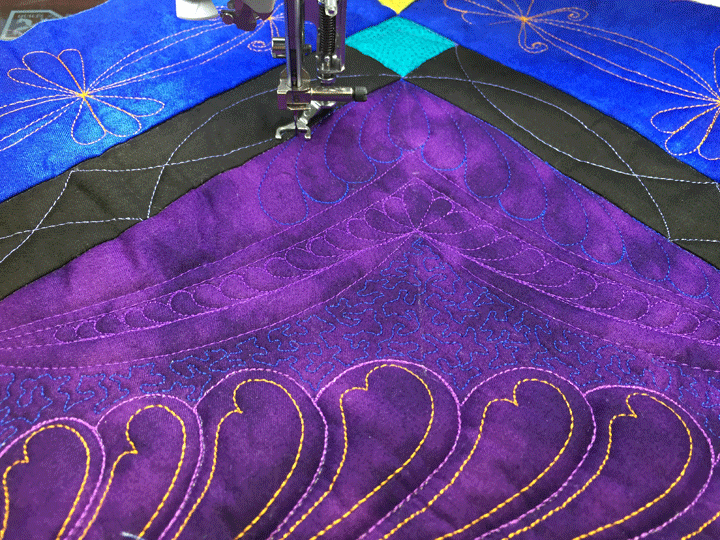
 I then went back in with the PTD 12 arc to create tapered swags on the larger curves, and used the same PTD 6.5 arc on the small center arches to create a tapered swag:
 If you look closely at the long diagonal soap lines in the corners, you’ll see a small tick mark about 1 inch from the swag cleavage points. I used those tick marks as may new starting/stopping points and then took my Quilted Pineapple 22 arc ruler to add in another arc. Once that arc was stitched, I added a new tick mark 1/2 inches down further and then used the same ruler to create a channel:
 Now that all the ruler work framing has been finished, the fill in work begins. I first added featherettes inside the widest channels:
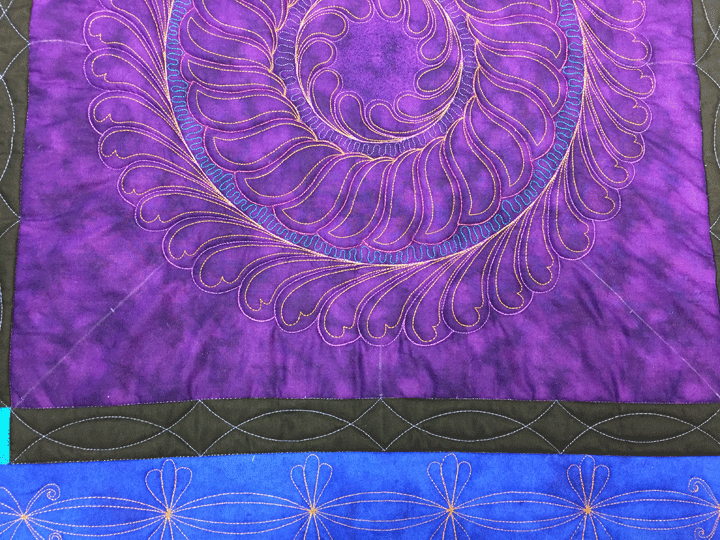
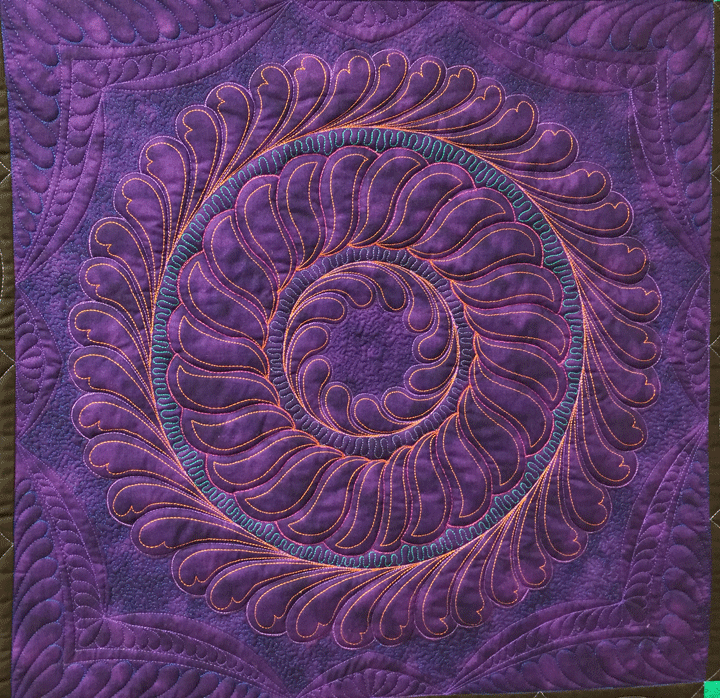
 Next, I used a dark blue thread to stipple in the zone between the wreath and the frame. This will serve to highlight both the wreath and the frame:
 Lastly, I added another featherette, stitched in the same dark blue polyester thread, in the remaining space between the block’s edge and the ruler work framework. Here is a shot of one corner as it is being stitched:
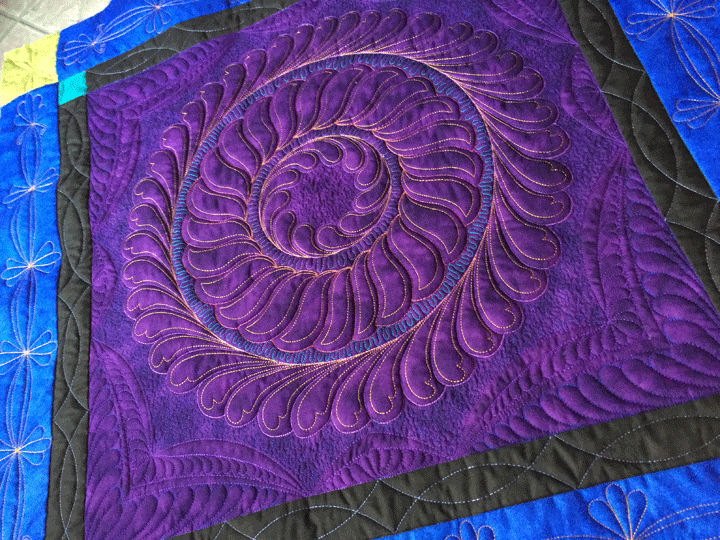
 The goal in stitching these featherettes is to completely fill the empty space with the featherette. If you do that consistently, that will give the look of identical and mirror image featherettes. Of course, you are stitching everything freehand, so it is not identical at all, but it will give the illusion that it is. Here are some other shots:
 You can appreciate the texture better in tangential shots:
 Learning to create custom featherettes to fill spaces on a quilt is a very, very useful skill to develop. If you are interested in learning more, this is an old blog post that talks about them a bit and you can find it by clicking here.
 An even more in-depth instruction can be found in my Craftsy class called Ultimate Free Motion Feathers and you can find it by clicking here.
Once again, floored by your stunning work! I would love to use the design on your black border. Did you mention how you did it and I missed that part? If not, would you be willing to share? Thanks!!!
Gorgeous! Patsy, do these pieces become quilts on their own, or do you join them to make a larger quilt?
Diane
Patsy – I am enjoying your ruler work DVD. I haven’t finished it yet or had much time to practice, but I’m going to suggest you consider writing a book on designing ruler work designs. The actual skills of doing ruler work have been pretty easy for me to learn, but I get stumped at what to stitch unless I am following someone else’s instructions. I need design guidance. Regards….