

Dec 20 17
Ruler Work Framing Designs that Involve Multiple Blocks
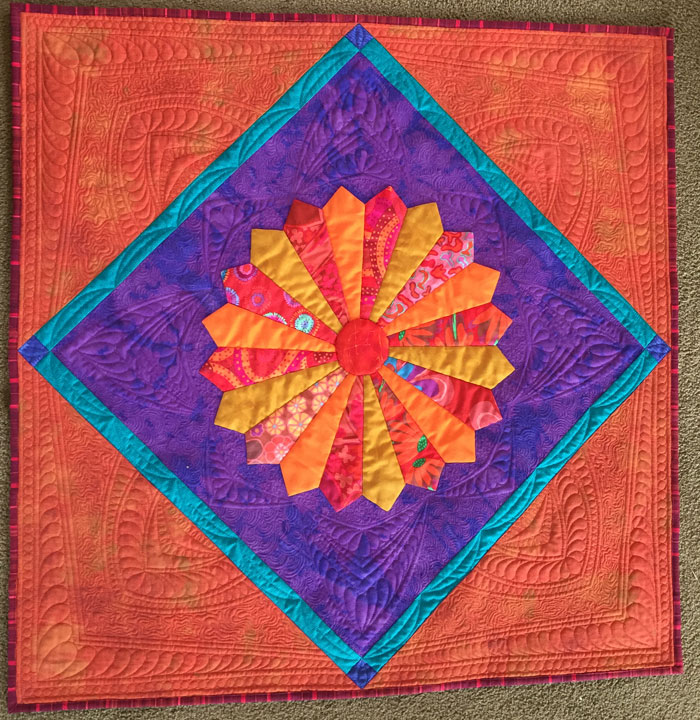
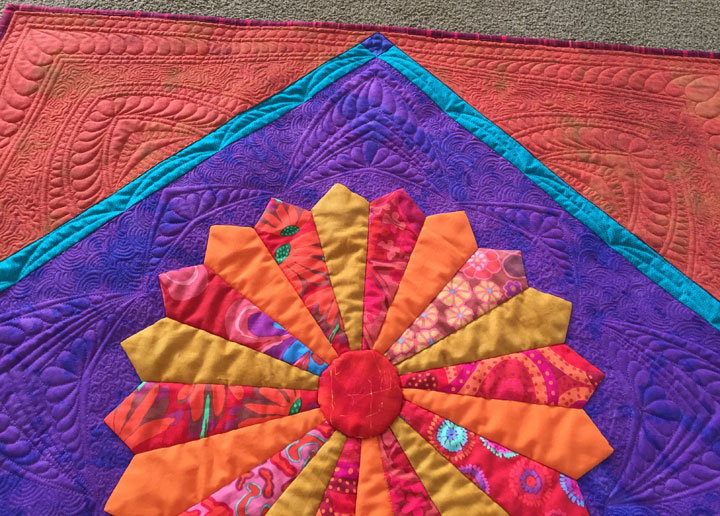
Between my lousy photography skills and the tapered channels that reside close to the edge of this quilt, this quilt doesn’t look square but it really is! I made up a bunch of Dresden plates using some scraps from another project last summer, and this is the 2nd one that I’ve finally finished. I used the Darlene Zimmerman Dresden template, which allows you to create all kinds of sizes of Dresden plates. I chose the largest size I could make. (You can find a wonderful tutorial for making these by clicking here.) These are Kaffe Fassett fabrics, and even though the pieces are relatively small, his glorious colors still pack quite a punch. I feel so happy when I’m working with vibrant colors like these!
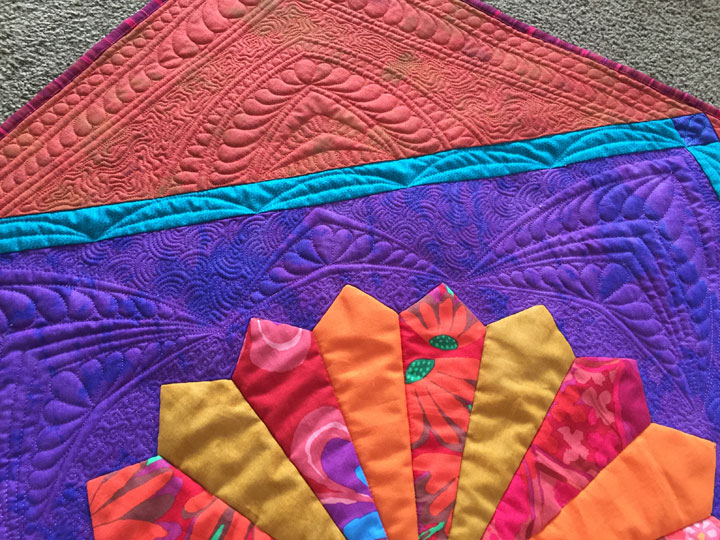
Anyway, back to the ruler work framing…There are really 2 parts to the framing, the outside rust colored “triangles” and the inner purple block that’s set on point. I am in love with the way they seem to interact to form a very complex frame:
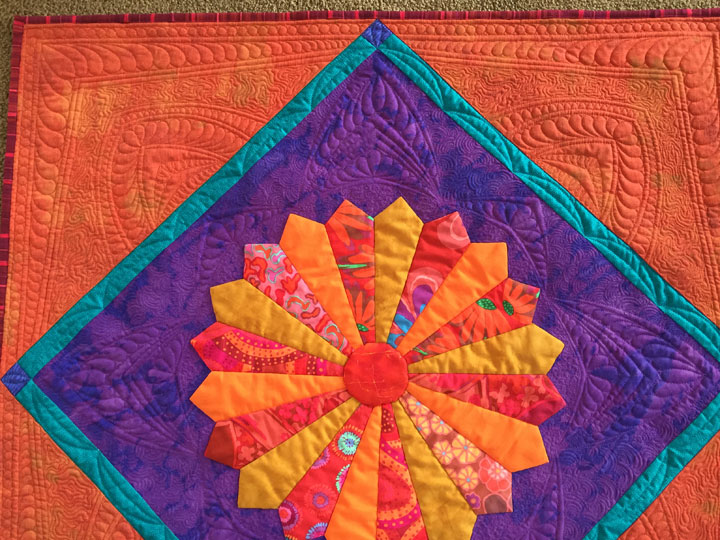
It’s like the quilted purple structures almost “jut out” into the orange zones. Here’s a closer shot of just the purple block:

The areas around the ruler work framework in the purple are quilted very densely (one with the “Igloos” background fill design and the other with a tiny “loop-d-loop” design), and this dense quilting helps to set off the purple ruler work:
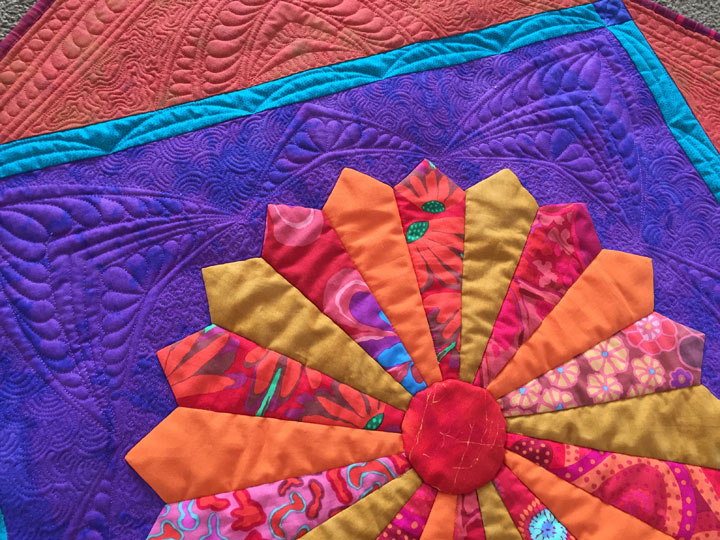
Here’s a closer shot of the rust colored section:
That large, irregularly shaped channel toward the middle of the orange triangles is filled with the “irregular swirl” design. I learned a couple important things by making this quilt:
- If you’re going to quilt really long straight lines, it pays off to take the time to mark the lines with a temporary marker before you begin. This is the opposite of how I normally work, but this is one place where doing the markings helps a lot.
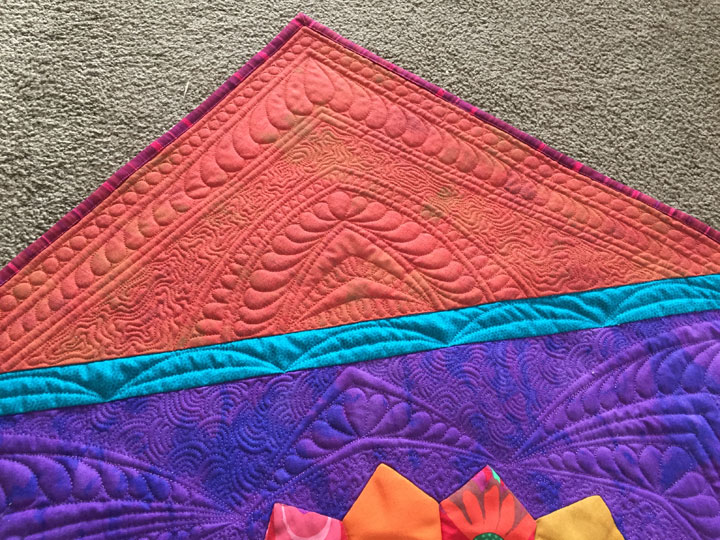
- If you place a long tapered channel close to the outer edge of the quilt, know that this will become a dominant visual focal point. In the case of this quilt, I’m referring to the long channels that hold a long featherette that forms a right angle. Even though that channel has 3 other channels between it and the binding, it’s close enough to the edge that it creates the illusion that the edges of the quilt are “pulling inward.” If I had to do it again, I would have stitched that channel as a long parallel channel to avoid this illusion.
Still, I’m very happy with this small quilt and really enjoyed quilting it. I think I am happiest with the kind of “bas relief” effect created by the ruler work. A couple more photos:
I’ll probably quilt something inside the Dresden “blades,” but I’m ready to play with another quilt for awhile!
Pretty! Love the quilting and the colors. It’s so interesting how the tapered channels affects the appearance the way you describe. I wonder if adding an element right at the corners could counteract it? Like maybe little custom tassels?
I really appreciate your advice based on what you learned about straight line quilting and illusions. I’ve been doing more marking when it comes to straight lines lately and switching from a free-motion foot to a walking foot to get them straight. And I still think you have to banish that inner critic from your studio — this piece is simply beautiful, and I don’t believe you need to change a thing!
Diane