

Jan 22 18
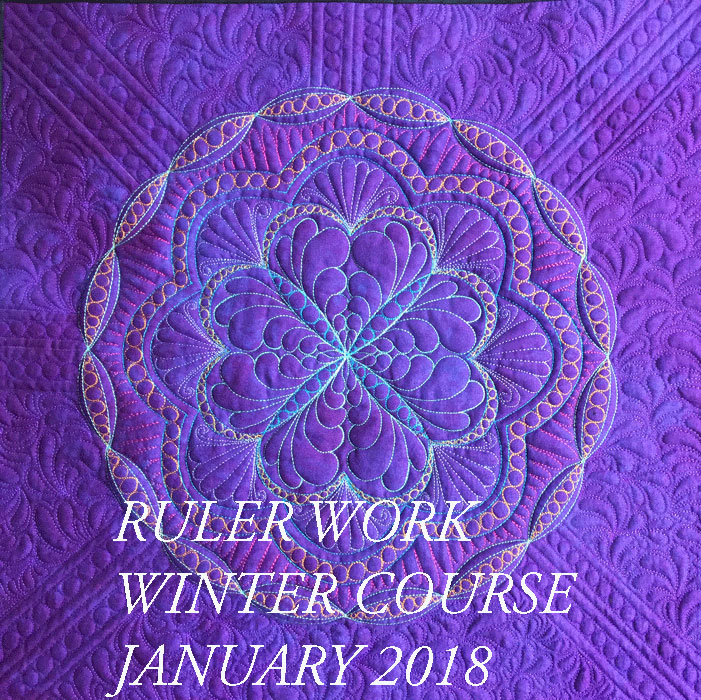
January 2018 Ruler Work Winter Course Part VII
Welcome to lesson #7; we are getting close to the end now, aren’t we? My hope is that you will recognize, as you go through these last lessons, that you already know a whole lot more than you realize. These last few exercises are designed to help you “take that leap” where you put your newfound skills to work in ways you had not yet imagined. You know how to make parallel channels and tapered channels using straight line rulers and curved rulers, but so far, you’ve only used these along the border edge of a border design. Today, you will begin using these same skills to create a variety of ruler work designs that do not follow along the border edge. Today’s lesson will teach you how easy it is to create a circular design using rulers and channel work.
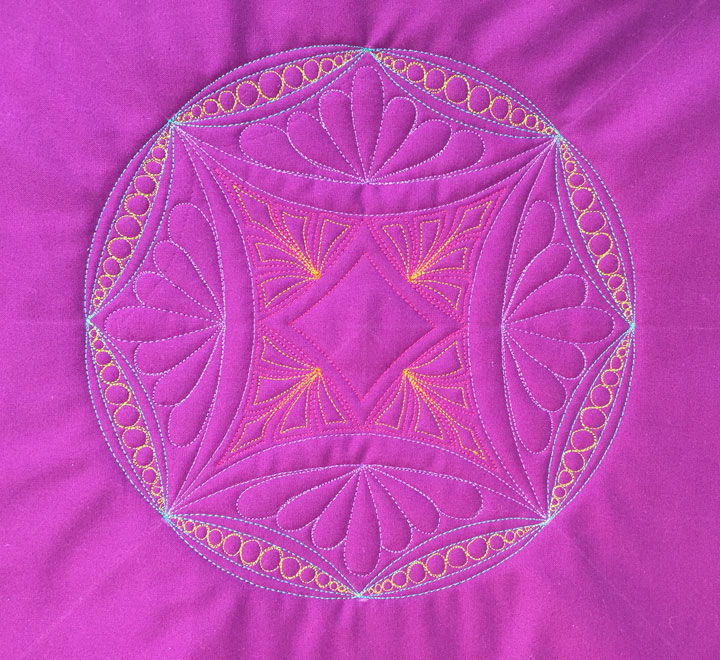
To do this, I need you to make yourself a sandwich that measures 20 in x 20. (Not roughly 20 in x 20 in; I need that top fabric piece to really measure 20 in x 20 in!) You can finish this into a pillow or the front of a tote bag or whatever you want once we’re done, but we will be using this quilt sandwich for the remaining final 3 lessons. Below is a shot of the portion of the design we will work on today:
…and here is what the ruler work framework appears in an “empty stage:”
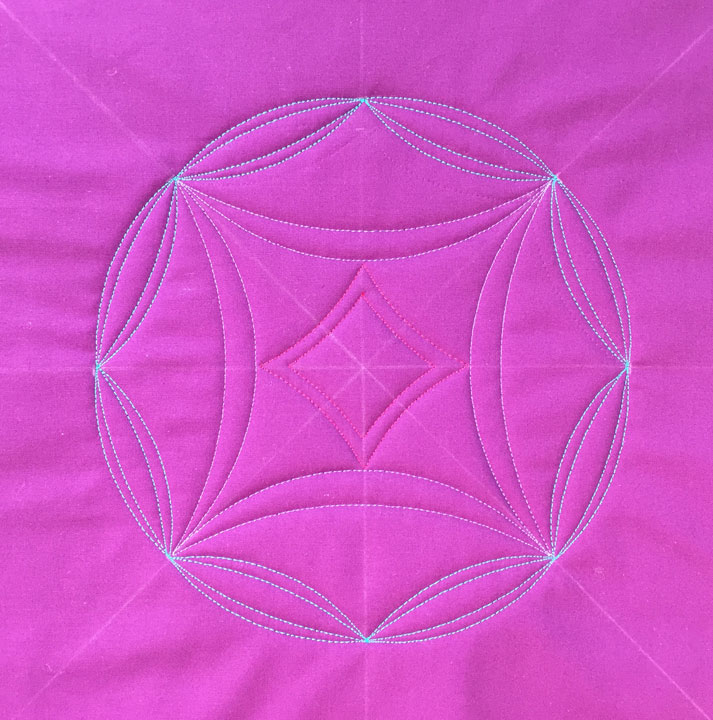
Please do not freak out!! If you have followed the ruler work lessons thus far, then you are fully capable of completing the ruler work framework above. If the fill designs are freaking you out, don’t worry about them as there are many other fill designs you can use instead. Now, let’s get to it!
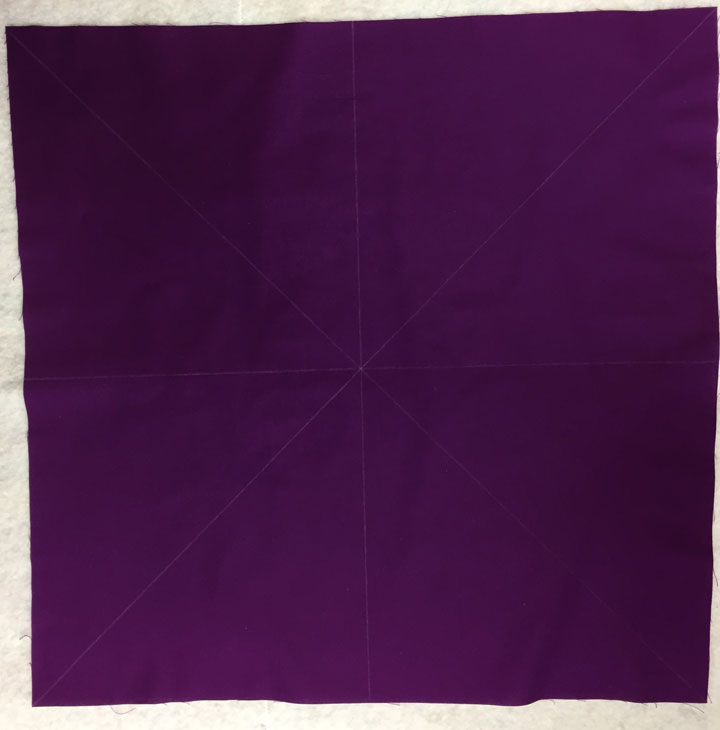
Using a sliver of soap or some type of temporary marker, I want you to draw temporary lines from each corner to it’s opposite corner. Your sandwich should look like the photo below:
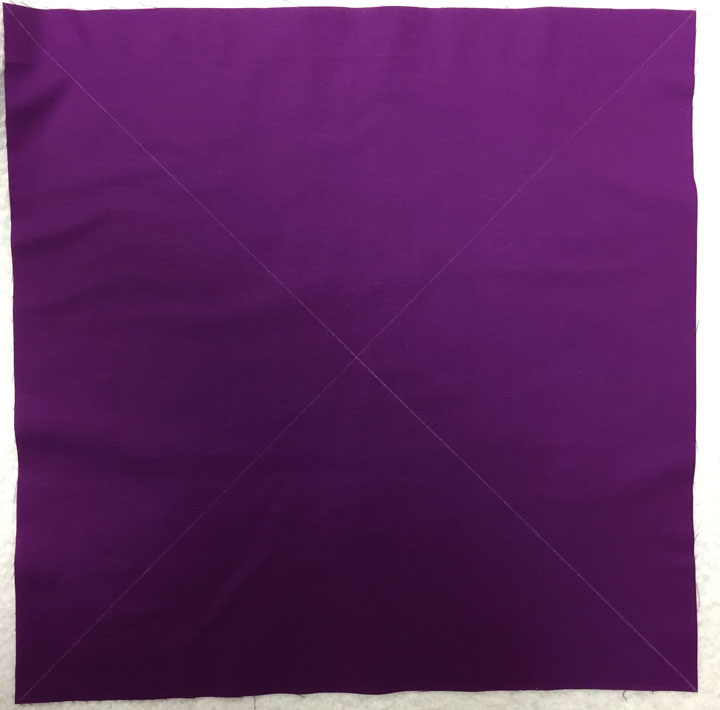
Note that where those 2 lines intersect is the dead center of the block, and it will become the dead center of your quilt design. If you didn’t already know this, commit it to memory as it is very useful. Always have a clear center point that marks your quilt block’s center, and make sure that point remains clear from the very beginning until the quilting design is completely finished. You may need to darken that point a couple times as you work, and that’s ok as long as it’s the same point you started with.
Next, we will add 2 more lines that will go through that center point. Align your ruler edge along the base of the top fabric, then slowly advance it so the other edge of the ruler goes right through the center point of the block. The photo below illustrates what I’m trying to describe:

Trace that line with your temporary marker, then repeat the same thing on the neighboring side. Your sandwich should now appear as below:
The reason I’m telling you to mark it this way is that I want you to have a specific point that is the center of your block. You need a tiny point, not a smudge or a confusing set of lines that don’t quite intersect in a point, and if you mark it as above, you should have a clear point. Know that if you are ever finding yourself in a spot where you want to fill a rectangular or square block with a ruler design, marking it in this exact same way will help you. These lines will allow you to create a symmetric ruler work design even when you’re working with blocks as small as 4 to 5 inch square blocks.
Next, draw a temporary line that is 1/2 inch inside the perimeter of your block, on all 4 sides. This last set of marks is to create a boundary that will ultimately be used as a seam line if you make this into a pillow or tote bag once we are completely done. We need to mark that boundary now so we deliberately leave that section outside of the design we will be making with rulers.
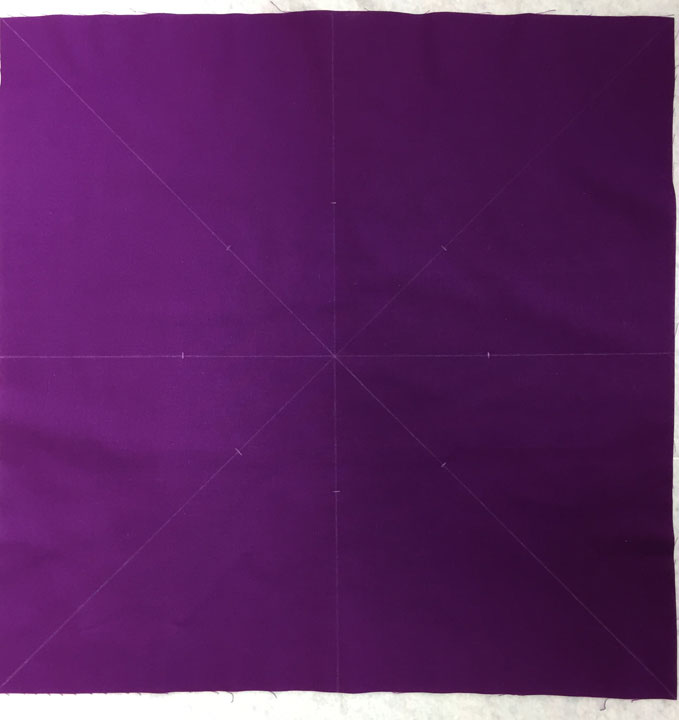
The last marks for today are easy. Make a small tick mark along each of the 8 lines above that rests 4 1/2 inches from the dead center of the block. Your sandwich is now ready for stitching and should look like the photo below:
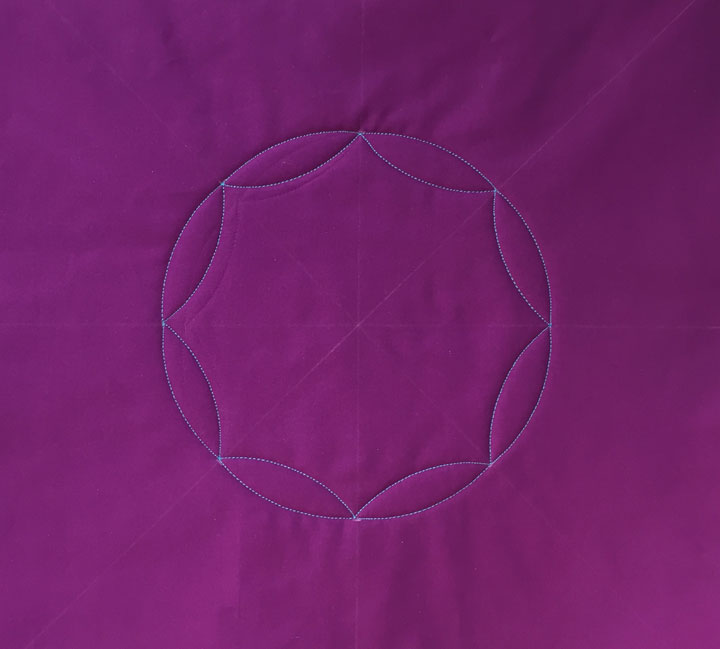
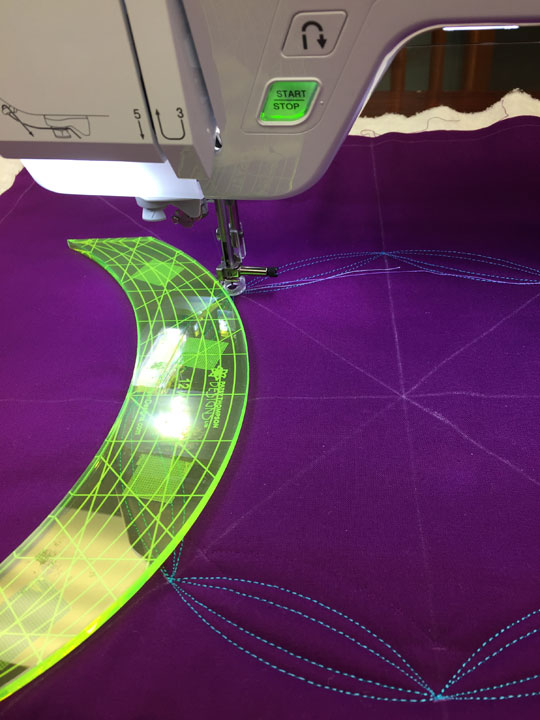
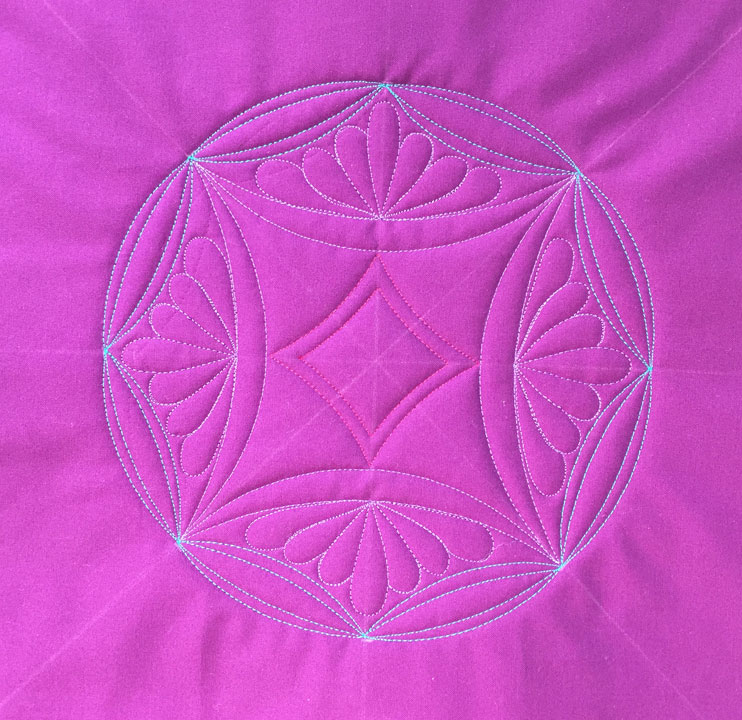
I am using my PTD 6.5 arc ruler for this first round of stitching. Pierce your needle in one of the tick marks that encircles the center point, and then stitch short curves that run from 1 tick mark to the neighboring tick mark. Continue doing this all the way around the circle. Once you return to the place that you began stitching, reverse the orientation of your arc ruler and now stitch a mirror image arc to travel to the next tick mark. Repeat this all around the circle until you meet up with where you began stitching. Stop with your needle down, and your sandwich should now look like the photo below:
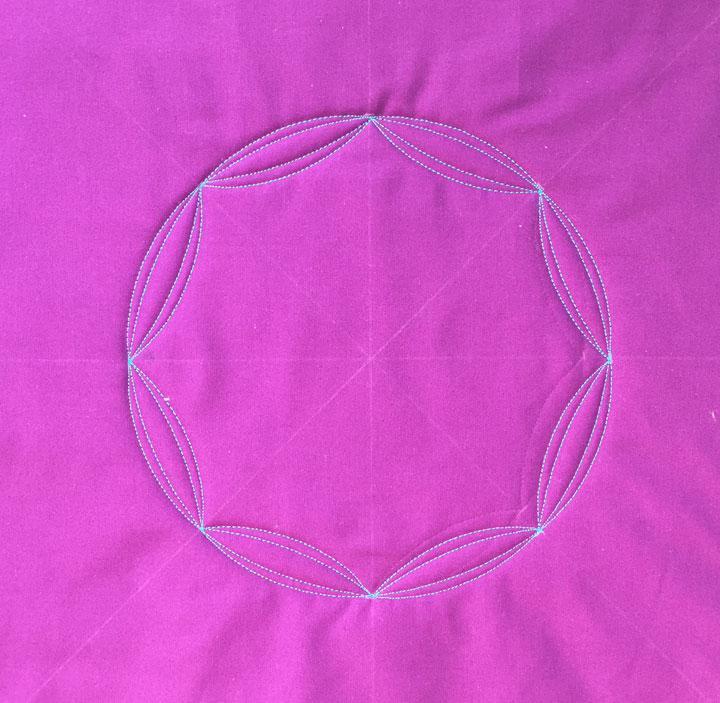
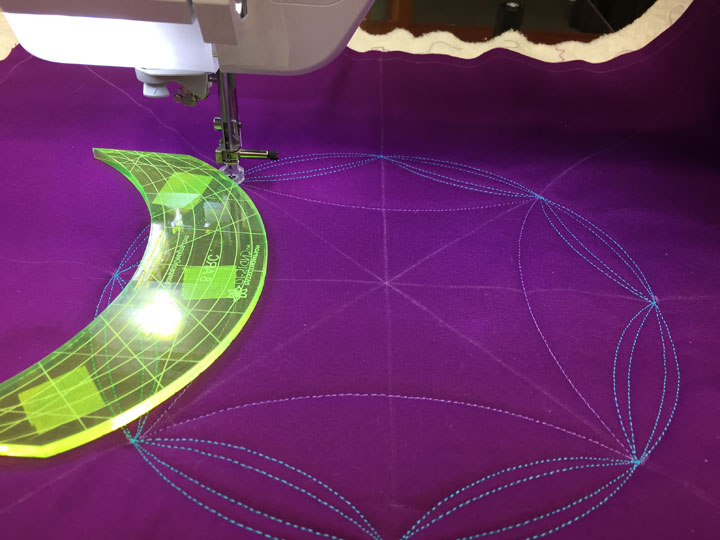
Now I am swapping to my PTD 12 arc ruler. I repeat the same process and this allows me to stitch a tapered channel on one side of my circle of swags. Once I arrive back where I started, I reverse the orientation of this same arc ruler and repeat the process again. Your sandwich should now appear as below:
We’re going to add more ruler work here, but before we do, I want to be sure you realize what you have just done. Look at the design you’ve created and ponder this:
- You have created a circle of crescents. You now know how to create a series of tapered swag channels in any size circle you wish. In this case, we have created a circle of crescents by stitching mirror image tapered swag channels that meet at the “cleavage points.” This is your first foray into using a tapered swag channel to create a unique design. Know that creating a circle of swags is but one of many, many, many ways you can manipulate swags into a design. I sure hope you are feeling a bit empowered now!
- If you are asking yourself how you would do this again on your “real quilt” with its own unique dimensions, you would begin by marking those 8 straight lines that we marked at the beginning, but you would change the position of the tick marks to create the size circle you desired. (For example, if you wanted to create a 7-inch diameter circle, you would place a tick mark 3.5 inches from the center on all 8 lines; for a 12-inch diameter circle, you’d place a tick mark at 6 inches from the center at all 8 lines, etc..) Yes, it really is that easy!
- Now, here’s where you will need to start thinking…Can you count on the same arc rulers I used here to be able to make crescents that will look good in any size circle dimension? No! These rulers will work well on many sizes of circles., but not all sizes of circles. This is because the distance between tick marks will change as you change the circle’s diameter. This phenomena will happen with any design that involves swags, because you will be altering the space between tick marks and therefore altering the amount of “plunge” of each swag. (Remember back to what you learned in lesson #6.) Let’s say that all you have available are the 2 arc rulers we used for the circle of crescents above. There are 2 ways that you could work around this: a. convert this to a circle of arched swags. This would also look great and would enable you to use the same arc rulers, OR b. Bisect each of the marked lines we’ve been using for our tick marks and if you did this in equal halves, this would effectively create a circle of short swags and enable you to make a very large circle with beautiful crescents using the same arc rulers.
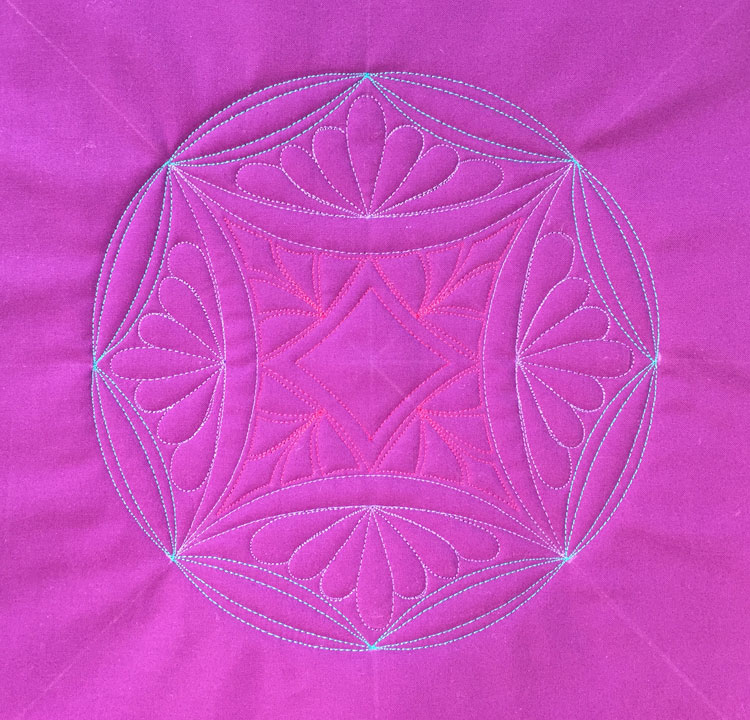
OK, so let’s get back to today’s quilting part of the lesson. Now we’re going to again play off our previously marked lines, but this time we an add a new “shape” into our framework by playing off “every other” tick mark. I’ve swapped to a different color of thread for this part of the ruler work as this helps to define “areas” within the design, so feel free to swap thread colors of you’d like. Position the quilt on the machine bed and view your circle as if it were a clock. Pierce your needle in the “10:00 position,” or the cleavage between 2 crescents that falls at 10:00. I am using my PTD 12 arc ruler for this next step as I prepare to stitch from the 10:00 position to the 8:00 position. (In other words, I am aiming to hit every other cleavage point.) The photo below, taken just before I began stitching this section, shows what I’m describing:
…and this next shot shows as the first 4 swags have been stitched, and I’ve left my needle pierced in the same place I began:

Next, you want to repeat the same exercise, but using an arc ruler whose curve is different enough from the original arc ruler that it will be interesting. I am using the PTD8 arc ruler in the shot below:
…and now the goal is to stitch a series of tapered channels that play off the first round of stitching. Here is a photo that shows the design once those tapered channels have been stitched:
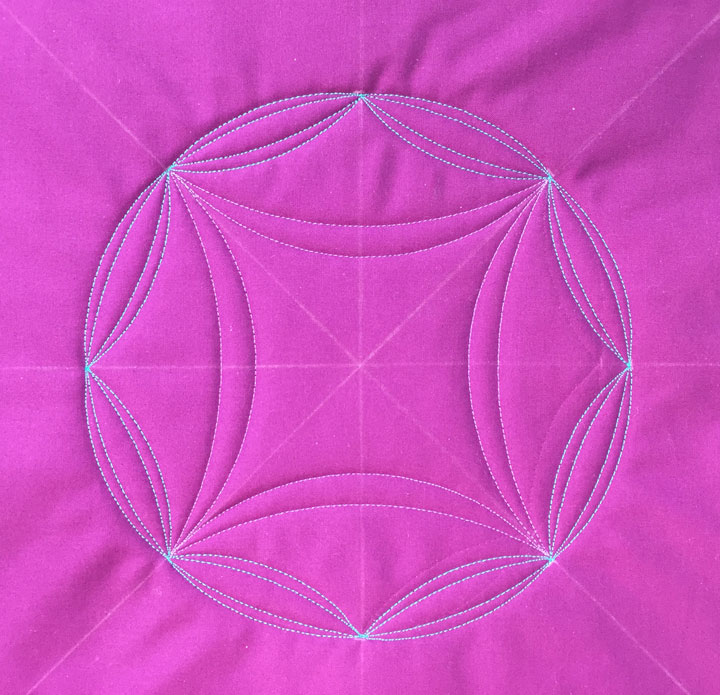
Of course, we’re going to move on, but I need to point out a something that might not be obvious. When you are “building” a ruler work framework/design, it is very easy to create designs by playing off those original lines we marked. In this case, we are building the design “inwardly,” but the same holds true when building the design “outwardly.”
We’ll add one more element into our framework and then we’ll begin filling it in. I’ve swapped threads 1 more time and using my PTD 6.5 arc ruler, I’ve created a short arc that goes from 12:00 to 9:00 to 6:00 to 3:00 and the back to 12:00. (In regular language, I’ve done what we did earlier, but by rotating my starting point 1 cleavage point over, I’ve added a new element.) The photo below shows what this looks like:
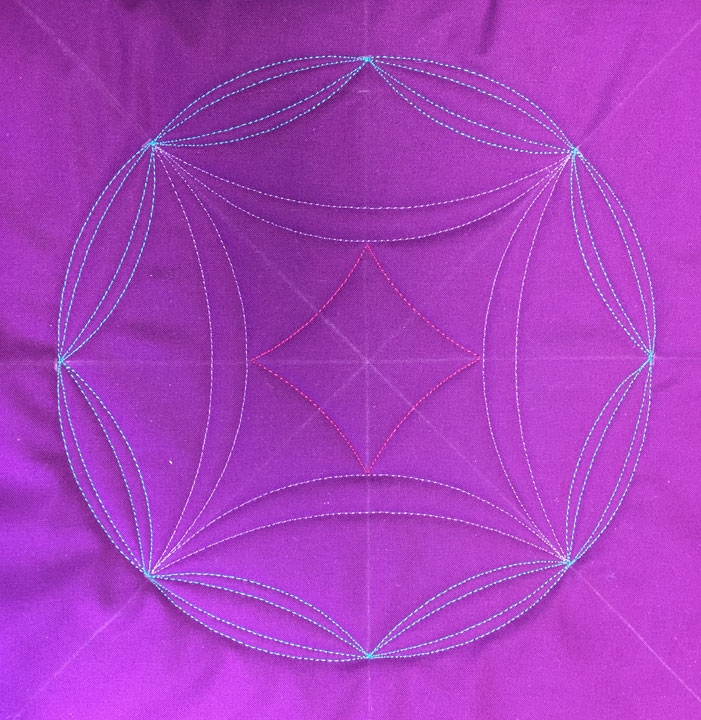
Using the same arc ruler, I then created a 1/4 inch parallel channel inside this and my finished ruler work framework looks like the photo below:
Ta-da! Everything we’ve done today is exactly what you’ve been doing in the earlier exercises, we’ve just changed the starting and stopping points so that we are no longer working along the boundaries of a border. Sometimes it helps to really think about what is familiar as it helps you realize that the skills you have can help you make much more complex designs than you may think.
We will be doing more ruler work on this design in the final 2 lessons, bit for today, let’s fill in what we have so far. First up, I added a featherette inside each of the “curved triangle” zones in the middle section:
Next, I swapped thread colors again and stitched an Aztec featherette inside each of the long, skinny “curved triangular” zones:
I then swapped to a green/gold polyester thread and added a single row of pearls inside the crescents. Notice that when you do this, you can do it as one continuous thread line, sneaking from one crescent into the next:
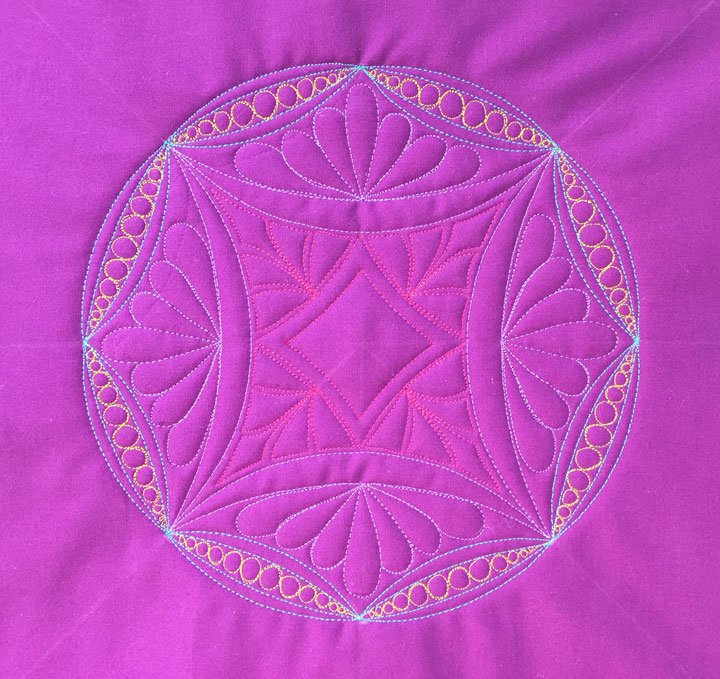
…and lastly, I used a gold polyester color thread and hyperquilted the aztec featherettes. This adds an interesting “high-lighting: into this area of the design:
Could you throw something into that center diamond? Yes! Personally, I’m holding off right now as I don’t have an idea that is jumping out as a great way to fill it, but if you’ve got an idea, then go for it!
Hold onto this quilt sandwich and we will pick up here in the next lesson. Today you have learned how to begin a ruler work framework, (in this case, a circle of crescents), and then to build on that framework working from the outside in. In our next lesson, we will play with building on this framework toward the outside. Until we meet again…
OMG this is beautiful. Excellent lesson. Thank you, thank you, thank you.
Wonderful Patsy! I can’t wait to get going on this. Many, many thanks once again for these amazing lessons.
Thanks so much. Can’t wait till my new rulers get here. Side note. I purchased your rulers owner the pineapple set Because yours have more registration lines. I think the extra lines will be much more useful in future. Thanks again
Geri
These lessons are explaining the design processes very clearly. I appreciate the explanations of how (and why) things are done, the order in which to do them and what to watch out for. You are simplifying the processes I have been trying to do, and giving me the confidence I need to continue with my fledgling attempts to create frameworks, but now with a greater understanding of the processes. Thank you.
I had previously purchased the Quilted Pineapple set of rulers and I am not seeing a 6.5 ruler, the smallest one is not marked. Will I need to purchase the set you sell to accomplish this lesson? I would have repeats of the 8 and 12 inch rulers because they were included in my bundle. May I just purchase the 6.5 ruler from ?
I have completed lessons 1 through 6 and have learned a lot, I think I may go back and do them over again.
Thanks for doing these lessons.
Hi Joan,
You should not have to purchase any rulers from us to complete this lesson. I’m trying to teach you concepts, not to sell you rulers! There are thousands of people all over the world taking this course and they are using all kinds of rulers to do it.
Remember that to create a tapered channel, you will need 2 curves that are different enough from one another to create curves that are aesthetically pleasing. I would play around with the rulers you have and find a combo that works. Also, just so you know, one manufacturer’s 12 arc is not the same as another manufacturer’s 12 arc. This means that what you have been doing all along is exactly what you’d be doing here (creating the same types of designs as what you see me doing, but you’ve been doing it with a different set of arc rulers/curves than what I have been using to demonstrate!)
Patsy
You are rocking it Patsy! Nobody teaches like you do, nobody! Thanks for sharing your time and talents.
LuAnn in Oregon
luannkessi.blogspot.com
Thanks for the lessons, I have learned a lot you have made it so easy to do. Thanks
Patsy, when doing the featherettes, do you stop after each one, tie off & move to the next ….or…do toy travel along the swag line over to the next?
Well, I’m stitching as badly as I spell…should be….do you travel…