

May 01 18
Creating Machine Quilted Feathered Diamonds
I think I’ve posted one or two times about feathered footballs like the one shown below:
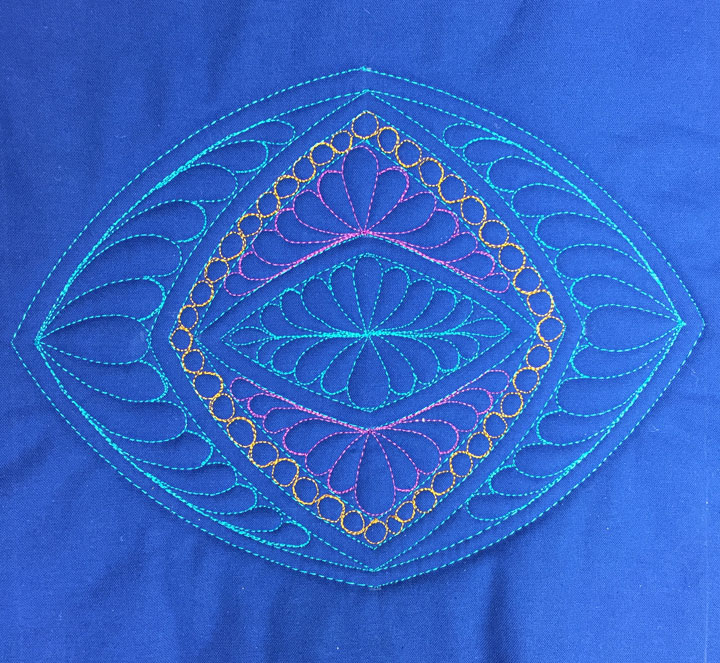
These are created using ruler work, and for feathered footballs, the orientation of the ruler is in the opposite direction as when one wants to create feathered diamonds like the one below:

(You’ll have to excuse the colors in the above photo. The background is a nice deep purple, but that was somehow lost in some of the “in-process” photos.) Anyway, when making a feathered diamond, you need to use a long ruler with a fairly subtle curve. In this case, I used the Quilters Groove Pro-echo 20 arc ruler, which you can find by clicking here. The reason you need a more subtle curve is because you’ll lose way too much “interior real estate” if the curve of the arc is acute, and then you’ll be left with nothing to play with once you go to add fill-in designs. Here’s how to make a basic feathered diamond.
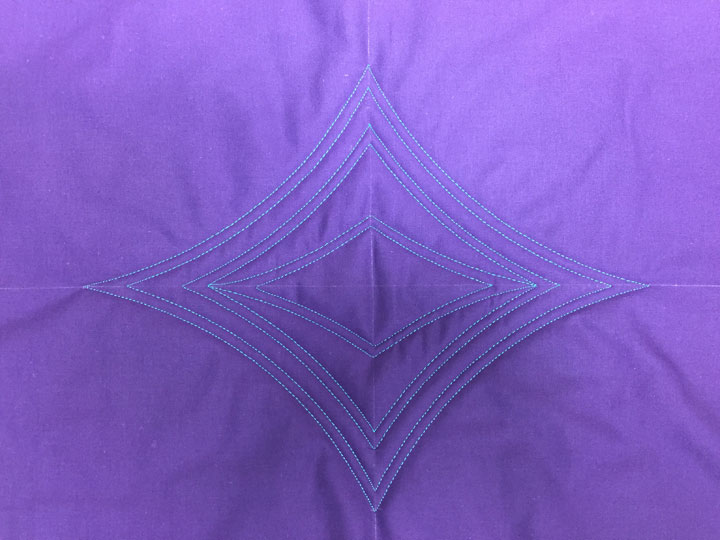
Step 1: mark a large crosshair through the center of your block. I made small tick marks at 7 inches from center on one axis and 5.5 inches from center on the opposite axis. I then used my Pro echo 20 arc to create the outermost diamond framework.
Step 2: Add your interior channels. In this case, I added a 1/4 inch parallel channel, then a 1/2 inch parallel channel, then another 1/4 inch parallel channel. Using the same ruler, I then added a tapered channel using a tick mark that was placed 1 3/4 inches from the highest/lowest interior apex on the one axis. Here’s what the empty framework looked like once the ruler work skeleton was complete:
Step 3: Begin your fill in adventure! I began my fill-in work with a new thread color and added a waterfall featherette inside the tapered channel. Here’s a shot once that was completed:

I swapped back to turquoise rayon thread and added the “fingertips” design inside the 1/2 inch parallel channel. Notice that I had to throw in a teardrop in each of the 4 corners of the diamond:
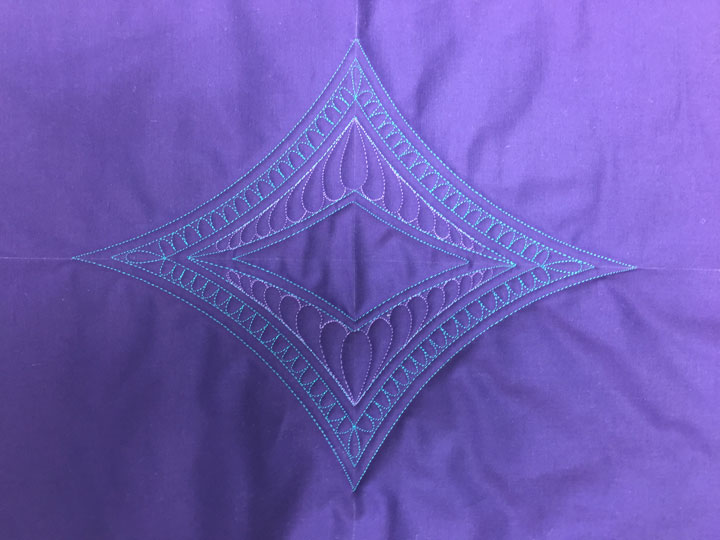
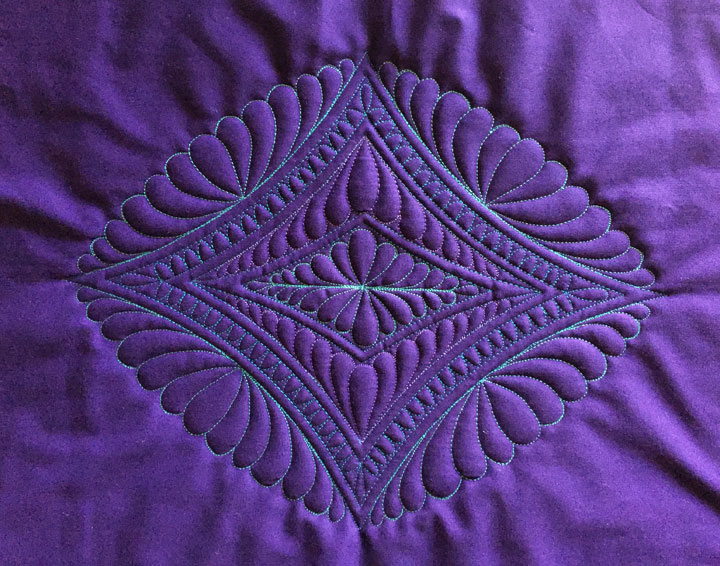
Lastly, I added an upright featherette inside the center diamond channel, and I used a different thread color (light aqua polyester) for that:
The shot above is a basic feathered diamond. This can be converted to a more elaborate feathered diamond by adding plumes along the outer edge. Because the design is highly symmetric, I felt like my outer plumes should be highly symmetric as well, so I made a temporary boundary line for them using a sliver of soap as shown below:
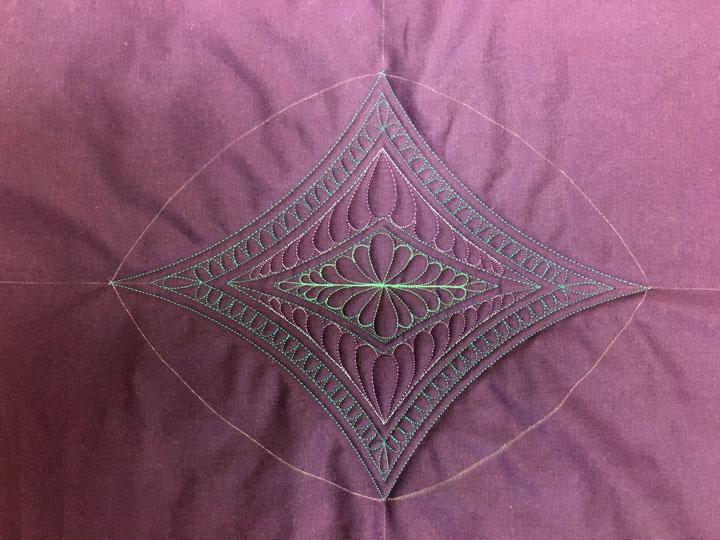
(I used my Pro-echo 22 ruler for that soap line, as it is an even more subtle curve than the Pro-echo 20 ruler I used for ruler work framework.) That soap line is important as it represents the outermost edge of my plumes. If I can force myself to “stretch” or contract each plume to meet that boundary line, I’ll end up with a lovely tapered featherette along all 4 sides. Here is a shot of that once it’s been stitched:
I am a sucker for “empty space” on a quilt sandwich, so I may end up adding something else…
Oh my gosh this was better than a really big bar of chocolate. Thank you. Yummy!
I love this. Can’t wait to try it!