May
21
18
This trapuntoed feathered wreath was rescued from a quilting UFO pile. It’s a good example of how you can use trapunto to visually direct the viewer’s eye to see “zones” of a design by preferentially adding more dimension to certain portions of a given quilted design. Different portions of this have 1 layer of batting, some have 2, some have 3, and 1 section has 4 layers of batting. Between trapunto and how densely you choose to quilt portions of a design, you have tremendous control over how someone perceives or “sees” the design your are creating. I’ll walk you through the process below, and know that these photos were all taken on different days, in different rooms, and in different lighting, so the colors will keep changing!
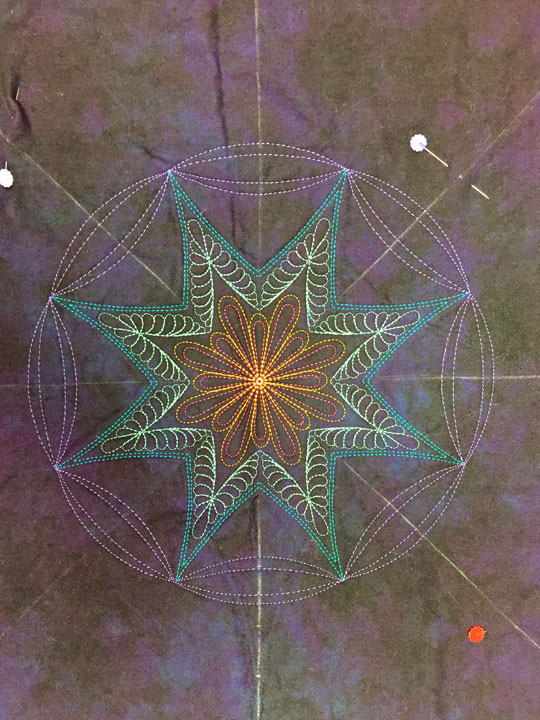
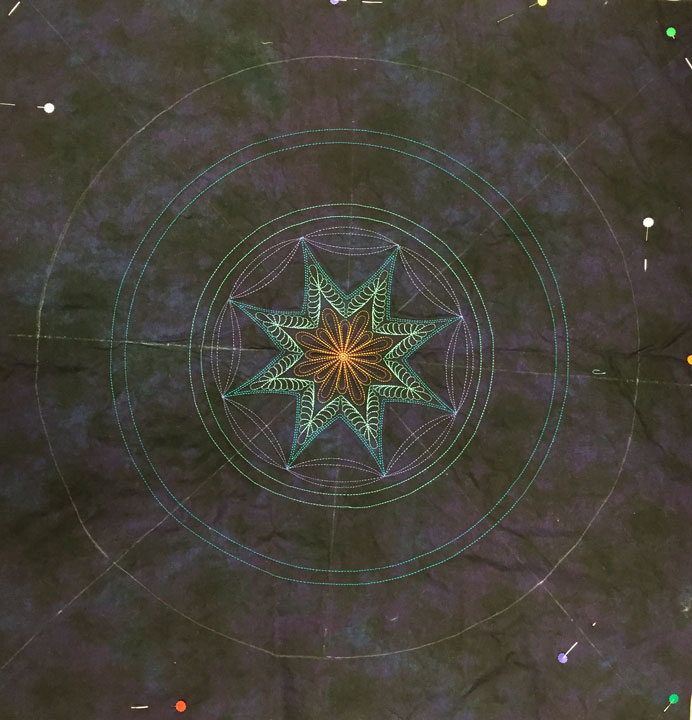
It started as a piece of commercial black mottled fabric that I over-dyed with purple. I then quilted the center star using a digital file on my embroidery machine, (you can find that design file by clicking here), and threw a scrap of polyester batting under the whole square but there was no backing fabric. I started to enlarge that center design using arc rulers, but this all came to a screeching halt 2-3 years ago because I wasn’t sure I liked what I’d done. This UFO has been sitting in my giant tote bag for all this time, waiting for me to do something. I cleaned out the tote bag last week and ripped out what I’d started earlier and then went to work making a large feathered wreath.
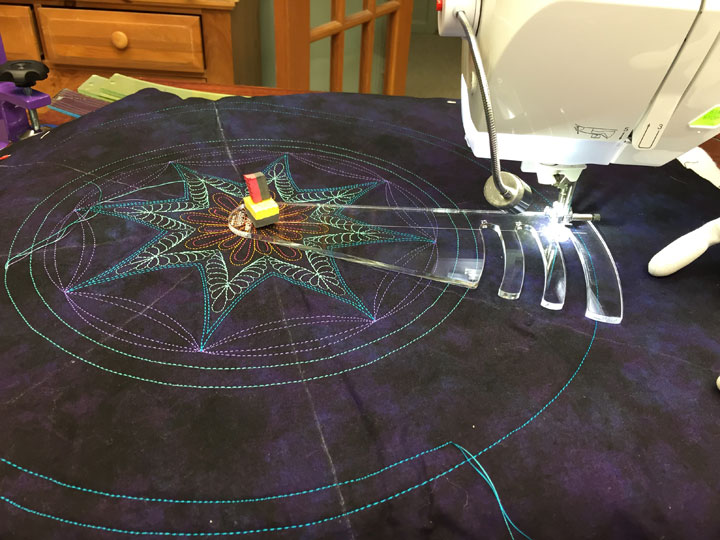
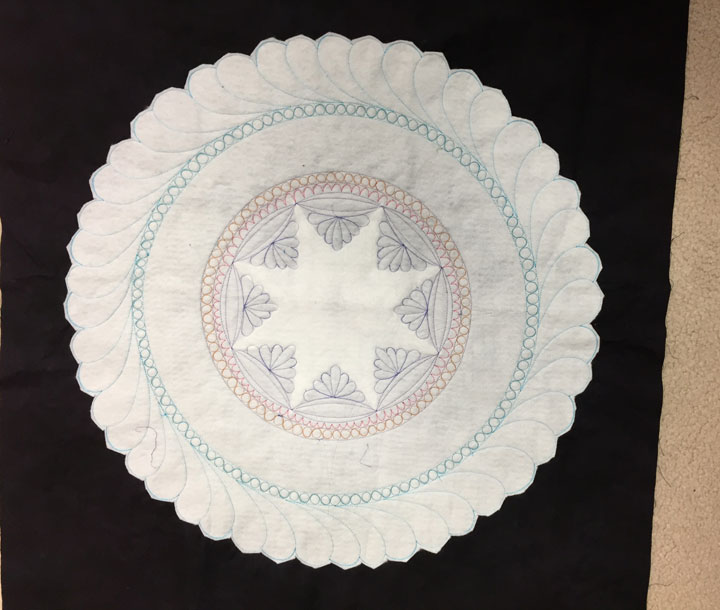
My first move was to use my PTD 6.5 arc and PTD12 arc rulers to create a circular chain of 2-tiered crescents that surrounded the star:
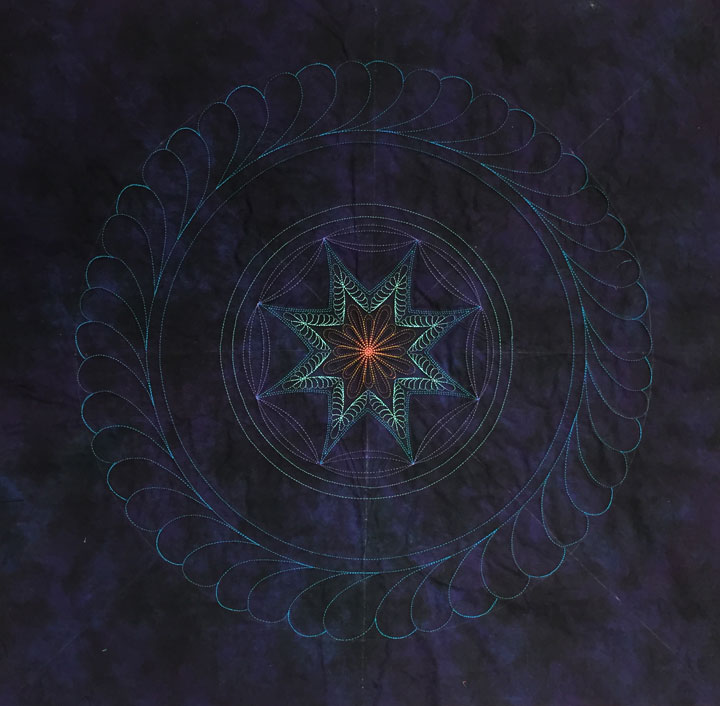
(The pins that you see are holding another layer of polyester batting that will fall underneath the entire wreath.) Next up, I started by adding multiple circles to create “zones” in the spine area. I got to break out my new set of Westalee Circle Rulers that allow me to make circles up to 18 inches in diameter:
(These larger circle templates work exactly like the earlier Westalee ones, but you can see that they provide channels for creating larger circles. You can find the Westalee COQ set 6 templates in our online store by clicking here.) I then marked a circle in soap that gave me 2 3/4 inches for my outermost plumes. This soap line is a temporary line that serves as the boundary for the edges of the plumes:
Here’s what it looked like once I added the plumes. You can see that even though they are all a bit different since I’m adding them freehand, they still look pretty symmetric and it’s all because of stretching the plumes to the soap line:
Next, I began filling in the narrow channels. A single row of pearls is a great way to fill a 1/2 inch wide channel, and quilting this in a gold polyester thread will add a little bling and help “set off” that circle well:
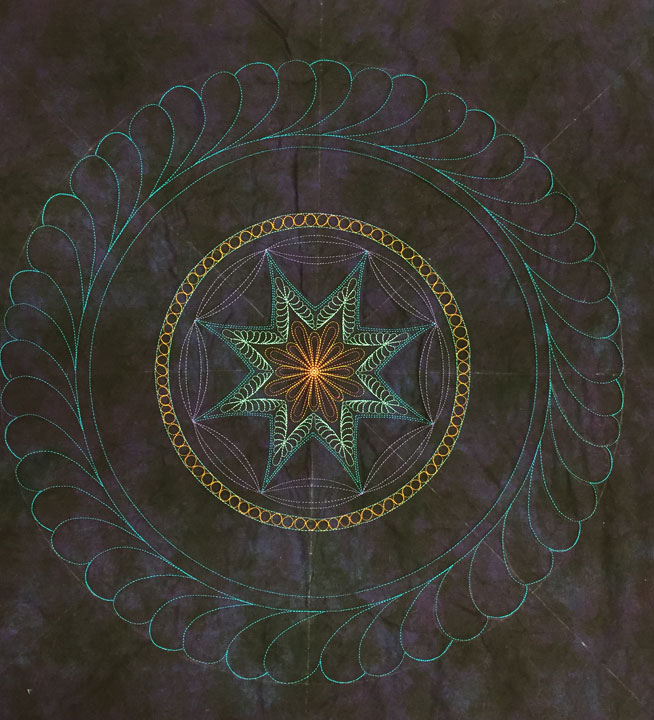
In this next shot, you can see I’ve added fingertips (magenta polyester thread) inside the irregular channel that falls between the pearls and the circle of crescents, and also added small featherettes (lavendar polyester thread), inside the space interior to the crescents:
…and the last thing I did on this day was to add a single row of pearls in the outermost 1/2 inch wide channel:

I had no idea of what I wanted to place in that wide channel, so I walked away from the project to think about it overnight. I cut away the excess batting that fell outside the wreath before I called it a day, so here’s what the project’s backside looked like at that point:
(Just to make it clear, there are 2 layers of batting underneath the center star, and 1 layer underneath the entire wreath at this point.) I decided to add a series of triangles surrounding the circle, so I created those using a straight line ruler and then created a tapered channel inside those rays:
…and here I have added an Aztec featherette (dark blue polyester thread) inside each of the rays:
…and I’ve now added a featherette inside the outer triangle spaces:
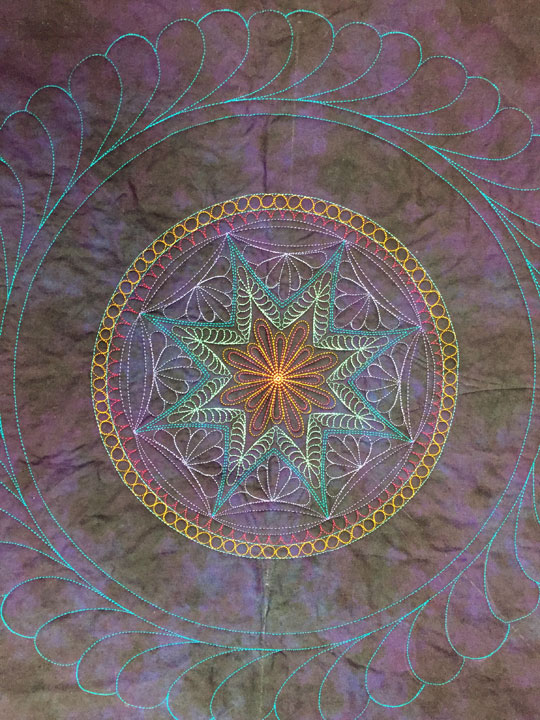
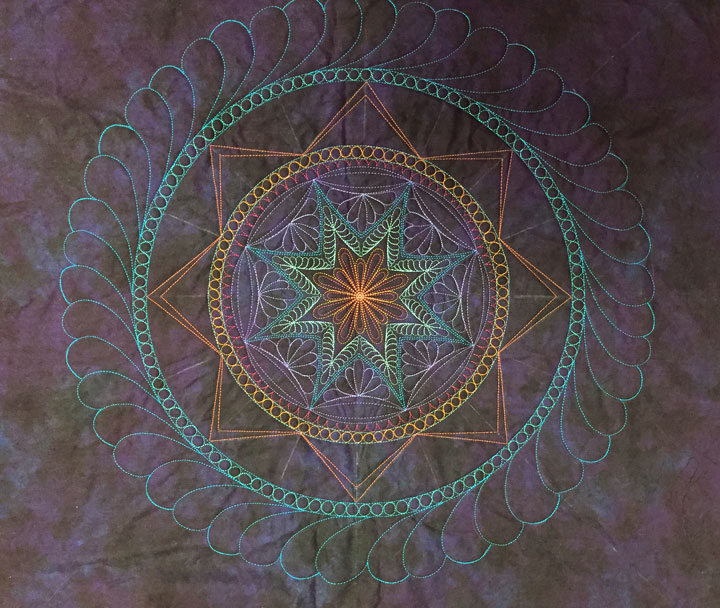
These are not very striking, so I added hyperquilting inside the featherettes in turquoise thread. You can kind of appreciate how much this adds in the next photo that shows some hyperquilted and others not yet hyperquilted:

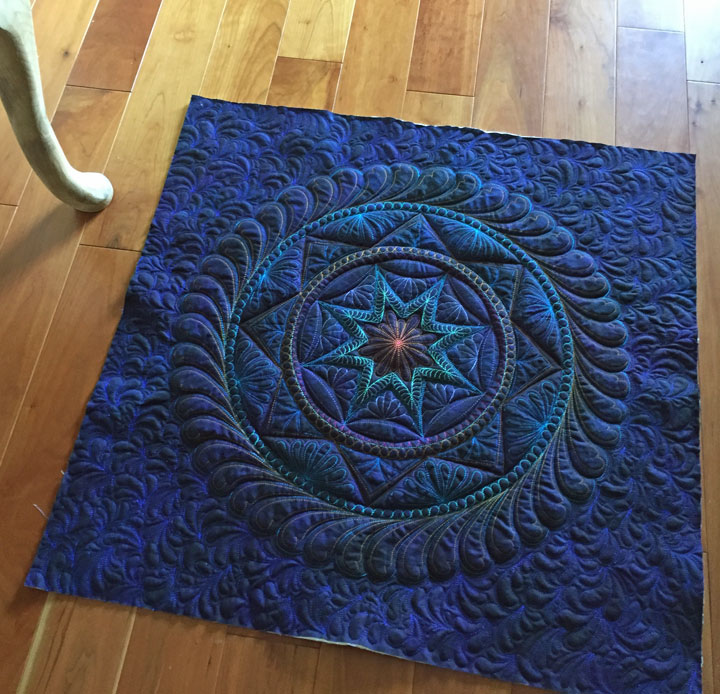
Now, it is starting to get exciting, and remember, all this drama is being created using thread! Here’s a shot once the whole wreath is done; you can see that it’s cool but seems king of “flat:”

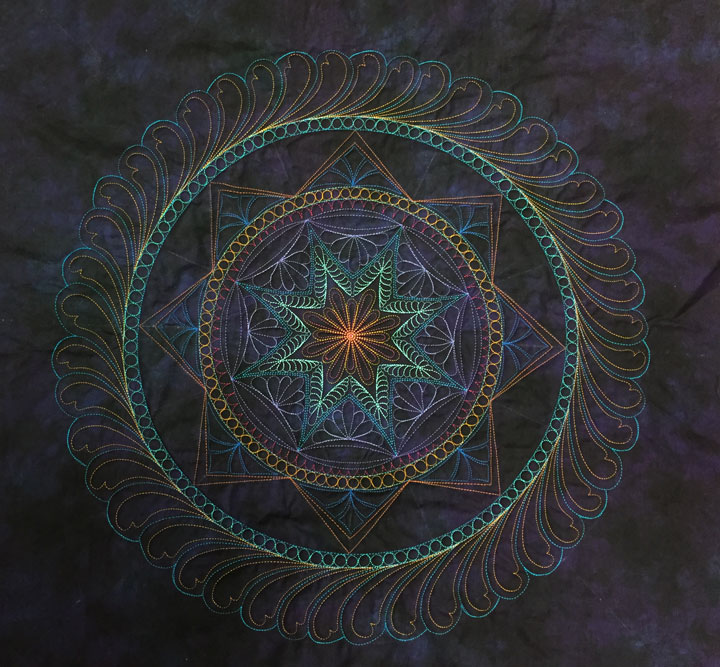
Here is where I decided I wanted to set off different zones more, so I threw in yet another extra layer of batting that covered the entire center “circle” that ends with the gold pearls. I wanted to exaggerate the difference between the 2 “featherette zones” inside that outer wide channel, so I added small pieces of batting over the outermost triangles. Here is a shot of what the back side of this piece looked like at that point:

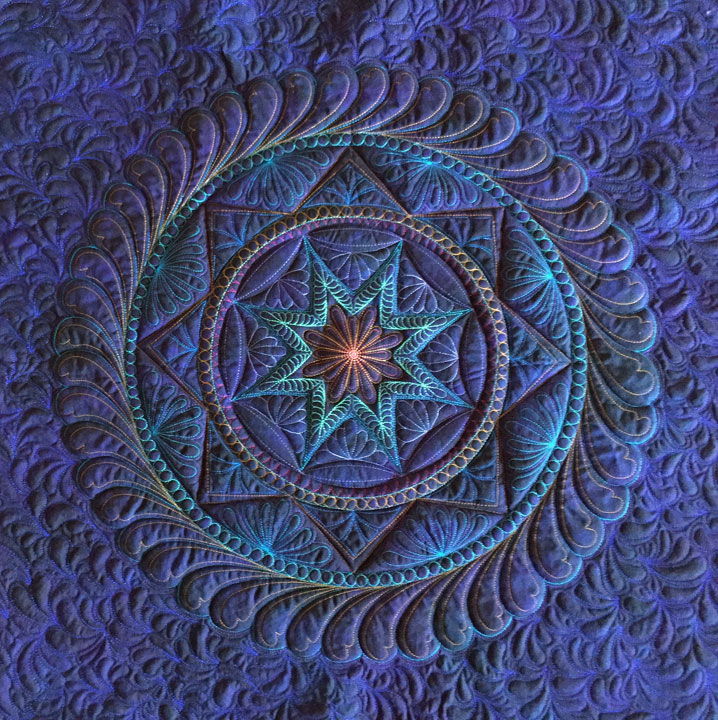
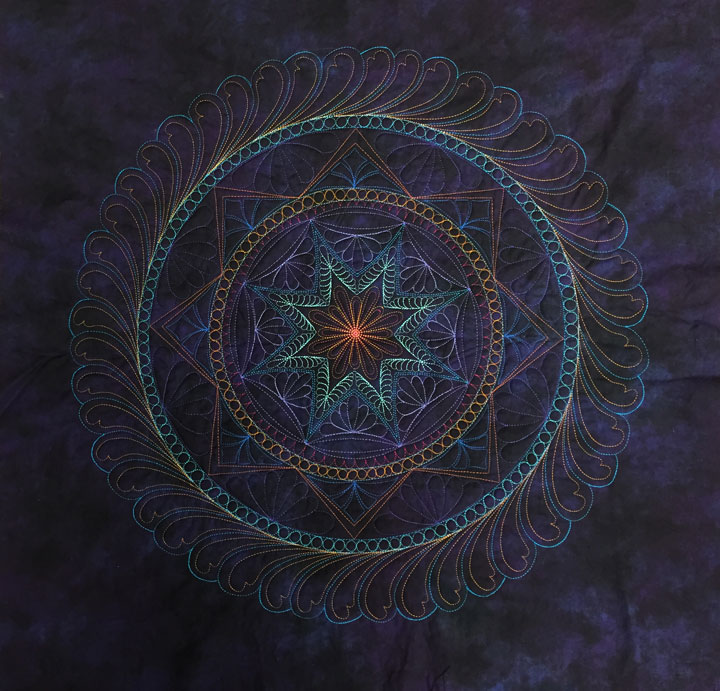
The rest is a downhill coast as I layered it unto the final quilt sandwich with a final layer of batting underneath the whole thing, followed by a backing fabric. I preferentially stitched outside certain zones of design to set them off, and here is the finished product:
Another UFO rescued…or at least it will be once I make the time to bind it!
Filed under Free Motion Quilting, ruler work on a HDSM.


Absolutely gorgeous. Thank you for your tutorial on how you did this. I truly want to give this a try. Love it.
So beautiful.
This design is absolutely stunning, Patsy. I never cease to be amazed by what you come up with. Thanks for sharing the tutorial.
Thank you so much for all the time and effort in sharing your beautiful talent!
Gorgeous, Patsy — and I have SO many questions:
When you add the small pieces of batting, how do you attach them to the quilt top — glue? fusible?
When you’re quilting a large quilt, what kind of batting do you find gives the best loft — that sweet kind of puffiness you see on quilts that are done on long-arm machines? I’ve tried to use two layers of a cotton/poly blend, but it’s difficult to get a ruler under the ruler foot when the batting is puffier.
Thanks so much for sharing your expertise!
Diane