Welcome to SewCalGal's 2013 Fall Machine Embroidery Blog Hop!
November 6th, 2013
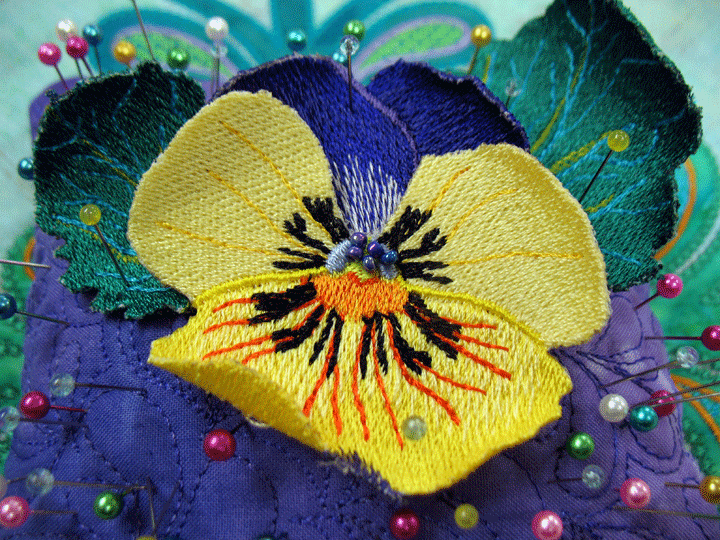
Welcome to the Fall Machine Embroidery Blog Hop organized by Sew Cal Gal! I am excited to be part of this blog hop and will be blogging about an interesting embroidery project by Zandra Shaw. Zandra (isn’t that a beautiful name?) is the designer/owner of The Embroider Shoppe and you can find more of her lovely embroidery designs on her web site here. I chose this particular project because it creates a 3-dimensional flower, so I figured the design would be useful as I could use it in many different applications. Here is the photo of the flower from her web site:
Before I begin to tell you about this embroidery project, though, it’s time for some “True Confessions!”
Confession #1 – I know nothing about traditional embroidery…literally nothing! I do machine embroidery applique using my own design files but I’ve never done straight embroidery other than stitching out 2 designs that were factory-installed on my embroidery machine when I was learning how to operate the machine. So, I approached this as a true novice.
Confession #2 – I know nothing about editing designs on my embroidery machine. If I want to edit/revise a digital file, I’ve always pulled it into my digitizing software and made alterations there. I had never used any of my editing buttons before this project! Again, I approached this as a novice. Now, on to this project…
The project came with 8 pages of clear instructions with numerous color photos interspersed in the text. That was really nice!
This project creates a 3-dimensional flower that has no fabric in it, so all of the color you see in the earlier photo above is from densely stitched thread and stabilizer. This project called for 2 different types of stabilizer, Sulky Fabri-Solvy and Sulky Soft ‘n Sheer Extra:
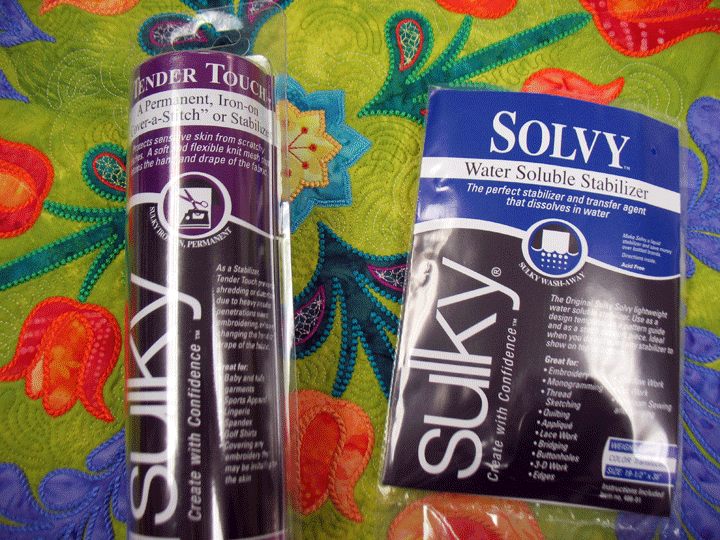
The first was Sulky Solvy, which is a water dissolvable stabilizer. This type of stabilizer will provide stabilization of the project while it’s in the hoop, but it will literally disappear after the project is completed if you expose it to water. (Water dissolvable stabilizers are handy things to have around the house, even if you don’t do machine embroidery.) I went to a couple stores in search of the 2nd stabilizer and couldn’t find it anywhere, so I substituted Sulky Tender Touch. This is an ultra-fine mesh stabilizer that will be permanently in the project. It has the feel and drape of a very lightweight fabric, so know that this is different than paper-based stabilizers. I layed 1 layer of Tender Touch on top of 1 layer of Sulky Solvy and then hooped them both. I first stitched out the 2 portions of the pansy flower, and this is what they looked like once stitched onto the stabilizer:
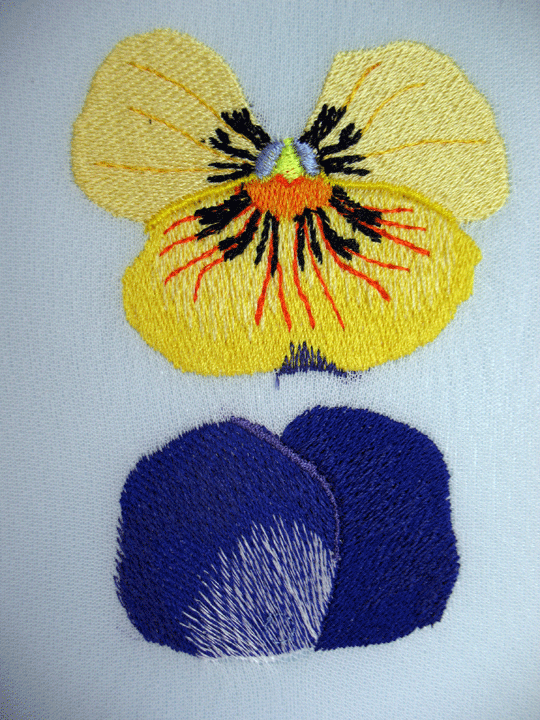
I should tell you that because this pansy is viewable from either side, I needed to use the same thread in each bobbin as I used in the top needle. Yep, every time I changed my top thread color, I needed to wind a new bobbin and change my bobbin as well. Here are some of the threads/bobbins I used:
You may be wondering why I am telling you this, but there is a very good reason. When you embark on an embroidery project, figure out how many thread changes there will be ahead of time, as each thread change takes time. (Special note to my friend, Kelly Jackson of IHaveANotion…you can get up off the floor and stop laughing now!)
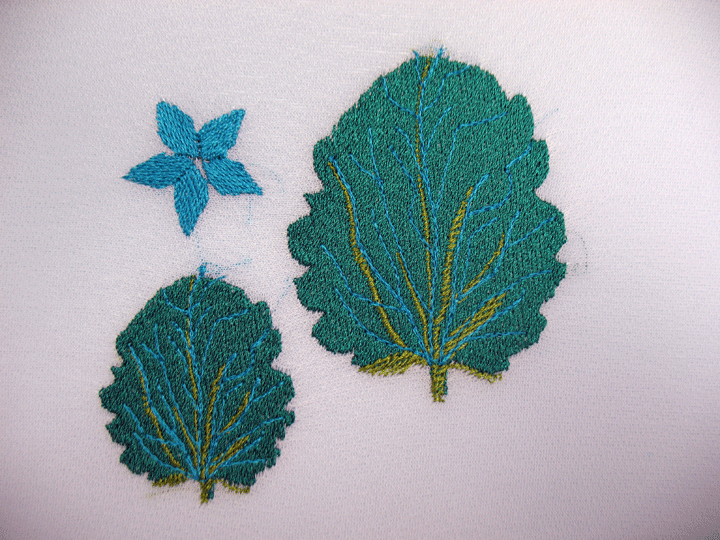
Back to the project, here is what the 2 leaves and calyx looked like once stitched out:
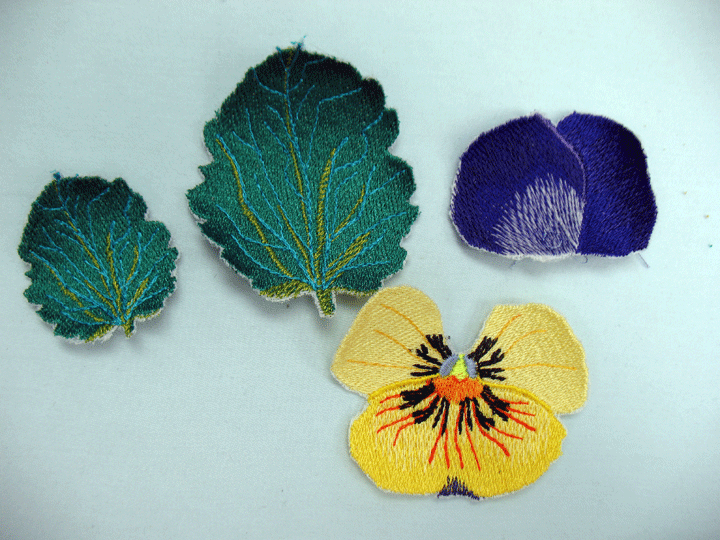
Once I unhooped the project, the next step was to carefully cut the individual pieces out. This part is a little nerve-racking, as you want to cut very close to the edge so there is minimal stabilizer remaining, but you don’t dare cut into the pieces themselves or the threads will start coming on-done. Here is what the pieces looked like at this point:
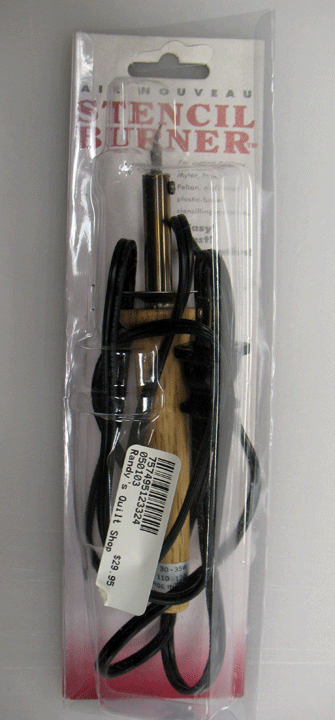
The next step was to get rid of any remaining stabilizer along the edges. The instructions called for a wood burning tool or general craft burning tool, but I couldn’t find mine so it was easily accomplished using my old stencil burner:
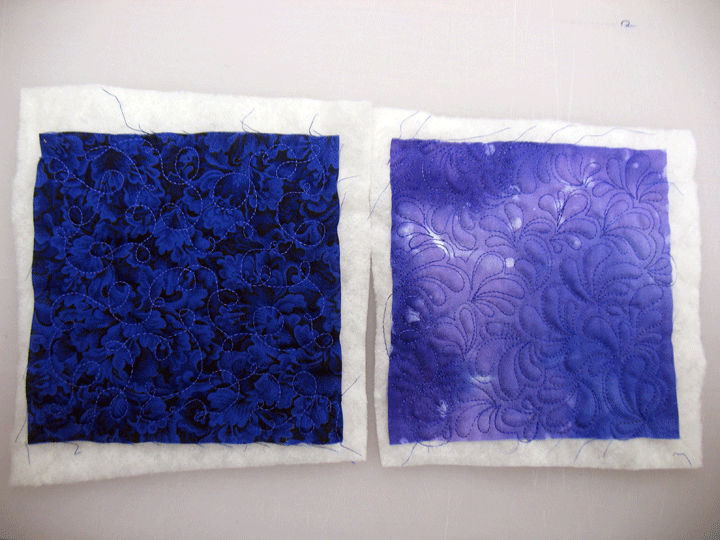
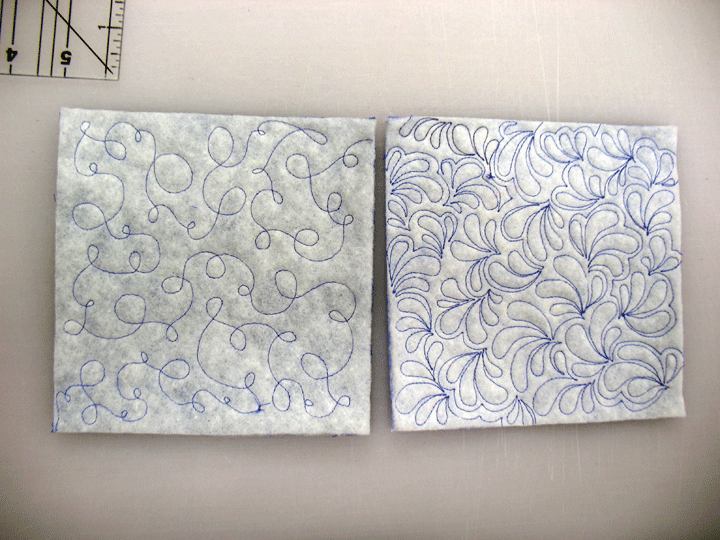
The project came with instructions to make a 3-dimensional flower on a stem, but I wanted to place my 3-D flower on a pincushion, so my next step was to quilt a top and bottom for my pincushion. I try to use different fabrics on the top and bottom as well as different quilting designs:
You don’t need any backing fabric, just a layer of batting, and you can see this on these backside shots after the batting has been trimmed away:
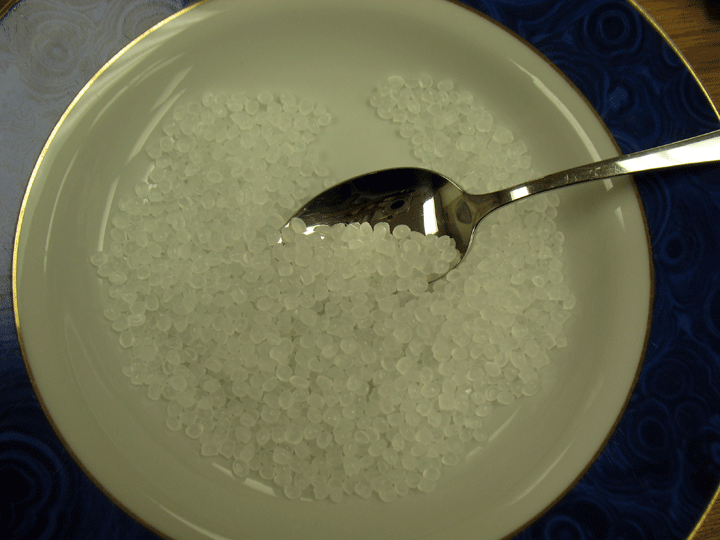
After stitching 3 of the 4 sides together and turning the pincushion inside out, I carefully attached the pansy parts to the front of the pincushion. I used beads as a way to “disguise” the stitching that attached the layers. Once attached, I filled the pincushion with polypellet beads. If you have never used these beads, they are a “must-have” in my sewing room. They are great for pincushions and beanbags for kids, and they add a nice little weight to the project. I always “top off” my pincushion by spooning the final beads in:
I whipstitched that 4th side shut, and I had my 3-D pansy pincushion:

You can see how I used the beads in the attachment a little better in this shot:
This blog hop is also hosting a give away, and if you’d like to try one of Zandra’s embroidery designs for free, all you need to do is to place a comment on this blog post telling me what kind of things you’d like to learn about embroidery in the coming months. Any comment posted between now and 11:59 EST on 11/21/13 will be eligible for this giveaway! Please take the time to visit each and every blog participating in this blog hop, and you’ll increase your chances of winning each time you visit another blog and make a comment! here is the line-up of participating blogs:
Monday, Nov 4th
SewCalGal
Tuesday, November 5th
I Have A Notion
Wednesday, November 6th
Patsy Thompson Designs
Thursday, November 7th
Beaquilter
Friday, November 8th
Stormy Days
SewCalGal
I have been using this product for years. I have tried others but have not found anything that works better for me. Viagra professional? All the medications one can see in our product lists are generic.