December 30th, 2017
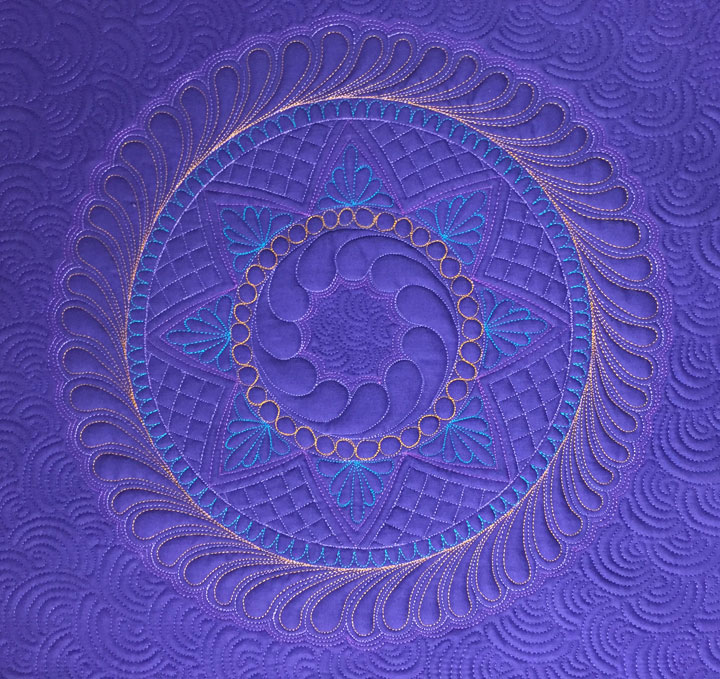
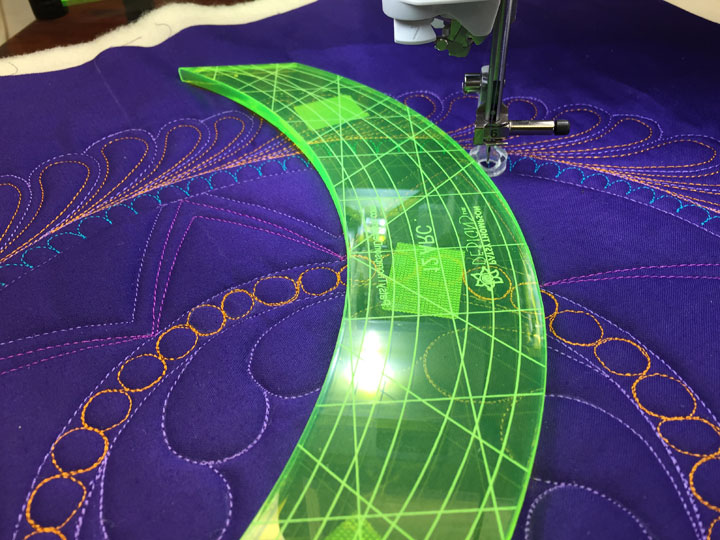
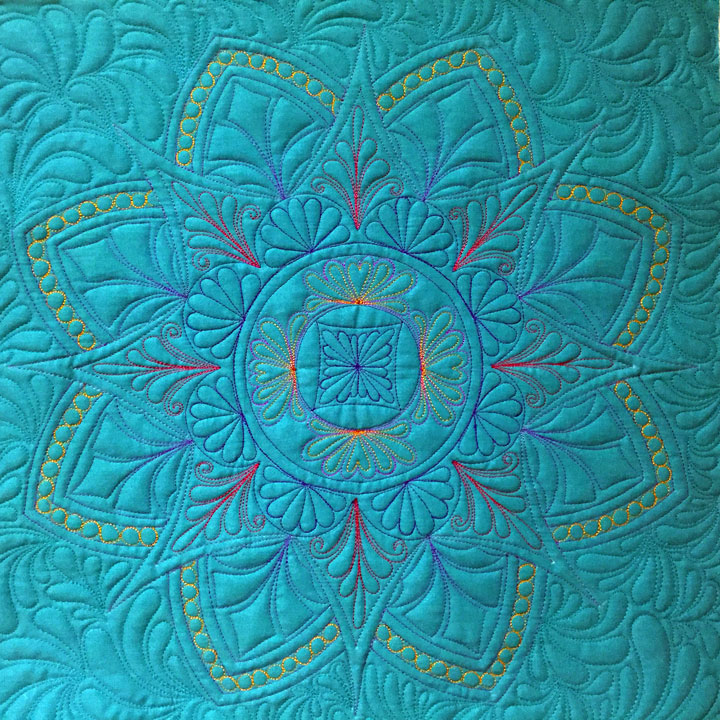
I’ve been meaning to create a ruler work feathered wreath with curved cross hatching and finally finished one today. Here is a closeup so you can get a better look at the curved cross hatching inside the spine zone:
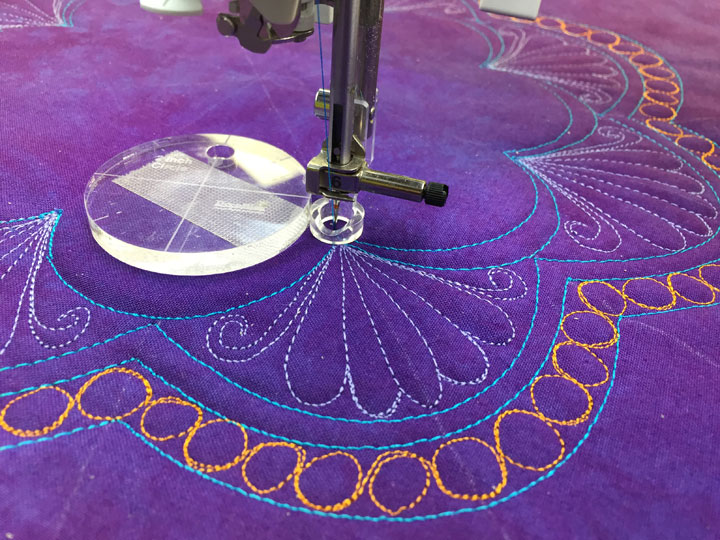
This is created in exactly the same way you do any curved cross hatching except that the “zone” we are filling with CCH is in a circular layout. I used my Westalee Circles on Quilts templates to create the ruler work circular zones, then added my inner and outer plumes. You can see that I’ve filled the inside and outside channels of the spine with a row of pearls (innermost channel) and with the fingertips design (outermost 1/2 inch channel) in the shot below:
If you look really closely at the shot above, you will see tiny tick marks just outside channel filled with peals. These, coupled with the long soap lines that run from corner to corner and midpoint to midpoint, were used to subdivide this wide channel with arched swags. These were stitched using my PTD 12 arc ruler:

Do you see small tick marks at roughly 1/4 inch below the apex of each arched swag? I used them to create a tapered channel inside each arched swag:
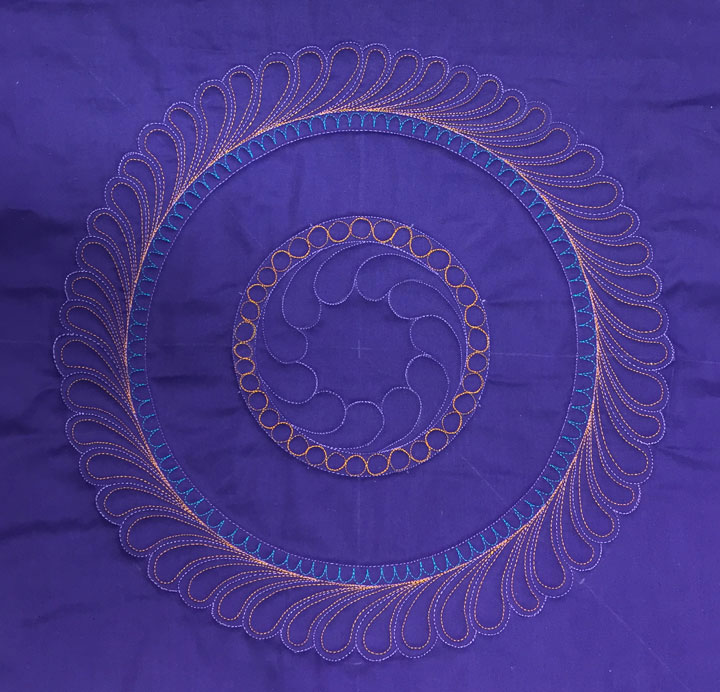
We now can begin to work on the zone that will be filled with curved cross hatching! Remember that in curved cross hatching, you will need to repeatedly make short lines of “backtracking” along the bottom and sides of the zone you are filling. Because of this, I first used my PTD12 arc ruler to create a parallel channel in the same lavender thread that was use to stitch the circle that forms the bottom of the zone which we’ll fill with CCHing:
As shown above, this is easily done by placing the ruler edge on the previous line of stitching. Here’s what it looks like at this stage once the entire section was complete:
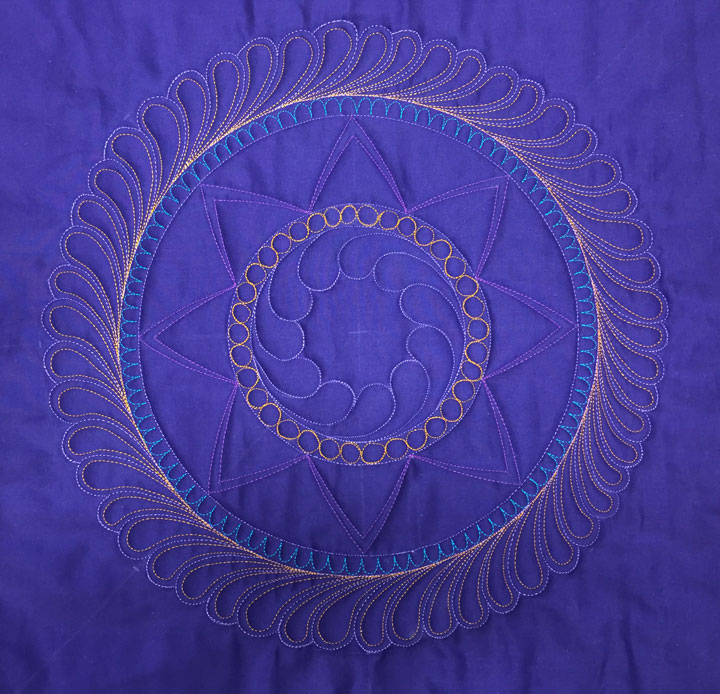
(I know, this looks a bit weird now, but trust me, it will all work out!) Next, I used the same PTD12 arc ruler to create a series of 1/2 inch parallel channels across each arched swag. This is what it looked like once this was complete:
You may be freaking out right now, but I promise that it will all work out! I repeated the same process except that I placed my ruler along the opposite side of each arched swag and stitched the same series of 1 1/2 inch wide channels. This completed the CCH’ing and here’s what it looked like at that point:
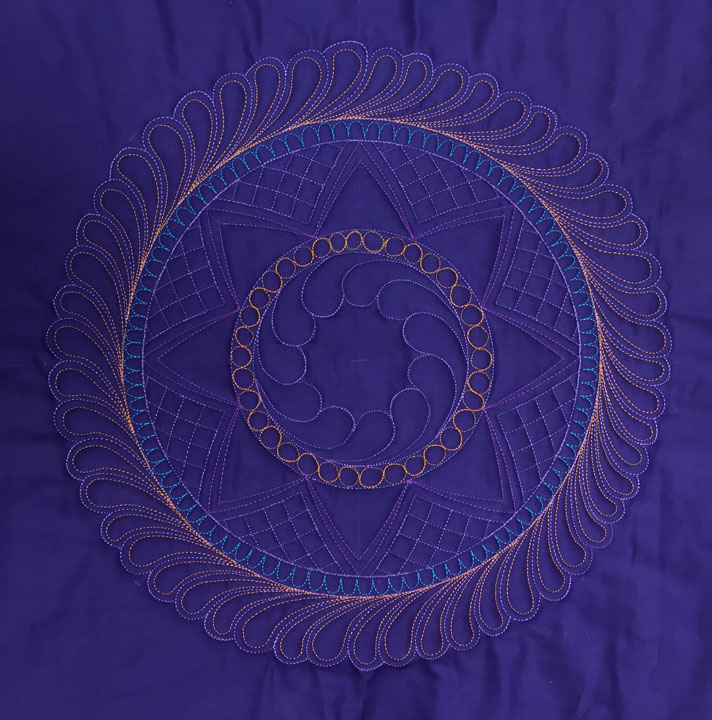
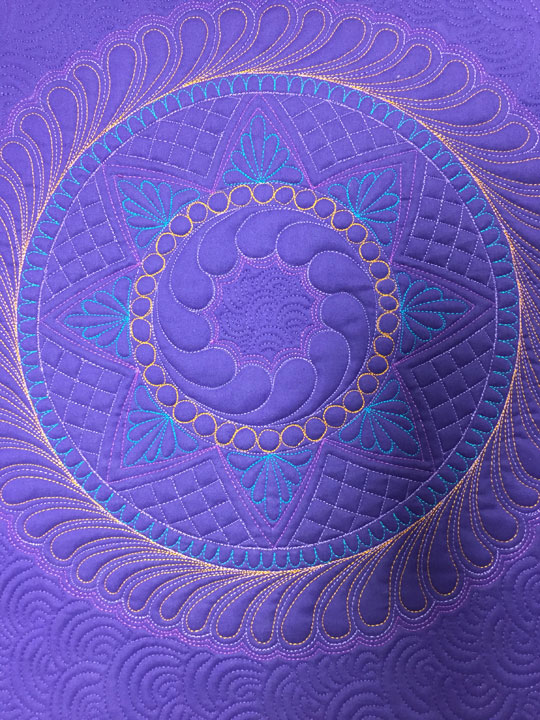
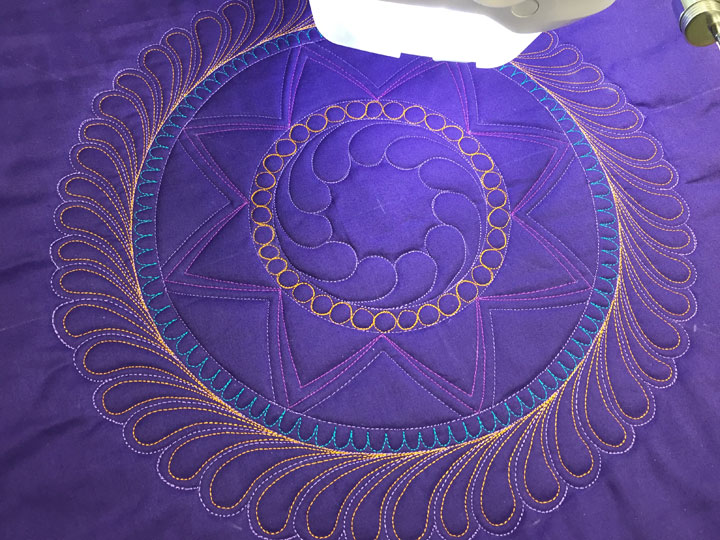
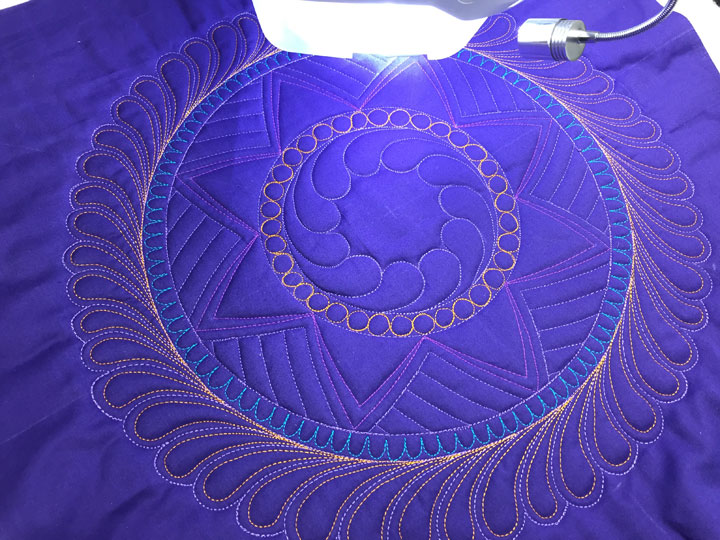
We’re nearing the end now! I used turquoise rayon thread to throw a featherette into each empty arched swag, then did 2 rows of echo outlining around the inner and outer plumes:
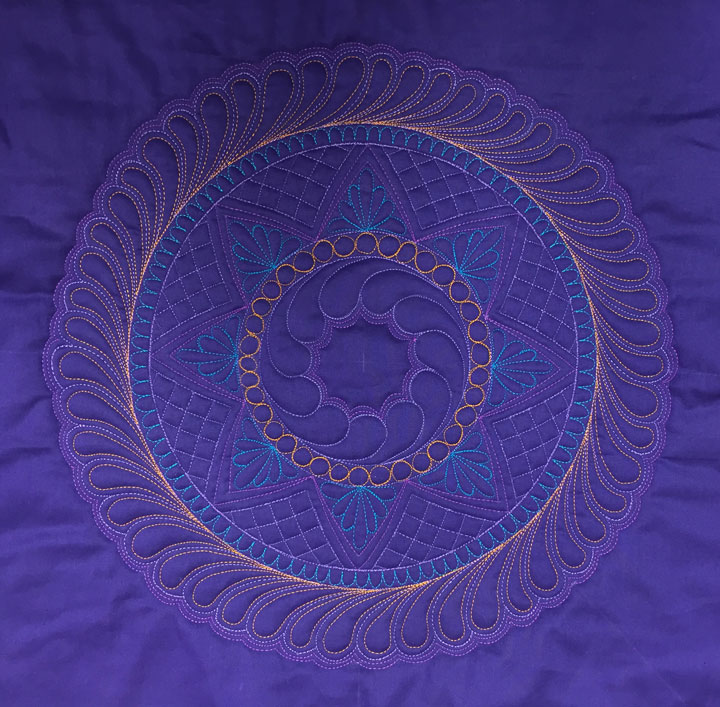
And last but not least, filled the background with the “igloos” background fill design:
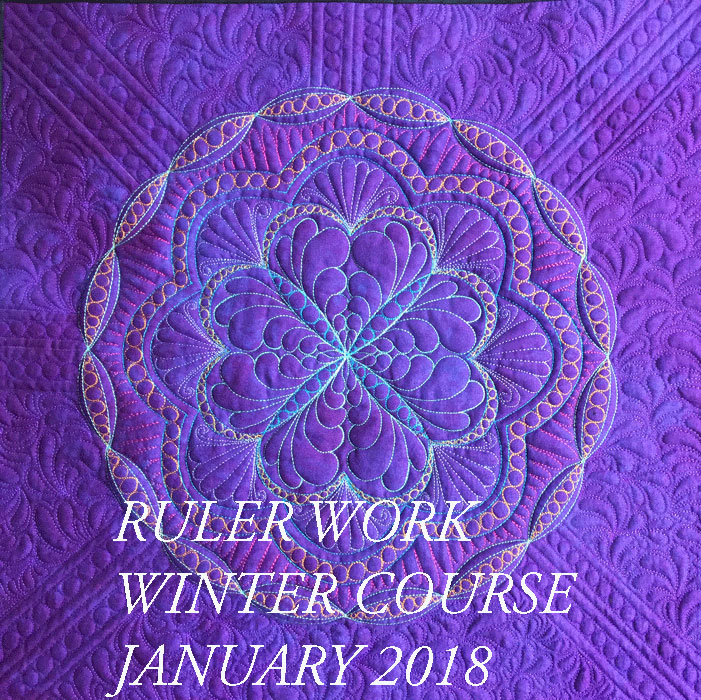
And remember, the great January 2018 Ruler Work Winter Course begins on Monday, January 1, which is the day after tomorrow! Meet back here for some ruler work fun and chase those winter blues away!!
Filed under
Free Motion Quilting, ruler work on a HDSM.
December 20th, 2017
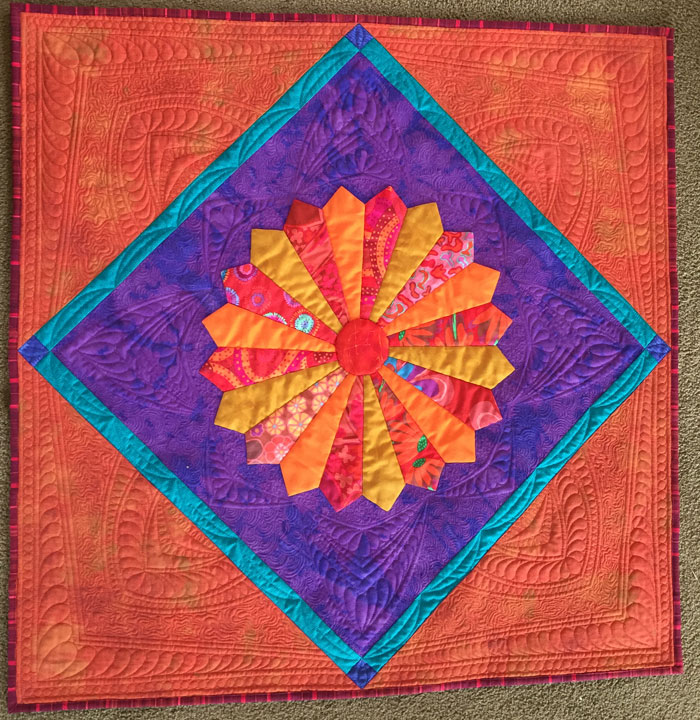
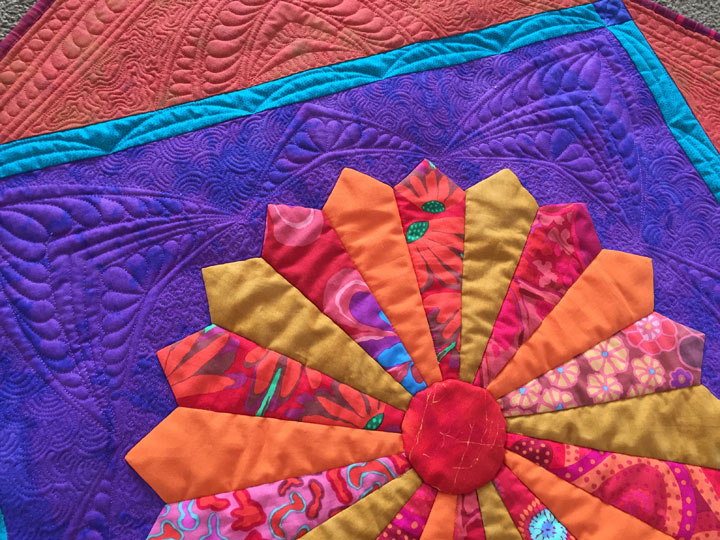
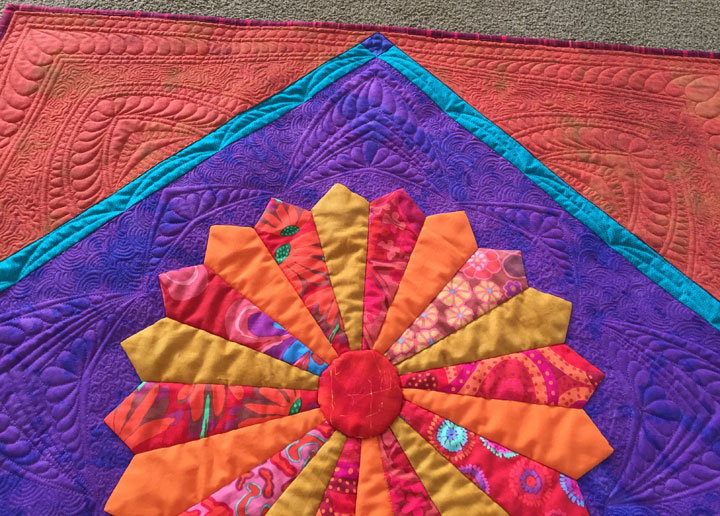
Between my lousy photography skills and the tapered channels that reside close to the edge of this quilt, this quilt doesn’t look square but it really is! I made up a bunch of Dresden plates using some scraps from another project last summer, and this is the 2nd one that I’ve finally finished. I used the Darlene Zimmerman Dresden template, which allows you to create all kinds of sizes of Dresden plates. I chose the largest size I could make. (You can find a wonderful tutorial for making these by clicking here.) These are Kaffe Fassett fabrics, and even though the pieces are relatively small, his glorious colors still pack quite a punch. I feel so happy when I’m working with vibrant colors like these!
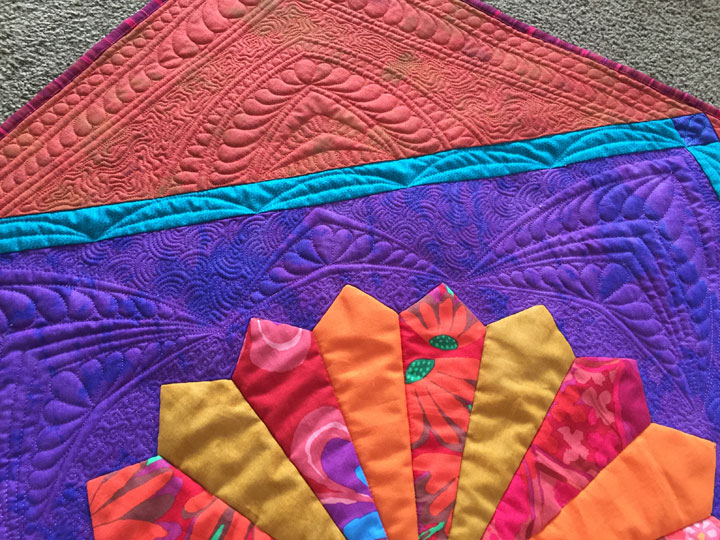
Anyway, back to the ruler work framing…There are really 2 parts to the framing, the outside rust colored “triangles” and the inner purple block that’s set on point. I am in love with the way they seem to interact to form a very complex frame:
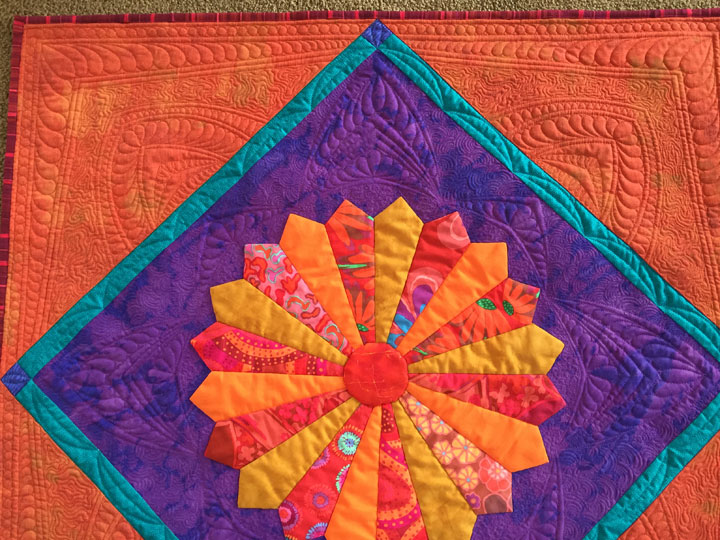
It’s like the quilted purple structures almost “jut out” into the orange zones. Here’s a closer shot of just the purple block:

The areas around the ruler work framework in the purple are quilted very densely (one with the “Igloos” background fill design and the other with a tiny “loop-d-loop” design), and this dense quilting helps to set off the purple ruler work:
Here’s a closer shot of the rust colored section:
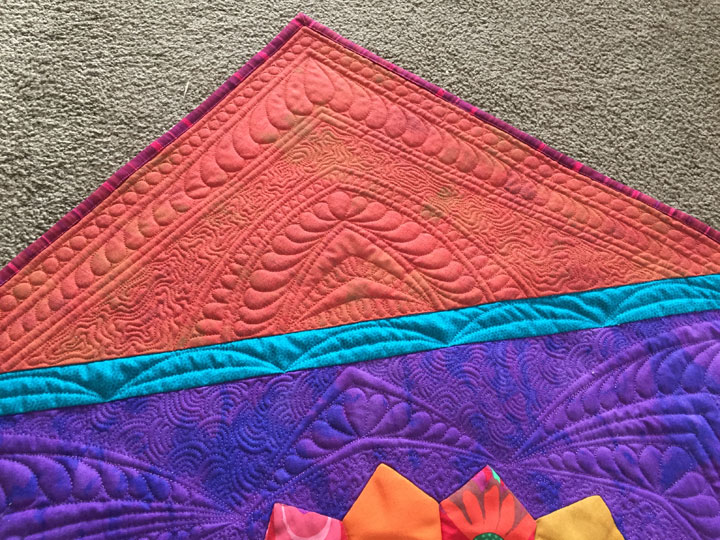
That large, irregularly shaped channel toward the middle of the orange triangles is filled with the “irregular swirl” design. I learned a couple important things by making this quilt:
- If you’re going to quilt really long straight lines, it pays off to take the time to mark the lines with a temporary marker before you begin. This is the opposite of how I normally work, but this is one place where doing the markings helps a lot.
- If you place a long tapered channel close to the outer edge of the quilt, know that this will become a dominant visual focal point. In the case of this quilt, I’m referring to the long channels that hold a long featherette that forms a right angle. Even though that channel has 3 other channels between it and the binding, it’s close enough to the edge that it creates the illusion that the edges of the quilt are “pulling inward.” If I had to do it again, I would have stitched that channel as a long parallel channel to avoid this illusion.
Still, I’m very happy with this small quilt and really enjoyed quilting it. I think I am happiest with the kind of “bas relief” effect created by the ruler work. A couple more photos:
I’ll probably quilt something inside the Dresden “blades,” but I’m ready to play with another quilt for awhile!
Filed under
Free Motion Quilting, ruler work on a HDSM.
December 12th, 2017
I am receiving so many questions about this that I figured the best way to address them was in a blog post. Here are answers to questions I’ve been asked:
**Where do I go to sign up for this class? Nowhere! There is no sign up as I am not collecting names or email addresses or any info on participants. Just come to my blog (the same address you used to get here today), and you will find the first ruler work lesson on January 1, 2018 and then a new ruler work lesson every Monday and Friday during the month of January, 2018.
**Does this course cost anything? No, it is completely free!
**Where do I find a supply list? There is no supply list. I can tell you that the first lesson will require the use of a straight line ruler (it doesn’t matter what kind of straight line ruler you have as any straight line ruler will work), and the 2nd class will require the use of 2-3 arc rulers, each of which must have a curve that’s different enough from the other 2 that they can be used together and create an interesting set of curves. Our set of rulers called the PTD Ruler Starter Pack has a straight line ruler and 3 different arc rulers, and you can find that in our online store by clicking here. HOWEVER, you do NOT need to buy our rulers to do this class! Use whatever arc rulers you already have at home. I am trying to teach you concepts and skills and I’m NOT trying to sell you anything!
**Why is there no supply list? There is no supply list because this course sprang out of my desire to commit to something fun/interesting that would distract me from winter. This course will help me because it will require me to focus on creating lessons to teach you ruler work skills and concepts, and not on the grey, icy/snowy cold and dreary winter that will surround me in January! The first 2 lessons are set in stone, so that’s why I can tell you which rulers we’ll use for those lessons. The rest of the lessons will not be written until January since that’s when I’ll need a distraction. In each post, I will tell you the dimensions of quilt sandwich you’ll need to stitch what we’re working on and I’ll give you info about the type of ruler you’ll need. I’m trying to kill 2 birds with one stone here (helping me and helping you), so I don’t want to spend more time this month working on a project that is deliberately designed for NEXT month! If it’s important that you have all this info far in advance in order to have all supplies at your fingertips before you begin the course, then check the blog in February when everything will have been written out!
Hope to see you back here on January 1st!
Filed under
Free Motion Quilting, ruler work on a HDSM.
December 9th, 2017
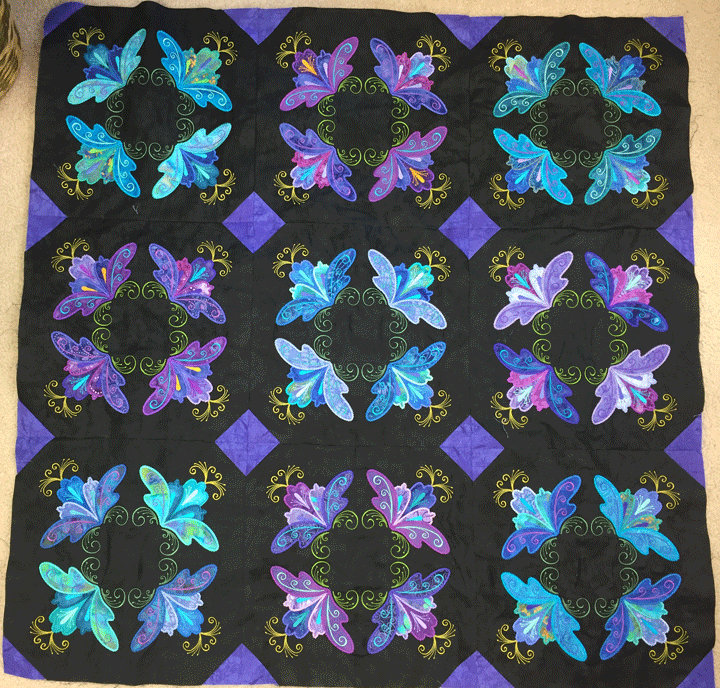
Remember this quilt top center? I am going on almost 1 1/2 years since I first started making blocks for the center section of this quilt. This past summer, I appliqued/embroidered the first border area and I finally added them on last week. Here is what the top looked like at the end of last weekend:
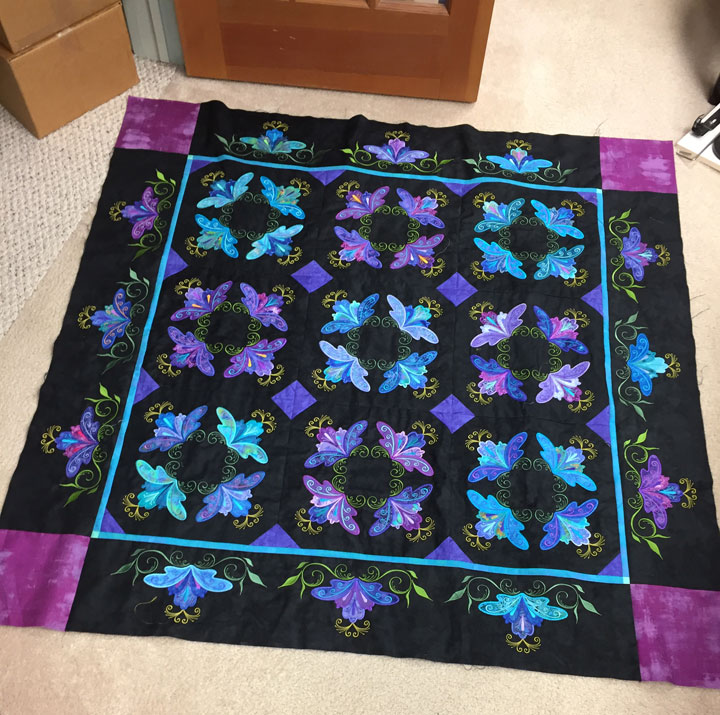
Ooh-la-la!! I am simultaneously excited and scared as I am moving ahead on this project. Excited because the drama of these appliques against the stark black fabric backdrop makes my heart flutter. Scared because I think I should quilt it with black thread and I know this will be a nightmare for me vision-wise! My vision is actually pretty good for someone my age, but seeing tiny stitches of black thread on black fabric will be really, really, tough for these old eyes. I am plodding ahead, though, and am now working on the next applique border section. This shot below is the first of the 4 outermost border sections:

I need to add another dark blue border before the final applique border, but the end is in sight!
Filed under
Machine Embroidered Applique.
December 6th, 2017
Won’t you join me online for a ruler work winter course this January?! I don’t know about you, but I am a “winter-hater.” I’ve tried to talk myself into liking winter many times over the years, but there’s no getting around it, it’s a totally awful time of year for me. The best way to get through it is to keep busy with as many things as possible that are fun, and let’s face it, ruler work is fun! I’m going to have a mini-ruler work course on my blog for the month of January. Join me every Monday and Friday for a post about some topic in ruler work and we’ll get started on January 1! I’ll be teaching this from the standpoint of a sit-down push-through quilter, but the info will be useful even if you’re working on a frame system. Spread the word to all your friends and meet back here at the blog for some useful FREE information about ruler work quilting! (I mean come on…”wintercourse” rhymes with “intercourse,” so it can only be a good time!)
Did I forget to mention that this is FREEEEEE??!!!
Filed under
Free Motion Quilting, ruler work on a HDSM.

