

Oct 09 15
Feathers and Rulers, and a New Video
…fit together like a hand in a glove! I think that one of the reasons I have become so hooked on ruler work is because it’s so easy to couple it with feather designs. Most of the time, it’s obvious to the viewer that ruler work was involved in creating the design. These are some examples where it’s easy to tell: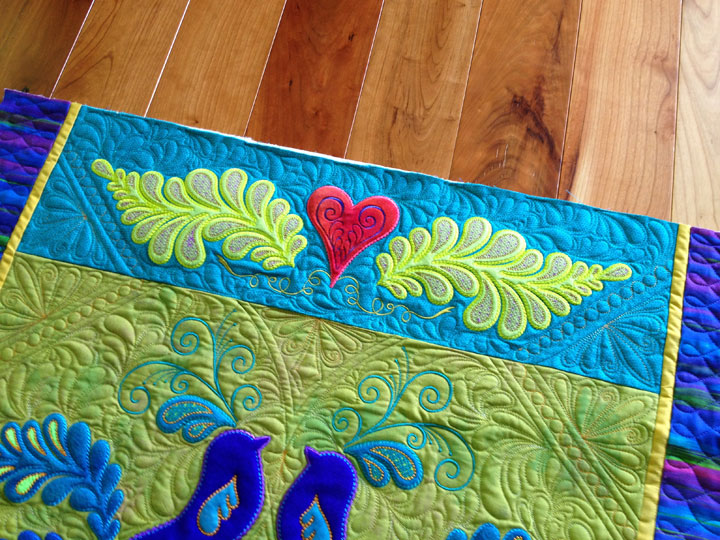
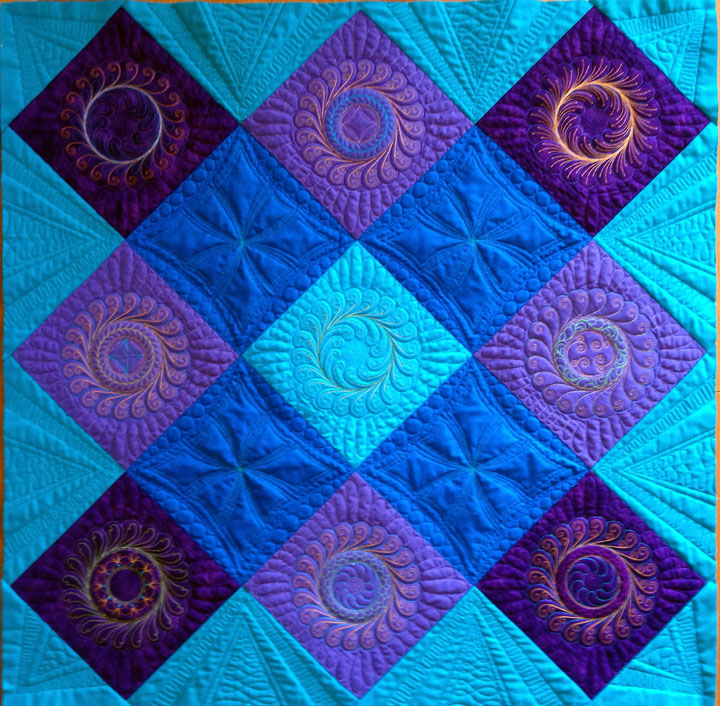
 But sometimes, there’s a type of “invisible ruler work” that’s also going on behind the scenes and this type of ruler work is different from using long arm rulers with our machines. A recent question about one of my posts really made me realize that most people are probably not getting the most out of their rulers. When I did a post about this quilt below:
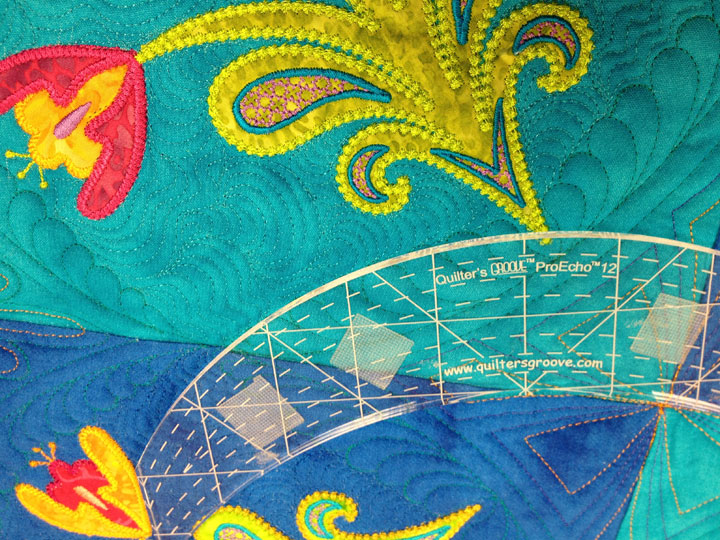
 …a reader asked “How did you get those feathers to be so precise and symmetric?” The secret to this kind of free motion quilting is to create temporary “boundaries,” or guidelines with your rulers. As you’re working, your goal is to fill each of those boundaries completely with your feather or featherette. Once the stitching is done, your markings are erased so the world never knows that you kind of “cheated” to get those feathers looking so symmetric. I don’t have any in process photos from when I stitched those feathers, but this shot taken now shows the ruler close to the position and I would have simply marked along that ruler edge with a sliver of soap to make that temporary guideline:
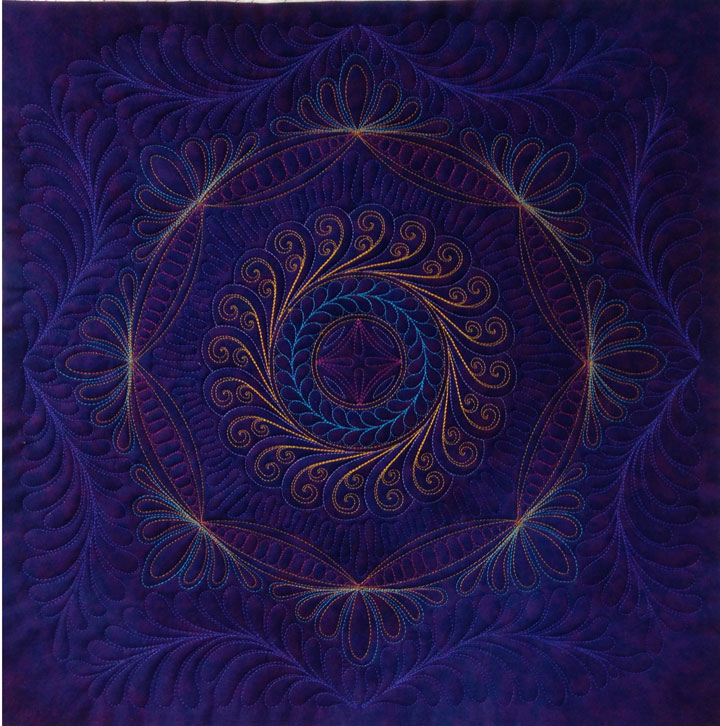
 Note that this is different from when we draw “mock-ups” of our ruler work designs because here, we don’t need to add 1/4 inch to account for the ruler foot. What I’m trying to say is probably easier to see in this repetitious featherette border design:
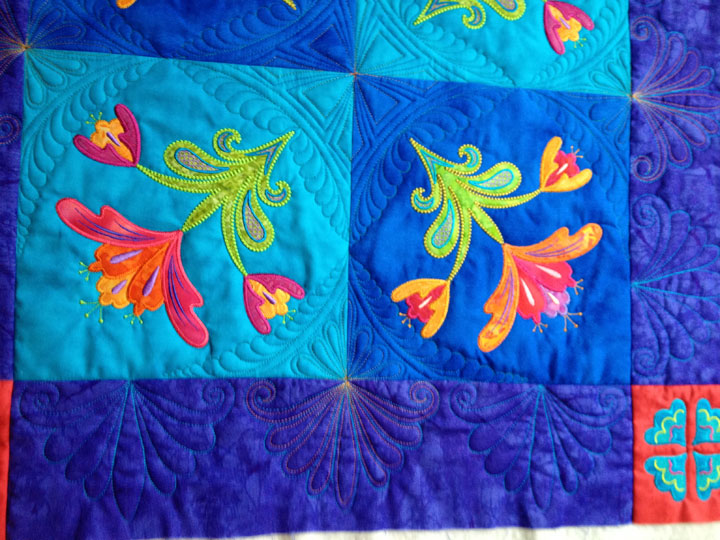 (I’m referring to the blueish purple outer border zone). These featherettes look very symmetric and it’s all because temporary boundaries were drawn by tracing along side a ruler with soap. Here’s an example of how one of these “begins:”
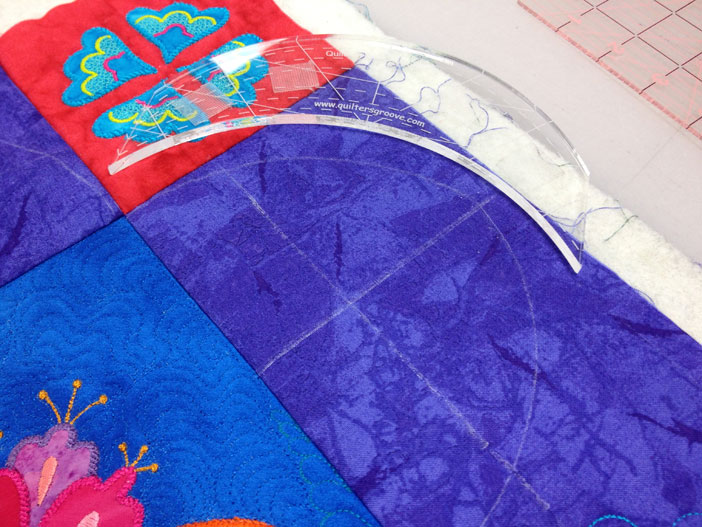 That horizontal soap line is the maximal height for the swirls at the base of the featherette. Here’s a finished featherette that’s also been hyperquilted, and you’d never know that the lines had ever been there to guide the quilting:
 In a semi-related note, I’ve gotten some emailed questions about the Line Tamer ruler/template for straight line ruler work. People aren’t sure exactly how it works, so here’s a short video that explains it:
Hi Patsy,
I cannot wait to see your work all the time. You are so talented. Thank you for sharing your skill.
I registered for your first Craftsy class and hope that I can win the second one.
Have a great weekend.
France
Thank you, Patsy, for that video. …..makes me want to own one!!!!
Hi Patsy, does the groove on the lion tamer fit Georges’ foot?
The Line Tamer comes in 2 sizes-1/2 inch diameter and 9/16th inch diameter. You need to buy the 9/16th diameter to fit the George.